I am going to show you how to make bias tape at home from fabric. It is very easy and you don’t really need a bias maker to do so.
In this tutorial, I will show you how to make a continuous bias tape. An easy way to fold squares of fabric to make long strips.
You will learn what width you need for a ¼” binding and a ½” too.
So keep reading to start making your own bias tape from any fabric of your stash.

NOTE: This post contains affiliate links, which means that if you make a purchase using one of the links in this article, I may earn a commission at no extra cost to you (To know more about this, click here.)
The best thing about making your own bias tape at home is that you can make it with literally any fabric you like.
This gives you the chance to personalize your sewing projects and have unique finishing details on them.
In this tutorial, I will be showing you how to make tape without anything but a pin.
And even though is pretty easy to do it like this, I gotta say this.
The fastest way to make bias binding tape at home and with any width is getting one of these hand bias makers.

These things are great gadgets to have at home. They are small, easy to store, and very practical for this purpose.
Though you definitely don’t need them to DIY bias tape they will make the job easier.
And if you ever want to buy them in the future you can get your bias maker of 5 different widths here.
But you came here to get the free alternative so let’s get to it!

You can get the same quality results as this maker by following these next steps.
Read this after: How to sew bias tape: The best 3 ways!
What is Bias Binding Tape?
A bias binding tape is trimming or notion used in sewing to finish the raw edges of the fabrics on sewing projects and clothing. You can sew by covering the edges of your fabric and then making a topstitch over the tape.
This tape is cut on the bias which is a grainline direction of the fabrics to allow a slight natural stretch.
You can find it in two different versions- Single and Double folded.
We mainly use single folded bias tape as a trimming by sewing it flat over our projects. On the other hand, we use the double folded bias binding tape to finish the raw edges of the fabrics.
We call it single folded because the only folds on the tape are the ones we make at the beginning to create the tape.
But on the double-folded we have the folds that we make initially on the edge of the tape and then, we fold it again to sew it over the fabrics.
Is it cheaper to make Bias Tape than to Buy it?
Yes, it is cheaper to make bias tape with fabric that you already have in your home. You can get many more yards (meters) of tape with a single yard of fabric for a much lesser cost.
Not to mention that by making your own bias tape you get more choices. You can choose cool fabric prints and finishes that you simply won’t find at the stores.
And the best thing is that you don’t need any special tools to do it.
Of course, it is much faster to use a bias maker tool, but not strictly necessary. If cheaper is what you are looking for then you are all set.
You already have everything you need to make a lot of yards of bias binding tape in your sewing room. The only thing you need is a piece of fabric and one pin.
And making it is way easier and faster than you might think too.
Many people will tell you to just cut a bunch of strips of fabric. Then you sew each strip together to form a single one.
Not us.
By using the continuous bias tape technique this is faster. You will get a single strip of fabric ready to be pressed in no time.
How to Make Bias Tape?
Materials:
- Fabric of your choice (a fat quarter will make a good amount of tape for many projects)
- Sewing Machine
- Pins
- Sewing Scissos.
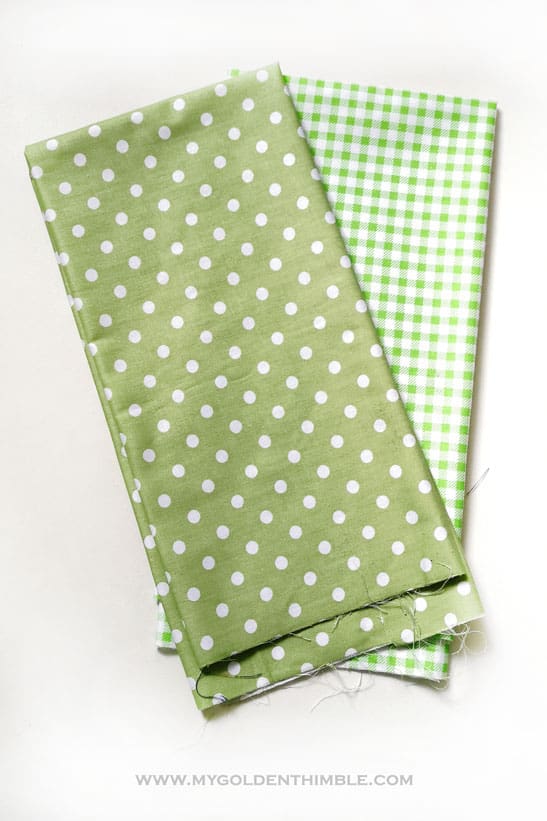
Fat quarters are perfect to make this tape. Whenever I buy them in bulk and I don’t like a print for my crafts I use it to make bias.
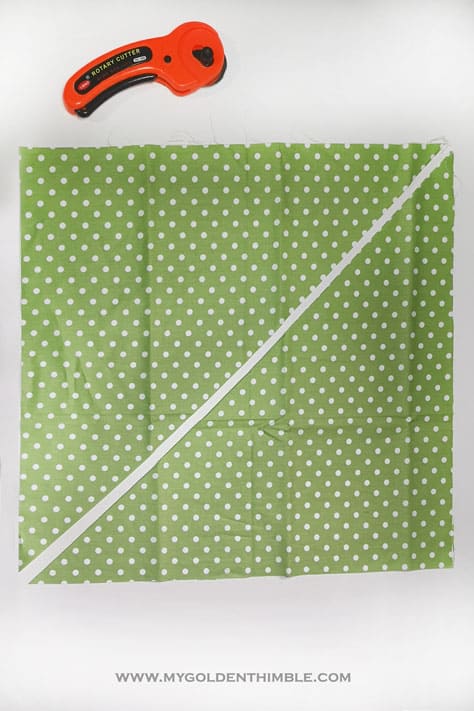
Start by cutting one perfect square of fabric.
Depending on how much bias you want to make you can make the square bigger or smaller.
Just for you to know, the bigger the square is, the further apart the joins of seams will be between each other.
This is nice if you don’t want a very bulky full of seams tape.
Check this out!: The greatest Netflix shows to watch while you sew.
Cutting fabric on the bias.
In order to make a continuous strip bias cut tape, we will first need to cut a perfect square.
Depending on how much tape you want it will be the size of your square. The bigger it is the more tape you will get out of it.

Cut your fabric square diagonally (on the bias) to end up with two triangles.
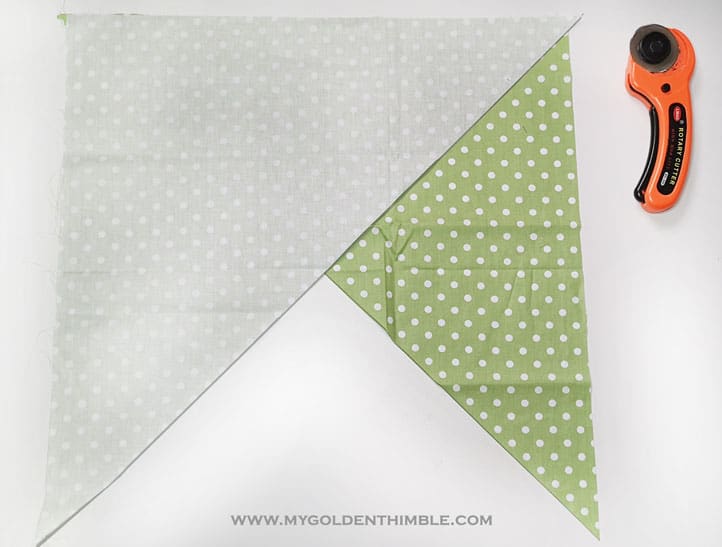
Then you will take one of these triangles and place it over the other one with the right sides facing together.
Join the sides to form a diamond
Make 2 of the sides that aren’t cut to the bias to match on the top and sew them at ¼”.
Cust FYI the biased sides are the longer ones. And you are going to sew the shorter ones.
Press that seam open, and you will end with a diamond shape like this.

Choose if you want a single folded bias binding tape and double folded bias binding tape.
Now we will need to mark the strips by using the bias cut lines as a guide.
Depending on the width you want your bias is the width of the strips you are going to markdown.
And this, of course, depends on what kind of project you are going to sew your bias tape on.
On a general rule, for double folded bias tape you have to use 4 times the width you want to end up with.
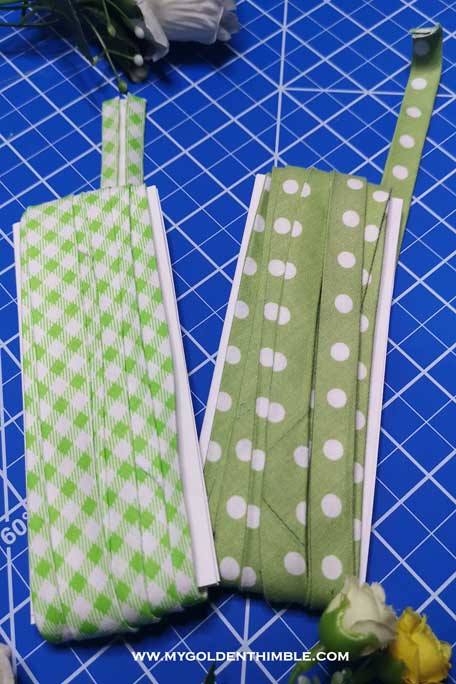
Up to this moment of the tutorial you are making what we call a single folded bias tape.
And the difference simply is that a double folded bias tape is a single folded tape that just was folded again…
Yeah… I know… Duh!

On the top picture, you are seeing my single folded bias tape and one the bottom one, the same tape but folded at the half and pressed again.
How to make ¼” single and double folded bias tape.
This width is very useful for binding or finishing simple projects with fabric that isn’t that thick. The most common uses are for seams, quilts, and easy fabric crafts.
To make ¼” double folded tape, cut your strips with a 1″ width.
On the other hand, if you want a ¼” single-bias tape cut your strips with ¾” width.
How to make ½” single and double folded bias tape.
With ½” bias tape, you will have more room for thicker fabrics.
This is the most popular bias tape on the market and it can be used in a lot of sewing projects. You can use it for binding, piping, or decorating your crafts.
If you want to make a double folded ½” bias tape you will need to cut your strips with a 2″ width.
But if you want it to be single folded cut them with a 1″ width.
Mark the width of the tape strip.
Depending on which type of bias binding tape you chose to make, mark all the fabric from one end to the other and cut if there is any excess.
Make as many rows as your fabric allows you to.
All the rows have to have the same width. If one of them (most likely the last one you drew) is wider, remove the excess with your scissors.

Upgrade your skills: Basting Stitch: Why you need to do it and when.
How to fold and pin the fabric to cut bias strip?
The next step is folding this piece to match our lines.
You will do this by first placing your diamond with the wrong side facing down, and then pulling the points to the center.
We need to match the lines we made so we can make one continuous strip of tape.
But the thing you need to make sure of is that the first strip and the last one will not be matched with any lines.
In these pictures, the first and last strips are marked with an asterisk.

I found that is very useful to “pinch” the edges of the fabric with my fingers to try to form the 1/4″ of seam allowance that I am going to sew next, and then to pin it like that.
Sew and Cut your tape.
Once they are perfectly matched sew at 1/4″, press them open, and then you are ready to cut along the lines.
This will give you a continuous bias strip.

How to make Bias Tape without a Maker?
Now that you have your bias strip is time to fold and press it.
And for that, you will only need a pin.
Yes, you read me right. Take one pin and do this next.
You are going to take your strip and fold both edges of one end to the center just at the half.
Then you are going to press about 4″ of the strip this way.
Take your pin and with the help of your Ironing Board Cover insert it like this to make a “bridge” for the tape to pass under.
This space has to be exactly the width of the bias.

Now the only thing you have to do is gently pull the tape from the folded end and press 4″ at a time.
You will love this: Free No-Show Socks Sewing Pattern and Tutorial
And that was it!!

Pretty easy right???
Psst…Is this article helpful to you?? Please support us so we can keep making awesome tutorials for you by buying us a cup of coffee here. We will be forever grateful!
Don’t forget to follow us on Social Media!!
Happy Sewing!!!

How to Make Bias Tape at Home
Follow these instructions to make your own bias tape out any fabric you like.
Materials
- Fat quarter fabrics
- Pins
- Thread
Tools
Instructions
1. Cut a Fabric Square.
Start with a perfect square of fabric. Fold it in half, diagonally wise, and cut through the folded edge.
2. Sew the triangles.
Place one of the triangles with the non-bias sides and the right sides of the fabrics facing together. Press seams open.
3. Mark the bias width
Mark lines of 1" for single folded bias tape or 2" for double folded bias tape.
4. Close forming a tube.
Match the lines you marked so you can form a continuous strip. Sew at 1/4" and press seams open.
5. Cut the continuous bias tape.
Start cutting your bias strip to form a continuous bias tape.
6. Press single or double folded.
Fold the edges of the tape to the inside center of the tape and press. Now you have your new bias tape.
Notes
For a single folded bias tape make 1" wide strips.
For a Double folded bias tape make 2" wide strips.
Recommended Products
As an Amazon Associate and member of other affiliate programs, I earn from qualifying purchases.
-
 Sewistix Sewing Pins Pack of 500 with 3mm Multicolor Glass Heads, 1.5 inch Straight Pins with Sharp Pointed Tip for Sewing, Dressmaking, Quilting & DIY Projects
 -
SINGER | MX231 Sewing Machine With Accessory Kit & Foot Pedal - 97 Stitch Applications - Simple & Great for Beginners
-
Rowenta DW2459 Access Steam Iron with Retractable Cord and Stainless Steel Soleplate, Black
-
Indonesian Batik Fat Quarters 8 Pcs Blue/Green
-
ZGXY Fabric, 8 pcs/lot Fat Quarter Fabric Bundles 100% Cotton 20'' x 20''
-
Lunn Studios Artisan Batiks Prisma Dyes Plum Perfect 15 Fat Quarter Bundle


When I’ve used purchased double bias tape, the fold isn’t exactly in the center so that when you make your final line of stitches right at the joint, you stitch through the back side to secure it. Are you folding your tape off-center or centered, and if the latter, how are you securing the backside without topstitching onto your front side?
I generally fold centered, just because making it off-centered and balanced through all the tape length is very difficult. But to secure it in the backside I simply make an invisible stitch grabbing only the first layer of fabric and ideally only one fiber of the main fabric at a time.
Thank you so much for this information. You’ve really saved me so much time with this pin trick. All your tips are great. Will use them as we make dresses for our Shoebox gifts.
Thank you so much Kathy, I am very glad that I can help!
Y can’t u tell and do..ur instruction and doing atvthe same time .not everyone are are very clever..help us
Hi Dafhtne,
Here is another suggestion to avoid the smallest pieces in the bias strips. When putting the two large triangle fabric pieces together in diamond shape, slide them along the joining edge so the little corners are sticking out on either side. You could mark the cutting lines before sliding, if you like, but not necessary. Cut off the small corners. The rest of the construction still works this way. I tested it with paper first and it works.
Great idea to make a continuous strip with only two sewing joints.
Hi Hanna!
I would love to see that! Would you mind sharing it in our sewing club (My Golden Thimble Sewing Club) ??? I am sure everyone will love your technique :O
Hi Dafhtne,
I’m not on facebook, but if you email me, I’ll send you a series of photo’s I just made, showing the extra steps in the process, based on your initial method. You may use them to share it on your Sewing Club for me.
Thank you so much!! I tried several different techniques but yours was by far the easiest to understand for a beginner like me.
Theresa
Hi Theresa, I am so glad that this was useful to you, thank you so much for letting me know!! This keeps me motivated to share more tutorials like these ones.
Put your bias around your ironing board and makes it much easier to cut!
Awesome tip!! Thanks Paula!
I’m going to have to try this! How many feet of tape do you get from one fat quarter?
Hi Noelle, Between 9-13 depending on the width you cut it.
Put your bias around your ironing board and makes it much easier to cut! Thank you for the pin trick.
It’s genius!! Thanks so much!!
I am very glad it helped you!
omg i don’t know you but you just saved me 10 zillion hours of effort and a lot of burnt fingers with that pin trick! thank you so so much!
You are very welcome!! Who knew it was that easy, right??
Your post is so timely given the lack of elastic, double-fold binding AND bias maker tools anywhere! Genius but so simple. Thank you!!