
This post will show you eight different options on How to Finish Seams without a Serger Machine.
Let’s face it. When we see a beautifully finished garment in the sewing world, we can only expect that when we turn it inside out, we find the perfect seams on the inside.
This is something only sewists and designers can appreciate.

NOTE: This post contains affiliate links, which means that if you make a purchase using one of the links in this article, I may earn a commission at no extra cost to you (To know more about this, click here.)
We know a good quality inner seam finish equals value because we know how much work is behind each seam.
We get certain of pleasure by seeing good seam finishes. In a way, it even makes us happy.
Especially if we did it ourselves.
Because a good finish not only helps us to prevent raw edges from fraying. It also makes our garments and sewing projects thousand times better.
Beautiful and professional

What’s the easiest way to finish seams?
The easiest way to finish a seam is by using an overlock seam with a Serger Machine.
For those of you who don’t know what a Serger Machine is, it makes a chain stitch at the edge of fabrics to prevent them from fraying.
These machines can make different types of Serger stitches with 2, 3, or 4 threads, and the machine can sew several layers of fabrics.
Besides that, this machine cuts the excess of fabric as we sew, getting rid of all loose threads and fray edges.
Unfortunately, not every one of us has one of these machines.
In fact, this is a machine that we usually get later in our sewing journey.
But that doesn’t mean that we don’t get to enjoy having clean and perfect inner seam finishes.
That’s why in this post, I will show you eight different ways to finish seams without a serger.
Because the reality is Sergers are relatively very new if we compare them with the Sewing Machine invention.
So, of course, there are many ways people used to finish seams before.
I didn’t get to use a Serger until I was in fashion school. And I learned to sew at the age of 9.
So, from 9 through my 20 somethings I finished all my seams by hand or with my home sewing machine.
This was great as a practice to sew better seams altogether.
That’s why you have nothing to worry about. Just choose whichever of these techniques is more convenient for you and your project and get sewing!
Why do I need to finish the raw edges of the fabrics?
Finishing our seams is essential for our sewing projects. First, because it prevents the raw edges from fraying, and second, it strengthens the seams, making them more durable.
If you simply let fabric fray, threads will become loose, and two things can happen.
Either the seam allowance will disappear (when threads fall, the fabric’s weave becomes undone). Or, the material will fray so much that you will end up with a ball of threads and knots bunching up.
This is especially true for fabrics such as cotton, linens, satin, chiffon, and other wovens.
What tools can I use to finish the raw edges of fabrics?
Besides your essential sewing tools, there are others that you can use to finish seams without a Serger. Some of these can be simply hand or sewing machine stitches, and others more advanced such as special sewing scissors, hem tape, and specialty presser feet.


Pinking shears, which is the name of the finishing seams scissors, are very effective on heavyweight fabrics.
The overlock detachable presser foot mockups a serger seam.
On the other hand, hem tape is an effortless way to finish a seam without sewing at all. You just need to fold and press it between the seams.
Do I need a Serger to finish the edges of a fabric?
Despite knowing a Serger Machine can help us to make professional, quick, and presentable seam finishes, this machine is not absolutely essential for that task.
There are many different ways in which you can finish a seam without a serger machine.
You can use stitches that are built-in in your home sewing machine or even try some hand stitches too.
All of these techniques will give you the same quality finishings as the Serger machine can provide you.
For fabrics that fray very quickly, we can use zig-zag stitches or mockup overlocks, which are seams that imitate the basic shapes and functions of an overlock stitch.
Both of these seams will also prevent the fabric’s edges from fraying.
8 ways to finish seams without a Serger.
Here are the 8 best options to finish seams without a serger machine. Follow the instructions or link tutorials to learn how to use them on your sewing projects.

Now you can print a Cheat Sheet Guide of these instructions! Scroll down to get the printable card.
1. Pinking shears.

The easiest and quickest technique you can use to prevent fabrics from fraying is to use pinking shears to cut the edges of your seam allowances.
These scissors make a zigzag cut along the length of the edge, making it harder for the threads to get undone.
Tailors love to use these scissors to finish the raw edges of suits and pants.
Mainly because it will leave no marks of threads when you press the seams from the right side of the fabric.
It’s pretty to do.
Once you have your main seam done and pressed, use the pinking scissors to cut a zigzag line along the entire raw edge of the fabric.
Don’t cut too much of the seam allowance. Make sure not to cut more than ⅛” of the total width of the seam allowance.
If you cut near the seam, you will risk the seams getting undone.
After cutting and removing the fabric excess, clean the area thoroughly and press the seams open.
This type of finishing works best on sewing projects and garments that won’t need to be tumble washed too often.
Also, you will get better results if you use them on heavy-weight fabrics, ideally with a very closed woven canvas.
2. French Seams

You can hide the seam allowances raw edges within themselves by making a Frech seam.
This is, in my opinion, one of the prettiest methods you can use to finish your seams.
You can make this type of seam by sewing half of the width of your seam allowance on the outside of the fabrics with the wrong sides of the fabrics facing together.
Then you will turn the piece inside out and encase that seam allowance on the inside of the garment and sew another straight line with the second half of the seam allowance measurement.
If you want to learn more about this beautiful seam, make sure to check out our French Seam sewing tutorial here.
3. Zigzag Stitch
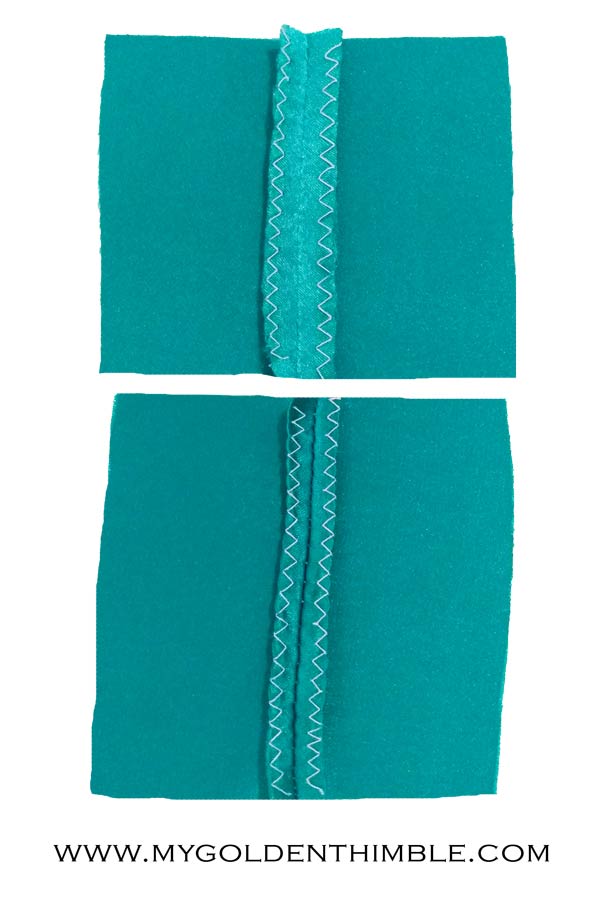
Most machines, even the beginner’s ones, have a setting to make a zigzag stitch.
Adjust the length and width of your stitch according to the type of fabric you will use.
This type of seam will hold the cross-grain threads preventing them from getting loose.
For heavyweight fabrics such as denim or canvas, increase your length and width seams.
If you are going to use lightweight fabrics like chiffon or gauze, use a narrower seam by decreasing the length and width.
Use this finishing in 3 different ways.
The first one is by simply sewing the zigzag seam on the edge of the fabric.
Is your seam allowance getting caught under your presser foot?
No problem. Another way to finish this is by sewing the seam a bit far away from the edge and then cutting off the excess fabric at the end.
Easy right?
4. Folded Zigzag

The third way to use a zigzag finishing is by folding the edge.
It is almost as if you were to make a basic hem. Only that you will only fold the seam allowance ¼” and to the wrong side of the fabric.
Make the seam over the folded edge.
You will notice that you’ll have more control over the seam allowance.
We recommend practicing this finishing on a scrap of the same fabric before sewing the real thing.
That way, you will calibrate the exact settings you need to modify to get a perfect seam on each fabric.
Another tip to get the perfect zigzag stitch is to lower the needle with the handwheel to see where it falls.
Move the fabric as needed to get the seam in the exact edge.
5. Straight Stitch

This is the oldest finishing seams technique.
Our grannies and the first tailors used it when they needed a clean and pretty finish inside their garments.
Remember that sewing machines didn’t have the option for a zigzag stitch at some point in history. Not to mention a mockup overlock seam.
To make this finishing, make a tiny fold of about half of the seam allowance measurement on the edge of your fabric.
Press it flat, and then make a straight stitch over the folded edge.
The raw edge will be hiding safely between the seams. It won’t be at risk of fraying this way.
This is quite a time-saving technique because you don’t need to take many steps. Not even change the configuration of your sewing machine.
6. Hem Tape
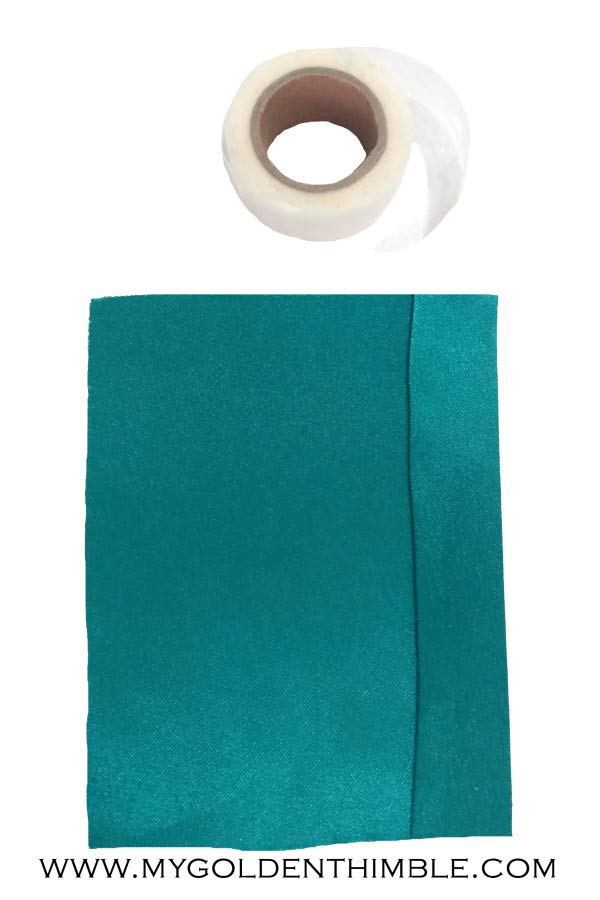
The hem tape is a wonderful invention mainly made for those who don’t want or don’t know how to sew.
This tape is made from an adhesive that melts between two layers of fabric by gluing them together.
One thing you must know is that this is not a permanent solution.
Even though the tape will endure being washed in your laundry a lot, it will give eventually.
But for a quick fix, you can use this tape and a pair of scissors.
Cut the same length of tape as the length of your fabric’s edge.
Make a single or double hem and press to mark the folds. Then place the tape between the fold and the garment layers and press.
Do not use steam!
Both layers of the fabric will stay together, and this will hide your raw edges.
No fraying fabrics here.
7. Overcast Presser Foot
A lot of the multiple-stitches home machines have one function to make a mockup overlock seam.
You will likely need an overcasting pressing foot, like the one I am using here.
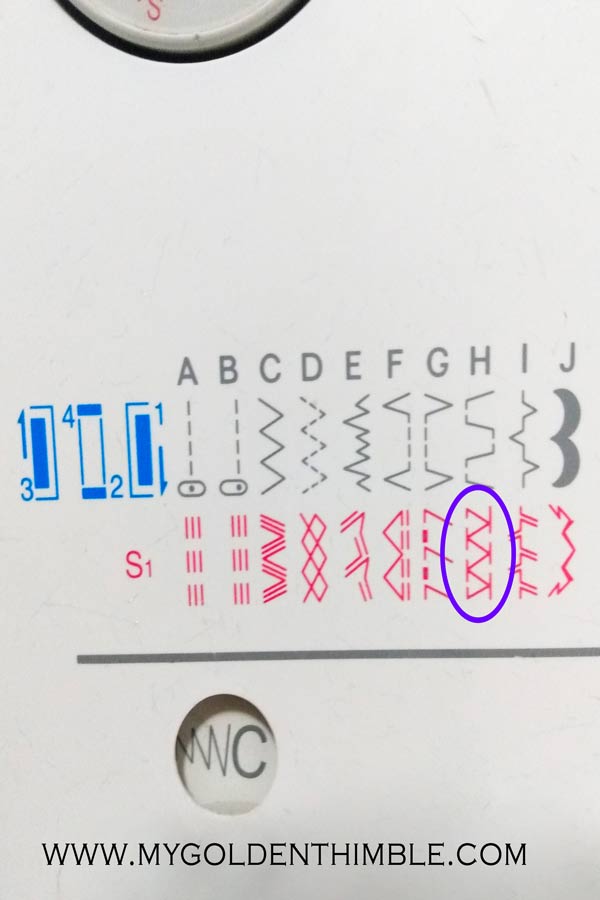
To make this finishing change your pressing foot to the overlock foot and set your machine with the overlock stitch.
It looks something like this.


This stitch has the same function as the zigzag stitch or an actual serger stitch.
As it is made with many tiny stitches you might encounter puckering or fabric bunching up under your foot.
If that’s your case, make the seam a bit away from the fabric’s edge. When you finish pressing this seam, you can cut the excess away.
There are two ways to make this seam as a finishing.
You can sew them over the two edges of seams that were pressed open.
So there will be an overlock seam on each edge of the seam allowances.
8. Overcast seam on two layers.

You can also sew this seam on both layers of the seams pushed to one side.
I recommend that you “overlock” both seam allowances together for lightweight fabrics. This will make the seams stronger and harder to fray.
If you find that your fabric is still fraying, try to make your stitches shorter and increase the tension slightly. If you want to know how to choose the perfect thread tension, click here.
I hope this post and techniques helped you as much as they helped me when I needed them.
These are just more tips that I love to share with my fellow seamstresses.
All of these techniques are great if you are sewing for yourself or for family or friends.
But if you are thinking of sewing to sell, then my advice is to research Serger machines and learn how to use them.
I grant that they aren’t super cheap, but if you choose the best serger for you, the investment will be worth it. And a good machine should last you years.
That way, you will always have a professional and clean look in all your sewing projects.
Please let me know which one of these techniques you like the best?
Write your answer in the comments below. I would love to chat.
Psst…Is this article helpful to you?? Please support us so we can keep making awesome tutorials for you by buying us a cup of coffee here. We will be forever grateful!
Don’t forget to follow us on Social Media!!

How to Finish Seams without a Serger
Use these instructions to finish the raw edges of your fabrics. Finish the seams without the need for a serger machine.
Instructions
1. Pinking Shears Method
Use pinking shears to cut the edges of your seam allowances.
You can find these special scissors for sewing in any sewing department store.
2. French Seams Method
The french seam technique is where you enclose the seam allowances within a new seam allowance.
This seam will be inside the garment and it is perfect to use on sheer fabrics such as chiffon or gauze.
3. Zig-zag Stitch Method
Every machine has a zig-zag stitch function.
Adjust the length and width of your stitch according to the type of fabric you will use.
Sew the edges of the fabrics with this stitch to prevent them from fraying.
4. Folded Zig-zag Method
Fold the seam allowance ¼” and to the wrong side of the fabric.
Make the zig-zag stitch over the folded edge of the fabrics.
5. Straight Stitch Method
Fold the seam allowance ¼” and to the wrong side of the fabric.
Then sew a straight stitch on the edge of the seam allowances about ⅛” far from the folded edge.
6. Hem Tape Method
The hem tape technique is perfect for finishing raw fabric edges without sewing.
To use this technique, make a double or a single hem on the edge and press it.
Then, place hem tape between the hem layers and press to fuse it together.
7. Overcast Presser Foot Method
Fake an overlock seam with the overcast presser foot for sewing machines.
To make this finishing change your pressing foot to the overlock foot and set your machine with the overlock stitch.
8. Overcast Folded Seam Method
It takes the same process as making it on the raw edge of the fabric as in step number 7, but only this time will you fold the fabric ¼” to the wrong side first.
Then you can sew over the folded edge of it.
Notes
The overcast presser foot is not strictly necessary to perform the overcast stitch, but it makes the job so much easier.
Recommended Products
As an Amazon Associate and member of other affiliate programs, I earn from qualifying purchases.
-

 Fabric Fusing Tape Adhesive Hem Tape Iron-on Tape Each 27 Yards, 2 Pack (1/2 Inch)
-
 JISTL Green Pinking Shears Comfort Grips Professional Dressmaking Pinking Shears Crafts Zig Zag Cut Scissors Sewing Scissors,Professional Handheld Dressmaking
-
 HONEYSEW Snap On Overcast Presser Foot (G) XC3098051 for Babylock, Brother, Simplicity, Singer Domestic Sewing Machine
-
 SINGER | M1000.662 Sewing Machine - 32 Stitch Applications - Mending Machine - Simple, Portable & Great for Beginners


Thank you for this, I always zigzag my seams but would like to try french seams and see if my machine has a overcast presser foot.
Ohhhh french seams are way cooler than the other methods (more high-end, personal opinion). We have a full post about it here: How to make French Seams.
Another seam finish that is usually only seen in custom or coutoure clothing is the Hong Kong. It is encasing the raw edge of each seam. allowance in narrow bias tape. When done in complementary or contrast colors, it adds such a classy touch to ùnlined jackets, skirts and pants. Now it is available in in light weight knitted form which is best for sheer, less substantial “blouse” fabrics.
You are totally right. I have also seen this type of finish in tailor-made clothes like jackets
Thank you . That was very informative