
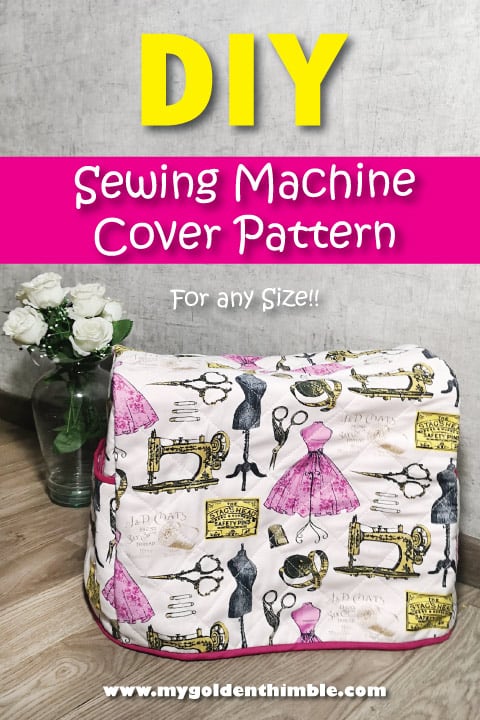
Making your own Sewing Machine Cover Pattern is very easy, even if you are a beginner.
In this free tutorial, I will show you how to make your own custom sewing machine dust cover pattern for your machine no matter if it is Brother, Bernina, or Singer or whatever brand you have and also how to sew it together.
NOTE: This post contains affiliate links, which means that if you make a purchase using one of the links in this article, I may earn a commission at no extra cost to you (To know more about this, click here.)
Leaving your machine out to gather all the dust is just the one great way to get it ruined.
That dust will slowly get into places you can even reach to clean and in no time you will have a malfunctioning machine.
So why would you risk aging your machine instead of extending its life?
Of course, a dust cover machine is not the only thing you want to do.
As I said in my post the 12 most common Sewing Mistakes and How to Fix them, you also need to maintain it and clean it properly with the right set of tools that won’t damage it.
For that, I use a painter’s soft brush, a mini vacuum, and a machine’s oil for when is needed.
I do this every 2 or 3 weeks depending on how much I use it
Right now, my sewing machine is rather new.
It only has 1 year with me, and even though it came with its own hardcover, I chose to make my own.
How to make a simple Machine Cover?
The hardcover was actually pretty good. But the thing is that it took a lot of space.
Every time I wanted to sit and sew, it will just lay in the middle of the floor, keeping me from moving freely.
That’s why I needed to figure out how to make a simple machine cover, that would keep dust away but it won’t take too much space on my sewing table.
So, I decided to make an equally functional and a lot prettier quilted sewing machine cover pattern.
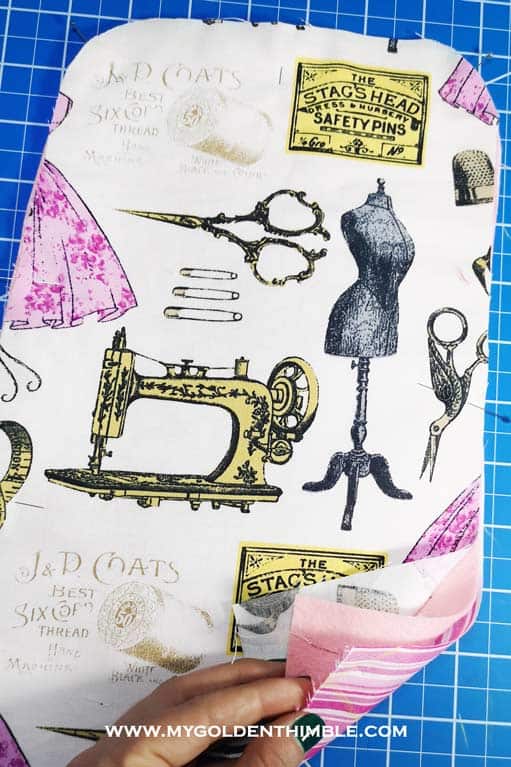
Of course, this won’t give the same “bulletproof” protection as the hardcover.
But it will keep it from scratches, soft hits, and mainly dust.
Plus, you get to keep your to-go tools in their pretty side pockets. And that’s a win!

I found this beautiful sewing-themed fabric with dress forms, scissors, and such things, and I just knew that this was what it was meant to be.
For the batting, I used felt fabric because my local store ran out of batting. Though the felt feels heavier the final look just fine.
It even gave it a stronger structure to stand by itself.
The lining was just a color matching quilting fabric.
And I used my own homemade double folded bias tape. As a tip, I would tell you to use the ½” width instead of the ¼” as I did.
Check this out: Reusable Dish Sponge that actually works. Pattern and Tutorial.
Sewing Machine Cover Pattern
This Sewing Pattern is rather easy to make. You are just going to need 3 measurements of your sewing machine and one more from the pattern itself.

Quilting my 3 layers of fabric was also a nice touch to this project and somehow it makes it feel more protected.
Sewing Machine Pattern Cover Quilted
I made the quilt look by marking crossed diagonal lines (2″ apart) on the lining side and then I simply sew along those lines with a sewing machine’s basting stitch.
If you don’t want to get on the trouble of measuring your own machine here are the measurements of mine, that should be pretty standard size:
- For the Sides:
- Base 7 ¾”
- Height 12 ½”
- Top 6”
- Pockets:
- Height 6 ½”
- For the Body:
- Base 16 ½”
- Side’s sides + top: 30”
About the bias and making it lined
Thinking things through, I could have easily sewed the lining of this pattern so it could have been used with a double view.
But my lazy bottom finished it with bias.
Which to be honest I don’t totally hate and it could be used with double view anyway.

All though if you want to know how to do a lined sewing machine cover then just sew the quilted part separately from the lining part.
Then either sew the wrong sides together or finish the bottom with bias tape.
But to reiterate the note on the bias, if you are going to use it as I did. As the 3 layers of fabric ended up being a bit thick I recommend you use a ½” double bias tape.
It doesn’t matter if it is bought or homemade bias tape. You want to have enough room when you fold it over the other side.
So let’s get started with the written pattern instructions or scroll down to watch the whole thing on video.
Read this too: DIY Donut Pattern Weigths. They are so soft!
How do you make a simple Sewing Machine Cover?
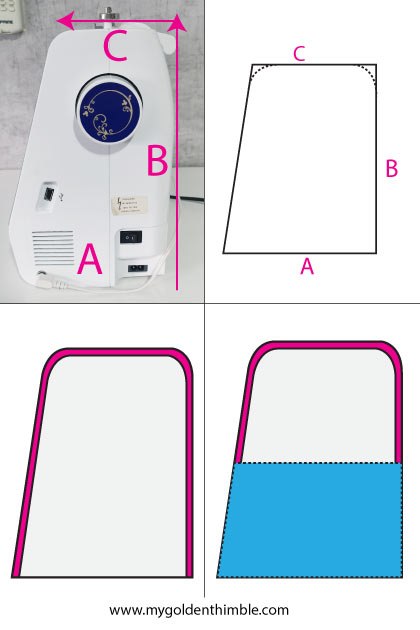
1. Take the following measurements
From the side, you are going to measure the base of your machine, the height, and the top.
Make sure to add to those measurements 1/4″ on each side for ease.
2. Draw a rectangle with the base, height, and top measurements.
Draw a rectangle that has the machine’s measurements and close with a line the open side.
The top line of that rectangle might be a little shorter than the base but that’s ok. It depends of the shape of your machine.
3. Round the top corners.
With the help of your French curve ruler round the top corners of your rectangle.
4. Add a seam allowance.
Add seam allowance to the rectangle’s sides and top.
I added ½” and then trim it to sew the bias tape but you can add whatever you feel is the best.
5. Draw the pockets.
Make a horizontal line on this pattern piece to draw the side pockets pattern. It can be whatever height you want.
Then copy that pattern piece with the help of tracing pattern paper.
6. Measure the top and the sides of the side pattern.
With the help of your measuring tape, take the length of the lines from the sides and the top out of the side piece of the machine cover pattern.
7. Draw the body piece.
Draw a rectangle that measures the width of the base of your sewing machine (seeing it from the front) by the length you measured on point 6. Add seam allowance.
That’s your pattern right here. You should have the body’s rectangle, the sides, and the pockets.
Cut the body 1 time and the sides and pockets 2 times on each of the fabrics you are going to use. The main fabric, batting, and lining.

You will like this too: Hair Towel Wrap Free Sewing Pattern
How to Make a Quilted Machine Cover Pattern
Quilting your pieces is optional but I think it gives the sewing machine cover a very nice finish look.
To quilt your pieces pin your layers on each piece and make diagonal lines with the help of a 2” ruler.
Make the same lines mirroring the first ones, so you will end with a grid.
Then sew them with a machine’s basting stitch.
Now follow this video sewing tutorial to quilt and assemble your sewing machine cover.
Or check below the video for the written step by step sewing instructions.
Sewing Machine Cover Pattern and Tutorial
How to sew a machine Cover
- Start by placing a sandwich with the main fabric, the batting and the lining for each one of the pieces. Make sure the main fabric and the lining have the right sides on the outside.
- Sew your homemade bias tape on the top of both of the pockets.
- Place the pockets over the sides of the cover and pin them together.
- Starting at the bottom (hem) pin the sides with the main body with the main fabric sides facing together. Sew with whatever seam allowance you added.
- Trim if necessary and cover that seam with bias binding.
- Finally, sew bias tape all over the hem.
You are done!! How did it go??
Do you enjoy our freebies?? Support us so we can keep making freebies for you by buying us a cup of coffee here. We will be forever grateful!
Sewing Machine Cover Ideas
Do you want some inspiration for your designs? Check these fabulous ideas:
- Machine Cover Pattern with Gap for the Handle by The Patchsmith
- Vintage Camper design by Sewing with Scraps
- Quilted Sewing Machine Design by I see stars quilting.








Hi, I have the cover cut and ready to go, but I have this question….When putting the binding on the inside of the cover, did you create a new seam with the binding, or just cover the edges with the binding and have two seams on the inside….one when you sewed the cover together and the other for the bias tape? I’m using black thread for my cover, and yellow binding, thus yellow thread for the binding on the back. It’s double sided quilted black fabric with daisies on the front and black on the back. I would so appreciate your help! Been putting it off for a few weeks just because of this problem.
I did 2 seams because it was too bulky and I thought if If I would have only sewed it with bias it could be harder to catch the layers on both sides.
I am dying to see your machine cover!! I bet is going to look awesome, those prints and colors seem so cool.
Thanks so much for this! It’s the most simple of this caliber of machine covers that I’ve seen. I took measurements of my machine some time ago and never moved forward with making a cover. I now have no excuse! 😉😊
Yeii! Great luck with your cover, I hope I can see it when its done. Be sure to tag me!
The Best Way to Use a Sewing Machine Cover, odds are it is a clear plastic cover made with vinyl. It is designed to protect the machine from dust but sometimes it is not very pretty.
Where is tour fabric from?
I have had it for years! Let me see if I found the selvage to see the name
Cute cover and nice pattern, looks very easy. Would be helpful if we could print it off.
Thank you so much Vishi 😀 I would like the idea to make it printable too. I will put a post-it in my to-do list for that, promise.
Nice tutorial! I’ll watch the video at some point too. I love that main fabric you chose! Can I ask where you got it?I made a cover for my one machine at our vacation home but now I need one for my every day machine. That one came out ok and I like it but I was winging it with no pattern. This will be very helpful.
Hi Daphtne. Great tutorial on making a sewing machine cover. Hadn’t thought to quilt it. Considered it more a dust cover then a protective cover. I agree that the new machine hard covers take up too much real estate on my sewing table. I purchased one for my new machine but ended up sending it back. It was sold by the same brand as the machine but was unnecessarily large. Much happier with a simple cloth cover. Only thing is I tend to dislodge the thread spool when taking it off.
You are right, this is more dust resistant. But is far better than those hard covers! I am very glad you like this tutorial 🙂