
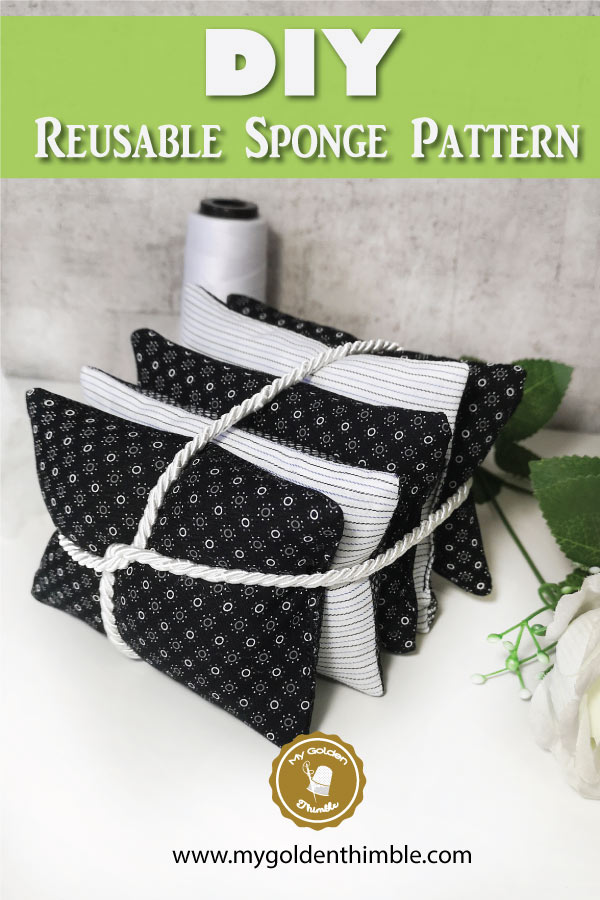
This Reusable Sponge Pattern is the Zero-waste DIY project that you were missing! You have reusable snacks bags, reusable shopping bags, produce, and even snack bags…
But my friends, this new reusable item is going to blow your mind!!
I am truly happy to share this new invention (or reinvented) sewing project with you guys. Believe it or not, I spent a good amount of time cooking this project in my head.
And finally, it has come to life.
NOTE: This post contains affiliate links, which means that if you make a purchase using one of the links in this article, I may earn a commission at no extra cost to you (To know more about this, click here.)
There is something you need to know: my hate for dish sponges is bad.
The person who always makes the dishes at my house is me. This means I am constantly fighting against poorly made disposable sponges and gloves.
Do you know how they get after a couple of weeks of use? All gooey and disgusting…
That is what I hate the most of them. How they get after only a couple of weeks of use. They are the most disgusting thing to touch. Giak!
Besides, they have such a little life span!

On the other hand, I feel so guilty because I use and throw away so many of them. This can’t be good for the environment…
Have you ever own a good dish sponge?? Not me.
When I hate something this much I try to find something to make it better. Yes, even something as simple as a sponge.
That is why my most recent obsession was finding a reusable dish sponge. This is how it went.
You will also want to read: Free Grocery Bag Pattern + Tutorial
First Fail: The reusable silicone sponge.
What can I say about this thingy dingy…? Well, they suck.
They look amazing, you know for sure they are durable and easy to clean and reuse. But here is the thing.
They don’t work!
The silicone tooth is too soft to even scrub the dirt out of your dishes. The soap simply won’t stay in there and it doesn’t make any foam.
So the first try was a fail.
Second Fail: Fabric+ Towel
All right. This one kind of made more sense to me. They have two sides: one with woven fabric and the second one is made of a towel-like fabric.
But at the end of the day, it had the same problem. The towel side wasn’t good enough to scrub the sticky food out of the pans and other stuff.
Finally, my inspiration started to work.
My version of the Reusable Sponge

Thanks to a Facebook tutorial, I saw that some people use the mesh some of the veggies come into to make a sponge.
They basically cut the mesh out of anything metal and make a big ball with it. Which then they used to wash the dishes.
It was brilliant!!!
The mesh was the thing my idea of reusable sponges was missing. It is soft enough so it wouldn’t scratch the dishes. But the holes of it would take the sticky dirt out of the dishes!
But the thing with that kind of veggie mesh is not something that everyone has on hand to make out of the fabric stash.
That’s how I came with the idea to use heavy-weight tulle fabric.
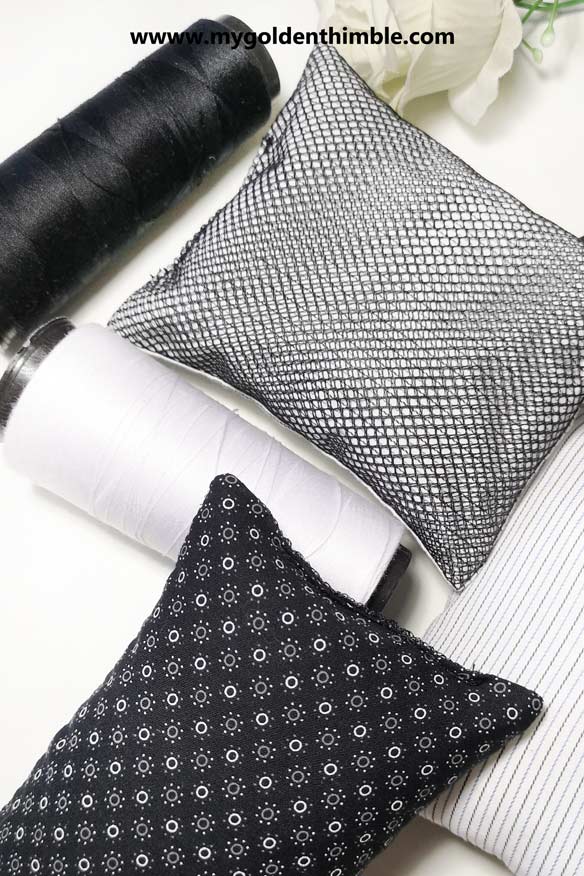
One can find tulle fabric anywhere and of any color really. And the fact that its texture is slightly harder than veggie mesh would provide the sponges of a very nice structure.
The reason I am using two layers of mesh is that I needed to reduce the hole’s spacing area.
The second layer of tulle holes is uneven with the first. This will help the food to don’t get trap between the layer of tulle and the one of fabric.
I don’t want to praise myself here. But came on! It is kind of genius!
This is definitely a great product to sell at craft fairs.
Make this too!!!: Reusable “Ziploc” Sandwich and Snack bags Tutorial
Fabric Sponge Tips and Care.
You can also skip to the 1-min video tutorial here.
Before we start the tutorial I would like to share with you a couple of tips to care for this fabric sponge pattern so you can reuse it over and over again for the longest you can.
- Don’t be shy with the filling. The filling on your reusable sponge is going to compress after a couple of uses. Even if at first it seems to full, go with it.
- Keep it dry. As dry as you can. Squeeze it hard after you finish washing your dishes. Try to take all the water out so it dries fast and won’t keep moisture.
- Use polyester fabric. It will last longer and it has a higher resistant to the cleaning products.
- Avoid chlorine. I probably won’t need to tell you this. I am used to putting little drops of chlorine in my dish soap to disinfect my dishes. But doing this will damage the fabric.
All right. Now let’s go to the tutorial.
PS!! Don’t forget to check out How to Mend your Reusable Sponges at the end of this post! (because these things are meant to last!).
DIY Reusable Dish Sponge Pattern tutorial.

You can also skip to the video tutorial here.
1- Gather your materials.

To make a reusable sponge pattern you will need:
- Two 3 1/2″ x 5 1/2″ rectangles of fabric. (I recommend polyester blends for the rough use)
- Two 3 1/2″ x 5 1/2″ rectangles of heavy-weight tulle.
- Stuffing. (The kind you would use for a pillow)
- Sewing Machine
- Fabric scissors
- Paper scissors
2- Layer your Fabrics.

Now you need to place the two layers of tulle between the two layers of fabric like this.
3- Sew around.

Make a straight stitch from one of the sides and sew around the rectangle at ¼”.
Remember to leave a space of about 1 ½” open to turn around.
After this cut the corners of the rectangle.
4- Turn and fill

Turn the piece inside out and pull out the corners with a pin.
Begin to fill the stuffing until full. Remember to put extra-filling in there!
The filling will eventually compress as same as the ones on pillows do after washing them to much. So be sure to pack that baby as much as you can!
5- Close the sponge

Pin the opening and make a straight stitch to close the sponge.
If you want you can also make an invisible stitch to make it look prettier.
And you are done!!
Making a reusable sponge pattern is so easy that I just know you are just wanna want to make lots of these puppies for your house.
Not that you will need them for a loooooong time. Because this will last at least three or four times more than your standard sponge.
If you happen to make this project please share it with me and the sewing gals at My Golden Thimble Sewing Club.Video Tutorial.
Do you prefer a more interactive and short guide? Check out this 1-min tutorial on video!
How to Mend your Reusable Sponge
As this is a zero-waste project I want to show you how to mend these sponges when they start to go “bad”.
They are very very durable, but they will have wear effects over the time we use them.
And the trick here is: DON’T THROW THEM AWAY!!
Hey! The whole point of us making reusable sponges is to avoid waste with the ugly commercial ones.
So we need to make this last as long as possible for them to do the job taking care of our waste.
Luckily, we have a very efficient and quick method of fixing these sponges, which I show in this video below.
My tip is to make several sponges and as they are gather them together on a basket under your sink. When you are about to use the last good one, fix all the rest.
Here is how.
So, basically, what I do in this video is that I seam to rip open the sponge and take out all the filling.
Then with a comb, I start to make the filling fluffy again.
After that, I cut another two layers of tulle with enough seam allowance.
I pin it over the unfilled sponge and fold the seam allowance in and then sew all around it.
Put the filling back in and close with either an invisible seam or a simple basting stitch.
And that’s it. Your sponge now is good as new to use and reuse again and again.
Do you enjoy our freebies?? Support us so we can keep making freebies for you by buying us a cup of coffee here. We will be forever grateful!
Don’t forget to follow us on Social Media!!







I hope you are still responding to questions.
I have never been satisfied with any dish cloth or sponge I’ve ever bought. My top priorities are:
1. Odor free (and I mean no odor even after repeated use). Swedish dish cloths even stink after a while and washing, boiling, etc. didn’t help.
2. Absorbs liquids and wipes surfaces well. I find, no matter how much I squeeze excess moisture out, odor-free sponges leave excess liquid in streaks on counters, sinks, microwaves, and stove tops.
3. Fits in hand. I dislike dish cloths because even though I fold them into quarters, they’re still hard to control and take too much effort to thoroughly squeeze.
My current sponge is Scotch Brite Stay Fresh Scrub Dots which accomplishes #s 1 and 3, but is terrible at wiping liquids from surfaces. It leaves those unsightly water streaks which look disgusting when dry.
I understand why you use polyester since it probably dries more quickly than cotton, but it seems like it wouldn’t be absorbent. How well do your sponges soak up excess liquid on counter tops, etc? Or, are they useful only for dish washing and not for wiping?
Hello Sia!
I am afraid I only use it to wash dishes. To absorb liquids from surfaces I rather use towels because they are so much easier to wash and dry. I understand this is not very helpful. But I hope someone else in here may have a good solution for you.
I’m wondering if the bath scrubbies material can be used when they have come apart after shower use.
Absolutely! I have done that too. Just make sure you wash and disinfect them before using.
Is this method mildew resistant??
It is. Make sure you leave you to squeeze the sponge after using it and leave it in a dry place.
I appreciate wanting to reuse and upcycle materials, but tulle is likely made of polyester, which is pretty bad for the environment. I would recommend researching fabrics that are actually biodegradable in order to not create additional waste product.
Thank you A, that is a very good point.
Hi, I’ve been making everlasting scrubby things to wash up with for ages now, using scraps of cotton fabric, old t-shirts for a soft cotton padded filling, and upcycled hessian, all from my stash. I’m a freelance seamstress, do all sorts of things from curtains to clothes to upholstery – I’m an avid charity shopper, for fabric/clothes etc. You can also use old sacking fabric for the scrubby side – stick with cotton, it’s easily washable, and eventually compostable.
Thank you so much for your tips! I bet a lot of people (including me) will love this to make the most out of our materials. I love that we need to think about compostable too!
Does it have to be stuffing? Can I use leftover scraps of fabric?
Hi Karen,
I did try making them with scraps of fabric but it got pretty heavy, hard to handle and, it took forever to dry.
I wouldn’t recommend it.
I like that you are trying to find another use for vegetable bags but I found unsponges to take awhile to dry and sometimes ended up with an odor.
I took some cotton mesh fabric, cut them into 10″x10″ squares, hemmed them and use these. They dry quicker which means I can use them for more than one day saving on washing water. These really work on scrubbing my pots and pans, can be washed in the dishwasher or washing machine, last a very long time, and can be composted at the end of their life.
Hi Mea! This is a wonderful input to this tutorial. Thank you so much for sharing. I am sure that a lot of our readers would like this idea!
hello lovely idea but somehow i am not comfortable with using polyester filling, as the polyester fibre can can get through the filtration method currently used. maybe coconut husk as filling might be a better idea.
That’s an absolutely great idea, and definitely more sustainable! Thank you for sharing that with us 🙂
Just saw this Love the idea but am a little confused. I can’t watch the videos because they are all fuzzy. When you turn the sponge after sewing, do you have fabric on one side and the tulle on the other?
Yes, Debby. You basically make a sandwich with the two layers of tulle in between the outer fabric then when you turn inside out, you grab the 2 layers of tulle with one of the layers of the main fabric and turn inside out. That way the tulle fabric ends on one side and the regular fabric on the other.
Daphne you are so wonderful to share this idea. They turned out Wonderful for me. I saw some similar sponges and wanted them so bad but couldn’t afford to buy them. Now I have made and used these ( in really cute fabrics teehe) and as long as one uses common sense they work beautifully. I used your idea for recycling and used my orange bags. Great idea
Tammy! That’s so cool! I bet those orange bags are going to do a great job. Thank you so much for commenting!
I am going to share this with my sewing group. I am always looking for useful and inexpensive items that can be used for gifts. Love homemade items. Thank you for sharing.
I hope everyone likes them!! Make sure to take pictures please!
is the stuffing really necessary?
I find it very helpful to really grab the water and soap when scrubbing. Plus makes more foam which is nice.
This is such a good idea! I hate sponges to because they are so wasteful and my partner thinks I’m crazy. I’m going to give this a go 🙂
You are going to love them! Tip: Make like 4 or 5 of them and rotate them, when they all are dirty you can pop them in the washing machine together!
Thanks so much I made them a few days ago and really love them so far! I also made a matching drawstring bag. It cost me less than $2 to make 10 sponges, the bag plus left over material! 🙂
I am so glad you liked this project!! It is one of my favorites too!