
Today, we will sew an Oven Mitt Pattern, a super easy and beginner-friendly sewing project.
With this project, you will learn how to sew kitchen-safe sewing projects and practice your quilting skills.
And, of course, you will be able to download our free Oven Mitt Pattern and print it from the comfort of your home.

NOTE: This post contains affiliate links, which means that if you make a purchase using one of the links in this article, I may earn a commission at no extra cost to you (To know more about this, click here.)
I think you are really going to love this sewing project.
This oven mitt pattern is perfect for making a quick project or sewing gift and practicing your sewing skills.
It doesn’t need that much fabric. So you can use your cotton fat quarters scraps.
Or even your pretty cotton summer dress leftovers and have a matching outfit. That will definitely cause conversation around your guests.
I will not call myself a cooking person if that is even a term.
The only reason I spend time there is to wash dishes with my reusable sponge and take food already cooked from the fridge to the microwave.

I do like to bake, though. So an oven mitt is an essential kitchen sewing accessory for me.
And making this pattern only means that I have yet another really cool thing to give to my friends and family at house warming parties.
What Type of Materials do I need to sew an Oven Mitt?
For this project, you need to make sure that all your materials are 100% cotton. The thread too, if possible!
Cotton is a pretty fire-resistant fabric, which we absolutely need around the kitchen, if you know what I mean.
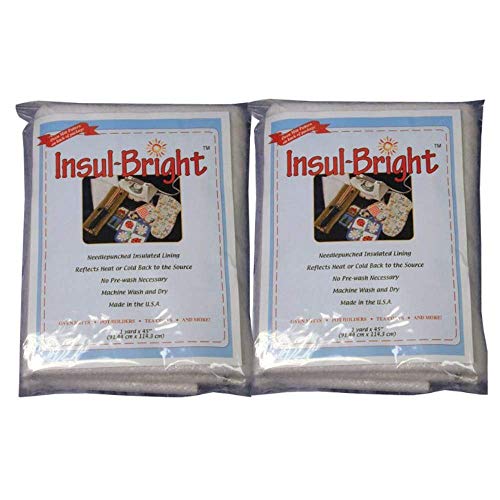
You will also need insulated batting. We recommend using the brand Insul Bright, a pretty good-rated material that will keep your hands safe from the heat of the oven and every hot kitchen appliance.

As for our main fabric, I finally decided to cut into my barbeque-themed cotton canvas.
I got this fabric last year on my trip to Guadalajara, Mexico. In a cute little store that had a loooooot of fantastic materials.
But, you know how it goes… You get fantastic fabric, and then you are too afraid to cut it.
That happens to me a lot, and I tend to generate a massive clutter, which doesn’t leave any space for new brand findings in my sewing room.
And that’s why this year, one of my sewing resolutions was to use as much fabric as I could from my fabric stash.
What is the Best Batting to Use for Oven Mitts?
An insulated heat-resistant one is the best batting to sew your oven mitt pattern. Preferably one that is made from 100% cotton fabrics.
The brand Insul Bright has a great one used explicitly for lining kitchen sewing projects, such as this one.


It has numerous qualities, such as being an excellent thermal insulator, it doesn’t provoke allergic reactions. Also, it’s pretty good to avoid moisture.
Not to mention that if it gets on fire accidentally, it will take twice, as usual, to burn due to its fire-resistant qualities.
This will give you a lot of time to run for your fire extinguisher or throw some water on it.
So, as you can imagine, this material is perfect for making other kitchen sewing projects such as pot holders, casserole covers, cozy bowls, lunch bags…
You can even use it as batting for your DIY Ironing Board Cover.
How to Make an Oven Mitt Pattern and Tutorial.

Materials:
- 100% Cotton Fabric (Main and Lining)
- 100% Insulated Cotton Batting
- Thread
- Fabric Scissors
- Pins or Clips
- Our free Oven Mitt PDF Sewing Pattern
1. Download and assemble the Sewing Pattern
To get your copy of the Oven Mitt Pattern, request to join My Golden Thimble Sewing Club on Facebook and go to the group files.
There you will be able to get a direct download to this and other cool and free sewing patterns that are exclusive for the members of the Club.
Print and assemble your sewing pattern.
*OPTION 2* I recommend that you join our Facebook group to get this free sewing pattern and, there you will also find a lot of other freebies we offer exclusively there.
But if you don’t have a Facebook account you can also get an instant download by signing in to your account and simply clicking on download here:
2. Prepare the fabric layers.

There are two ways you can go here.
You can cut fabric squares big enough to fit the hand of the pattern and quilt it first. Then cut the shape of the hand out of the quilted fabric. Which I think is relatively easier.
Or you can cut the shape of the mitt and quilt it along with your batting as it is. Then cut the excess batting.
I did the last one, and honestly, I found it a lot harder. Doable, but I will quilt all together the next time and then cut the shape out of that.
Whatever is method you want to use, make sure that you make a sandwich with the fabrics like this: Lining, batting, and main fabric.

Both the right sides of the lining and the main fabric have to be facing outside.
Repeat this step twice for both of the layers of the oven mitt.
3. Quilt the oven mitt.

Now you decided which of the two methods to use. It’s time to quilt.
You can make the quilt design you like. We decided to go simple with this project by quilting simple parallel lines crossed.
Use a large stitch length to make it easier and faster. This will help you if you need to unstitch a line for any reason.
4. Make a basting stitch

Make a basting stitch to secure the three layers of fabric on each side.
You can sew a machine basting stitch at ⅛” from the edge or at ¼,” which will be the measurement of our seam allowance.
Repeat on both layers of the oven mitt pattern.
5. Prepare the cuff.
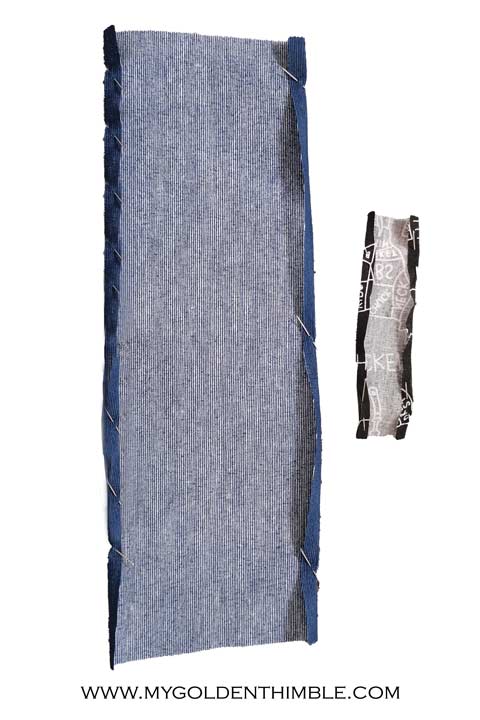
I decided to add a lovely contrasting color cuff to this design to make it look more attractive.
But, if you don’t feel like doing this step, you can skip it and close your oven mitt by sewing bias tape at the bottom.
If you decide to go with the cuff, then follow these instructions.
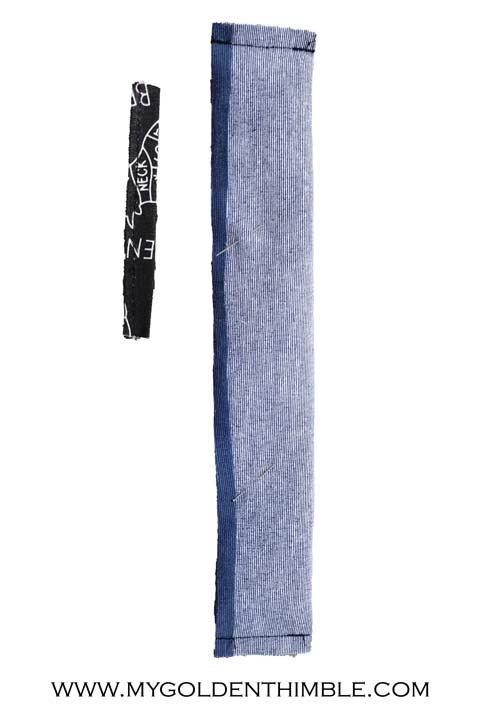
The first thing you want to do is press ¼” on the wider edges of the cuff.
Then, fold it in half with the wrong sides of the fabrics facing together and sew the ends at ¼”.
6. Make the loop
To make the loop to hang or store your oven mitt, the easiest thing to do is add a piece of bias tape.
You can make your own bias tape to match the main fabric as we did here.
Or you can use store-bought bias tape.
The length of our loop is 4 ¼” in total.
7. Join the cuff.

This is the only step where things might get a little bit trickier.
First, you are going to align both layers of the mitt with the main (outside) fabrics facing together.
Without the cuff yet.
Sew over the edge at ¼” but stop just before getting to the end. About 2” or 3”.
Then you are going to pin the cuff on the hem of the mitt. Make sure that both cuff edges are aligned on the front and back.
Sew the cuff by making a topstitch at ⅛” from the edge of the cuff.
8. Sew the Loop and Close.

Finally, fold the bias tape loop in half and place it between both layers of the cuff at the middle of it.
Finish your edge seam from step 7 all the way down.
Then simply turn inside out. Your oven mitt is ready!

Awesome! Now you finish your very own oven mitt pattern. And I bet you did great. I am very grateful that you make it all the way through the end of this tutorial.
Please let me know if you have any questions at all in the comment section below.
Do you enjoy our freebies?? Support us so we can keep making freebies for you by buying us a cup of coffee here. We will be forever grateful!
Don’t forget to follow us on Social Media!!

How to Sew an Oven Mitt
Follow these instructions to sew an oven mitt sewing pattern.
Materials
- 100% cotton fabric
- 100% cotton insulating batting
- Thread
- Needle
- Sewing Machine
- Pins
- Free Printable PDF Sewing Pattern
Instructions
- Download and assemble the Sewing Pattern
- Cut your fabric as indicated on the pattern
- Quilt the three layers of fabric. Lining, batting and finally the main fabric on top.
- Make a basting stitch at the edge of both "hands" to hold the three layers of fabrics together.
- Press the cuff in half and press 1/4" of the seam allowance in.
- Make a hanging loop for the mitt with a strip of 1 1/4" tall by 5" wide. Sew it at 1/4", turn inside out, and press.
- Sew the outer side of the oven mitt side on the wrong side of the fabric.
- Join the cuff to the oven mitt by enclosing the hem with the cuff. Sew a topstitch on the cuff's open edge.
- Place the loop between the two layers of the cuff on the open side and pin or clip the rest of the mitt. Make sure the right sides of the fabrics are facing together.
- Close the mitt with a seam of 1/4".
- Turn right side out and press.
Recommended Products
As an Amazon Associate and member of other affiliate programs, I earn from qualifying purchases.










HELP I can not find the oven mitt pattern or even the group files
Trevor, I just uploaded the file again 20 minutes ago, try again please 🙂