
If you are looking to add a stylish element to your wardrobe, then look no further than our Tiered Skirt Pattern!
This Tiered Maxi Skirt Pattern is fun and flirty. Perfect for any occasion, from a casual day to a fancy brunch with your friends. You can even take it to the beach for the perfect summer outfit!
And the best part? We’re offering a free PDF download of the pattern so you can easily create your own beautiful tiered skirt.
So grab your sewing machine, and let’s get started on this fabulous project!

NOTE: This post contains affiliate links, which means that if you make a purchase using one of the links in this article, I may earn a commission at no extra cost to you (To know more about this, click here.)
About This Free Pattern
I can not express my happiness with the Marigold Tiered Skirt sewing pattern.

When I drafted the design two weeks ago, I wasn’t sure about the types of customizations I wanted to add to this particular design. All I knew was that I wanted it to be “summer green,” and I wanted it to be a maxi skirt.
Believe it or not, I struggled a lot to find just the color of green I had in my head. I wanted to get a rayon fabric, which has way more weight and flow for this type of design. Unfortunately, no green rayon was found out there.
I ended up settling on this poplin fabric, and I have to tell you, I absolutely loved it! Just look at the volume that this type of fabric achieved for this skirt.
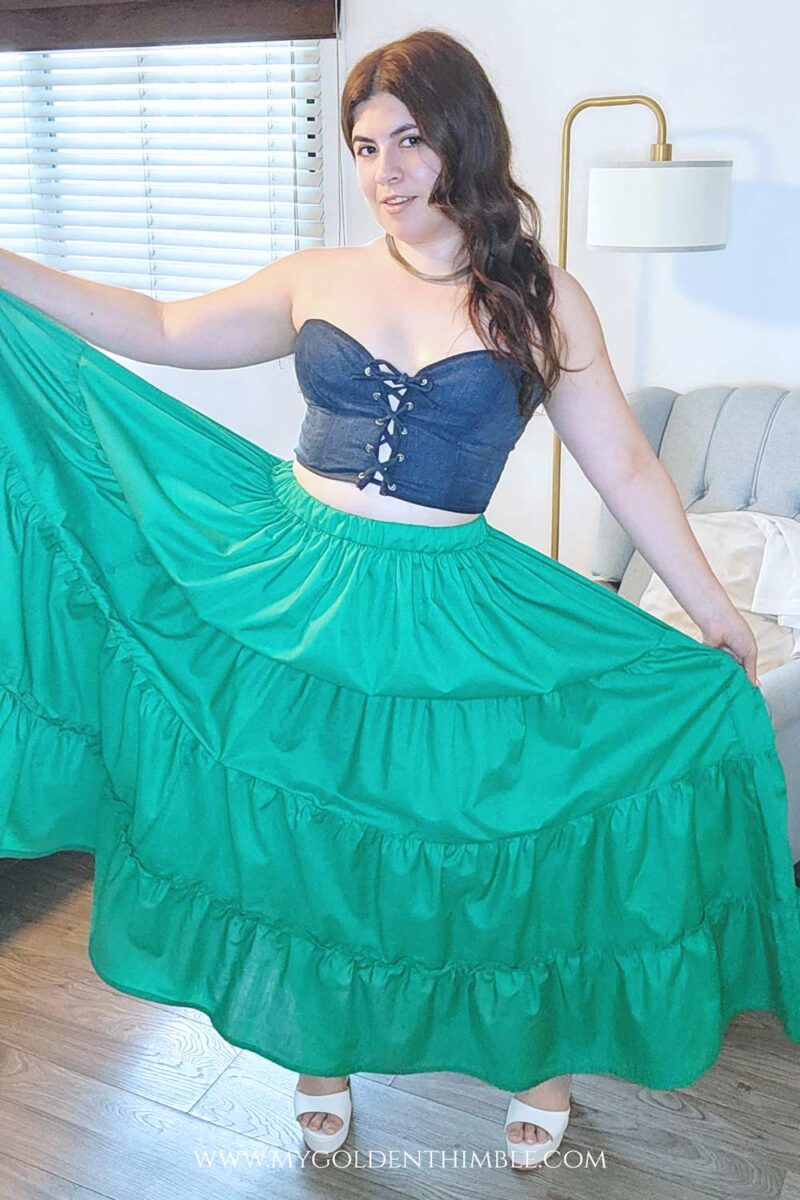
Even though this is a very easy skirt to sew, it might get tedious. You will be gathering a looooot of fabric yards.
So, hang on! You can do this.
Just FYI, this free pattern fits a medium with a waist girth of 31”. Further options for different sizes are explained below.
You can still use this pattern if you are around 2-3” below or over that waist girth size. The elastic waistband should fit you in that case. The exact measurements for the finished product are included in the pattern card on the free files.
- More Free Skirt Patterns and Tutorials:
- 21 Free Skirt Patterns For Summer
- Draft Your Own Pencil Skirt Pattern
- 30 Minutes Gathered Skirt Pattern
- Wrap Skirt Pattern and Tutorial
- Midi Length Half-circle Skirt Tutorial
How to Sew a Tiered Skirt Pattern

Materials:
- 5-6 Yards of Woven Cotton Fabrics like Rayon, Cotton Poplin, or Linen (Learn about Cotton Fabrics for Sewing Clothes)
- Matching Thread
- 1 yard of 1 1/2″ Wide Elastic
- Sewing Machine
- Serger Machine
- Loop Threader
- Marigold Tiered Skirt Pattern (Download Free Version at the Bottom)
1. Cut The Fabric Pieces of Your Tiered Skirt pattern
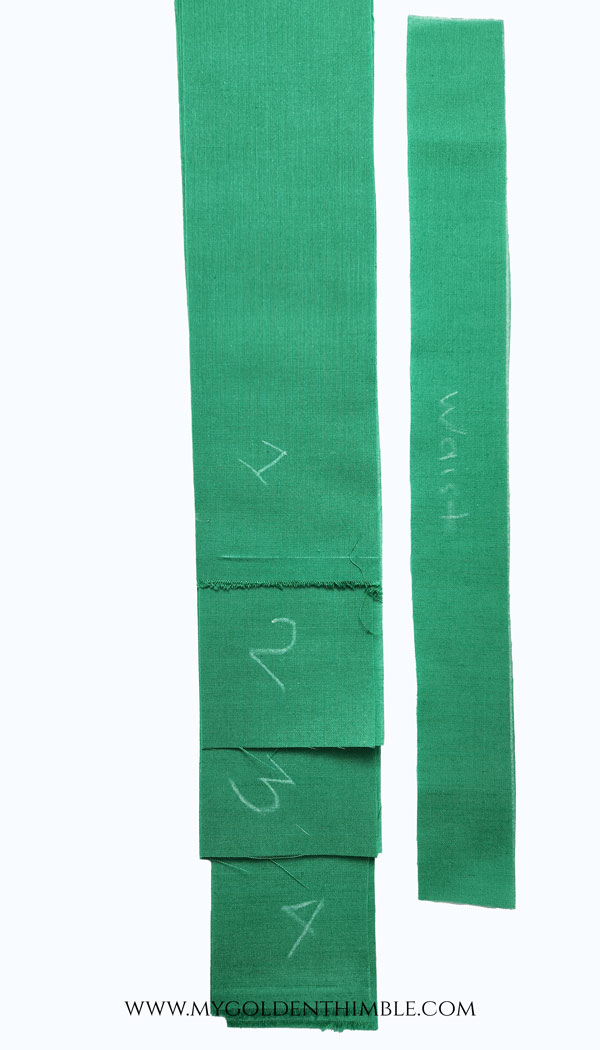
*Note: You can download the pattern at the opt-in at the bottom of this post. This pattern fits a medium with a waist girth of 31”. Options for larger and smaller sizes will be available soon. Please leave a comment below if you are interested in getting them.*
Once you have downloaded and assembled your pattern, you will need to read the pattern directions and cut the pattern pieces according to the indications.
You will end up with four tiers sets and the waistband.
2. Sew the waistband
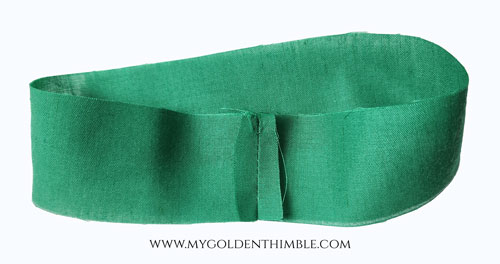
Fold the waistband piece in half lengthwise and sew the shorter ends with ¼” of seam allowance.
Press the seams open.
3. Form the tiers.

Overlock the shorter ends on all of the panels of each tier set.
Sew the panels of each tier by making a big loop. You have to join the shorter ends by sewing the shorter ends at ¼” and then press the seams open.
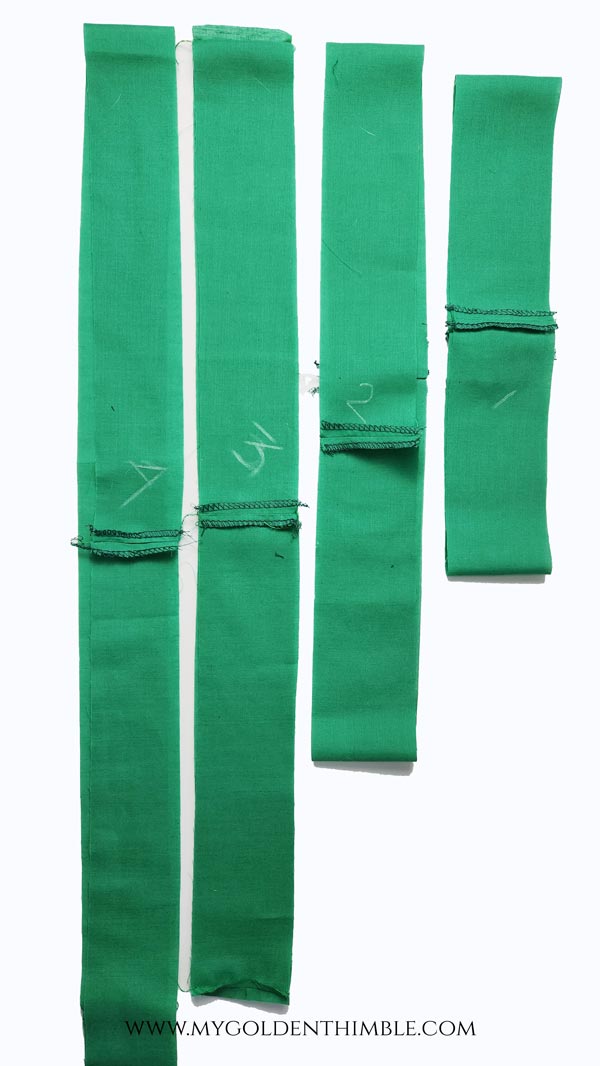
You will end with four tiers.
4. Gather and sew the first tier

Make a basting stitch at ¼” of the top of tier #1. Don’t backstitch at the beginning or end of the seam.
Then, take one of the thread tails and pull it to gather the top of the tier until it fits the circumference of the waistband.
Then, pin the top of the tier with the waistband and the right sides of the fabrics together. Sew at ¼” of seam allowance.

Press the seam allowances towards the waistband on the wrong side.
5. Finish the waistband.

Fold ¼” on the length of the waistband towards the wrong side of the fabric and press.
Then, fold the waistband in half and pin it. Make sure that the folded edge covers the seam of the gathered tier.

Do this next step very slowly. Make a stitch in the ditch seam from the right side of the skirt to secure the waistband on both sides. You need to make this seam exactly in the middle of where the waistband and tier #1 are joined. This way, the seam will only be visible on the inside of the skirt.
Make sure to leave 2” open.
Cut a piece of elastic that measures your waistband girth. In this case, I used a length of 31”. Use this open space to insert the elastic inside the waistband.
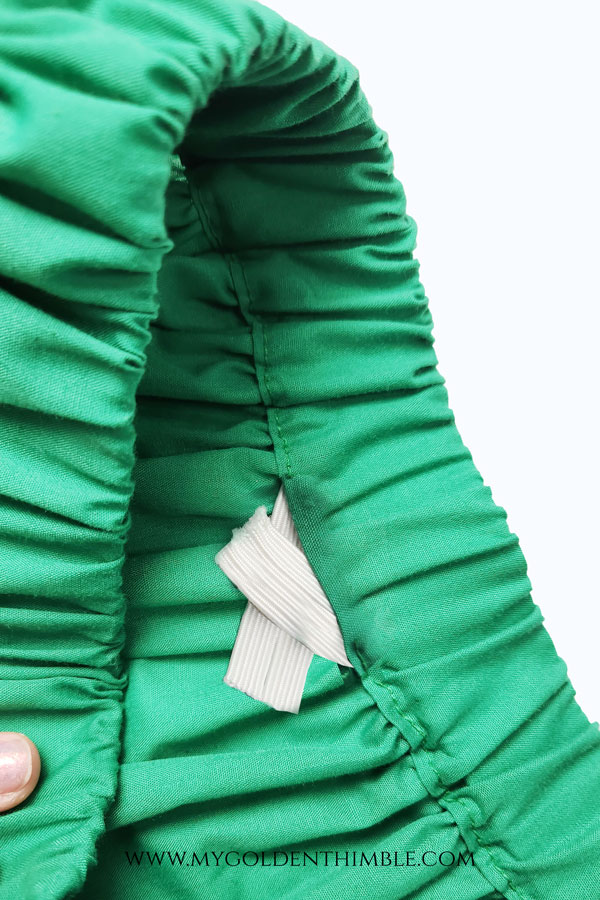
Overlap the elastic about ½” with hand or machine stitches, and then finish closing the waistband with the stitch in the ditch seam.

6. Gather the rest of the tiers
Before starting gathering the tiers, make an overlock stitch on the bottom of tier #3. Then, make a rolled hem with your serger on the top of tier #4.

Repeat the steps of making a basting stitch at ¼” and gathering the tops of each tier. Start with tier #2, and make the top gathered part match in length with the bottom part of tier #1.
Note: The basting stitch for gathering on tier #4 should be ½” from the top instead of ¼.” We will explain why later.
Then, gather the top of tier #3 and make it match the length of the bottom part of tier #2.
Continue doing this by gathering each layer of the tiers and making them match the previous tier.

Finally, divide each loop into four equal parts and mark them with your favorite marking tool. This way, you will know which to match and pin on each tier. I made my marks by color-coding the divisions of each tier in this picture.
You can label each mark with a letter to make it easier.
7. Sew the first three tiers

Using the marks on the last step, match the gathered part of tier #2 with the bottom part of tier #1 with the right sides together.
Sew at ¼” of seam allowance and then serge both of the layers of the seam allowance together.

Press the seams up.
Repeat the same process by sewing the top gathered part of tier #3 with the bottom part of tier #2.
8. Sew the final tier
To make our maxi-tiered skirt stand out, we are going to sew the last tier differently.
You already have this tier basted and gathered at 1/2”. Now, you are going to pin all the gathered top of tier #4 over the bottom of tier #3 but, this time, with the right side of tier #3 facing the wrong side of the fabric of tier #4.

Make the gathered seam of tier #4 overlap tier #3 about ½”.
After that, make a topstitch right over the basting stitch of tier #4 to hold both layers of the tiers together.
9. Make the hem

The worst part is over!
Now, the only thing left to do is to make the hem of the skirt on tier #4 by folding the hem edge twice ½” and sewing a straight stitch.
10. Press the seams
You are done!!
Finish your project by pressing the seams of your skirt to get an even better look!
Free Maxi Tiered Skirt Pattern Download
To get the free version of this pattern, which fits a waist girth of 31”, sign up in this form below, and you will get it right in your inbox.
The email should arrive in a few minutes. Remember to confirm your subscription so we can send you the pattern without any issues! The free version of this pattern comes in Letter and A4 paper-size printable options.

The complete version with full sizes of this pattern fitting sizes from 2XS (22″ waist girth) to 2XL(50″ waist girth) is now available for purchase!
With the purchase version, you will get all the sizes, plus the printable extra detailed instructions, to get an ad-free experience. Plus, you will get the pattern on Letter, A4, A0, and Projector Files for your convenience.
Visit the Marigold Complete Tiered Skirt Pattern Product Page here to learn more.
Or you can go ahead and download our free option for this pattern here:
Happy Sewing!






Is the free pattern no longer available? I can do everything by pictures, except I want to make sure the extra length of each additional tier is accurate. For example, other patterns I’ve seen say that each additional tier gains 5″. But this pattern is more like a circle skirt, very full and animated.
Yes my love, it is a green form at the very end of this post. You have to put your name and email and I’ll send it to you. If you don’t see the form, change browsers or disable your ad blocker.
thank you for this pattern. I love it and can’t wait to make it.
You are most welcome! Enjoy the skirt.
definitely would like in larger sizes
Awesome! I am already working on it 🙂
We would LOVE to see this pattern for size 1x-5x (Size 16-32 womens US). Looks great!
Thank you! I will definitely include many sizes!