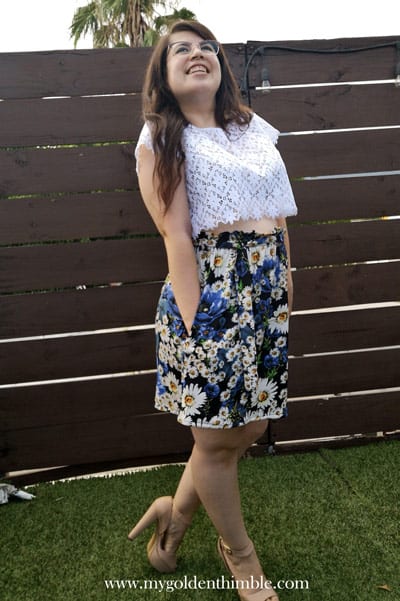
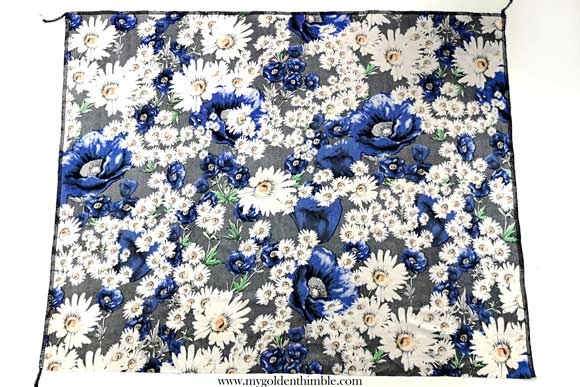
You are not going to be able to believe how fast you are going to finish this easy skirt pattern.
This high waist elastic gathered skirt is one of the prettiest and easiest skirts you can make for yourself this summer.
The best part? It only takes 30 minutes to make from pattern to sewing.

Why I needed an Easy Skirt Pattern
I am not the best dressing to be in my home.
My garments consist of either very fancy/formal wear you can only use outside, or super old and worn clothes that have the word sloppy all over them.
Being at home all day gives you a strange sense of “who cares” when it comes to dressing up.
And lately, this happened to me more and more until I realized I was being all day with ripped shorts (not the cool kind) and promotional t-shirts.
I mean…
This was enough.
I needed a new summer wardrobe to be at home but still look decent.
That was one of my self-imposed conditions.
The other one was that I still wanted to be comfortable in it.
But with so much work in my hands what could I do?
Well, an easy skirt pattern. The easiest one.
What is the easiest skirt to make?

This elastic waist gathered skirt I am showing you in this tutorial is by far the number one easiest skirt to make.
This skirt is a simple yet very nice looking garment.
One of my favorite details is the paper bag detail on the waistline.
You gotta love that curly edge on top of the gathered elastic waist.
I also added a belt, which I grant, it doesn’t even stand out with this fabric print.

But I think that if you make this skirt in a solid color, it would look fantastic!
Not only is fast and beginner-friendly, but you don’t even need a pattern.
I mean a complex paper pattern of course.
We are drawing directly on the fabric which only makes it easier and saves us a couple of steps.
How do I make a simple skirt pattern?
To make this beautiful skirt you will need to take only 2 measurements: the hip seat width and your preferred length for the skirt.
Then, we are going to do very simple math (I promise) and draw a pattern on top of our folded fabric.
After that simply follow the sewing step by step tutorial and you will be done in no time.
Oh! And btw… It has pockets!

Sewing and Making the Easy Skirt Pattern.
1. Trace the following measures.
Fold your fabric in half twice by the length.
You should end with 4 layers of fabric.
Then trace a horizontal line from the fold of the fabric out (waistline) that measures your hip seat measurement divided by 4 + 2″.
In my case my hip measurement is 44 ½”. So that will mean, 44 ½”/4 = 11 ⅛” + 2″ = 13 ⅛”.
Then make a vertical line that measures the length you want from your waist down + 1″ + 4″.
For me, the desired length is 20″ so that would make a 25″ vertical line.
Cut your rectangles and you should end up with two rectangles like these ones.

2. Serge the edges.
Serge both rectangle’s edges except for the hem.

3. Press the waistline
Fold the waistline 2″ pin them and press them.
Don’t remove the pins just yet.

4. Draw the pockets.
Here is a no brainer pocket pattern for you.
You can use this technique to make pockets for absolutely every pattern you want.
You are going to need 2 layers of mirrored fabric.
Draw a vertical line and then place your phone on the fabric at a downward sloping angle.
Trace a semi drop around it leaving ease of about 1″.
Cut this pattern two times to have two pockets.
Serge all edges of each pocket layer.

- Check out more incredible related posts:
- Makeup remover pads DIY. Reusable and Free Pattern!
- Easy Sewing Machine Cover Pattern and Tutorial for beginners.
- DIY Bikini Top Pattern and Tutorial
- How to Sew Bias Tape. The best 3 methods out there.
- Camisole Pattern with beautiful Variations. Instant Download!
5. Sew the pockets
Measure 2 ½” from the folded edge of the waistline down and place one layer of the pocket on the skirt edge with the right sides facing together.
Sew the edge at ½”.

Open the pocket and understitch at ⅛” grabbing both the skirt and the pocket’s seam allowance.

Repeat with the opposite side.
Then do the exact same thing with the other skirt layer.
6. Sew the sides
Remove the pins from the folded waistline and unfold it.
Then sew the sides at ½” passing through the pockets as indicated in this picture below.
Press the seams of the skirt open.

7. Insert the elastic
To insert the elastic we have to sew two straight lines for it to pass through.
First, fold and pin the waistline again and make sure the seam allowances are opened.
Sew the first line just above the serged edge of the waistline leaving about 3″ open.
Then sew another line 1 ⅛” above the one you just made.

Place your 1″ width elastic around your waist and cut it where you feel it comfortable.
With the help of a safety pin insert the elastic through the open seam.
Close the elastic either by hand or machine and sew a straight line to close the open seam.

8. Make the loops.
Cut 2 rectangles of 1 ½” by 2 ½”.
Fold them in half with the right sides facing together and sew them at ¼”.
Use a loop turner to turn them inside out and press with the seam line on the back.

Fold ¼” of each end and press them to the back of the loop.
Then either by hand or by machine sew the loops to each side of the skirt.
Make sure you don’t sew over the elastic.

9. Sew the belt
Cut a 4″ by 50″ wide strip of fabric and sew it at ¼” leaving 2″ opened.
If you want you can make a pike like finish as I did here.
Turn the belt inside out.
Close the open edge with an invisible stitch.

10. Sew the hem.
Yei! Last step, my friend. You are almost over.
Finally, fold the hem of your skirt ½” twice and sew along the edge to form the hem.
Press.

And that is it!!
Wasn’t it easy??
Now you have a wonderful tutorial to make lots of pretty skirts for all your summer days.
If you liked this tutorial please don’t forget to tag us on your insta pics!
Don’t forget to follow us on Social Media!!


I love this skirt but unfortunately don’t own a serger. How can I make this garment without a serger? Thanks.
There are tons of ways you can do it. Check out the How to sew with knits Tutorial’s Post. There is a section in there about how to sew without a Serger Machine. A couple of tutorials you can really like.
Loving the tutorials thank you.
Hi there
Thanks for the great tutorial for this easy skirt pattern. I’m so excited to try this too but can’t seem to find details of the fabric type you used here?
Did you use a stretch fabric for this skirt? and if so, how much more should I add the side seams if wanted to use a soft flowy viscose/rayon type fabric?
Thanks for your help
Kind regards
Linda
Hi Linda!
I am so sorry I totally missed the fabric specifications. This pattern is meant to be used on wovens, so you don’t have to add any extra seam allowance (unless you want more a more gathering and flowing finish).
I did use a knit fabric, but I sew it as it was a woven with the 1/2″ seam allowance on the sides.
So basically you can follow the same directions either for wovens or knits.
I hope this clarifies things for you.