
Learning how to read sewing patterns can be intimidating for beginners, especially if you have never seen a commercial pattern before!
Nevertheless, understanding how to read, interpret, and use them is the key to successful garment construction.
In this guide, we will take you in a very comprehensive way into every part (including symbols) of a sewing pattern (comercial or PDF) so you can succeed in your sewing projects!
Take a deep breath and grab yourself a cup of coffee. Let’s get started.

NOTE: This post contains affiliate links, which means that if you make a purchase using one of the links in this article, I may earn a commission at no extra cost to you (To know more about this, click here.)
Full disclosure: I had never seen a real commercial sewing pattern in its full colors until I was studying fashion at my university. Even though I had been sewing clothes since I was about nine years old!
The reality is that I learned from my grandmother, who taught me how to make patterns in newspapers. Then, in college, we will make one standard pattern at a time…
That is why when I first decided to buy a Butterkick paper pattern and opened it, I was SHOCKED!
The number of pattern pieces, lines, and symbols absolutely overwhelmed me. It took me a good couple of years and a lot of reading and researching to finally understand them to the letter.
And just because I know that feeling of confusion, I am going to accompany you in your sewing pattern endeavors and help you navigate them successfully and EASILY.
Components of a sewing pattern
Sewing patterns typically consist of several components that provide all the necessary information for creating a garment or other sewn project.
And even though paper patterns are slightly different from PDF sewing patterns, they all have the same basic components:
1. Pattern Envelope

Just to make myself clear, when I say commercial sewing patterns, I am referring to the physical paper patterns that are sold in stores. This might include brands such as Simplicity, Butterick, Burda, or Mc’Calls sewing patterns. But when I say digital PDF patterns, I refer to the indie patterns that a lot of designers, such as myself, sell digitally for you to download and print at home.
Commercial patterns will normally come in an envelope that will have a lot of the most essential information about the sewing pattern in question. Here, you will find these elements.

- Pattern picture or illustration. A picture or drawing of the sewing pattern being worn and its variations.
- Name or Serial Number. The name of the serial number is used to identify the pattern.
- Size Chart. The measurements and sizes in which this pattern was drafted.
- Suggested Fabrics and Consumption. The amount and type of fabrics needed to sew this pattern.
- Garment Final Measurements. Measurements of the finished garment.
- Notions and materials requirements. Notions or materials you will need to complete the pattern, such as thread, buttons, closures, etc.
On a Digital Pattern, you will find all of this information either on the pattern selling page or the pattern card included in the file of the pattern.
2. Pattern Pieces

The pattern pieces are the pieces that make the sewing pattern, such as the bodice pieces, sleeves, collars, facings, etc. They are used as a template for cutting sewing patterns in our fabrics in your desired size before sewing them.
Each one of these pattern pieces will be labeled with a number or a letter corresponding to the sewing instructions. These labels are important to keep track of as you cut and sew the fabric pieces together.
These pattern pieces will usually include pattern symbols like notches, grainlines, and other markings that are helpful in cutting, sewing, modifying, and assembling the garment overall.
Other markings on the pattern pieces might include darts, pleats, or gathers, which are folds in the fabric that create shaping and fullness in the garment.
We will explain each one of these markings and symbols below in a moment.
3. Size Chart

When it comes to reading sewing patterns, the size chart is one of the most crucial elements we should become familiar with.
Both commercial and digital patterns must have a size chart so you can choose the best pattern size for you or grade between sizes if necessary.
To make sure you pick the right size for your pattern, they include a handy chart or table that shows the body measurements for each size option. That way, you can find the perfect fit based on your own measurements.
Be aware that not all sizes have the same measurements in different brands of patterns. We will explain this in-depth in the upcoming section about Measuring and Sizes.
4. Cutting Layout Diagrams

A pattern layout diagram is a visual representation of how to position the pattern pieces on the fabric to achieve the most efficient and economical use of the material.
A cutting diagram shows you exactly how to position your pattern pieces on the fabric to make the most efficient use of the material.
It’ll even include helpful tips like where to place the fabric, which direction to align the grainlines, and how to cut the pieces out. The sewing pattern symbols will normally be on the pattern pieces, too.
Not only will this save you money on fabric, but it’ll also give you a more precise and polished result.
5. Sewing Instructions

Now, for you to learn how to read pattern instructions, you need to be familiar with all the elements of a sewing pattern. Don’t worry. We will cover them all in this post.
The sewing instructions will have detailed written, illustrated, or video instructions that will guide you through the construction of the garment or project.
The sewing instructions may or may not have sewing symbols explained. That’s why you should know what they mean before even cutting the fabrics.
Reading and interpreting measurements on a sewing pattern
The one thing I need you to understand about sewing patterns is that sizes are basically a joke.
Why do I say this??
Have you ever been in a clothing store and tried on size 10, and it kind of fits you, but then you go to a different store to try their size 10 and it has a completely different fit to your body?
That is because each store carries its own SIZE CHART with whatever measurements they fit their brand for each size.
The same thing happens with sewing patterns!! Each designer has its own size chart with their own measurements.
So don’t think that just because you are a size 10 in one brand of sewing patterns, you will be a size 10 in them all.

In fact, you can be different sizes in the very same pattern chart!! I explain that in depth in my guide on how to grade patterns between sizes. But it basically means that according to your measurements you can be a size 10 in your chest measurement and a size 12 in your hips measurements, like in my case.
Patterns usually give you a couple of standard body measurements from which to choose your size (chest, waist, hips, and hip girths).
To know how to choose the size that will fit you correctly, you need to measure yourself and write down all your sewing body measurements.
Here is a great sewing measurements tracker for you to write those measurements down.
Symbols and markings on sewing patterns explanation.
Out for the good part!!
How do you read a sewing pattern symbol?
When it comes to sewing patterns, there are a bunch of symbols and markings used to communicate important information about how to construct your garment, get the right fit, and place your fabric correctly. It might seem a bit overwhelming at first, but once you get the hang of it, it’s not so bad!
Here are the common symbols and markings you will encounter on sewing patterns:
1. Grainline

The grainline is the direction in which the fabric threads run, and it’s essential to align pattern pieces with this line to ensure that the finished garment drapes and hangs correctly.
The symbol for a grainline looks like a straight arrow with two ends. This arrow will look different if you need to cut the pattern on the fold or on the bias of the fabric.
Please read my post on Understanding Fabric’s Grainline to learn exactly how the grain line works on a pattern. You will see how crucial it is to pay attention to the grainline when cutting your pattern pieces.
2. Cutting Lines

The cutting lines outline each one of the pattern pieces on the paper to help you cut them out. Each cutting line will represent a different size.
To differentiate each cutting line, follow the style of it. They can be variations of dots and line patterns.
Some PDF sewing patterns come layered, which is great because you can select only one cutting line (size) to print, which can save you ink, paper, and just messiness on the printed pieces.
3. Foldline

The fold line symbol is an arrow of a grainline with two points indicating which line of the pattern should be cut on the fold of the fabric.
When you lay out your fabric, you will usually fold it in half. Cutting on the fold means you need to position this line of the pattern on the fold of the fabric and cut the rest of the pattern out.
Do not cut the foldline!!
Cutting along the fold line allows you to create symmetrical pieces without a seam down the center.
4. Notches

Notches are small markings that are placed on the edges of pattern pieces.
They are usually in the shape of triangles, diamonds, or straight small lines.
These notches serve as a guide to help you match up corresponding pieces in specific zones during the process of assembling a garment, assuring that the final product has a proper alignment and fit.
The notches are usually placed at specific points on the pattern pieces and are designed to match up with notches on other pieces that need to be joined together.
Pro Tip: Pattern makers normally place a single notch on the front pattern pieces and double notches on the back pattern pieces so you don’t get confused between markings.
Notches need to be transferred from the paper into the fabric using sewing marking tools or by making a small cut on the fabric above the notch.

In this section, I want to share with you a great tool that changed making notches on patterns for me. It is called a pattern notcher. It helps you cut out the notches on your paper patterns so you can easily transfer the markings into the fabric.
5. Darts

Darts are marked in patterns with triangle or diamond shapes. At the point of the darts, a Tailor Tack (see #7) symbol can be present.
These lines are used to shape fabric to fit curves, such as bust, waist, or shoulder darts. Darts are folded and sewn to create three-dimensional shapes in the garment.
6. Lengthen/ Shorten Lines

These lines are the absolute best to modify the length of your sewing patterns in KEY areas.
Let’s say you have a longer bodice than normal people. With the lengthened and shorter lines, you can make the bodice of the pattern longer so you can have a perfect fit!
To do that, you cut over the line and slice the pattern in two, then you put a sheet of paper below and tape the pattern together again with that additional part.
This works the other way around, too. You can use these lines to shorten the pattern. You can fold over these lines, making the pattern shorter.
Lengthening and shortening lines can be found on the bodices, pants, legs, skirts, sleeves, and more.
7. Tailor Tacks

Even though I am not very used to using tailor tacks, they can be very useful to transfer the key points and markings from the paper pattern to your fabric pieces without using any marking tools.
You use them by sewing a loose stitch with a hand needle and thread with long ends. No knots!

Then, you remove the paper pattern and snip the thread between the fabric layers. The thread markings will stay on the fabric, making it easy to spot the key points.
For example, you can find a tailor-tack symbol at the end of a dart, indicating that that is the exact point where the dart will end.
Tailor tacks are amazing for precision in sewing.
8. Gather

Gathering symbols indicate the spaces on your pattern pieces that you need to gather. They look like either wavy lines or two dotted lines.
To gather your fabric, you need to loosen the tension on your sewing machine (I like to use the longest stitch length) and then make two parallel seams. Then, you pull out the ends of the seams to make the fabric gather.
9. Tucks

The tuck symbols will tell you where to bring the lines together, so later, you can sew over those lines parallel to the fold line that is formed.
This symbol looks like a box with a dotted line in the middle (fold line) and two points at the beginning and the end of the tuck lines.
10. Pleating

Okay, so pleating looks very similar to the tuck symbol, so be careful there.
The pleat symbol indicates several tailor-tucks where you need to join said points together to form the pleats.
They will have a little arrow that will tell you the direction in which to fold the pleats.
11. Pocket Placement

Pocket placement is the dotted line or shadow of the pocket pattern piece on the other pattern piece the pocket goes sewn on.
For example, if you are making a dress shirt, the dress shirt bodice will have an outline of the pocket indicating where exactly this pocket needs to be.
I like to use these types of placement outlines for other elements in patterns, such as fabric appliques, patches, zippers, and more.
12. Buttonhole/button placement

When sewing, it’s important to mark your pattern pieces with care to make sure that your buttons are in just the right spot. No one wants to deal with a wonky button that throws off the whole look of your garment!
The buttonhole placement tells you exactly where the buttonholes and buttons need to be sewn.
A little extra attention to detail can make all the difference.
13. “Cut 2 of” Cutting indications

No one talks about this because they assume it is easy. But for sewing beginners, it can be a little confusing.
Every pattern piece should have cutting indications. These will be under the pattern piece name, and they will read something like:
- “Cut 2 mirrored”
- “Cut 1 on fold.”
- “Cut 2 mirrored in lining”
Cutting two mirrored pieces means folding the fabric lengthwise in half (making the right sides of the wrong sides mirrored). Place your pattern piece using the grainline. Then cutting both layers of the fabric to get two pieces with a mirrored side.
Cutting on the fold, as we explained above, will mean putting the “On the Fold” symbol side of the pattern on the folded edge of the fabric and cutting the piece so you have a perfectly symmetric piece.
When the pattern indicates cutting in the lining, it wants you to do the exact same thing but with a lining fabric.
How to follow sewing pattern instructions?
Each brand of sewing pattern has its own method of delivering the sewing instructions of the pattern.
Commercial brands with printed pattern papers will have their instructions with illustrations of the garment and the seam indications.
Digital patterns, in my opinion, can be easier to follow because they tend to have their instructions with real step-by-step pictures and written instructions. Some of them have video tutorials, too!
But beware, my friend, because in some cases (especially when it comes to free sewing patterns), the sewing patterns will have NO sewing instructions. And you will have to figure it out on your own.
So, make sure you check twice if the pattern you are buying has these sewing instructions.
Luckily, we live in the internet era!!
Whenever you find complex terms or instructions, pop up to Google and ask what the heck “this” means (hold the heck). You will end up with lots of content (hopefully, you will find My Golden Thimble tutorials out there) that will help you.
Making alterations to a sewing pattern
Once you are confident enough to play around with your sewing patterns, it is time to dare to modify them to your personal taste and preferred fit.
There are a lot of things you can do to modify sewing patterns.
The easiest thing is learning how to blend pattern sizes (or grade between sizes) to achieve the best fit possible for your body type and sizing.
But there are more advanced things you can do, too.
For example, you can check to see if they are balanced. That way, you can see if you need to modify any armholes, crotches, or waistlines to fit your body better.
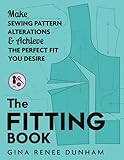
My friend, Gina Renee, has an amazing book teaching you how to make EVERY-POSSIBLE-FITTING-ALTERATION to sewing patterns ever.
Ever since I read this book, I have been obsessed with it. So much so that the universe aligned and let me participate with Gina in making a Spanish version of it for all our Latin-speaking readers!! Both versions of this book are now available on Amazon.
Conclusion.
This article is all about understanding and identifying how to use information in a friendly, easy-to-follow way.
By breaking down complex ideas into short summaries, you can better remember and share crucial information with others.

Learning how to summarize is a fantastic skill that will help you learn and work more efficiently.
Remember to keep practicing and applying this skill in different patterns so you can better read and understand information in the future.
Also, please let me know any questions or doubts you have about this information. That way I can explain them to you further in the comments below.
Happy Sewing!





Hi, thanks for your simple language above. I have been sewing off and on for a few years and you have been a big help.
Can I, with a sewing pattern increase it from a 12 to about a 16 without it being mucked up, as sewing patterns out there are quite expensive now.
Thanks.
Hi April! Thank you so much for your words. I have so much fun making this content for you guys.
As for your question, to increase a pattern size you will need to grade it up. There are tons of video tutorials out there teaching you how to increase sizes depending on the pattern (bodice, skirt, top, pants, etc.) Or you can also try grading between sizes if you have all the sizes of your sewing pattern included on the file you got.
Let me know if you have more questions about this.
D.
Hello, are there situations where you do not want the selvages of the fabric to be folded touching each each other? When looking at my pattern it appears the selvages are about 3 inches apart to allow for a single pattern piece for a band to be cut from one piece of fabric. Not sure I’m reading it correctly.
I am not very sure of what you mean about them being 3 inches apart. Could you post a picture of it on our Facebook Sewing Club Group?? (My Golden Thimble Sewing Club) I would be able to help you better if I had a picture.
Thank you for this simple and clear information. I find vogue patterns very hard to follow. Have never tried a digital pattern but would like to.
Digital patterns (in my opinion) are way easier than commercial ones! And they also offer a lot of options for printing them, like you can print them on a home printer, at a printer’s shop on larger formats, and there are patterns with project options! So no paper would be involved.
Definitely give them a try.
XOXO