
Learning how to take your body measurements is essential to sewing your own clothes.
In this tutorial, I am going to show you how to take your own measurements even if you don’t have anyone to help you.
You’ll only need a measuring tape and a piece of paper or a Body Measurements Chart to write them on.

NOTE: This post contains affiliate links, which means that if you make a purchase using one of the links in this article, I may earn a commission at no extra cost to you (To know more about this, click here.)
The moment I made my first garment, I knew my life would never be the same again.
Sewing for yourself is an amazing experience. It is cheaper and gives you the opportunity to make exactly what you want, instead of just buying what is available in stores.
But as you know, our perfectly human bodies just don’t have a standard “fit them all” size.
About our body shape.
Now, the first thing I want you to know, the only universal sewing truth, is that: EVERY single BODY IS DIFFERENT.
That’s right.
Stores and the most patterns out there work with standard sizes, so it is easier for them to reach more customers, but the truth is that there isn’t one same body as another.
We all have different body shapes. Apple, triangle, pear… you name it.
Take me, for instance. I have a tremendous huge bottom.
Completely disproportionate to the girth of my waist.
That makes me a “pear shape”.
So when I sew my own clothes, I have to grade the sewing pattern between sizes, so the garment fits me perfectly.
And to do that, I have to know my own measurements.
This tutorial will help you if you are just starting to learn the basic things to do learn how to sew your own clothes.
Knowing how to take your measurements will help you check and modify your PDF sewing patterns from My Golden Thimble before you cut the fabric so they will fit perfectly!
How can you take your own body measurements?
The first thing you want to do is to write the measurements down.
You can start making your own measurements booklet with our Free Body Measurements Printable Chart to write down your friends and family’s measurements.
Taking your own measurements may be difficult but not impossible.
Take your measuring tape and follow these instructions.
Make sure that you hold your tape when you lean down, so you don’t add or subtract measures.
Things you need to know first.
Most seamstresses ignore that the measuring tapes are made of a material that tends to grow and deform over time.
There are just so many things we don’t know about the measuring tapes.
Also, not every tape is correctly calibrated.
So before you even try to measure yourself, you have to check if your tape is right.
To do this, place your tape against a sewing rule or your cutting map and check that they both have the same measurements.
Do not check only the first couple of numbers.
Sometimes the beginning of it will be OK, but when you go through the higher numbers, you’ll find out that they are uneven.
How to take your body measurements.
Horizontal Body Measurements:
1. Chest Girth:

Measure the horizontal circumference around the body, taken under the arms and across the fullest part of the chest/bust.
2. Waist Girth:

Measure the minimum horizontal circumference around the body at waist height. This will be where the smaller part of your torso is.
3. Hip/Seat Girth:

Measure the maximum horizontal circumference around the body at hip height.
4. Upper-Arm Girth:

Measure the maximum circumference of the arm, taken midway between the elbow and the shoulder joints.
5. Hand Girth:

Measure the maximum circumference of the hand around the knuckles, excluding the thumb, and take with the fingers together.
6. Bust Point to Bust Point:

Measure the horizontal distance from bust apex to bust apex, taken with the arms down.
Vertical Body Measurements:
7. Front Waist Length:

Measure from the base neck side, passing from your bust to the waist.
8. Back Waist Length:

Measure from the base neck side to the waist.
10. Waist Height:

Measure the distance from the waist level to the hip girth level along the side of the body.
11. Waist to knee:
Measure the distance from the waist level and then vertically to the floor. Hold your tape with your hand, and then lean on to measure from there to the knee by the side.
12. Waist to feet:

Measure the distance from the waist level vertically, hold the tape with your hand, and lean to watch where the tape ends.
13. Shoulder Length:
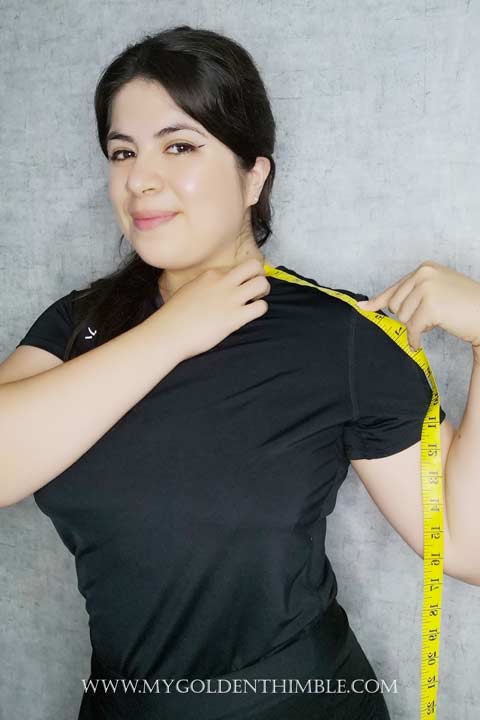
Measure the distance from the side of the neck base to the top of the shoulder joint, taken with the arm down.
14. Arm Length:
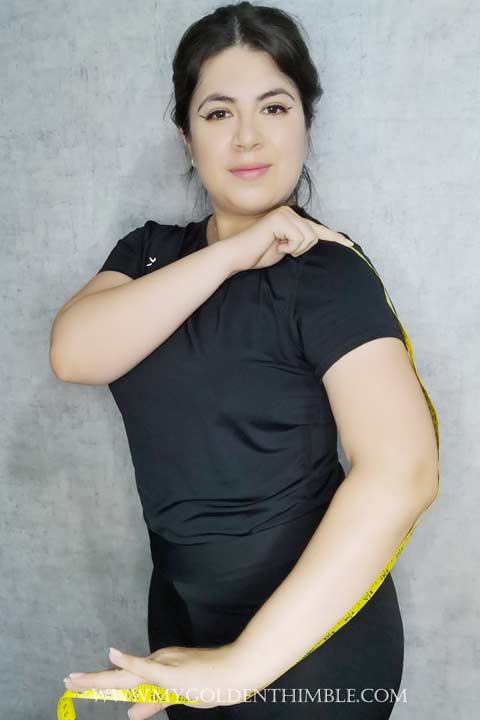
Measure the distance from the top of the shoulder joint along the outside of the arm over the elbow to the prominent wrist bone, taken with the arm bent and the hand placed on the hip.
15. Crotch length:
Hold the tape in the front center at waist height and pass it through your legs to the back of your body until you reach the back waist height.
Psst…Is this article helpful to you?? Please support us so we can keep making awesome tutorials for you by buying us a cup of coffee here. We will be forever grateful!
Don’t forget to follow us on Social Media!!








Thank you for the instruction on measurements. I have been sewing my own clothes for years and just started to sew for others. You take a couple of measurements that I usually don’t so I will add that to my list.
Some of the extra measurements are for pattern making, but it is great to have them just in case because they are super usefull for fitting modifications too.
your shoulder measurements should be from one shoulder to another not as you have shown
The measurement from one shoulder to another is for back width and it used for another method of drafting this pattern 😉
you need both, from shoulder point across back to the other shoulder point & from base of neck to shoulder point.
Yes, indeed.
Well explained and demonstrated. Thank you for providing a clear explanation.
Hi Marivic, thank you so much for saying that. I am very glad I could help. I think I got a hang of it because I usually take my own measurements on my own all the time.