
Learn how to make fabric twine easily using nothing but all those pieces of fabric scraps in your sewing room.
All of us want to make the most out of our precious fabrics.
Not only for ecological reasons but also because fabrics are so expensive! Why shouldn’t we use the very last bit of it? And of course, make something useful for our home.
Such as this unique and colorful Fabric Twine DIY.

Yesterday I was organizing my fabric stash, and I realized that I have just too many scraps.
Too many, to be honest with you.
So, I had to think about what I could do with them. Otherwise, they would become something too hard to manage.
You know how much I love zero-waste sewing projects.
So far, here at My Golden Thimble, we have made Reusable Makeup Pads, Reusable Sponges, Fabric Grocery Bags Patterns, Reusable Ziploc Snack Bags, and so much more.
And as I know you guys are pretty eco-friendly too, I decided to do more projects like this one.
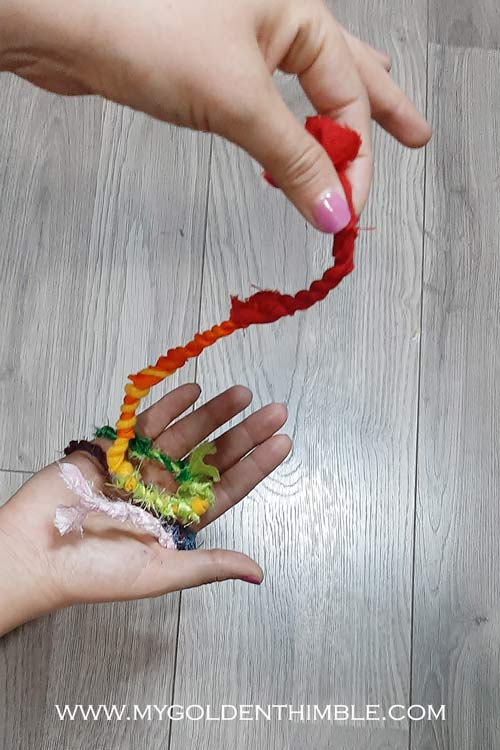
Make your own Design
A beautiful rainbow fabric twine so you can finally use all those scraps and get to recycle them for something good.
This happens to me all the time. I am a fabric scrap hoarder.
Every time I am cutting my fabric for a garment, I see the small leftover pieces, and I just think, “this is too pretty to throw it away.”
And so I save it.

So, we will learn how to make fabric twine using nothing but small pieces of scraps. And I am sure you are going to love it!
If you don’t want to spend money buying a rope, it’s handy. Because let’s face it.
A rope is never there when you need it.
Depending on your needs, you can make it as thick and long as possible. Also, it’s just stunning to look at.
I love that it doesn’t need any extra material and only requires the scraps of fabric and basic things we already have.
Plus, you don’t need any pattern, just a ruler or measuring sewing tool. That’s it.
Are you ready?
Why should I make a fabric cord with scraps?
Making a fabric twine is an effortless way to use all your fabric scraps while making something useful for your home. And most importantly, we are choosing to give a second life to the scraps of fabric from all our projects.
You can also recycle other things to make this twine. For example, a garment in your closet is worn out and can no longer be used. Turn it into a rope with this cute project.
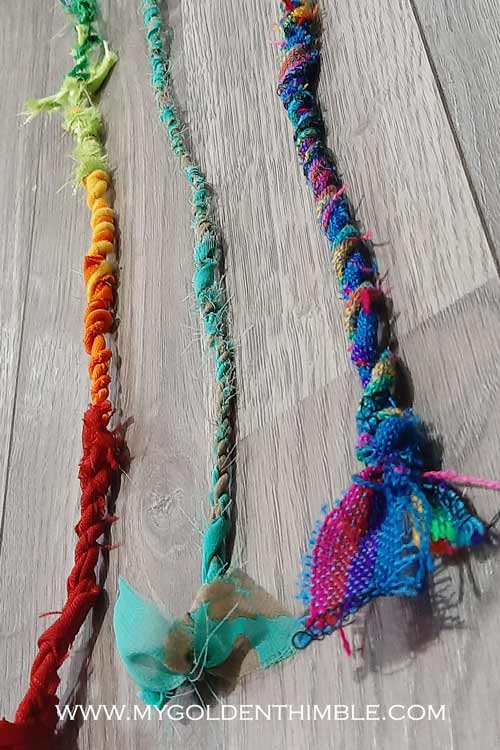
And a great thing about this project is that anyone can do it!
You don’t need any special sewing skills for it. Kids and grownups can gather together and make beautiful pieces of rope.
It uses the straight stitch, a stitch you can do by hand or by sewing machine.
This is the easiest stitch to do.
How can I use a Twine made out of Fabric?

You can use this twine on any project that involves rope, whether for utility or decoration. Another use is to make accessories such as necklaces, key chains, bracelets, DIY headbands, wristlet straps, and even a beautiful wreath to decorate your room.
How about home decorations? You can turn this twine into a rug, bowls, baskets, centerpiece ornaments, door wreaths, etc.
A twine/rope is something that we will always need around.
And don’t go thinking that this twine isn’t strong just because it’s made of fabric. It’s actually stronger than more ropes.
So, what are you waiting for to make your eco-friendly version?
What fabrics should I choose for the decorative wreath?
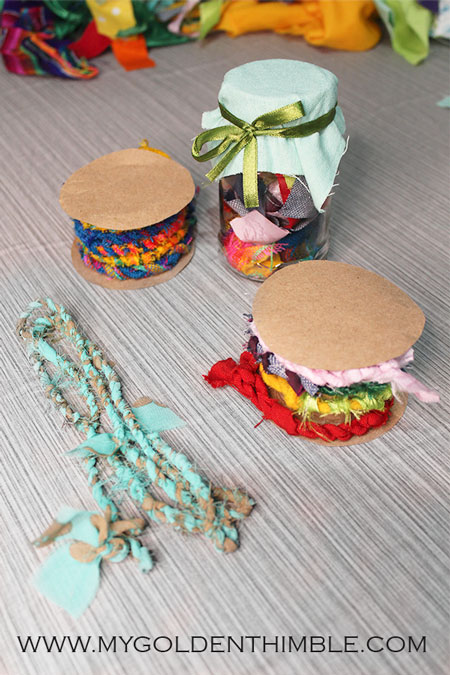
I would recommend separating the type of fabrics. Like stretch fabrics and non-stretch fabrics, so we can have two types of cords to use depending on our project.
If you want stretch fabrics, I will use an overlock machine to join the scraps together so the rope doesn’t break if it stretches.
For this project, it is much easier to use fabrics that do not stretch to make a stiff and robust rope, but as the goal is to use any type of scrap, it does not hurt to know different options.
What colors should I choose for my project?
This depends on your project. The colors can be of your choice. But here are some ideas you can use to choose the best color combination for your DIY Fabric Twine.
- Use internet color palettes.
- Gradients.
- Solid colors.
- One-color.
- Warm colors.
- Cold Colors.
- Without any sense of order at all (my personal favorite).
You can experiment and make a gradient of red, orange, yellow, green, blue, and purple, and you will have a beautiful rainbow rope.
Or, on the contrary, go completely minimalistic. Use black and white.
If you feel sassy, you can try with prints, like only animal prints or flower prints.
And let’s not forget about transparencies. It could also be a rope made of scraps of transparent, shiny, or even plush fabrics.
There is a wide variety of fabrics and textures, don’t be afraid to use them and create beautiful new strings for any project.
Materials:
- Scraps of Fabric
- Ruler or Measuring Tape
- Sewing Scissors
How to Make a Fabric Twine with Scraps?
To make a fabric Twine, you first need to gather all the fabric scraps you can. Scatter them by color and size and follow these instructions to start making the rope.
If you want to keep order and organization in your sewing room, place your twine in a bowl, jar, or drawer where you can keep it handy.
This is very simple, and you can make a spool to store your new string using a cardboard tube. It can be a toilet paper tube, a napkin roll, or reusing ribbon or thread tubes that you have used completely.
1. Choose your scraps
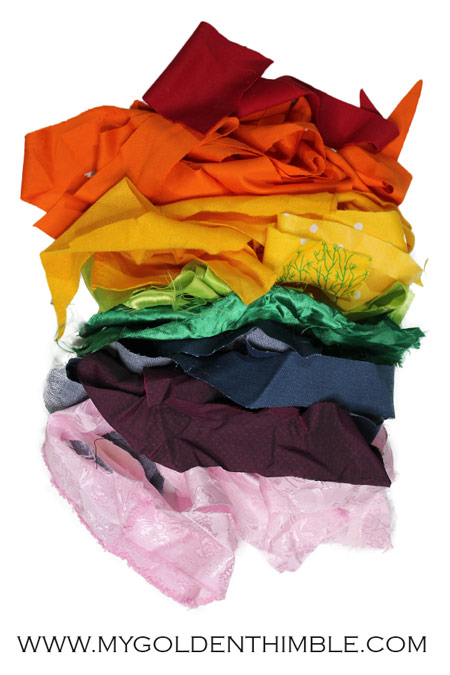
As mentioned before, you can use your creativity to mix and match your colors and textures in this step.
Try to skip the fabrics that had stretch on them.
For this example, we are using a rainbow color palette. I separated the pieces by the color in the order that I would use them.
2. Cut Strips
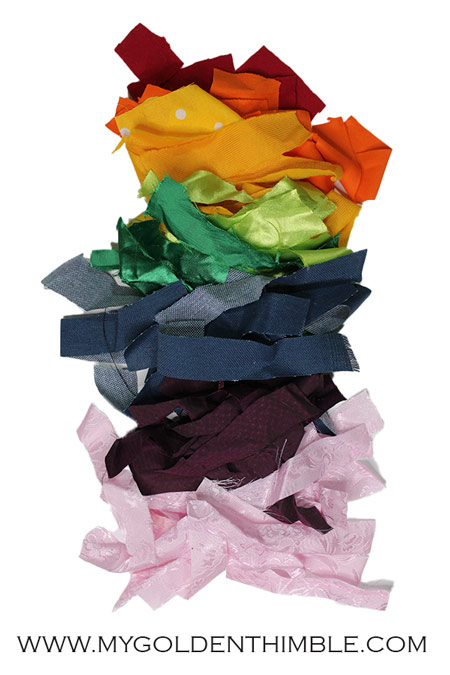
Cut out strips of a maximum of 1″ and the length you want.
The longer, the better.
Ideally, you want to find the fabric grainline, so you don’t cut your fabric on the bias.
3. Make a knot

First, we take two scraps strips and join them together, making a knot with the ends.
4. Twist away

I recommend you put a heavy object over the base knot.
This will make the following steps easier.
We will twist each strip (separately) over its own body.
5. Braid the Fabric Twine

Cross the two fabric strips while you pull them towards you.
Continue twining and crossing the ends of the fabric.
Stop when is about 1” or 2” left at the ends.
6. Joining Strips
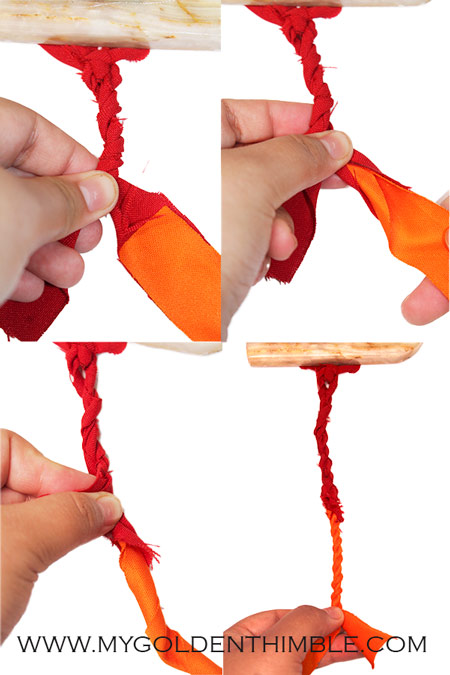
To join two different scrap pieces, go around the new scrap strip with one of the strips close to the base knot.
The first piece of fabric to be overlapped. About 1″ or 2″.
The next thing to do is twist these two pieces of fabric, as we did in step four.
7. Repeat and make a Knot to finish

Repeat steps five and six until you reach the desired length.
Twist, cross, join, and until you have a nice long rope.
To finish, just make a knot as you did at the beginning, and that’s it.
You have transformed your fabric scraps into an excellent rope for your needs and projects.
What did you think of this tutorial? Tell us all about it in the comments, and tell us what types of projects you’d like to see and how many of these we can make to use this project.
Psst…Is this article helpful to you?? Please support us so we can keep making awesome tutorials for you by buying us a cup of coffee here. We will be forever grateful!
Don’t forget to follow us on Social Media!!








thank you so much for this
now I have got what to do with my leftover fabric
I am glad you find this post useful for your fabric scraps 😀
I don’t understand how these 2 twisted “ropes” will not ravel and come undone. Three strips ya, but only 2?
You can also sew a super long strip as I mentioned a little before that part 😀
Individually, they are twisted clockwise and then when you twist them to each other, they are twisted counterclockwise. This keeps them from coming unravelled. This is how regular rope is made, but using different fiber.
This is great advice. I will do it this way from now on.
A bit more detail on the twisting might help:
1. Twist each strand in the same direction, for example, twist ‘toward the right’ .
2. Wrap the strands around each other- it’s not “braiding”. (Tip: If you have twisted ‘toward the right’ pass your right strand over the left. Keep passing the right strand over the left. It will look like a nice rope.
These tips are amazing! Thank you for sharing them with us. Our Twine will look even better!