
If you’re ready to declutter your sewing room, you’ve come to the right place!
Today, I want to help you create a space that not only looks tidier but also helps you maximize your creativity every time you sit down to sew.
Clutter has a sneaky way of getting in the middle of that, making even the simplest sewing session feel overwhelming.
In this guide, I’ll walk you through what to keep, what to donate, what to toss, and how to organize everything afterward so your sewing room works for you, not against you.
And be sure to keep an eye out because I’ve also created a free printable sewing room decluttering checklist that you can use to stay on track and make the whole process feel much more manageable.

NOTE: This post contains affiliate links, which means that if you make a purchase using one of the links in this article, I may earn a commission at no extra cost to you (To know more about this, click here.)
Warning!! I am including tons of FREE links, printables, and even more guides within this post to help you achieve your goals! Make sure to keep an eye out for them and save this post on Pinterest so you can come back to it later when you need the resources.
Decluttering without regret. Yes! It’s possible
I truly believe that working in a space where you feel comfortable, inspired, and organized makes every project more enjoyable.
Let’s be honest—fabric, notions, sewing patterns, and unfinished projects have a magical way of multiplying over the years.
One day you have a neat little collection, and before you know it, you’re digging through piles of fabric trying to remember where you put that zipper or wondering if you already own the perfect thread color.

Sewing room decluttering isn’t about having less; it’s about making it easier to find what you already have so you can spend more time sewing and less time searching.
Now, don’t worry—I am not here to convince you to become a minimalist, and I’m definitely not going to tell you to get rid of that gorgeous fabric you’ve been saving for the perfect project.

The goal of this guide isn’t to throw away everything you own.
Instead, it’s to help you declutter your sewing room in a way that feels realistic, keeps the supplies you truly love, and creates a workspace that inspires creativity instead of frustration.
Before You Start: Decide Your Decluttering Categories
Whenever I’m decluttering my sewing room (or honestly, any space in my house), I like to start with a few large trash bags or bins to help me sort everything into categories. I know it may sound simple, but using trash bags makes the whole process so much easier because they’re inexpensive, hold a lot of supplies, and let you quickly separate everything without overthinking it.

Instead of making dozens of tiny decisions as you go, you’ll simply place each item into its category. Then, once you’re finished decluttering, you can work through one bag at a time and give everything its new purpose. It makes the whole process feel much less overwhelming!
These are the three categories I recommend using:
Keep / Relocate
This is where you’ll place everything you know you want to keep. Maybe it’s a tool you use all the time, a favorite fabric you’ve been saving for the perfect project, or something with sentimental value that still brings you joy. Not everything needs to be used every month to deserve a place in your sewing room.
The important thing is to be honest with yourself. Are you keeping it because you genuinely love it and know you’ll use it someday, or simply because you feel guilty letting it go? If it’s something you truly value, then it belongs in this category.
Some of these items may not even stay exactly where they are now. That’s why I like calling this category Keep / Relocate. Maybe that cutting mat belongs in another drawer, or your embroidery supplies would make more sense stored in a different cabinet. You’re keeping them—you’ll just find a better home for them later.

Sell / Donate
This might end up being the most satisfying bag of them all.
Place anything here that you think could still be useful to someone else. There are so many ways to sell or donate sewing supplies, whether you’d like to make a little extra money or simply give your materials a second life.
For example, there are plenty of Facebook sewing groups where you can sell or give away fabric, patterns, notions, and tools. Personally, I love donating fabric to fashion schools. Many students have limited budgets, and they can use those fabrics to practice new techniques, sew muslins, or experiment with their designs without spending a fortune.
You can also donate to organizations like Goodwill, local creative centers, schools, community sewing groups, or even your sewing friends.
Chances are, something that’s been sitting untouched on your shelf for years could become someone else’s favorite new sewing supply.
I truly believe that repurposing and reusing what we already have is one of the best ways to reduce waste. Giving your sewing supplies a second chance instead of throwing them away is a wonderful way to help both other makers and the environment.

Trash
I know… this is probably the hardest category.
And don’t worry. I’m not going to tell you to be ruthless or throw away things you genuinely love.
Getting rid of something is going to leave you feeling guilty for weeks? Then it’s probably worth taking a little more time to think about it.
What I do want you to do is reflect on why you’re keeping certain items. Are you holding onto them because they’re still useful, or simply because they’ve been sitting there for so long that letting them go feels difficult?
This category is for things that no longer serve you and realistically won’t serve anyone else either.
That could include:
- Damaged or unusable fabrics
- Broken sewing tools you’ve been meaning to fix “one day”
- Supplies that have worn out and should be replaced
- Dried-up glue, brittle elastic, rusty pins, or empty containers
- Items that take up a lot of space but no longer have a practical purpose
- Things that are simply too old or worn out to be useful anymore
It can be surprisingly difficult to throw things away, but sometimes letting go of what no longer serves you is exactly what makes room for the supplies you’ll actually enjoy using. Remember, the goal isn’t to throw things away just for the sake of it—it’s to create a sewing room that supports your creativity instead of getting in the way.
Declutter One Category at a Time
If there’s one piece of advice I hope you take away from this guide, it’s this: don’t try to declutter your entire sewing room in one day.
Seriously… don’t do it.
It sounds like a great idea until you pull everything out of your shelves and drawers and suddenly your sewing room looks even messier than when you started.
Take it from me—I’ve been there and done that. We own a lot of sewing supplies, and trying to tackle everything at once usually ends in frustration instead of progress.

Instead, work on one category or one area of your sewing room at a time. This makes the process much more manageable and helps you make better decisions without feeling overwhelmed.
Personally, I like to divide my sewing room by spaces. I’ll work on one wall or one area at a time. For example, one side of my room holds my fabric and some sewing tools, another is my sewing table, another is my closet, and so on.
You may prefer working by categories instead, like fabrics one day, sewing patterns the next, and notions after that. Choose the method that works best for you.

Most importantly, set realistic expectations. The more supplies you’ve collected over the years, the more time you’ll need. Don’t expect to finish everything in one afternoon—or even one weekend. Give yourself at least a couple of sessions for each area and focus on making steady progress rather than rushing through it.
For this guide, we’re going to work through these main categories:
- Fabric
- Sewing patterns
- Notions
- Sewing tools
- Unfinished projects (UFOs)
- Boxes, bins, and drawers

Let’s start with one of the biggest challenges in every sewist’s workspace… the fabric stash!
Looking for even more clever ways to keep your sewing room tidy? These creative sewing room organization hacks are full of simple ideas you can put into practice right away.
1. Decluttering Your Fabric Stash
For many of us, our fabric stash is the biggest collection in the sewing room. It’s also the easiest one to let grow over the years!
If you’re keeping more fabric than you expected, don’t worry! This DIY hidden fabric storage idea is perfect for making the most of your sewing space without sacrificing style.
The good news is that you don’t have to get rid of everything. You just need to be intentional about what stays.
After that, you can decide how to store the fabrics you kept with these ideas.

Keep / Relocate: Keep the fabrics you genuinely love and can realistically see yourself sewing with. It’s perfectly okay to save a special fabric for the right project, as long as you still enjoy having it in your stash. If you decide to keep it, make sure it has a proper place where you’ll be able to find it later.
Sell / Donate: If a fabric is still in good condition but no longer matches your style or sewing goals, let someone else enjoy it. You can sell it in sewing groups, give it to a sewing friend, or donate it to schools. Or community organizations where it can be used for practice projects and muslins.
Trash: This category is for fabrics that are stained, moldy, damaged beyond repair, or no longer usable. Tiny scraps that are too small for any future project and worn-out pieces that can’t realistically be repurposed should also go here. If you’re unsure, ask yourself: “Would I actually use this if I found the perfect project tomorrow?” If the answer is no, it’s probably time to let it go.
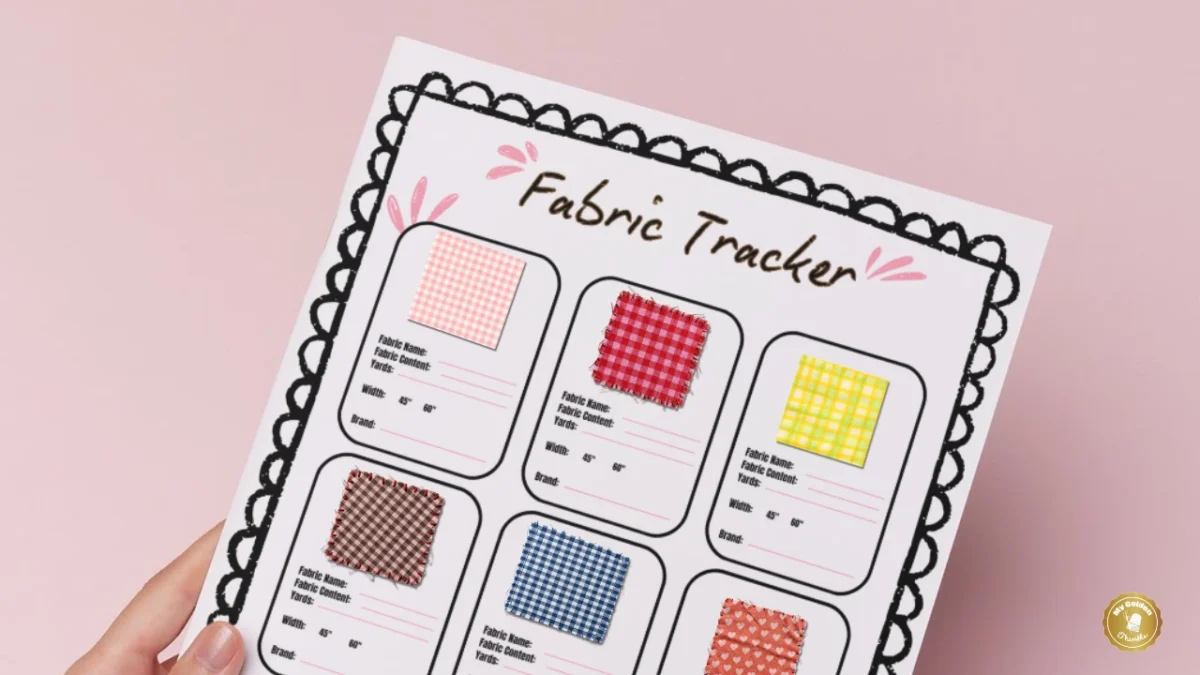
As you’re sorting, remember that quality is more valuable than quantity.
2. Decluttering Your Sewing Patterns

Whether you have a shelf full of printed patterns or a folder packed with PDFs, having a good sewing pattern organization system is one of the best ways to keep your sewing room tidy.

You can work through organizing your digital sewing patterns and organizing physical patterns at different times, sorting each into your three decluttering categories.

Keep / Relocate: Keep the patterns that still match your style, fit the clothes you enjoy wearing today, or that you’re excited to sew in the near future. I also recommend keeping patterns that were a bigger investment, since you may want to revisit them later.
Sell / Donate: Be extra careful with this category. Please never sell, share, or redistribute digital PDF sewing patterns created by other designers. Small businesses put countless hours into designing, testing, grading, and writing those patterns, and they are protected by copyright. If you no longer want a PDF pattern, simply delete it. Printed commercial (check license first!) or vintage patterns, however, can often be sold secondhand on places like Facebook Marketplace or eBay, or donated to fashion schools, sewing clubs, or local libraries.
Trash / Recycle: Get rid of bulky printed PDF patterns you know you’ll never sew again. If you only need one or two sizes, trace those onto pattern paper and recycle the original printout to save a surprising amount of space. Also, don’t feel guilty recycling patterns that didn’t fit well or that you simply didn’t enjoy making. Not every pattern deserves a permanent place in your collection.
3. Decluttering Your Notions

I have to admit, there have been a few times when I’ve thrown away a notion only to need it a few months later for a new project.
That’s exactly why I created a very intentional sewing notions organization system where everything I decide to keep has its own category and designated place.
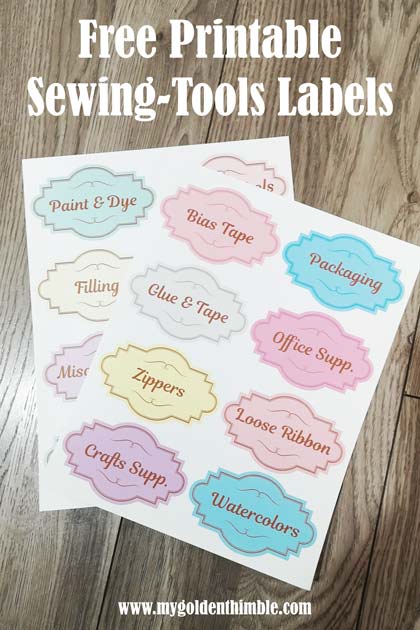
It has saved me from buying duplicates and made finding what I need so much easier.
Keep / Relocate: Keep the notions you regularly use or know you’ll realistically need in the future. Things like buttons, zippers, elastic, bias tape, snaps, interfacing, hooks and eyes, and specialty notions can all be worth keeping. As long as they’re in good condition and have an organized place to live.
Sell / Donate: If you have duplicates or notions you’ll never use, but they’re still in great condition. Let someone else enjoy them. Sewing friends, schools, community groups, and beginner sewists are often happy to receive supplies. Otherwise, they sit untouched in your sewing room.
Trash: Throw away anything that has reached the end of its life. Such as dried-out glue, brittle elastic, rusty pins, damaged zippers, empty thread spools, or notions that are broken or no longer usable. There’s no reason to let supplies that can’t do their job take up valuable storage space.
The goal isn’t to have fewer notions. It’s to have the right notions, organized in a way that makes every sewing project easier.
4. Decluttering Your Sewing Tools
Your sewing tools are the heart of your sewing room, so don’t feel like you need to get rid of them just to have a cleaner space. In fact, I recommend keeping all of the basic sewing tools, even if you haven’t learned how to use every single one yet.
Once you’ve reduced the duplicates, these sewing tool organizer ideas will help you give every tool its own home.

A good pair of fabric scissors, quality rulers, rotary cutters, seam rippers, and specialty sewing tools are all worth holding onto, especially if they were an investment.
Keep / Relocate: Keep the tools that are in good working condition and that you know you’ll use as your sewing skills continue to grow. Just make sure each one has a designated place, so it’s easy to find when you need it.
Sell / Donate: This is where you’ll usually find the easiest items to part with. Look for duplicates. Maybe you have five fabric markers but only ever use one, several craft scissors when one is enough, two sets of pattern-making rulers, or multiple cones of the same thread color that you’ll never finish. If they’re still in great condition, consider selling or donating the extras so someone else can put them to good use.
Trash: Anything that is broken, bent, rusted, dull beyond repair, falling apart, or no longer safe to use belongs here. Even if a tool was expensive, keeping something that no longer works properly only creates clutter and makes your sewing experience more frustrating.
5. Decluttering Your Unfinished Projects (UFOs)
Unfinished projects can be some of the hardest things to declutter because they often come with a little bit of guilt.

But here’s something I’ve learned over the years: sometimes a project stays unfinished for a reason.
Deep down, you may have realized you didn’t love the fabric, didn’t like how it was turning out, or simply couldn’t picture yourself wearing or using the finished piece.
Keep / Relocate: Keep the projects that you’re still genuinely excited to finish. Maybe they became too challenging, life got busy, or you simply needed a break from them. If you can still imagine yourself happily completing the project, it deserves another chance.
Sell / Donate: I generally don’t recommend selling or donating unfinished sewing projects. They’re often incomplete and may not be very useful to someone else. Instead, if the fabric is still in good condition, see if you can salvage the larger pieces and use them for a different project. S
Trash: If you’re honest with yourself and know you’re never going to finish a project, it’s okay to let it go. Recycle what you can, save any reusable notions or fabric scraps, and throw away the rest if it can’t be repurposed. Letting go of a project you no longer love makes room for one you’re truly excited to sew.
6. Decluttering Closets, Bins, and Drawers
Now it’s time to tackle the places where clutter loves to hide. Think your closets, bins, and drawers.
Instead of emptying everything at once, work through one drawer, one bin, or one section of your closet at a time.
If you realize you simply don’t have enough storage, these sewing room storage and shelving ideas can help you maximize every inch of your space.
As you go, ask yourself if each item really belongs there or if it would make more sense in another organized space.

Keep / Relocate: Keep the supplies that are valuable, in good condition, and that you know you’ll use again. If they’re stored in the wrong place, simply relocate them to a category where they’ll be easier to find.
Sell / Donate: This is a great category for supplies you bought with the best intentions but never ended up using. Maybe you wanted to try a new craft, purchased a specialty tool for one project, or stocked up on something that no longer interests you. If it’s still in great condition, let someone else enjoy it by selling or donating it.
Trash: Throw away anything that is broken, damaged, expired, or no longer useful. I know it can be difficult, especially if it was expensive, but the money is already spent. Keeping something that no longer serves a purpose won’t bring that money back—it only takes up valuable space in your sewing room. If it can’t help you or someone else anymore, it’s time to let it go.
Habits That Keep Your Sewing Room Clutter-Free
Congratulations! If you’ve made it this far, you’ve already done the hardest part. Now, let’s make sure all that hard work lasts.
Decluttering is only the first step. Once you’ve decided what to keep, it’s much easier to organize your sewing room. If you’re ready to keep going, don’t miss my Sewing Room Organization Challenge, where we organize the entire sewing room step by step.

You don’t need to spend hours organizing every week. Instead, build a few simple habits that will keep clutter from creeping back into your sewing room.
- Put supplies back as soon as you finish using them.
- Finish or intentionally pause projects instead of starting too many at once.
- Give every tool and notion a designated home so you always know where to find it.
- Take 10–15 minutes once a week to tidy up your sewing space.
- Be mindful when buying new supplies. Ask yourself if you truly need them or if you already have something similar.
- Declutter regularly. Even one drawer or one bin every few months can make a huge difference.
Remember, a tidy sewing room isn’t about being perfect—it’s about creating a space that makes you excited to sit down, sew, and enjoy your creativity.
Declutter Printable Guide Download

Hey there! Want this amazing free download? Just pop your name and email into the form below, and we’ll send it your way. Oh, and remember to check your promo or spam folders in case the email takes a detour there by mistake. If it does, just nudge it into your main inbox so you don’t miss any more freebies from us!
Don’t see the form? Disable your ad blocker and refresh the page!
Note: If you don’t see the Opt-In Form, disable your ad blocker extensions and reload this page.








Thank you
You are most welcome
Great Tips and suggestions! Thank you. I’m heading to my happy place to tackle some of your ideas on my stash!!🧵🪡😊
I bet you are going to feel wonderful after you finish!
in need of printable decluttering.
thank you in advance.
dena
Hi Dena!! Did you happen to catch the opt-in form to get it at the end of the post??