In this tutorial, I’m going to show you exactly how to draft a basic skirt block pattern step-by-step, even if you’re still pretty new to sewing and pattern making.
Before we go further…
Don’t let the word “drafting” scare you — this process is much easier than it sounds, and once you make your first block, you’ll be able to reuse it over and over again for future sewing projects.
This simple pattern is the foundation for hundreds of skirt types, from cute gathered skirts and pleated styles to fitted pencil skirts and trendy mini skirts. Once you learn how to draft your own skirt block using your custom measurements, you’ll have a pattern that fits your body perfectly and opens the door to creating almost any skirt style you can imagine.

NOTE: This post contains affiliate links, which means that if you make a purchase using one of the links in this article, I may earn a commission at no extra cost to you (To know more about this, click here.)
About The Basic Skirt Block Pattern
Learning how to draft a basic skirt block pattern was actually one of the very first things I learned in fashion school.

At first, it just looked like a simple skirt pattern, but I quickly realized that this basic block pattern was the starting point for almost every skirt type you can think of. Pencil skirts, A-line skirts, gathered skirts, wrap skirts, pleated skirts, and mini skirts all begin with the same foundational pattern.

Once you create your basic skirt block, you can reuse it over and over again to create brand new skirt designs while keeping a much better fit throughout your sewing projects.
In this tutorial, I’ll guide you step-by-step through the process of drafting your own basic skirt block pattern so you can build a strong foundation for future sewing and pattern-making projects.
Measurements You Need To Draft A Basic Skirt Block Pattern
Before we start drafting the basic skirt block pattern, we first need to take a few body measurements.
Don’t worry, though, you only need 4 simple measurements to create this skirt block, and once you have them written down, you’ll be ready to start making your custom pattern.

The measurements you’ll need are:
- Waist Girth
- Hip Girth
- Waist To Hip Height
- Skirt Length
These measurements will help you create a custom fitted skirt block pattern made specifically for your body measurements, which is exactly what makes block drafting so useful for sewing and pattern making.

If you’re not completely sure how to properly take your sewing measurements, I actually have a full tutorial that shows you exactly how to measure yourself step-by-step.
I also made a super cute free printable body measurements booklet where you can write down and save all your measurements for future sewing patterns and projects.

Trust me, having your measurements organized in one place makes sewing so much easier later on, especially once you start drafting more of your own patterns.
Pattern Making Rulers You’ll Need For This Tutorial
Before we start drafting our basic skirt block pattern, I wanted to quickly explain the two main pattern-making rulers I’ll be using throughout this tutorial.
You can find both of the rulers I’ve been using for over two decades here on Amazon. (They will last you a lifetime).

The L-Shaped Ruler
The ruler you’ll see me use the most in this tutorial is the L-shaped ruler, sometimes also called a square ruler or tailor’s square.
This ruler is incredibly important in pattern making because it helps you create perfectly straight 90-degree angles and “square” your lines correctly.
Every time I say: “square this line….” I am referring to you using the L-shaped ruler.

The Curve Ruler
The second ruler we’ll be using is the curve ruler, also known as a French curve or hip curve ruler.
This ruler helps us draw all the smooth curved areas of the pattern that would be difficult to freehand.
Visit these drafting tutorials after finishing this post!
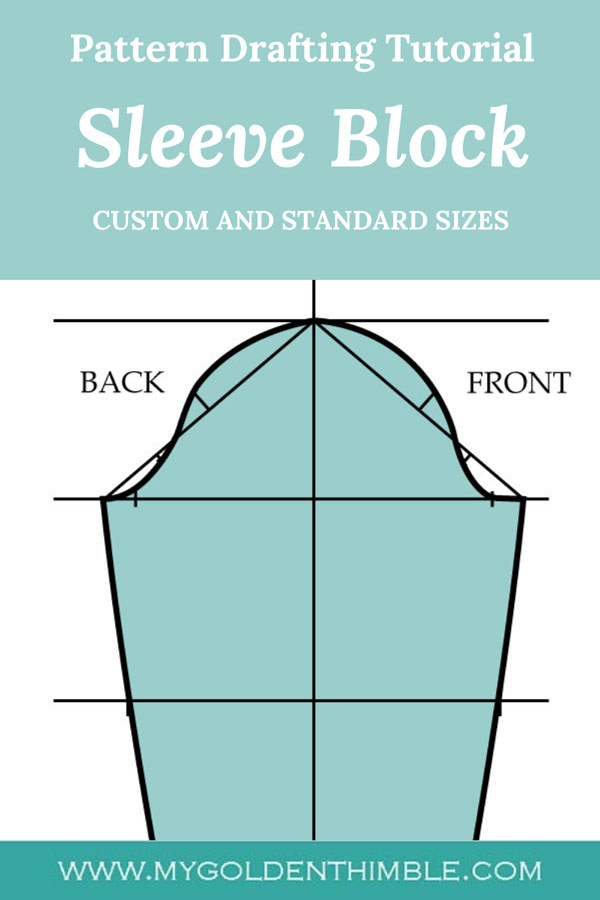


How to draft the Basic Skirt Block Pattern

Step 1: Draft The Front And Back Skirt Panels
To start drafting your basic skirt block pattern, the very first thing we need to do is create the base rectangles for both the front skirt panel and the back skirt panel.
Start by drawing a rectangle and labeling the top right corner as Point A and the top left corner as Point B.
Draft The Width Of The Rectangle
The measurement from A to B will determine the width of your rectangle. To calculate this measurement, use:
Hip Girth ÷ 4 + 1/4 inch
This means you will take your hip girth measurement, divide it by four, and then add 1/4 inch for ease.
Measure this amount horizontally from Point A to Point B and square (using your L ruler) a straight line.

Draft The Length Of The Rectangle
Next, we will determine the length of the skirt block.
From Point B, square a line straight down using your skirt length measurement. This line will become Point C at the bottom.
Once you have the skirt length marked, square across with your L ruler to complete the rectangle.
Create The Back Skirt Panel

Now that you have your first rectangle finished, copy the exact same rectangle right next to it.
- The first rectangle will become your front skirt panel
- The second rectangle will become your back skirt panel
At this point, you should now have the basic foundation for both sections of your basic skirt block pattern ready for the next drafting steps.
Step 2: Mark The Hip Line And Waist Measurement
Now that we have both rectangles drafted, we can start adding the guidelines that will shape our basic skirt block pattern.
Mark The Hip Line
Starting at Point B, square measure straight down using your waist-to-hip height measurement and label this new point as Point D.
Once you have marked Point D, use your L-shaped ruler to square a straight horizontal line from Point D all the way across both rectangles toward the left side.
This horizontal line will become your hip line, which is one of the most important reference lines when drafting a skirt block because it helps shape the fit around the hips correctly.

Mark The Waist Measurement
Next, starting again from Point B, measure horizontally toward the left using:
Waist Girth ÷ 4 + 1 inch
Once you have marked this measurement, label the point as Point E. This mark will help us begin shaping the waistline of the skirt block in the next steps.
Step 3: Draft The Front Waist Dart
Now we’re going to create the front dart for our basic skirt block pattern. The dart helps shape the waist area so the skirt fits the body properly instead of sitting completely straight.
Find The Center Of The Dart
Start by finding the exact halfway point between Point B and Point E. Once you find the center, make a mark and label it as Point F.
Mark The Dart Width
From Point F, measure:
- 1/2 inch toward the right
- 1/2 inch toward the left
These two marks will create the width of your dart.

Draft The Dart Length
Next, from Point F, square a straight line downward using your L-shaped ruler. This line should measure 4 inches long.
Complete The Front Dart
To finish the dart, connect both 1/2 inch marks to the bottom point of the 4-inch line.

This shape will become your front waist dart and will help give the skirt block a more fitted and professional shape around the waist area.
Step 4: Shape The Front Waistline
Now we’re going to start finishing the shape of the front skirt panel by slightly lowering and shaping the waistline. This small adjustment helps the basic skirt block pattern fit more naturally around the body instead of sitting too straight across the waist.
Lower The Waistline
Starting at Point B, measure straight down 1/2 inch and make a mark.
From this new point, measure 1/2 inch toward the left and make another mark.
These new marks will help us create a smoother and more natural waist curve for the front skirt panel in the next step.
Step 5: Draw The Final Shape Of The Front Skirt Panel
Now we’re going to finish shaping the front skirt panel of our basic skirt block pattern. For this step, you’ll want to use your curve ruler to help create smooth, professional-looking lines.
Shape The Waistline
Using your curve ruler, carefully connect Point E to Point B, following the same positioning shown in the picture. This will create the curved shape of the front waistline.

Draw The Side And Hem Lines
Next, draw a straight line from:
- Point B straight down to Point C
- Then, from Point C, straight toward the left
- Finally, connect that point upward until it meets the hip line
These lines will create the basic outer shape of the skirt panel.
Create The Hip Curve
To finish the panel, use your curve ruler again to draw the hip curve from Point E down toward the point where the side seam meets the hip line.
This curved line is what gives the skirt its smooth, fitted shape around the hips and waist.

At this point, you should now have an almost finished front skirt panel for your custom basic skirt block pattern.
Step 6: Start Drafting The Back Skirt Panel
Now that our front skirt panel is almost finished, we can move on to drafting the back skirt panel of the basic skirt block pattern.
Label The Back Panel
Start by labeling the top left corner of your second rectangle as Point G.

Mark The Back Waist Measurement
Next, from Point G toward Point A, measure:
Waist Girth ÷ 4 + 1 1/4 inches
Once you have marked this measurement, label the new point as Point H.
The back skirt panel needs slightly more ease than the front panel, which is why we add a little extra measurement here.
This will help create a better fit and make the skirt more comfortable to wear.
Step 7: Draft The Back Dart And Shape The Center Back
Now we’re going to draft the back dart and make a few small adjustments that will help the back skirt panel fit much better around the curves of the body.
Find The Center Of The Back Dart
Start by finding the exact halfway point between Point G and Point H. Once you find the center, label this mark as Point I.
Mark The Dart Width
From Point I, measure:
- 5/8 inch toward the left
- 5/8 inch toward the right
Make a mark on both sides.

Draft The Dart Length
Next, from Point I, square a straight line downward using your L-shaped ruler. This line should measure 5 inches long.
Complete The Back Dart
Now connect both 5/8 inch marks to the bottom point of the 5-inch line.
This will create the shape of your back waist dart, which helps the skirt contour much better to the back waist area.

Shape The Back Waistline
Next, starting from Point G, measure:
- 1/2 inch downward
- Then from that new point, measure 1/2 inch toward the right
Make a mark at this location. This adjustment will help create a smoother and more natural shape for the back waistline.
Lengthen The Center Back
Because the back of the body naturally has more curve and volume, we also need to slightly lengthen the center back skirt line to compensate for the shape of the body and improve the overall fit of the skirt.
To do this, go to the lower left corner of the back rectangle and:
- Measure 1/2 inch downward
- Then measure 1/2 inch toward the right
Make a mark at this new point.
This small adjustment helps prevent the back of the skirt from pulling upward once worn and gives the finished skirt block a much nicer fit overall.
Step 8: Draw The Final Shape Of The Back Skirt Panel
Now it’s time to finish shaping the back skirt panel of our basic skirt block pattern. For this step, use your curve ruler and position it the same way shown in the picture so you can create smooth professional curves.
Shape The Back Waistline
Starting at Point G, use the 1/2 inch mark we created earlier and connect it to Point H using your curve ruler.
This line will create the shape of the back waistline.
Create The Hip Curve
Next, from Point H, use your curve ruler again to draw a smooth curve down toward the hip line.
This curve will help shape the skirt around the hips and create a much more flattering fit.
Draw The Side Seam
From the point where the hip curve meets the hip line, draw a straight line downward to create the side seam of the back skirt panel.

Shape The Hemline
Now, starting from the bottom of the side seam hem, use your curve ruler to draw another smooth curve that connects to the 1/2 inch mark at Point J.
This slight curve helps compensate for the shape of the body and creates a smoother hem once the skirt is sewn.
Draw The Center Back Line
Finally, square a straight line upward from Point J to create the center back line of your back skirt panel.
At this point, you should now have both your front skirt panel and back skirt panel completed for your custom basic skirt block pattern.

But before we finish, there are still a couple more important steps left to fully complete the pattern.
Step 9: Compensate The Darts
Now we are going to compensate the darts, which is one of those small pattern making steps that makes a huge difference in the final fit and finish of your skirt.
What this basically means is adding the tiny bit of extra shaping the fabric needs so the waistline stays completely smooth once the darts are sewn closed. If you skip this step, the waist edge can sometimes look uneven or pointy after sewing the darts.
Fold The Dart Closed
To compensate for the darts, fold your paper pattern exactly as if you were sewing the dart closed.
Carefully match the dart legs together and press the fold flat with your hand.

Trace The Correct Waist Shape
Once the dart is folded, use a tracing wheel and pass it over the waistline curve.
This will transfer the correct smooth shape the waistline needs once the dart is sewn.
Repeat On Both Panels
Repeat this same process for both:
- The front skirt panel
- The back skirt panel
After opening the darts again, you’ll notice a small adjustment in the waistline shape around the dart area. This tiny correction helps create a much smoother and more professional-looking finish once the skirt is sewn together.
At the end, your pattern should look something like the example shown in the picture.
Step 10: Add Pattern Notes And Seam Allowances
We are finally at the very last step of drafting our basic skirt block pattern, and now it’s time to add all the important pattern notes and seam allowances to fully complete the pattern pieces.
This step may seem small, but trust me, adding proper labels and notes will make your sewing projects so much easier later on, especially if you decide to reuse this skirt block months or even years from now.
Label Your Front Skirt Panel
Start by labeling your first pattern piece as:
Front Skirt Panel
I also highly recommend writing down the exact body measurements you used to draft the pattern. I personally always write down my:
- Waist girth
- Hip girth
- Waist to hip height
- Skirt length
This makes it super easy to check later on if the pattern still fits or if I need to make adjustments in the future.
Add The Cutting Directions
Since the front skirt panel is usually cut on the fold, add the on-fold symbol along the center front edge.
Then write the cutting direction:
Cut 1 On Fold
If you want to learn more about sewing pattern symbols and markings, you can also check out my full post where I explain all the most common pattern symbols used in sewing and pattern making.

Label The Back Skirt Panel
Next, label your second pattern piece as:
Back Skirt Panel
Again, write down the measurements you used to create the pattern so you can easily reference them later.
For the back panel, we usually place the zipper at the center back seam, so instead of cutting this piece on the fold, we will cut it as two separate mirrored pieces.
Add the grainline marking and write the cutting direction:
Cut 2 Mirrored
This means you will cut two mirrored back pieces so the zipper can be inserted at the center back of the skirt.
Add The Seam Allowances
Finally, it’s time to add the seam allowances around your pattern pieces.
There are honestly no strict rules here, and you can adjust these measurements depending on your sewing preferences, but these are the seam allowances I personally recommend:
- 1/4 inch for the waistline
- 1/2 inch for the side seams and center back seam
- 1 inch for the hem allowance
Once you finish adding your seam allowances, your basic skirt block pattern is officially complete and ready to be used for sewing or transforming into tons of different skirt designs later on.
Final Thoughts On Your Basic Skirt Block Pattern
And just like that, you now have your very own custom basic skirt block pattern ready to use for future sewing projects. This is honestly one of the most useful patterns you can learn to make because it becomes the foundation for creating so many different skirt styles later on.
I really hope this tutorial helped make pattern drafting feel a little less intimidating and a lot more approachable. If you have any questions or doubts while making your skirt block, feel free to leave them in the comments below and I’ll be happy to help you out.
And of course, if you make your own skirt block using this tutorial, don’t forget to tag me — I absolutely love seeing your creations and the beautiful projects you make with them!