
Make your own Fabric Pull-up Bows for all your DIY Gifts!
I have always loved the way Pull-up bows work. So I decided to figure them out so I could make a DIY pull up bow tutorial.

This year I commit to making more Zero-waste projects to reduce the waste of trash in my home.
Until this day I have made, reusable grocery bags, dish sponges and Resealable snack bags.
But as Santa’s season is here I began to think about all the waste gift-giving creates. Especially pull up bows.
Not, because this is the major problem, but because I really, really love them!

And to be perfectly honest with you, I have tried to save and reuse plastic bows in the past. But the thing is that the materials they are made from, are not made to last very long.
They are made to last for one time. As everything else…
The Traveling Bows Idea
That’s why I came up with the idea of making travel bows. What are travel bows, you ask?
Well as you know pull up bows come flat. So, by making them with fabric you can flat them back to storage them and save them.

This way you or your friends can reuse them next Christmas, or to other season gifts.
I even will include a little note that reads: “Hi, I am a traveling bow, please save me and use me on a different gift. I would love to help giving joy with my fancy shape and colors!”
How cute will that be??
Maybe I alone will not make a big difference this year. But I truly hope you can help me make this Fabric Pull-up bows a “thing”.
That way I know we will make a difference in a year or two!
The best thing is that you can use scraps of fabric to make these bows. And combine patterns and colors to make them even more special.
2 ways to pull-up
While I was figuring out how the heck I was going to make this fabric pull-up bows work I found something.
I followed the same tutorial that I am giving you here, with one difference.
Later you will see the instructions of where to make the stay stitches on the fabric bow.
On the tutorial below, I am giving you the exact distance each stitch should be sewn. This will give you a standard store-bought bow shape.

But I also found that if you sew the stay stitches parallel to each other, then you will end up with a very pretty puffy bow too.
Just like this one.

To get this finish look instead of the other one simply sew your stitches parallel like this, instead of the way I show on the picture tutorial below.
One thing I want you to remember though is the second option is very important that you use lightweight fabric.
Otherwise, you would end with a ball of ribbon instead of a nice manageable bow.
In fact, if you can, cut the strips on the bias.
This way you will be able to arrange the shape of the bow better.
DIY Fabric Pull-up Bows Tutorial
I am going to give you instructions to make 2 sizes of bows. Small and medium.
Of course, once you know how to make this amazing pull-up fabric bows you can modify the theory to customize your own.
Let’s get started.
MATERIALS:
To make these pull up bows you will only need some leftover fabrics. Depending on the size of bow you want to make is how much you are going to need.
Here are the measurements of each size:

The first thing you need to do is fold 1/4″ of all the ends of each strip and pin it and press it.
Do this for each strip.

Then, fold the bigger rectangles lengthwise and mark a small 90° triangle at the beginning of the strip.
You are going to sew this considering ¼” of the seam allowance.
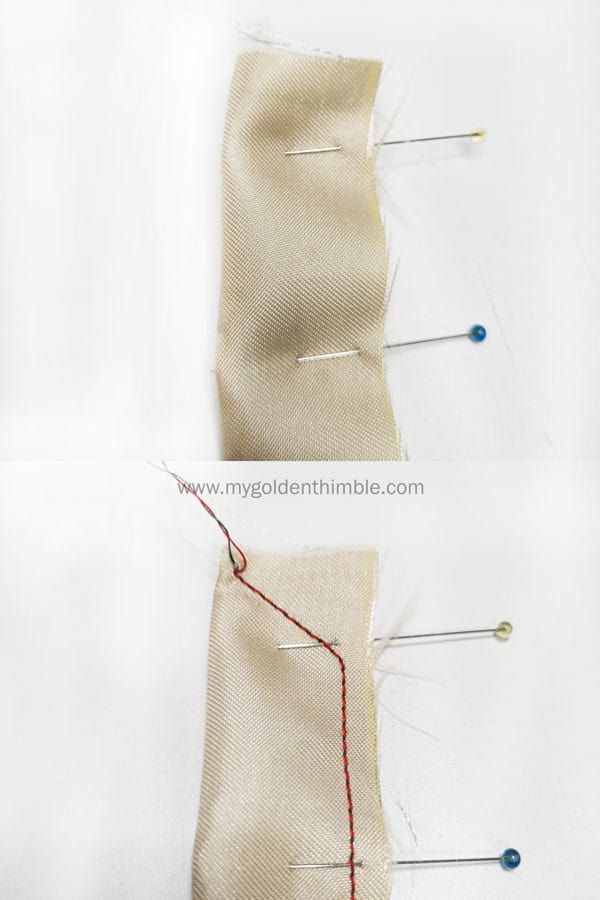
Cut the excess fabric and turn inside out.

For the thinner strips, you are going to fold them in half and sew a straight line at ¼” of the seam allowance.
Close the open edges of the bow’s wider strips with an invisible stitch.
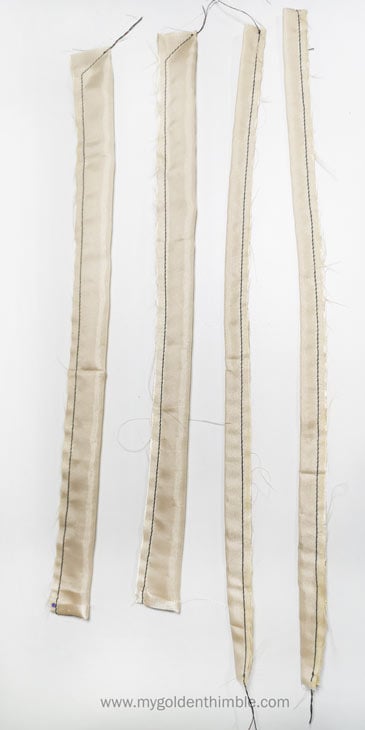
Turn inside out too. Press them both.
Now you will need to place the thinner strips inside the wider ones just in the middle of them. Like a sandwich.
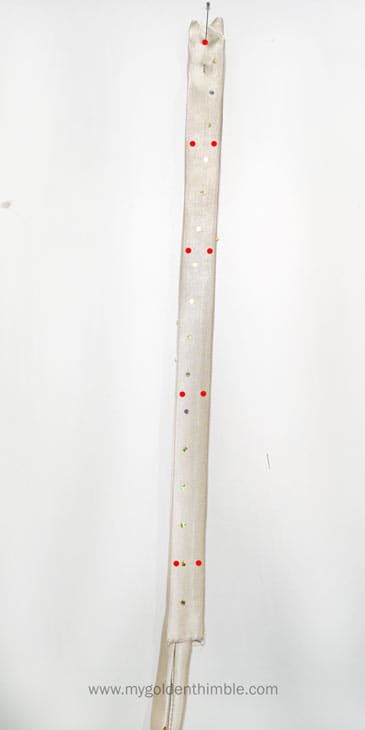
Then you are going to sew a stay stitch by hand or machine at the beginning of the bow. Meaning you are going to secure the 4 strips together.
After this make the following marks with your favorite marking tool for fabric:
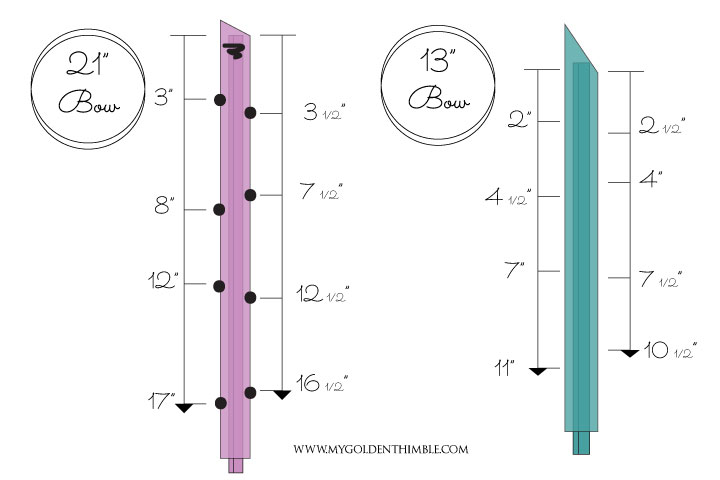
You can now pin along with these marks and start making small stitches just beside each side of the thinner strips.
Make sure you only grab the wider strips together. This will make a canal for the thinner strips to move freely.
That’s it. To form the bow you pull the thinner strips and slide the wider strips up.
That’s it!
As far as the note goes, I am putting mine below the bow. So, when people remove it, they will be able to read the message.
Hopefully, they will save it and use it again later. And this simple piece of fabric will travel around many happy homes and events.
Please let me know if you liked this tutorial and don’t forget to check out all the rest of the amazing Christmas DIY’s and sewing patterns and projects we have for you.
Don’t forget to follow us on Social Media!!
Happy Sewing!!








Oh wow! I love the pull up bows. Well done. I look forward to more brilliant ideas.
Thank you so much! Let me know if you try it 😀
Thank you for the tutorial1