
In this post you are going to learn all there is to know about the French Seam.
This seam is a great alternative to get cleaner finishes on the inside of your garments by replacing the overlock seam.
You can also use it for a large number of sewing projects such as french seam pillows, pockets, reusable grocery bags patterns, and more.

The French Seam has been my salvation and my adoration since I started my career as a fashion designer.
Although this seam is meant to be used to sew sheer fabric inner seams, I like to use it for so much more than that.
When I was starting, I didn’t have a Serger Machine. I used the finishing for everything I sewed.
Not only because it makes your sewing garments look high-end.
But also because not having a Serger meant that I had only 3 options to finish my seams.
One was Zig-zag the edges (I didn’t have a multi-stitches machine). And the other one was to cut my seams with zig-zag shear scissors. At that time I only had 2 out of the 5 scissors needed for sewing.
And of course, the last option, which in my opinion, was the better one, was sewing this amazing seam.

Even now that I do have a serger and a super pro sewing machine with lots of stitches, I keep choosing this seam.
The number one reason I do it is when I am sewing sheer or lace fabric.
But confession time… I also make this seam on my garments when I don’t feel like re-threading my serger machine.
It’s just more convenient this way. Just a couple of straight stitches and you are done!
So keep reading and learn how to make a beautiful-looking seam finish.
What is a French Seam?
A french seam is a type of enclosed seam made on the interior of the seam allowance’s garments made with special or delicate fabrics. This seam is formed by enclosing the seam allowance on the wrong side of the garment’s fabric. This gives, as a result, a clean seam allowance without easily visible stitches.
When to use a French Seam?
Use a french seam when you sew garments with sheer fabrics and can be easily spotted from the outside of the garment.
These fabrics are usually see-through such as chiffon, organza, and lace. But it can also be used to sew fabrics such as silk or satin, to give the garment a cleaner look on the inside seams.
How to sew a French seam.
French Seam Allowance.
If you want to use a french seam in a commercial pattern, or a sewing pattern that you are drafting, consider the following rules. The first seam you are going to make has to be half of the finished seam allowance measure.
For example, if you have a seam allowance of ½”, your first seam will have to be ¼”.For a finish seam allowance of ⅝” your first seam will be of ⅜”, and so on.
French Seam Step-by-Step Tutorial
1. Align the fabrics with the wrong side facing together.

The first step is to align both layers of your fabrics with the wrong sides facing together. Pin the edges of the seam allowance.
It might seem wrong at first but don’t worry.
You’ll see why later.
2. Sew a straight stitch

Depending on the seam allowance your pattern has (see above) it’s the seam allowance you are going to sew.
The most common seam allowance for a french seam is ½”.
So make your first seam on the right side of the fabric at ¼”.
3. Trim the Seam Allowance.


Press your seam allowance to any side and then trim it in half.
Be careful to not trim too near to the stitches or you might accidentally cut through it and ruin your seam.
Open the seam and press the allowance to the side.
4. Enclose the seam on the wrong side.

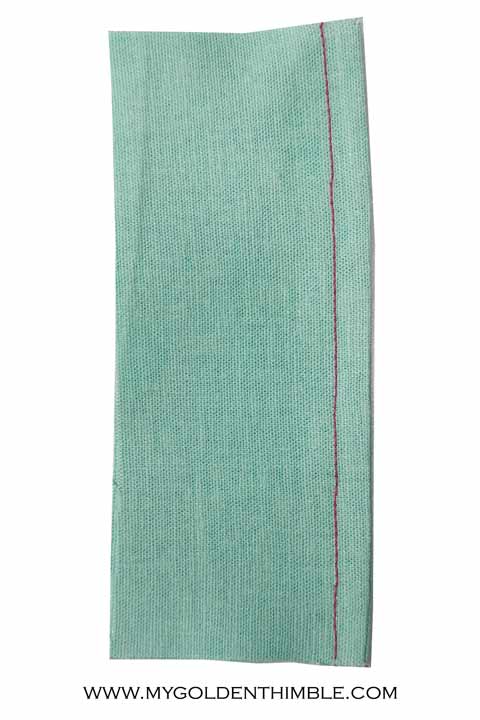
After trimming half of the seam allowance, turn the fabrics making the right sides facing together.
Press on the wrong side of the fabric making sure the seam line is on the edge of your fabric.
Make a seam of the same allowance you made your first seam.
Press again to any side of the garment.
Done!

Flat Felled Seam VS French Seam
Despite having a very similar sewing process, the flat felled seam and a french seam have completely different finishes and proposes.
A french seam as you just learned is used on more delicate garments such as blouses, dresses, and any delicate fabric garment.

On the other side, a flat felled seam is used for rough use garments such as denim jackets or work clothes.
And, although they are both enclosed seams, the french seam “hangs” inside the garment. When the flat felled seam lays flat inside of it.
Please let me know in the comment box below if you have any further questions about the French Seam that wasn’t covered in this post. I will be glad to help you with anything I can!
Don’t forget to follow us on Social Media!!
Psst…Is this article helpful to you?? Please support us so we can keep making awesome tutorials for you by buying us a cup of coffee here. We will be forever grateful!








For the flat felled seam, do you actually sew three seams? The first one with wrong sides together, and then two more externally visible seams to make it lay down? Are the two externally visible seams sewn from the inside of the garment? It would make sense so that you are sure to catch the edge of the fabric inside. Or do you sew one from the inside and one from the outside?
Ok so, when you are doing a flat felled seam you sew the wrong sides together. Then from the outside of the garment you trim one of the seam allowances and use the other to wrap it up. Then you push them flat and make a topstitch on the edge of the folded seam allowance. This will leave you with two visible seams stitches on both the outside and the inside of the garment.
Hope that makes sense.
taught by then 11 year old niece how to do this last summer on a ribbon skirt she was making for a competition with an age group of up to the age of 18. I told her you always want to do your best and have a nice clean finish on your seams inside so that they’ll always look professional. this little trick I’m finishing got her first place over the older girls. it’s never too young to start learning to do things the right way.
This is an amazing example of why these types of seams are so important!
Thank you for sharing this with us.