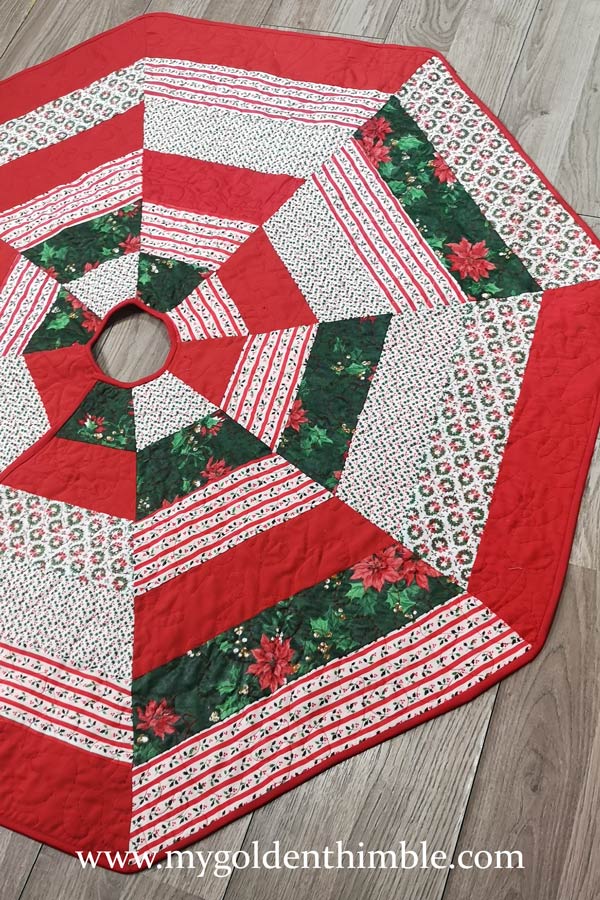
I am so happy that I finally get to share with you my quilted tree skirt pattern and tutorial.
This post will show you how to make this super cute octagonal tree skirt quilt using your Christmas scrap fabrics.
This pattern and tutorial are free to all my readers, and you can follow the step-by-step tutorial in this same post. But if you prefer, you can also print the instructions, which will be available at the end of the article.
So grab your fat quarters, scrap fabrics, or any cool Christmas Printed Fabric you got this season, and let’s do this quilted tree skirt tutorial!

NOTE: This post contains affiliate links, which means that if you make a purchase using one of the links in this article, I may earn a commission at no extra cost to you (To know more about this, click here.)
Christmas Sewing Projects have always been my favorite thing to do this season.
In fact, I have been doing DIY Christmas Crafts and Christmas decorations since November (sorry, guys, I need to prep ahead for you), and I didn’t get my Christmas spirit spark until I started sewing this beautiful quilt pattern.
Choosing the Skirt Tree Colors
After many years of trying different modern, classic, and colorful Christmas Color Palettes, I returned to the traditional red and green. At least for this year!
This was amazingly convenient for me because a dear friend gave me a huge bag filled with all sorts of scraps this year.
I found the most fantastic fabric prints, pieces, and scraps in this bag. And I am guessing it used to belong to a quilter because I found a lot of circle and hexagonal blocks already cut (score!).
Lucky for me this bag contained a lot of scraps of Christmas fabrics and the same colors as this year’s Color Pallete!
How do you make a Quilted Tree Skirt?
To make a quilted Christmas tree skirt pattern, you first must decide on the shape and style of your tree skirt pattern options. You can basically do any form you like, but the most popular options include Circular, Hexagonal, and Star-shaped.
Then, measure your tree and choose the size you want your tree skirt to be. The ideal tree skirt patterns are 5″ to 6″ more prominent than the tree’s base.
After that, you have to choose which pattern to use. We have a lot of excellent tree skirt quilt patterns and tutorials to choose from here.
Initially, I wanted to go with option number 3 of that list, which is a hexagonal quilt block pattern. But, my fabric scraps needed to be bigger to fit the last strips required lengths.
That’s why I made this octagonal easy quilted tree skirt pattern.

Follow the sewing instructions of your chosen pattern and quilt with batting. Finally, finish the edges of your tree skirt with your own homemade bias tape.
If this is your first time making a tree skirt, I recommend you visit my tutorial on How to Make a Custom Tree Skirt Pattern.
In this tutorial, I explain how to make a custom-size pattern for any tree and everything you should know, like, how do you make a simple Christmas tree skirt? How big should a Christmas tree skirt be? and other important questions like these.
How much Fabric do I need for a Christmas Tree Skirt?
For this quilted tree skirt pattern, you will need about 2 1/2 yards (total) of fabric only for the top of the quilt.
Additionally, you will need 1 1/2 yards of backing and 1 1/2 yards of batting fabrics.
As I made this design entirely from scraps, I didn’t follow any specific color pattern combination for each of the panels of this skirt. I had to make the strips with any amount I fit in the scraps. That’s why you can see there are some red panels together.
Weirdly enough, my OCD didn’t act out this time. I think it is because quilts’ original purpose is creatively using whatever fabric leftovers you have.
How to quilt a tree skirt?
You can make your quilted Christmas tree skirt patterns in many different ways. For example, there are techniques like hand quilting, free motion quilting, and trapunto.
Make sure you get good quality batting. If you can, get 100% cotton batting.
I know that there might be many quilters reading this post that already know and have tried many of these techniques.
This might not even be your first Christmas tree skirt quilt pattern. So, for those of you out there, I invite you to challenge your skills and try a new exciting technique this time.
As for the beginners in quilting like me, you can do anything from the most simple to the most random type of designs.
If you have read my Free Fabric Box Sewing Pattern and Tutorial, you know how much I enjoy Free Motion Quilting. Mainly because I don’t need to think about following a line or a specific pattern.
You just move your fabric around the machine, and that’s it.
How wide should a Tree Skirt be?
The ideal width of a tree is 5″ or 6″ wider than the base of the tree. This means that if your tree’s width is 50″ in total, your tree skirt must be at least 56″ wide.

My tree is 48″ wide, so this pattern makes a tree skirt of 54″ in total width.
Depending on the person, you could prefer a smaller or a large Christmas tree skirt pattern.
You can modify the total width of this pattern by adding or removing strips at the end of each panel and cutting the panel following (enlarging) the sidelines.
Octagonal Quilted Tree Skirt Pattern and Tutorial.
The first thing to do to make this quilted tree skirt pattern is to gather your fabric and materials. You will need the following.
Materials.
- A lot of scraps of assorted Christmas Fabrics (around 3 yards total) or about 1 1/2 yards of four (4) different Christmas fabric colors.
- 1 1/2 yards of backing fabric
- 1 1/2 yards of batting
- 7 yards of bias tape.
- Sewing Machine
- Color Matching Thread.
1. Cut your fabric strips.
You are going to cut eight strips of assorted color fabrics in this measurement. Cut eight (8) strips of each of the following.
- 7″ by 4 1/2″- Pattern piece 1
- 11″ by 4 1/2″- Pattern piece 2
- 14″ by 4 1/2″- Pattern piece 3
- 17″ by 4 1/2″- Pattern piece 4
- 21″ by 4 1/2″- Pattern piece 5
- 24″ by 4 1/2″- Pattern piece 6
2. Sew the strips to form the panels.

Place each one of the strips in ascendent order (1,2,3,4,5, and 6), and begin to pair two by two with the right sides of the fabrics facing together.
This means you are going to place pattern piece 1 over pattern piece 2 (right sides facing together), and you are going to sew them at 1/4″.
Then you are going to align the bottom of pattern piece 2 with the top of pattern piece 3 (right sides facing together) and sew them at 1/4″.
Now take the bottom of pattern piece 3 and align it with the top of pattern piece 4, sew them at 1/4″, and repeat with the rest of the pattern pieces until you form your 6-strip panel. Now press all the seams open.
You have to sew a total of 8 panels like this one.
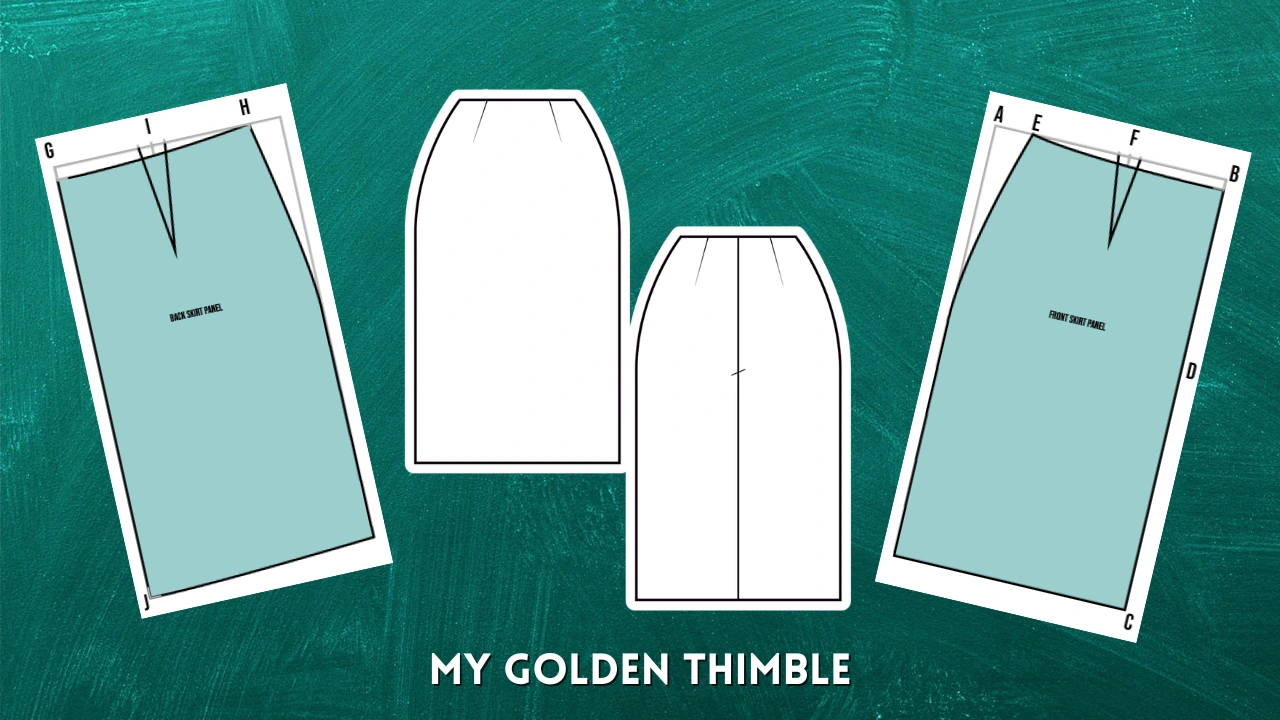
3. Make the pattern.

Use your favorite pattern-making paper to draft the following figure.
This pattern is 1/8 of the octagonal tree skirt pattern, and we will use it to cut our 8 panels to shape. These measurements already include the seam allowances, so you don’t need to add more.
4. Trim the panels.

Use the pattern you made before to trim the sides of each one f the panels to the shape of the pattern.
Make sure to align the top and bottom edges to get a straight cut.
You can get rid of the trimmings or use them to make another scrap quilt.
5. Join panels 1 and 2.

At this time, you can decide the order in which you will sew your panels together. You can place them on the floor to see how they might look and number each one of them.
Place two panels with the right side of the fabrics facing together and sew one of the sides at 1/4″.
Press the seams open.
Start joining each of the panels in the order you prefer by joining the right sides each time.

To make this easier, you can join the first four (4) panels and the last four (4) separately and then join panel 4 with panel 5 to make the complete tree skirt. This will make it much easier to reduce the bulk you need to manage with your sewing machine.
The technique will be especially useful if you don’t have a long-arm sewing machine.
Remember to leave panels 8 and 1 without sewing the sides. This will be the opening of our pattern.

6. Add the batting and backing layers.
To easily cut the batting and backing layers, I laid the backing fabric on the floor with the wrong side of the fabric up.
Then over that, I placed the batting with the right side of the fabric up. Finally, I placed the patchwork quilt tree skirt over those two, with the right side of the fabric facing upwards.
When I ensured everything was as flat as possible, I started pining the three layers of fabric.
When everything was pinned, I cut the shape of the octagon, but I left a leftover of the batting and backing fabrics of about 3″ around the edges.
7. Quilt your Christmas Tree Skirt.

Use one of the quilting techniques mentioned above to quilt the three layers of the fabrics together.
I decided to use a free-motion quilting technique. Because, as I mentioned before is one of the most pain-free techniques.
My lovely friends at My Golden Thimble Sewing Club advised me to quilt my tree skirt pattern with red thread, and I couldn’t love the result more!
8. Add bias tape on the edges of the skirt.

Once everything is quilted, sew the bias tape in one of these 3 ways to the outer and inner edges of the tree skirt.
I began with the sides and followed with the outer edge to finally sew the inner edge.
And you are done!!
I hope this quilted tree skirt pattern was a fun project for you to do. If it was, please let me know in the comment box below because one of my greatest pleasures is to read you.
Do you enjoy our freebies?? Support us so we can keep making freebies for you by buying us a cup of coffee here. We will be forever grateful!
Don’t forget to follow us on Social Media!!

How to Quilt a Tree Skirt Pattern
Follow this tutorial to make an octagonal quilted tree skirt pattern for your Christmas Tree.
Materials
Tools
Instructions
1. Cut your fabric strips.
Cut eight (8) strips of each of the following.
- 7" by 4 1/2"- Pattern piece 1
- 11" by 4 1/2"- Pattern piece 2
- 14" by 4 1/2"- Pattern piece 3
- 17" by 4 1/2"- Pattern piece 4
- 21" by 4 1/2"- Pattern piece 5
- 24" by 4 1/2"- Pattern piece 6
2. Sew the strips to form the panels.
Place each one of the strips in ascendent order (1,2,3,4,5, and 6), and begin to pair two by two with the right sides of the fabrics facing together.
This means you are going to place pattern piece 1 over pattern piece 2 (right sides facing together), and you are going to sew them at 1/4".
Repeat with the rest of the pattern pieces until you form your 6-strip panel. Now press all the seams open.
You have to sew a total of 8 panels like this one.
3. Make the pattern.
Use your favorite pattern-making paper to draft the following figure. These measurements already include the seam allowances, so you don't need to add more.
4. Trim the panels.
Use the pattern you made before to trim the sides of each one f the panels to the shape of the pattern.
Make sure to align the top and bottom edges to get a straight cut.
You can get rid of the trimmings or use them to make another scrap quilt.
5. Join panels 1 and 2.
Place two panels with the right side of the fabrics facing together and sew one of the sides at 1/4".
Press the seams open.
Start joining each of the panels in the order you prefer by joining the right sides each time.
Remember to leave panels 8 and 1 without sewing the sides. This will be the opening of our pattern.
6. Add the batting and backing layers.
Layer up the backing, the batting, and the patchwork tree skirt together.
When everything was pinned, I cut the shape of the octagon, but I left a leftover of the batting and backing fabrics of about 3" around the edges.
7. Quilt your Christmas Tree Skirt.
Use one of the quilting techniques mentioned above to quilt the three layers of the fabrics together.
I decided to use a free-motion quilting technique. Because, as I mentioned before is one of the most pain-free techniques.
My lovely friends at My Golden Thimble Sewing Club advised me to quilt my tree skirt pattern with red thread, and I couldn't love the result more!
8. Add bias tape on the edges of the skirt.
Once everything is quilted, sew the bias tape in one of these 3 ways to the outer and inner edges of the tree skirt.
I began with the sides and followed with the outer edge to finally sew the inner edge.
Recommended Products
As an Amazon Associate and member of other affiliate programs, I earn from qualifying purchases.
-
 SINGER | M1000.662 Sewing Machine - 32 Stitch Applications - Mending Machine - Simple, Portable & Great for Beginners
 -
Warm & Natural Twin Cotton Batting
-
40 Pieces Christmas Fabric Quilting Fabric Squares Fat Quarters Precut Sewing Fabric Patchwork Christmas Tree Snowflake Printed Fabric Scraps for Dress Apron Crafts, 10 x 10 Inch/ 25 x 25 cm


Hi! I’m working your pattern. My sections overlap slightly. Is it intended to be that way? How do you do the batting with them over lapping?
Hi Angela! Could you post a picture on My Golden Thimble Sewing Club on Facebook? I am not quite sure what do you mean.
How tall is the pattern that we make? It shows the top width and bottom width, but doesn’t show how tall it should be. (Dotted line in center)
Please help?
Hi Dawn!
Thank you for commenting. The heigth of that pattern is 24 1/2 inches! Or (if you make less or more panels) will depend on the amount of panels you end up with.
Are ther a pdf pattern that I can print
For this particular pattern is only the instructions of how to draft the template, love.
Dafhtne
im confused where you say you leave 3 inches of the batting and the backing ?
Hi Denise! I am sorry for not being clear. The 3 inches of extra fabric you have to leave of batting is just as you are quilting the batting and lining to the main fabric. This to account for the shrinkage. Now, this step is not necessary, but I do recommend it “just in case”.
You can trim the excess off when you are done quilting, and ready to add the bias tape.
Thankyou for clarifying for me! love this pattern!
You are most welcome, gorgeous!
Can someone tell me how tall the finished panels should be. If I added correctly the triangle should be 25 tall with a base of 23. Is this correct?
Hi Ann! That’s correct. Mine was 23″ tall.
Thanks for sharing your beautiful ideas. I am making two of your octagonal tree skirts (Holly Jolly) for married grand daughters as an early Christmas gift.
You are most welcome. It’s my pleasure! I hope I get to see your tree skirts! Please tag me on social media.