
In this tutorial, I will show you how to sew a tote bag with a flat bottom using any fabric you like in a very easy way.
This simple tote bag will be a fantastic addition to your reusable sewing projects, such as zero-waste sponges, snacks, and grocery bags. You can take it to the market or go out with friends.
So, choose your favorite fabric, and let’s make ourselves a lovely new bag.

NOTE: This post contains affiliate links, which means that if you make a purchase using one of the links in this article, I may earn a commission at no extra cost to you (To know more about this, click here.)
This tote bag sewing tutorial is a great project for any beginner learning to sew. It has straightforward instructions and is relatively easy to handle in a home sewing machine.
But it is also one of the most popular bag patterns out there.
These are bags you can use and see every day. They can be used to go out, to the gym, to hold groceries, and even as a gift bag.
You know what? Flat tote bags also make awesome gifts! I recently used them as “gift wraps” to store the free sewing patterns that my friends at My Golden Thimble Sewing Club won during the “Start of the Year” giveaway contest.


How do you stiffen the bottom of a tote bag?
Sometimes when you put heavy items in a tote bag, they will sag in the middle making your bag lose its shape.

You can stiffen a tote bag with a plastic canvas like this one. Cut it into the size of the bottom of your bag and place it there to give it more shape and to hold your items more safely.
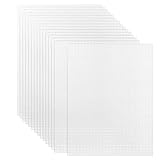
- Package Includes: Coming with 10 pieces of 7 count eye mesh, the size is 10.5 X 13.5 inches/ 26.5 x 34.5 cm, with 7 holes per inch
- Material: The plastic canvas sheets are made of PE, premium quality plastic. These plastic canvas sheets can be easily cut or trimmed to the size and shape, which can meet your different craft projects
- Smooth and Flexible: The smooth and flexible surface of these mesh plastic canvas sheets ensures that your embroidery and other craft projects come out looking neat and professional. They are easy to work with and can be cut to any size or shape that you need
This canvas is super easy to cut with regular scissors, and you can leave it right as it is. However, you can also cover it with the same fabric as your bag to match the materials.
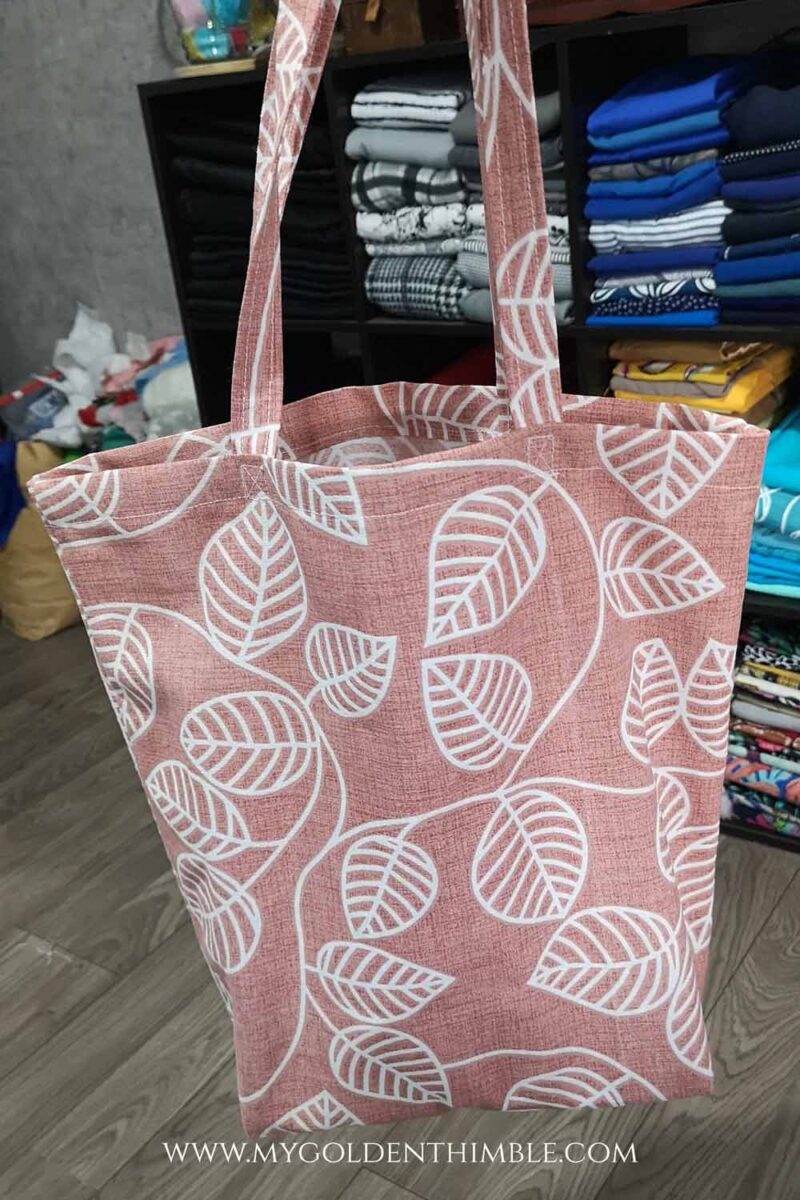
You can already see the difference that it makes.
Another option to stiffen the bottom of a tote bag is to make a rectangular base with batting and heavyweight interfacing. All this is covered with outer fabric.
I would use plastic canvas if I really want a solid, hard base.
Otherwise, I’ll use a batting base stitched into the bag, which is great because when you lift the bag, you can see that it has a better shape.
I will make a simple batting base for this tutorial, as I don’t want the bottom to be extra stiff.
How to sew a Tote Bag with a Flat Bottom
Let’s jump right into our sewing tutorial. I will teach you how to sew a tote bag with a flat bottom.
The first thing you need to do is gather your materials.
As this is a simple tote bag without lining, I recommend you use a strong canvas fabric, preferably upholstery fabric, to make outdoor cushions or similar.
But in reality, this bag can be made with almost any fabric with a good body, like quilting cotton or duck cloth, which are good too.
Remember to always pre-wash your fabrics before sewing them to get rid of any dirt, chemicals, or dyes that you might still have from the store.
Materials:
- Half a Yard of Strong Canvas Fabric
- Medium to Heavyweight Batting (Optional)
- Plastic Canvas for the base (Optional)
- Matching Thread
- Sewing Machine
- Iron
- Magnetic Seam Guide (Optional)
1. Cut the Body.

Use your cutting mat and a rotary cutter to cut two rectangles that measure 18 1/2″ long by 16″ wide.
To make the handles of our tote bag, cut two strips that measure 24″ by 2 1/2″.
In this step, you can add fusible interfacing to the pattern pieces to strengthen the body of your tote bag.
Tip: Use the handles as an opportunity for design. Choose a contrasting color or a different material to create a unique look.
2. Sew the sides and bottom.

For this tutorial, I will use a French Seam, one of the techniques to finish a seam without a serger to avoid fraying. But of course, you can always use a Serger seam to make it quicker.
I’d like to make French seams better, as it saves me time changing my serger thread spools. But please choose whatever technique you feel comfortable with.
Sew the sides of the bag at 1/4″ of the seam allowance with the wrong sides of the fabrics facing together.
Press your seams. Then, cut out about 1/8″ of the seam allowance to make a clean French seam.
Turn your bag outside with the right sides and pin the sides.
We are going to encase the seams we just made with a new 1/4 ” seam. Remember to make a backstitch at the beginning and end of each seam.
Repeat with the bottom of the bag.
3. Cut out the corners.

Use a marking tool to draw a square that measures 2″ by 2″ where the fold of the fabric is.
Cut out this square, which will be the base of our boxed corners.
4. Sew the flat bottom.
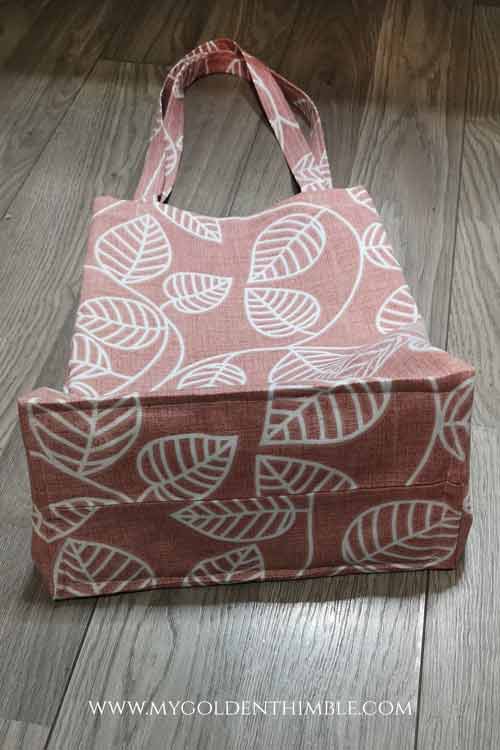
If you want any bag to have a flat bottom, you need to sew boxed corners on it. There are two ways to do this.
One is by flattening the corners of a bag, making a triangle, and then sewing the boxed corner and cutting the excess fabric.
The second way is to make squares on the body’s bag before sewing it, which will allow you to make the boxed corners faster in later steps.

Let’s do the later one.
Turn your bag to the right side and join the gaps on the bottom of the bag.
Align the center seam of the bag’s side and the bottom’s center. Pin and sew at 1/4″. Press the seam.
Cut 1/8″ of the seam allowance and turn the bag inside out.
Pinch the fabric again and encase the seam with a new 1/4″ seam. Make a backstitch at the beginning and end of each seam.
Use your iron to make a crease on the bottom to mark the shape better.
5. Make a hem.

Fold the top edge of your bag 1″ towards the wrong side of the fabric. Press and then fold 1″ again.
Pin your fabric across the hem and make a seam at 1/8″ from the folded bottom edge of the hem.
Press your seams.
6. Make the straps.

Fold one of the shorter ends of each strap towards the wrong side of the fabric 1/4″
Fold the two straps in half lengthwise with the right sides of the fabrics facing together.
Sew the strip’s top and sides at 1/4″ seam allowance. Cut the corner of the strap.
Turn the piece inside out with the help of a loop turner.
Sew a top stitch at each side of the strap lengthwise.

7. Attach the straps.

Take one of the ends of the handles and place it 4″ away from the side of the bag.
Pin them in place.
Secure the strap in place by sewing a square. Then sew a cross over that square, so the strap is more secure.
Repeat with the rest of the strap ends.
8. Make the flat bottom.

I will add a soft base for this tote bag sewing pattern to help my bag keep its shape.
To do so, cut a batting rectangle of 9″ by 4″. Then place it over a big scrap of the outer fabric.
Press the edges of the fabric towards the rectangle to cover it.
Then pin this rectangle to the base of your tote bag pattern on the inside.

Sew it in place by making a stitch around the rectangle at ¼”.
You can also replace the batting with a plastic canvas of the same shape. The plastic canvas will give you an even sturdier bottom.
How do you add a closure to a tote bag?
For a tote bag, you can use several types of closures. For example, you can add a magnetic button, a zipper, any type of sew-on button, and more.
In this case, as it is a simple DIY tote bag, I would add a plastic snap-on button like these ones.
To install a snap-on button, pierce the fabric with the awl, insert the button cap, snap on the inside part, and press the button in place using your tool. Make sure to put opposite sides on each side of your tote bag so they can snap in correctly.
And that’s it!! Now you know how to sew a tote bag with flat bottom you can replicate whenever you want.
Please let me know if this tutorial on how to make a tote bag with a flat bottom was helpful to you or if you have any questions at all in the comment section below.
Do you enjoy our freebies?? Support us so we can keep making freebies for you by buying us a cup of coffee here. We will be forever grateful!
Don’t forget to follow us on Social Media!!








You wrote: “Use your cutting mat and a rotary cutter to cut a rectangle that measures 18 1/2″ long by 16″ wide. ” Shouldn’t this say Cut “2” rectangles???? It could be very confusing for beginners….
Updated! Thank you so much for your note.
Can this be done without a sewing machine? I have a sewing machine, but I don’t know how to use it so I usually sew by hand.
Absolutely! In fact I have a great guide of seams and stitches you can use if you are hand sewing anything. Is in my post about Hand Stitches Guide, I recommend you use the running stitch. Or if you want I also have a Guide on How to use a Sewing Machine from scratch. If you want to venture on using the machine!
The best of luck!!
No measurements!
The measurements are in the video 😀
what video? this is a very confusing pattern!
Hi C,
You need to disable your ad blocker to see the video, or it is also on our youtube channel.