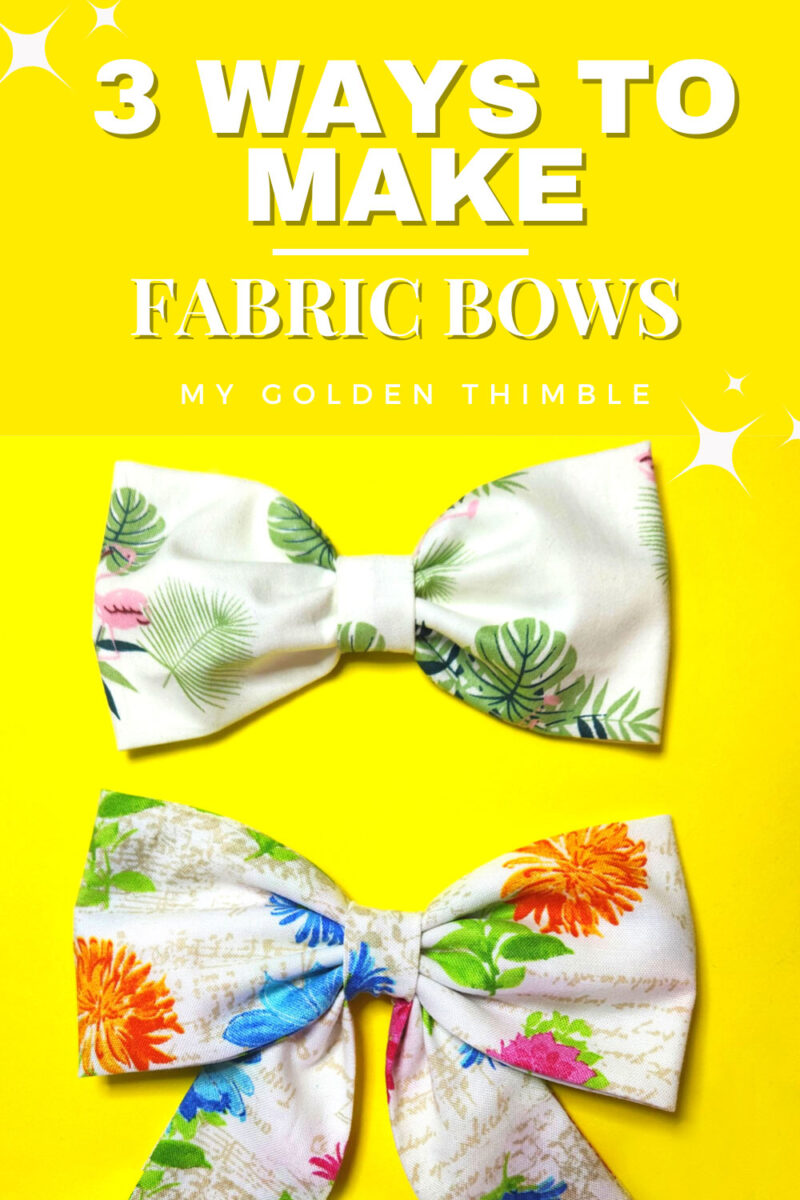
Welcome to our step-by-step tutorial on How to Make a Fabric Bow. In this tutorial, I will show you three easy ways to DIY Fabric Bows to create hair bows accessories, gift wrapping, and decorate your home.
You will find these easy tutorials very simple to follow. You will be creating your own beautiful bows in under 10 minutes!!
I will guide you through each process step-by-step with clear instructions and detailed images to ensure you can create a stunning fabric bow every time.
I will also give you the free patterns for each bow size. So grab your materials, and let’s get started!
NOTE: This post contains affiliate links, which means that if you make a purchase using one of the links in this article, I may earn a commission at no extra cost to you (To know more about this, click here.)
How many styles of Fabric Bows are there?
You can create many different styles of bows with fabric depending on your preferences and design styles. Some of the most common ones are the following.
- Classic Bow: This bow consists of a square of the fabric of a single layer gathered in the center to form the bow shape to create the classic bow style.
- Loop Bow: This type of bow is created with a strip of fabric or ribbon folded over several loops that can be arranged in different ways.
- Layered bow: Make this bow by layering two or more classic bows or looped bows on top of each other. They can be of different colors or patterns to create more intricate designs.
- Pinwheel Bow: You can create a pinwheel bow by twisting a long strip of fabric as if you were tying your shoelaces.
- No-Sew Bow: These fabric bows can include any construction technique above but are glued instead of sewn.
There are other fabric bow styles besides the ones with loops and the classic design. Some designs feature tails that add a unique touch to the bow.
These are just a few examples of the many styles of DIY bows that you can create. In this post, I will teach you how to make a bow out of fabric in the Classic Bow Style in three ways and shapes a classic form and a looped one, and I will also tell you how to add tails to your bows.
What Can I Do With the DIY Fabric Bows?

Fabric bows are versatile and can be used in a variety of ways. Here are some ideas.
First, you can use fabric bows to make hair accessories for kids or adults. I should know; I still wear them all the time. They can be attached to hair clips, headbands, or hair ties.
Bows are perfect for gift wrapping. You can use simple bows like these or make your own Reusable Pull-up Fabric Bows for gift wrapping. Use fun colors!
Another idea for fabric bows is to use them as clothing embellishments to create a feminine look. You can even use these to make a Faux Bow Tie if you don’t know how to sew and tie a classic Bow Tie Free Sewing Pattern for Kids and Adults.
Finally, you can use them to decorate any part of your home or a party, such as a birthday or a wedding. Bows can be added to balloons, hats, and other party elements.
DIY Bows Tips and Tricks.

Here are some tips and tricks for sewing fabric bows:
- Choose a suitable fabric: Select a lightweight fabric that is easy to manipulate. Cotton, silk, and linen are excellent choices for fabric bows.
- Use sharp scissors: Make sure you use sharp scissors to cut the fabric to avoid frayed edges.
- Press the fabric: Iron it before you start sewing to ensure it’s free from wrinkles and creases.
- Use a sewing machine: Sewing machines make the process of sewing fabric bows faster and more accurate. A sewing machine can also help you create even stitches.
- Leave enough seam allowance: When sewing the fabric pieces together, make sure you leave enough seam allowance. This will ensure that the bow doesn’t fall when you sew it.
- Use coordinating thread: Use thread that matches the fabric’s color to make the stitches less noticeable.
- Clip the corners: After sewn the fabric pieces together, clip the corners to reduce bulk and make it easier to turn the fabric right-side out.
- Hand-stitch the final seam: To close the last seam of the bow, it’s best to hand-stitch it for a clean and polished finish.
- Experiment with different sizes and shapes: Try different sizes and shapes to create a variety of bows for other occasions.
By following these tips and tricks, you can create beautiful fabric bows that are functional and stylish.
Don’t lose it! Save this Tutorial on Pinterest.
Bow Sizes and Measurements.
Follow these chart measurements to make the bow size you prefer.
| Size | Final Size | Pattern Measurement | Center Part Pattern |
|---|---|---|---|
| Mini | 3″ x 1 1/2″ | 3 1/2″ x 3 1/2″ | 1/2″ x 2″ |
| Small | 4″ x 2″ | 4 1/2″ x 4 1/2″ | 3/4″ x 2″ |
| Medium | 5″ x 2″ | 5 1/2″ x 4 1/2″ | 1″ x 2″ |
| Large | 6″ x 3″ | 6 1/2″ x 6 1/2″ | 1 1/2″ x 2″ |
DIY Fabric Bow Materials.
- Fabric. You can use literally any fabric that you like to make your bows. The easiest fabric to work with is Cotton. Cotton will hold your bow shape better.
- Interfacing. You will only use interfacing if you have a fabric that is too heavy or weak to hold its shape.
- Rotary Cutter. Use it to cut sharp shapes.
- Thread and Needle. Use a medium size needle so you can pierce all the layers of the fabrics easily.
- Sewing Machine. This one is optional, but if you have a machine, it will make your sewing process faster.
- Hot Glue Gun. Only for the No-Sew Bows and the Hair Bows.
- Alligator Hair Clips for Bows. If you are making hair accessories, you can get these clips in various sizes.
- Alternative to these materials, you can use fabric scraps, ribbon, or any other embellishments and material you have in hand.
Other DIY Bow Projects:
How to Make a Fabric Bow.
1. Cut the bow patterns.
Cut one layer of the body pattern and one layer of the strip that goes in the middle.
Use the chart of sizes and bow measurements above to choose the bow size you want and know the measurements of your patterns.
If you feel your fabric is too weak or heavy to hold its shape, press fusible, interfacing on the wrong sides of the fabrics.
2. Sew the Rectangle.
The body of this pattern already has a one-quarter-inch seam allowance included.
Fold the rectangle lengthwise with the right sides of the fabrics together and sew the open sides at 1/4”, leaving the middle side open about 1 1/2”.
Cut out the corners carefully without cutting the seams.
Turn the piece inside out from the open space and press the piece flat.

3. Gather the center.
Thread your hand needle and make a running stitch right in the center of the rectangle.
Then pull the thread to gather the bow. You can use your fingers to arrange the folds.
Use the same thread to wrap around the bow.
Make a double knot to secure this part.


4. Add the centerpiece.
Fold the long edges of the center strip towards the middle, leaving the right sides outside.
Press flat.
Put your bow in the center of the strip and use the strip to wrap it around the bow.
When you make a full circle, cut the strip’s excess fabric (if any) and fold ¼” of the end in.
Use an invisible stitch to secure this center part.

5. Add your hair clip.
If you make a hair bow, you can add the clip by sliding one part between the bow and the center strip.
Secure it with a dot of hot glue between the clip and the bow.
How to Make a Bow with Loops.
This technique is very similar to how to make a bow with ribbon. But by making it with fabric, you will achieve a better body and fullness.
1. Cut the patterns.
Use this chart to select the bow size you want to make and cut the patterns accordingly.
| Size | Final Size | Pattern Measurements | Center Part Pattern |
|---|---|---|---|
| Mini | 3″ x 1 1/2″ | 6 1/2″ x 3 1/2″ | 1/2″ x 2″ |
| Small | 4″ x 2″ | 8 1/2″ x 4 1/2″ | 3/4″ x 2″ |
| Medium | 5″ x 2″ | 10 1/2″ x 4 1/2″ | 1″ x 2″ |
| Large | 6″ x 3″ | 12 1/2″ x 6 1/2″ | 1 1/2″ x 2″ |
If you feel your fabric is too weak or heavy to hold its shape, press fusible, interfacing on the wrong sides of the fabrics.
Cut only one piece per pattern for each bow.
2. Make the body.
Fold the rectangle lengthwise with the right sides of the fabrics together and sew the long side at 1/4”.
Turn the strip inside out and press the body flat with the seam allowance in the middle of the body.

3. Gather the center.
Fold the raw edges toward the center of the bow’s body.
Overlap the edges about 1/4” and make a running stitch in the center.
Pull the thread to gather the center of the bow, and use your fingers to arrange the folds however you prefer.
Wrap the thread four to five times around the center and make a tight knot to secure this part.
4. Make the center piece.
Use the same chart to cut a strip for your bow size.
Fold the long edges of the center strip towards the middle, leaving the right sides outside.
Press flat.
Put your bow in the center of the strip and use the strip to wrap it around the bow.
When you make a full circle, cut the strip’s excess fabric (if any) and fold ¼” of the end in.
Use an invisible stitch to secure this center part.

5. Add your hair clip.
If you are making a hair bow, you can add the clip by sliding one part between the bow and the center strip.
Secure it with a dot of hot glue between the clip and the bow.
Adding tails to a Fabric Bow.
Cut a long strip of fabric to add tails to any of these bows. Fold it in half with the right sides together and sew the raw edges at ¼”, leaving a space open.

Turn the piece inside out, press and close the open stitch with an invisible stitch.
Follow the steps above to make your classic bow, and add the tails on the back after you wrap it with the thread.
Then, use the same thread to wrap the tails too.

Fold the long edges of the center strip towards the middle, leaving the right sides outside.
Press flat.
Put your bow in the center of the strip and use the strip to wrap it around the bow and the tails.
When you make a full circle, cut the strip’s excess fabric (if any) and fold ¼” of the end in.
Use an invisible stitch to secure this center part.

In conclusion, sewing fabric bows is a fun and rewarding project that can add a special touch to many different occasions. With a little practice and patience, you can create beautiful and unique fabric bows in a variety of styles.
By following the tips and tricks outlined in this tutorial, you can ensure that your fabric bows are of high quality and look professional.
Whether you use them for gift wrapping, hair accessories, or home decor, fabric bows are a versatile and stylish addition to any project. So, grab your fabric and sewing machine, and start creating beautiful fabric bows today!
Don’t forget to show me your creations at My Golden Thimble Sewing Club on Facebook!
Psst…Is this article helpful to you?? Please support us so we can keep making awesome tutorials for you by buying us a cup of coffee here. We will be forever grateful!


Can you pls just clarify for me, I am a little confused on cutting instructions… For example, if I were to make a small size bow, without the tail, the bow piece be 8.5″ by 4.5″ but what would the middle portion be?
Hi Liz,
Of course! The actual middle part of each bow is customizble depending on your taste. But I have updated the Chart of measurements so everyone can have an idea of how much to add in there.
For the Small Size bow the bow piece (body) will be 8.5″ by 4.5″ and the middle portion pattern will be 3/4″ by 2″ of course you can remove the excess in length as needed.
Thank you.. for some reason, when I printed the cutting instructions, it eliminated the center sizes! Good grief. I appreciate your getting back to me! I am going to make some of these today!
That’s so cool! I am very glad you found it and that you got it now!
If you can tagg me on social media when you finish your cute bows so I can give you praise.
This was really helpful. It was an interesting tutorial. I’ll try it out right away. Thank you so much!!!
Thank you so much for taking the time to let me know. I am so happy this was useful for you.
Thank you very much for these tips
Thank you so much for commenting!