
In this wreath tutorial, I will show you how to make a gorgeous and easy Felt Wreath DIY decorate for Fall using simple materials that, no doubt, you already have at home right now.
If you follow my dyeing method, this project will take maybe an afternoon to complete. But if you already have the perfect colors for your felt wreath, you can surely finish this project in under an hour.
I was happiest about this leaf wreath because I didn’t have to buy anything! I used all recycled materials (even for the dye) and some leftover wire from a previous project.
Let’s get this started!

NOTE: This post contains affiliate links, which means that if you make a purchase using one of the links in this article, I may earn a commission at no extra cost to you (To know more about this, click here.)
Fall Decor Wreath
Fall is a time of the year when things start merging for me.
Do you know when you walk into a Walt-Mart in mid-September and start seeing all the Halloween, Christmas, and New Year’s decorations and products simultaneously? Well, that’s kind of how my home looked like at the beginning of Fall.
And please don’t judge me. But even though I had most of my DIY fall decorations up by late September, my DIY scrap-busting Easter wreath was still up on my front door.
You see, I went on an all with my new Halloween freebies for the blog, and I sort of forgot about the bunny wreath. Hard to miss, though, staring at my face with its beautiful bright spring colors, unmatching my golden fall colors.
That’s why I plugged in my glue gun and took out my felt scraps to make this unique fall wreath with felt leaves.
What do I need to make a simple Felt Wreath DIY?
Before I tell you how to make a felt wreath, gather your materials. You will need scraps of white felt (or fall colors felt), a wire hanger, craft wire, a glue gun, scissors, a rotary cutter, coffee, and turmeric. Yes! Coffee and turmeric, I will explain later.

The idea here is to make a bunch of beautiful leaves that we will dye and attach to our wreath. At the end of this project, I decided to add an even more special touch to my fall wreath by writing the word “fall” with Jute Twine. If you like how it looks, you should get some twine, too, and I will explain in the instructions how to add it to your wreath.
Just FYI, you can totally skip all of this and just get yourself a Felt Wreath Kit. All though, what would be the fun in that? Am I right?
Natural Dye to get Fall Colors

Here comes the best and quite fun part of this project. And just let me tell you that if you choose to do your Felt Wreath DIY this way, you will end up with a super aromatic smell in your home for hours! You see, by the time I decided to make this wreath, it was about sleeping time. So you bet no craft store was going to be open for me. But when creativity calls, creativity calls!
I was sure I wouldn’t get the beautiful golden and brownish felt colors I wanted for this project. I could have ordered a Fall Felt Color Collection on Amazon, but I didn’t want to wait.

So I went to my kitchen, pulled out my spice drawer, got the turmeric powder, and then some instant coffee grounds. I use them to naturally dye my white felt with the most beautiful yellow and brown colors you will ever see.
We have a full tutorial on how to Natural Tie Dye, where we explain step-by-step, and with a video tutorial on what you have to do if you want to use natural ingredients to dye fabrics. You should check it out if you have never dyed natural ingredients before. But basically, you need to boil the turmeric and the coffee, add some salt to the mix and soak your felt fabric in it.
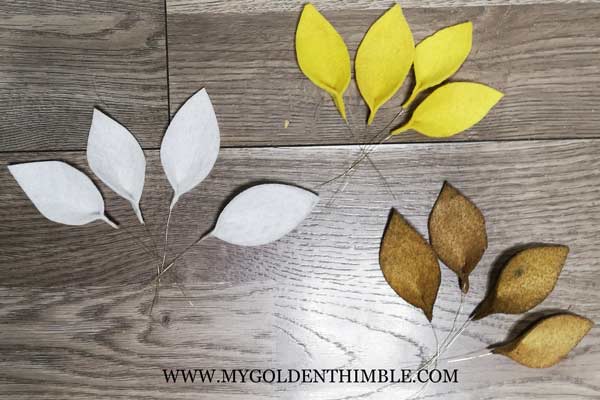
Here are the colors I achieved with this process.

Tips to Make the Perfect Felt Wreath DIY
- Use thick felt to do this project so the leaves hold their shape better. The ideal thickness would be 2mm or more.
- Use natural fiber felt and Dye the colors with turmeric and coffee! You will achieve an incredible color palette and make your house smell fantastic.
- If you don’t feel like dyeing your felt fabric, get a kit of fall felt colors from Amazon.
- Use a template to cut your leaves, but make smaller leaves if you have leftover felt. They work perfectly to fill out spaces.
- If you don’t have a wreath frame, make one with a wire clothes hanger or a piece of cardboard from an old box.
- To make the perfect “fall” word sign, print your favorite font with the word and use it as a template.

How to Make a Felt Wreath DIY
Quick and easy way to create a festive Fall Felt Wreath DIY for your front porch or door. Use this tutorial to make one yourself!
Materials
- Felt Fabric with Fall Colors
- Wreath Frame or Hanger
- Craft Wire
- Jute Twine
- Hot glue sticks
- Turmeric (optional)
- Instant Coffee Grounds (optional)
Tools
Instructions
1. Make a leaf template.
The first step is to make our leaf template so all of the leaves can have more-less the same size in our wreath. I used a scrap piece of pattern paper that measured 3” tall by 2” wide. Make two points on the top and the bottom of the leaf.

2. Trace and cut your shaped leaves.
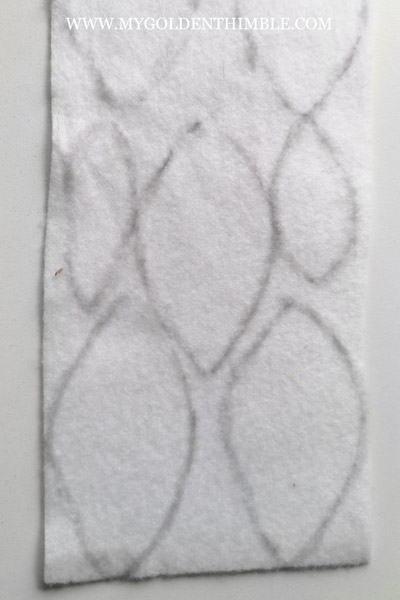
Use your leaf template and put it over your felt fabric. Use a marking tool to trace the leaf as close as possible to the space of your scraps of felt. I made about 10 to 15 leaves for each color. Cut your leaves, and if you have smaller spaces, cut mini leaves with that pieces of felt.
3. Dye your felt leaves.
Now comes the fun part! Boil about 1 ½ cups of water and add a teaspoon of salt and two spoons of turmeric powder to the mixture to get the yellow color or two scoops of instant grounds of coffee for the brown color. Damp the leaves and let them simmer in your mixture for about 10-15 minutes. Use a cookie sheet to let them dry.
4. Make the wreath form.
My friend, you can use a bought nice wire wreath, they are super cheap, and they sold them in bulk. My rush didn’t want to wait one day for my order to arrive with my Amazon Prime account, so I used a wire from my closet. I basically shaped it into a circle with my bare hands. I also pushed the hanger's inverted “U” part together so I could hang my wreath from there.

5. Build the leaves with wire.
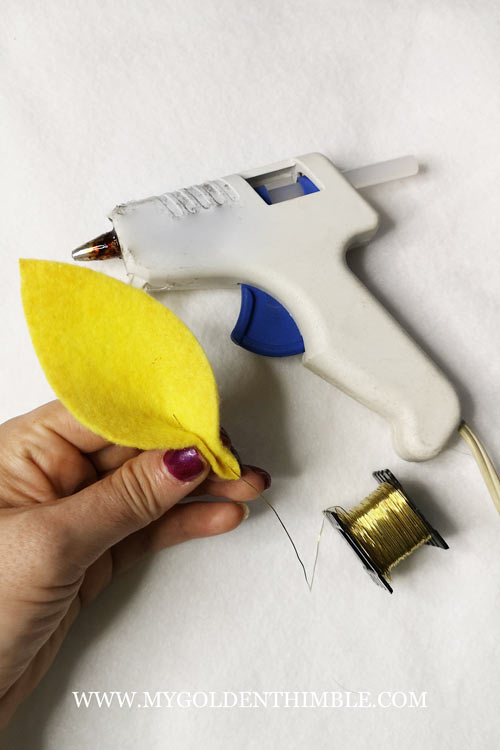
This step is really easy. You need to cut several 3 ¼” pieces of craft wire (any thin version will do). Then use your glue gun to attach them at the bottom of each leaf. Don’t glue more than ¼” or ⅜” into the leaf, so you have enough wire to wrap the leaves with.
6. Attach the leaves to your Felt Wreath DIY.
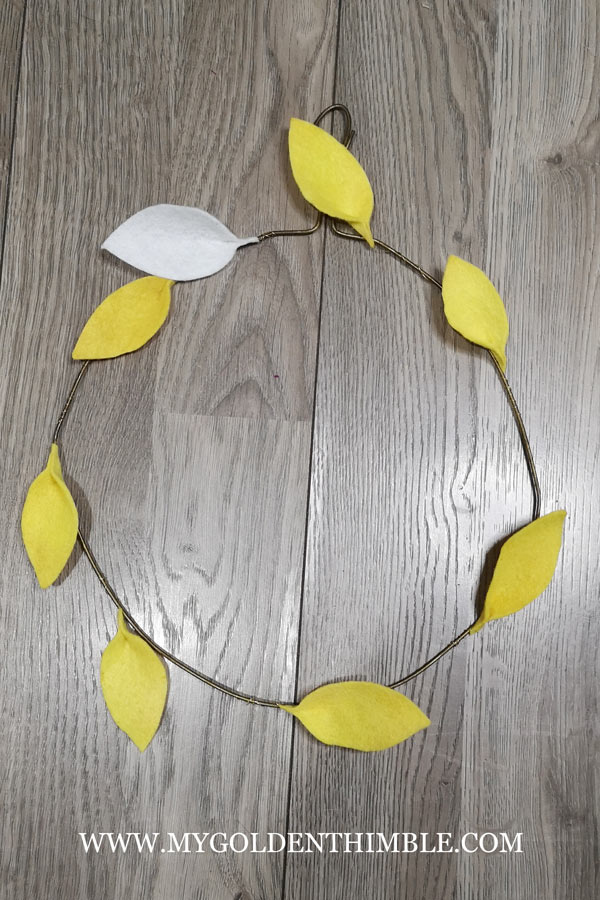
Easy peasy. Use the wire at the bottom of each leaf to the wreath. I started with the yellow color first, and then I continued with the white. Finally, I added the brown leaves. I do it by colors because I can spread them evenly around the wreath. Remember to use the little leaves you made with small scraps as fillers on the spaces you see fit.

7. *Optional* Add a fall sign.
Signs are beautiful. I definitely love the Home Interchangeable Seasons Sign I have in my living room. So, why not make a pretty nice “fall” sign to match? I placed a piece of paper under my wreath and hand-drew the word fall to make it.

Then I used that paper as a template to shape my Jute Twine to match the wording. I helped myself with my glue gun to ensure the twine stayed in place. To help the sign stay flat, you can iron it and then put a very big book on top of it for the night.

Notes
Use different leaf sizes to give a more interesting effect.
Recommended Products
As an Amazon Associate and member of other affiliate programs, I earn from qualifying purchases.
-
 21 Felt Sheets Mix Color Fall Colors Collection Merino Wool Blend Felt Sheets Crafting, Sewing, General 6"X6" Squares
 -
Cordless Hot Glue Gun, Gogonova 15s Fast Preheating Glue Gun, 5Ah Built-in Battery Hot Melt Glue Gun, Smart Power-Off, Kit with 25 Pcs Premium Mini Glue Sticks and USB-C Charging Port
-
MTB Wire Wreath Frame 18 inch Green, Pack of 10 Wreath Form








