
Each Christmas, DIY Ornaments and Decorations such as this 3D Star Tree Topper are one of the best traditions to enjoy the holidays.
Your whole family can sit around the table and make these fantastic crafts together. Which not only will give you all a wonderful time, but also lots of cherished memories.
Today I will show you how to make this beautiful (and, if I may say, extraordinarily affordable) star topper for your tree.

NOTE: This post contains affiliate links, which means that if you make a purchase using one of the links in this article, I may earn a commission at no extra cost to you (To know more about this, click here.)
As I always say, you don’t need to spend thousands of dollars to get something beautiful to decor your home.
You can create beautiful things with almost no money.
I bet you already have a lot of things in your house to make these kinds of decorations, such as toilet paper roll trees and snowflakes, glitter foam ornaments, or styrofoam sequins ornaments.
This beautiful topper cost me less than a dollar, and I honestly think the result looks like much more than that.
I remember when I was a little girl. The magic and joy of putting up the Christmas tree were the decorations…

This Christmas, however, with everything that is happening in the world, I felt that I needed an extra touch of magic.
Making your decorations makes them even more valuable, especially if your family makes them with you.
It’s like putting a part of yourself on them. And when you take them out next year, you will feel all the memories coming back.
That’s why this year, I decided to make this 3D Start Tree Topper using origami techniques and foam glitter paper.
Materials:
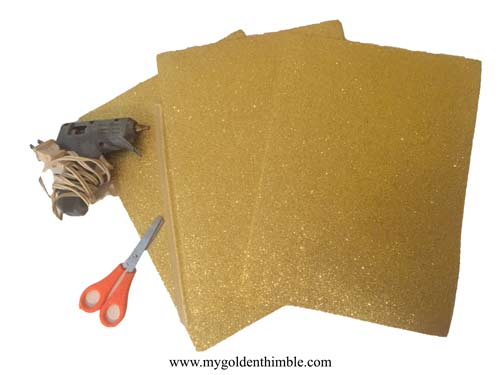
- 3 Glitter Foam sheets of your favorite color.
- Glue Gun.
- Scissors.
How to make a 3D Tree Star Topper?
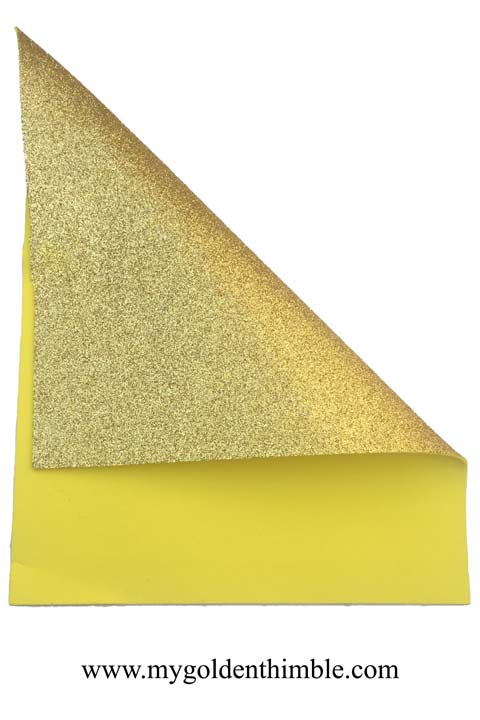
1. Cut a Perfect Square and Fold.
We will start with our glitter foam sheet in a vertical position. Place the smooth side looking up.
Fold the upper right corner to the left side of the sheet, making a triangle.
Cut out the bottom rectangle shape.
2. Fold in half.
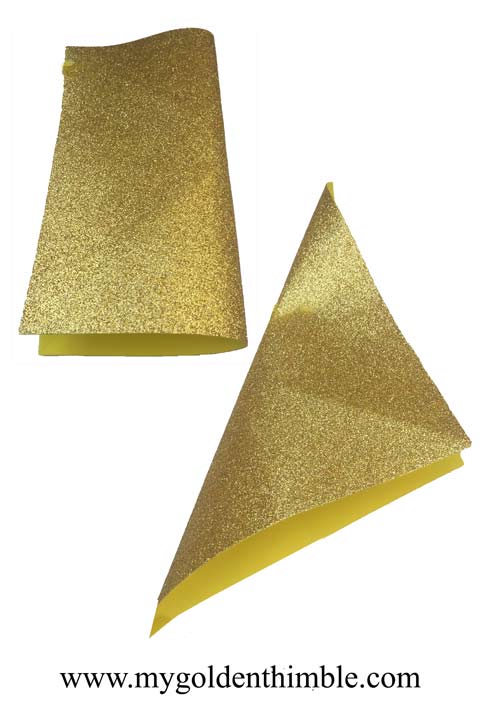
Now we are going to fold vertically and horizontally the square in half.
Bring the left side to the right side. And then fold by bringing the top to the bottom.
Make another fold grabbing the upper left corner to the lower right corner. Press the folds.
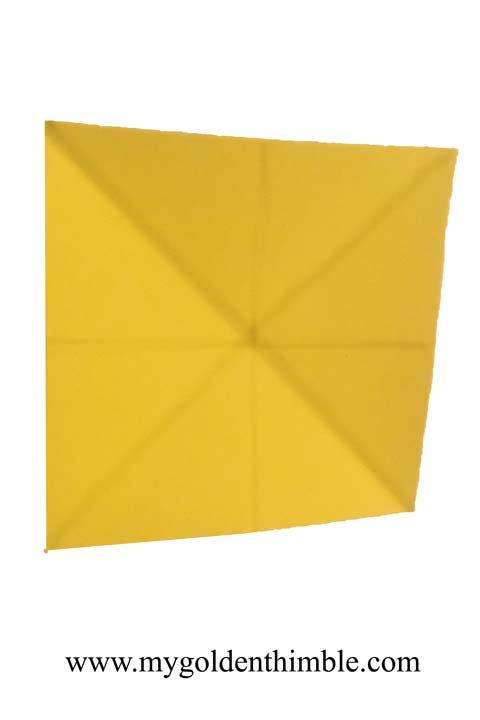
Press the fold thoroughly to make sure it leaves a mark on the fold.
Make another fold grabbing the upper left corner to the lower right corner. Press the folds.
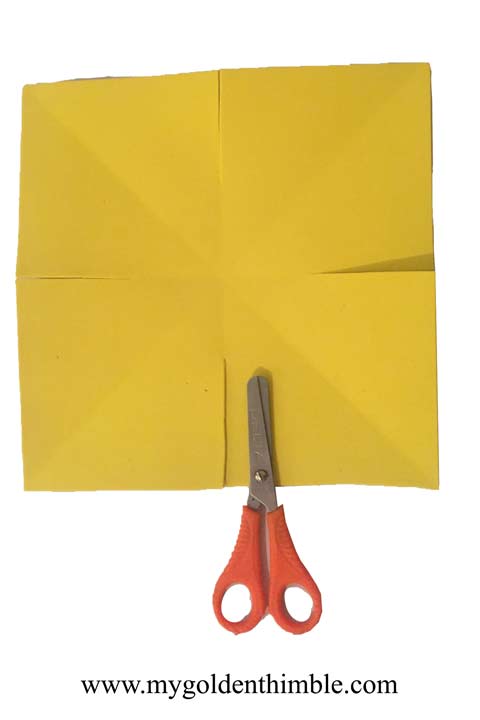
3. Cut from the corners.
Make 4 cuts off about 2 ½ “ as I did here.
From the sides to the center.
4. Form points.
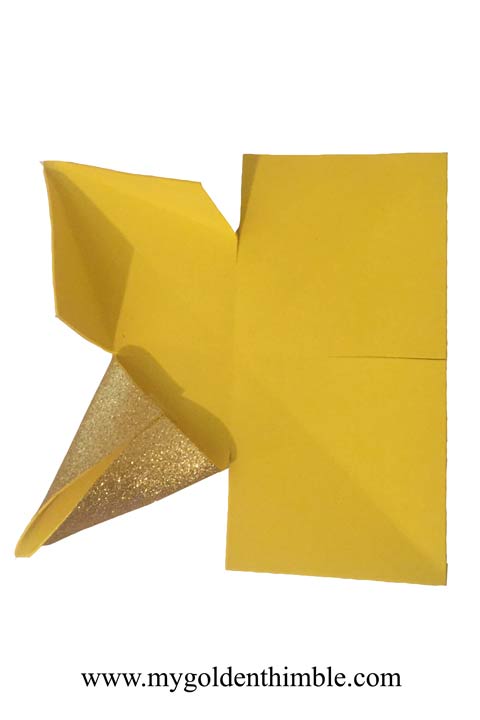
Take the corners of the cut shapes to the center fold line of each section.
Then use your glue gun to slightly overlap and glue these corners to form a cone shape on each section.
This will form the first four points of the star.
5. Repeat to form a second star.
Repeat steps one to five to make a second star.

How do you get the Star Tree Topper to Stay?
1. Fold into a cone.
Take a new glitter foam sheet and roll it into a cone shape.
Use your glue gun to close the sides. And cut off the excess on the bottom.

2. Join the star with the topper stay.
Glue the cone to the bottom point of one of the starts from the inside. Then use the last star to cover the ornament from the top. Twist the points so they lay between the bottom star’s points.


And there you have it. A beautiful and very easy DIY 3D Star Tree Topper!! The only thing left is to light up your tree and enjoy this Christmas day with your friends and family.
I hope you enjoyed this tutorial as much as I did. Please let me know in the comments below if you will make this star for your Christmas DIY decorations.
Don’t forget to follow us on Social Media!!
Psst…Is this article helpful to you?? Please support us so we can keep making awesome tutorials for you by buying us a cup of coffee here. We will be forever grateful!







