Learning how to sew an invisible zipper on an elastic waistband might sound like a sneaky little problem you might not have noticed you had. But, love, once you fix it, you’ll wonder how you ever lived without knowing how to do it!
Elastic waistbands are comfy and forgiving, but let’s be honest — sometimes they’re tricky to slip on, especially with thicker stretch fabrics or fitted designs.

But how on earth to sew an invisible zipper on stretch fabric that’s usually made entirely with your serger?
Straight stitches and stretchy seams don’t usually play nice together… unless you know the right technique.
In this tutorial, I’ll show you:
- How to sew an invisible zipper on stretch fabric without creating that wavy or puckered look most people get.
- How to add a zipper to an elastic waistband without losing stretch, comfort, and the high-end quality finishing.
The Problem: Putting on my clothes shouldn’t feel like a workout!
Have you ever had that moment when you’re pulling up a tight stretchy skirt and suddenly hear that scary snap of threads ripping from overstretching?
Well, this — and so many other little things we don’t even realize are problems — is exactly what I’m here to solve today.
You know what I mean — when you’re jumping up and down trying to pull on your leggings, or wiggling into a fitted knit skirt, praying you don’t ruin your hair (that took hours to style) or smudge your makeup in the process.
Here’s the thing: whether it’s elastic or non-elastic, tight skirts, dresses, or pants made with stretch fabric almost never come with a zipper.
Why?
Because we just assume the fabric will expand enough to slide through our hips or shoulders.
And sure, if you know how to sew stretch fabrics, you know they do grow across the cross-grain (which usually works fine), but the issue starts when comfort and convenience come into play.
For me, it became more than just an occasional annoyance.
I have a pretty big difference between my waist and hip measurements, and every time I’d try to pull on a tight elastic-waist skirt or pair of leggings, I’d have to do a little dance just to get them up.
It’s not cute, and it’s definitely not fun.
Putting on my clothes shouldn’t feel like a workout!
The Solution: An elegant invisible zipper
I wanted to just open my skirt, step right in, and zip it up gracefully — no jumping, no smudging, no stress.
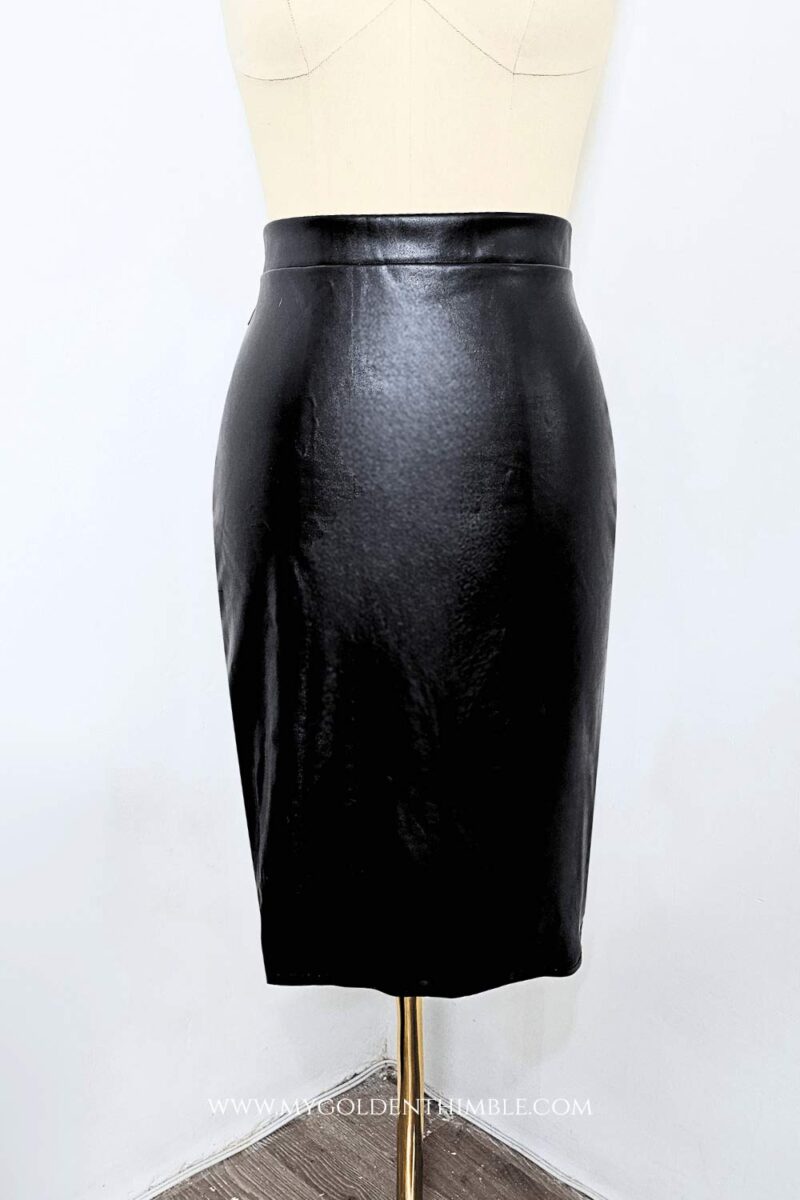
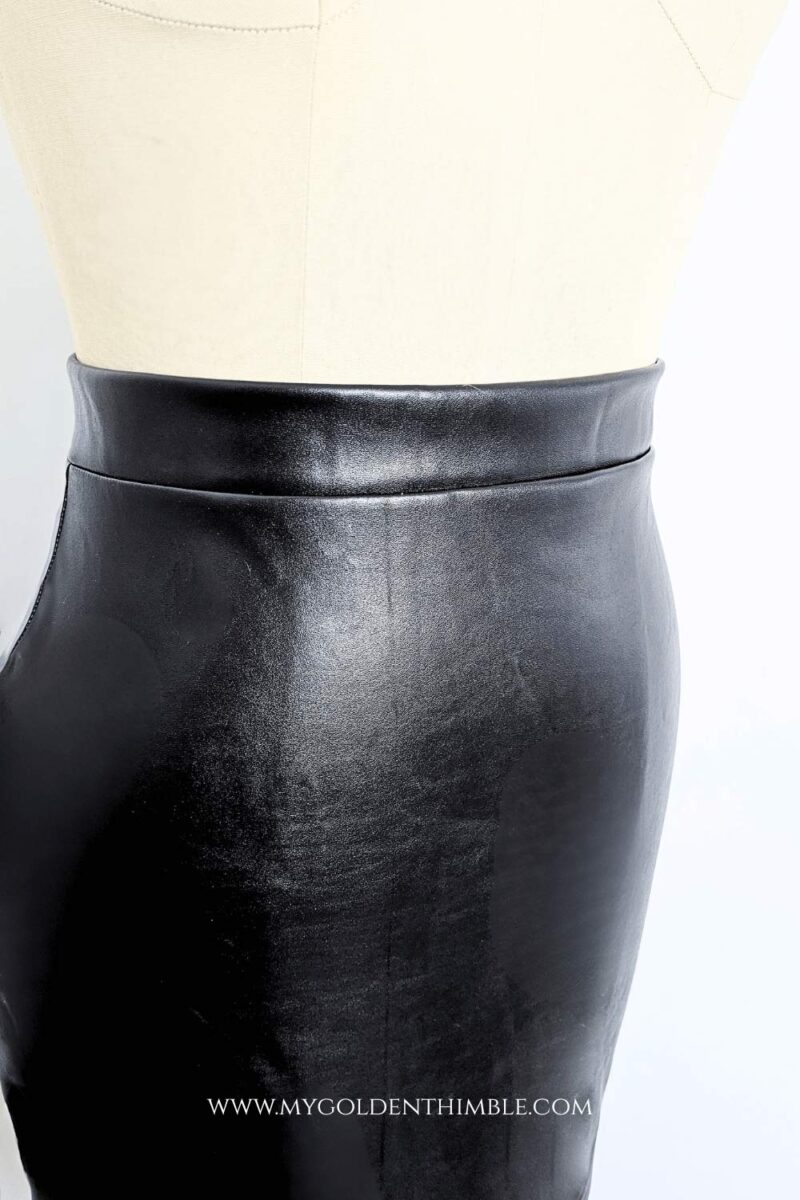
And that’s exactly how this whole trick began — while I was working on a faux leather skirt for my fall and winter handmade wardrobe. I used the pattern I drafted for my stretch pencil skirt. This skirt has negative ease.
I wanted the stretch, comfort, and flexibility of knit fabric, but also the easy wearability of a zippered waistband.
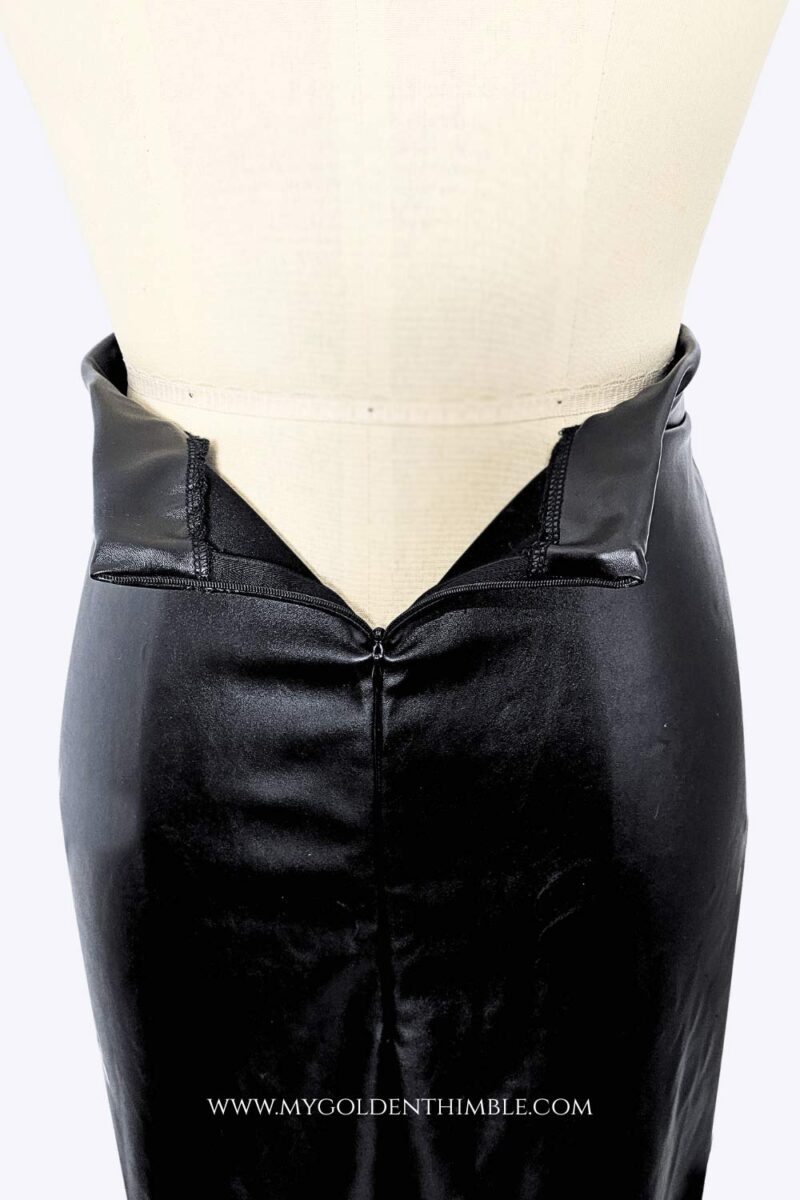
That’s when I ran into a new problem: how do you sew an invisible zipper on stretch fabric without ruining the elasticity of the waistband?

Stretchy garments are sewn with overlock stitches or a serger, which allows the fabric to stretch as you move. The problem is, if you sew a straight stitch directly on a stretchy waistband, you lock that section in place — it won’t stretch anymore.


So after a lot of experimenting, unpicking, and a few “what if I try this” moments, I came up with a simple little technique that lets you sew an invisible zipper on an elastic waistband and insert invisible zippers without losing the fabric’s stretch.
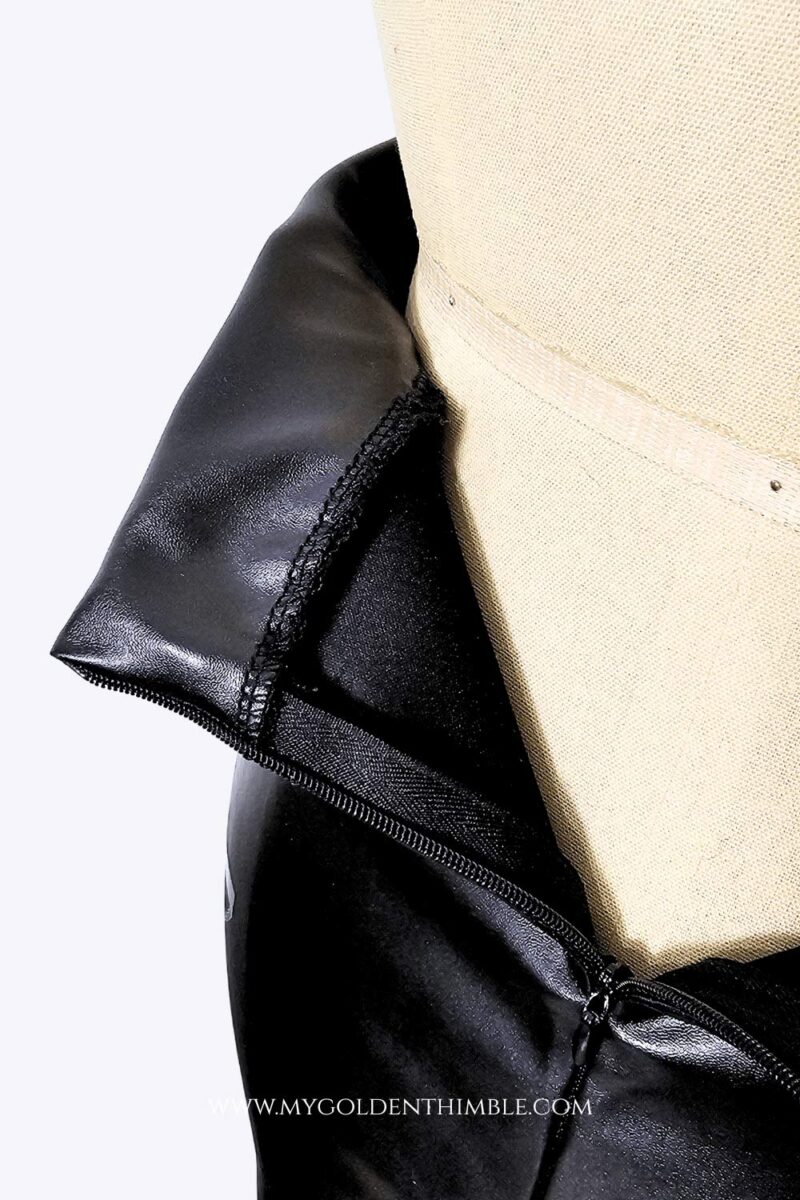
It combines the stability of straight stitches with the flexibility of stretch seams, giving you the best of both worlds: An elastic waistband sewn with a serger + and an invisible zipper insert that will be perfectly enclosed within that waistband.
Let’s pick this up step-by-step.
How to Sew an invisible zipper on an elastic waistband

For this tutorial, I’m using my Violet Pencil Skirt, which I’ll be releasing very soon in the My Golden Thimble pattern shop (I’m so excited about it!).
In this tutorial, I won’t be explaining how to sew the entire skirt. We’re going to focus only on the special technique of how to sew an invisible zipper on stretch fabric that also has an elastic waistband.
Materials and Tools You’ll Need
Before we start learning how to sew on an elastic waistband and add that sneaky little invisible zipper, let’s gather everything you’ll need. The beauty of this technique is that it doesn’t require anything fancy — just the right tools and a bit of patience.
Here’s what I used for my stretch fabric skirt with an invisible zipper:
- Stretch fabric – Anything with a good amount of recovery works perfectly here: ponte, scuba, faux leather, or thick jersey knits.
- Invisible zipper
- Elastic –Same width as your waistband
- Sewing and Serger machine – You’ll need both a regular sewing machine (for straight stitches and zipper insertion) and, if possible, a serger for finishing the seams.
- Invisible zipper foot
- Stretch or ballpoint needle
- Matching thread
- Sewing clips
- Lightweight fusible interfacing or stay tape – This is your secret weapon to keep the zipper area from stretching while you sew. Make sure it stretches!!
You can also keep a seam ripper, measuring tape, and pressing iron nearby — because trust me, a good press makes all the difference when you’re learning how to sew invisible zippers on stretch fabric smoothly.
1. Stabilize the Zipper Area
This is the most important step when working with stretchy fabrics.
Before you do anything else, take a strip of lightweight fusible interfacing and apply it along the center back seam of both skirt pieces. This will stabilize the area where your invisible zipper will be sewn, preventing it from stretching or wavering while you stitch.

Cut your interfacing about ½ inch (1.3 cm) wide and the full length of your back center seam. Fuse one strip along the wrong side of the fabric at the zipper edge on each side of the skirt, making sure it’s nicely aligned and pressed flat.
2. Sew the Side Seams
Next, place your back skirt pieces on top of your front skirt piece, with right sides together. Match up the side edges carefully and pin or clip them in place.
Tip: If you are working with fabric that gets puckered easily, use sewing clips instead of pins!
Then, take your project to your serger (or use a stretch or zig-zag stitch on your regular sewing machine if you don’t have one) and sew both side seams.
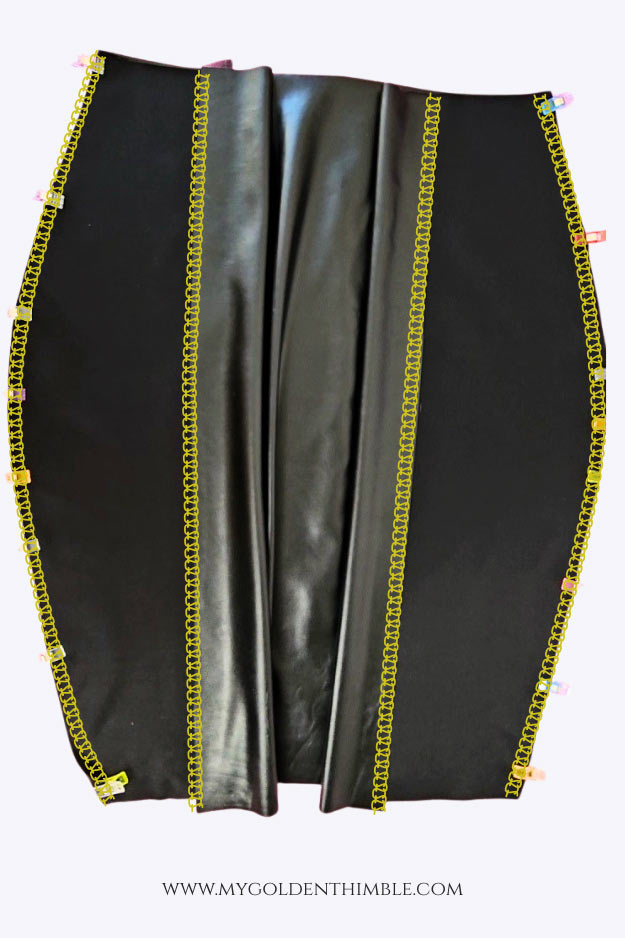
Tip: Make sure you’re not stretching the fabric as you sew — let the machine feed it naturally to keep your seams even.
Once your sides are serged, give them a quick press toward the back. Now your skirt should start looking like, well, a skirt!
3. Preparing the Waistband for the Zipper
Now we’re going to prepare the waistband and waistline so they’re ready for the invisible zipper. But keep in mind — we’re not sewing the whole waistband to the skirt just yet! This part is all about setting up the area where the zipper will go.
Here’s what you’re going to do:
Measure three inches from the raw edge of the waistband, center back toward the center on both sides.

Do the exact same thing on the waistline of your skirt body: measure three inches from the raw edge of the center back toward the middle of the skirt.
Take your waistband to your serger machine and serge just those three inches along the top edge of the waistband. This keeps that section nice and clean and ready for the zipper later.
Next, align the waistband with the waistline of your skirt, right sides together, and serge only those same three inches, grabbing both layers.
This will join the waistband and skirt together. But only along the bottom edge of the waistband.
This step is super important because it preps the section where we’ll insert the invisible zipper later.
4. Inserting the Invisible Zipper
Once you’ve finished preparing both sides of your skirt, you’ll notice that the waistband is only attached at the edges of the center back. That’s exactly what we want! This open section is where we’ll be sewing in our invisible zipper.
If you’re not too confident about sewing invisible zippers yet (no worries — they can be a little tricky!), I have a detailed tutorial all about how to insert invisible zippers cleanly and professionally.

Here’s how to do it:
- Make sure that the top stopper of your zipper aligns right at the midpoint of the waistband’s width — this helps your zipper finish cleanly when we attach the waistband later.
- Clip, pin, or glue-baste your invisible zipper in place (whichever method you prefer).
- Sew the zipper as usual with your invisible zipper foot.
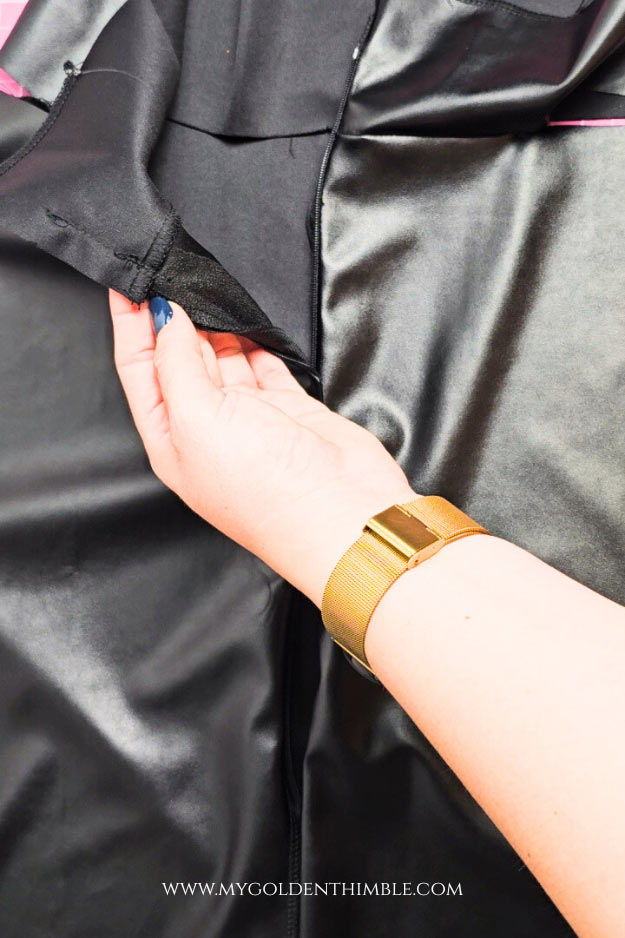
A little tip before you sew — make sure the serged seam allowance of your waistband that’s holding both layers (waistband and skirt) is facing down when you attach the zipper.
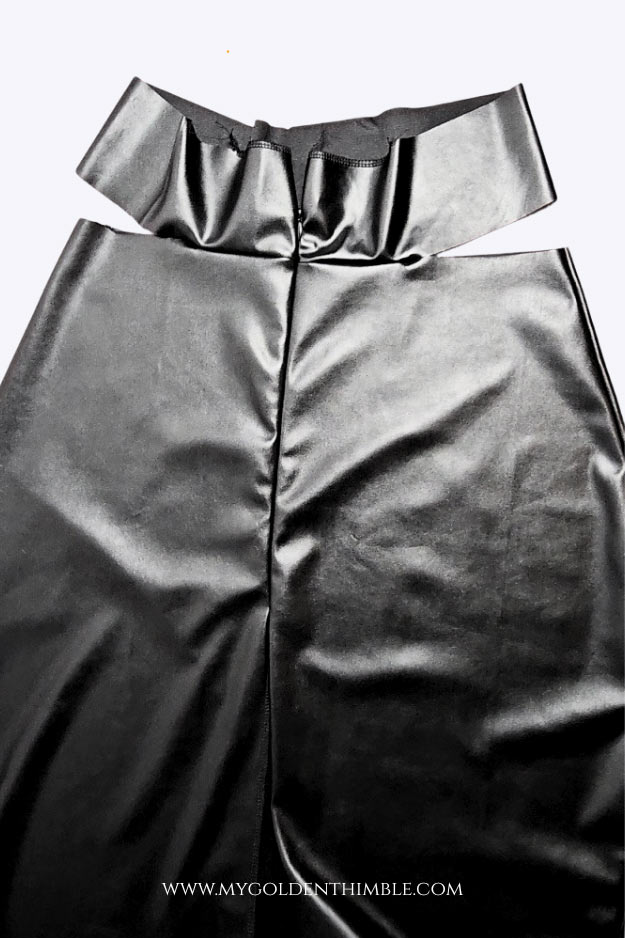
This will help the zipper lie flat and give you that smooth, polished finish that makes invisible zippers look so professional.
5. Folding and Sewing the Waistband Over the Zipper
Now comes the slightly tricky — but totally rewarding — part! First, make sure that the excess top of your zipper is tucked out of the way. We don’t want it getting caught as we work.
Next, fold the waistband in half toward the zipper, keeping the right sides of the fabric together. Take your time here and make sure both serged waist seams are aligned perfectly — this alignment is what will make your waistband look clean and professional once finished.
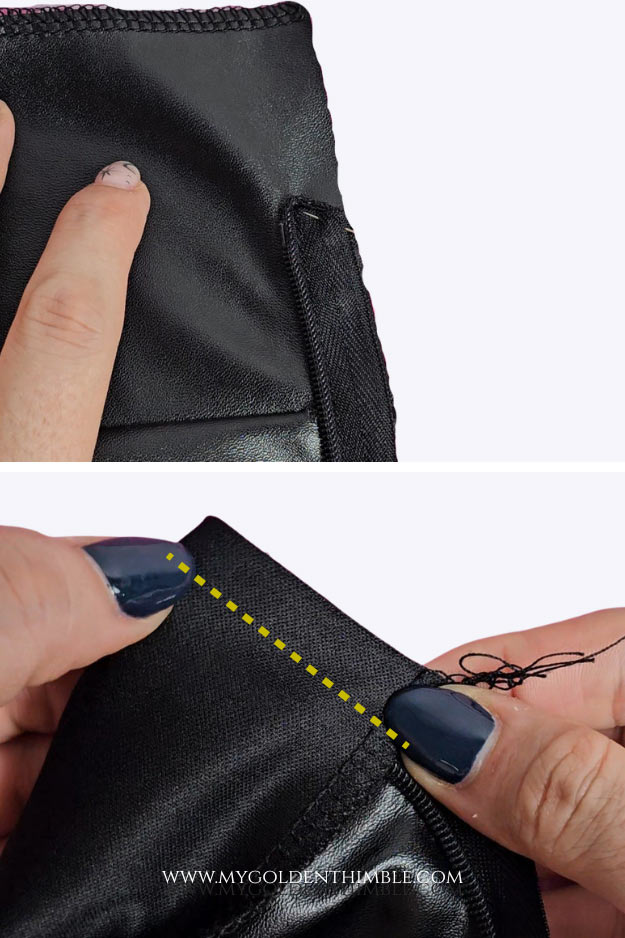
Using your invisible zipper foot, sew a straight stitch right next to the zipper teeth. Be careful not to sew over the teeth themselves! This stitch secures the waistband to cover the zipper from the inside, giving your skirt a polished, smooth finish on the inside and out.
5. Attaching the Elastic to the Waistband
Now here’s the part that really gives your stretch waistband that clean, stable, and professional finish — the elastic! You can’t really complete a comfy, polished waistband without it.

To attach the elastic, first align the raw edge of the elastic with the raw edge of the center back of your skirt, from the inside of the garment. Make sure it’s evenly placed along the waistband so it won’t twist or shift when you wear the skirt.
Next, using your zipper foot, we’re going to topstitch the elastic right on top of the straight stitch you made in the previous step.

Now turn the waistband to the right side and admire the clean finish.
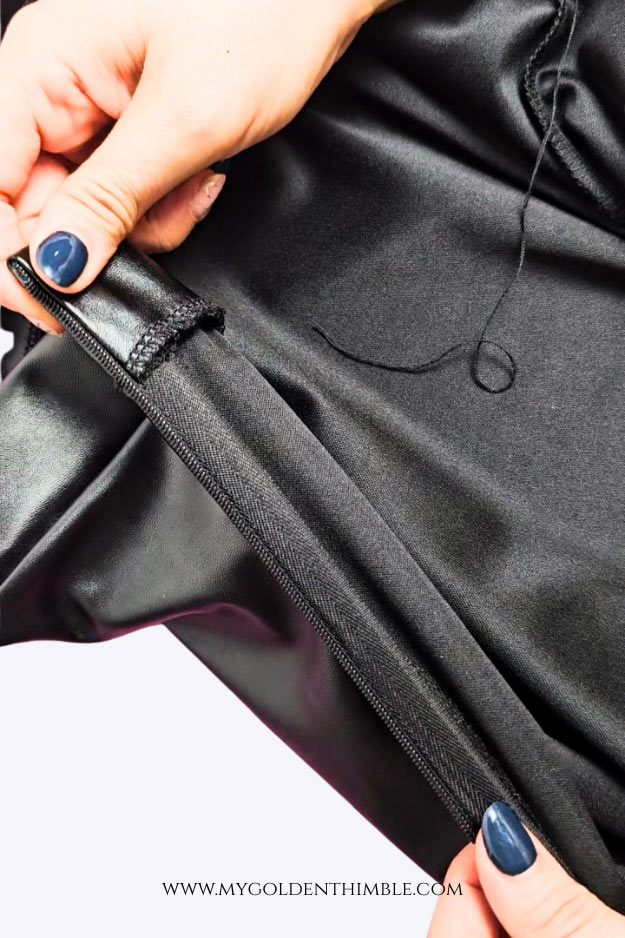
This will secure the elastic neatly between the layers of your waistband, keeping everything in place and ready for the next step: closing the rest of the waistband.
6. Closing the Waistband
Alright, we’re at the final step! By now, your elastic is neatly sandwiched between the two layers of your waistband, and the edges should look tidy and prepped for finishing.
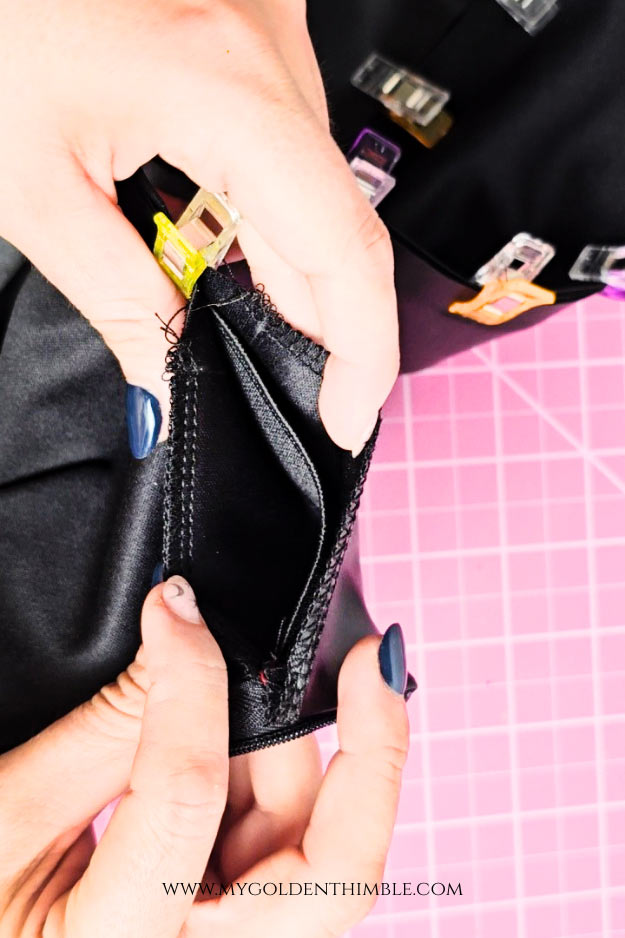
Now it’s time to sew the rest of the waistband to the skirt. Fold the waistband in half (WST) and match it to the skirt, so the waistband sits on the right side of the skirt bodice.
Take your time and clip the entire edge along the serged seams we prepared earlier — this keeps everything in place and aligned perfectly.
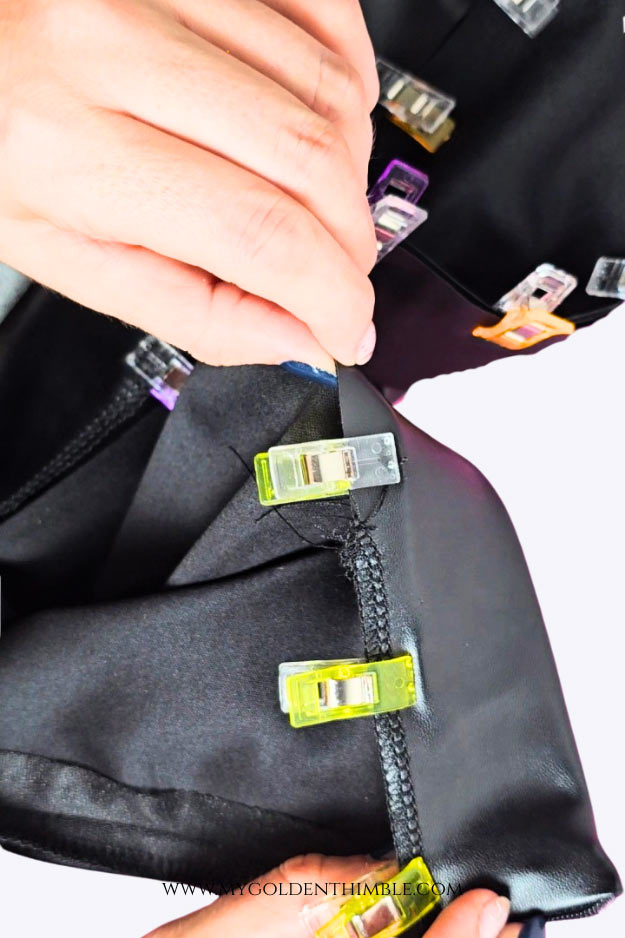
Next, we’re going to finish the serged seam.
Start sewing a few inches before the end of the already serged edge and continue along the waistband as you would normally for any stretch fabric waistband.
Stop ¾” where your first serged edges begin.
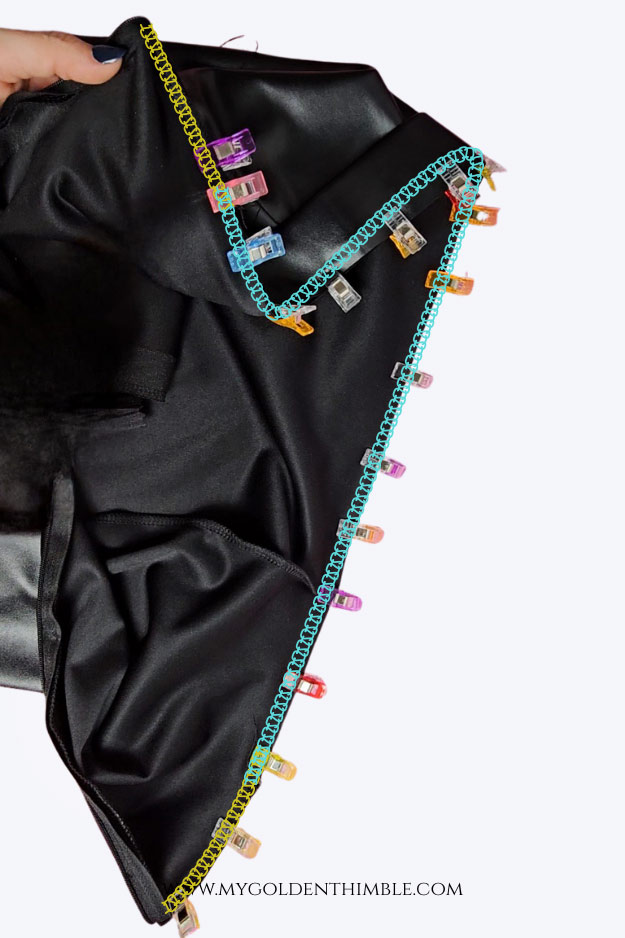
By now, your waistband is fully attached and functional. You can check to make sure the zipper goes up and down without any issues.
But wait!
We’re not quite done yet! There’s one final step you can take to elevate your waistband finish even more, giving it that professional, boutique-quality look we all love.
7. Finishing the Waistband for a Clean Look
Now for the final touch to really make your waistband look complete and polished! Remember the little gap left open by the serged edges at the start of this tutorial? Closing this gap is key to making sure your waistband sits evenly inside the garment and doesn’t shift or move oddly when you’re walking or sitting.
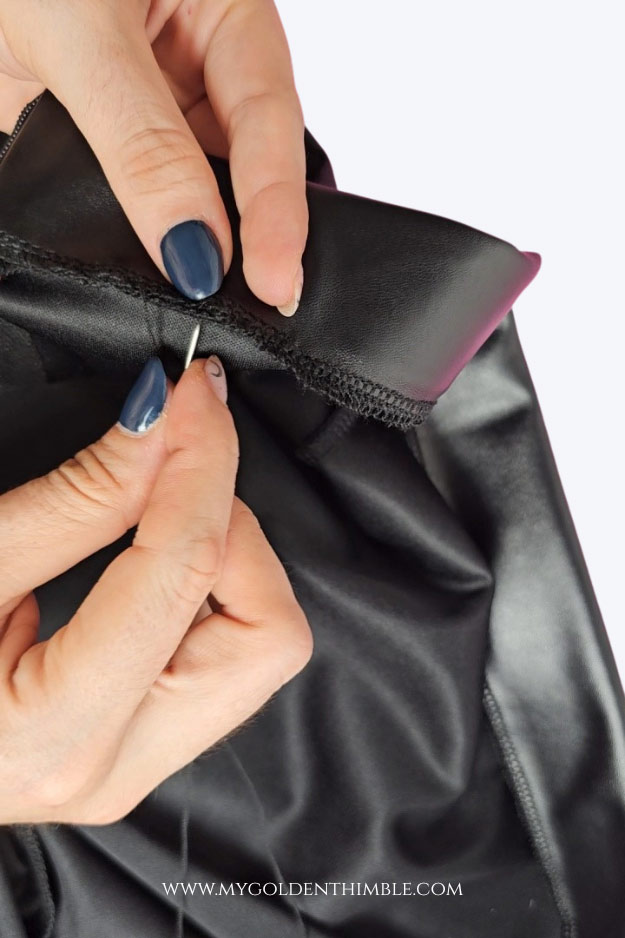
Here’s how to do it:
Align the open serged edges on each side of the waistband.
Using either a stretch stitch or a zigzag stitch, sew directly over the serged seam, stretching the fabric slightly as you go, and stop as near to the zipper as you can. This will secure the waistband while keeping the elasticity intact.
Optional but recommended: add a few hand stitches along the very edge of the serged loops to prevent them from appearing bulky and to achieve a smoother, even finish for the waistband.
And that’s it! With this last step, your elastic waistband with an invisible zipper is fully finished, functional, and professional-looking. All while keeping the comfort and stretch of your garment intact.
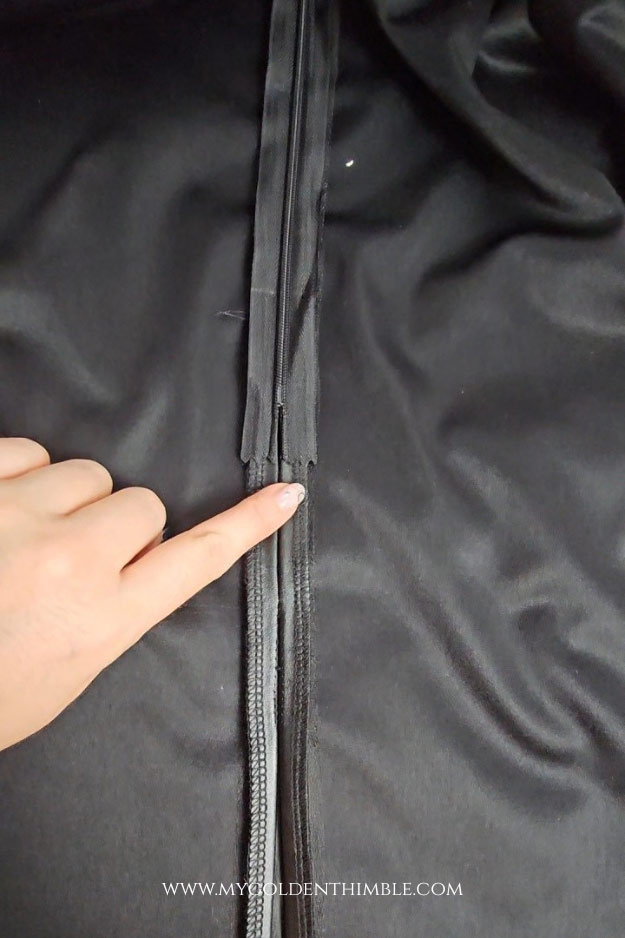
Now, finish sewing your skirt!!
Conclusion
And there you have it, my friend — a little weird, a little tricky, but oh-so-useful trick for Sew an invisible zipper on an elastic waistband with an elastic waistband.
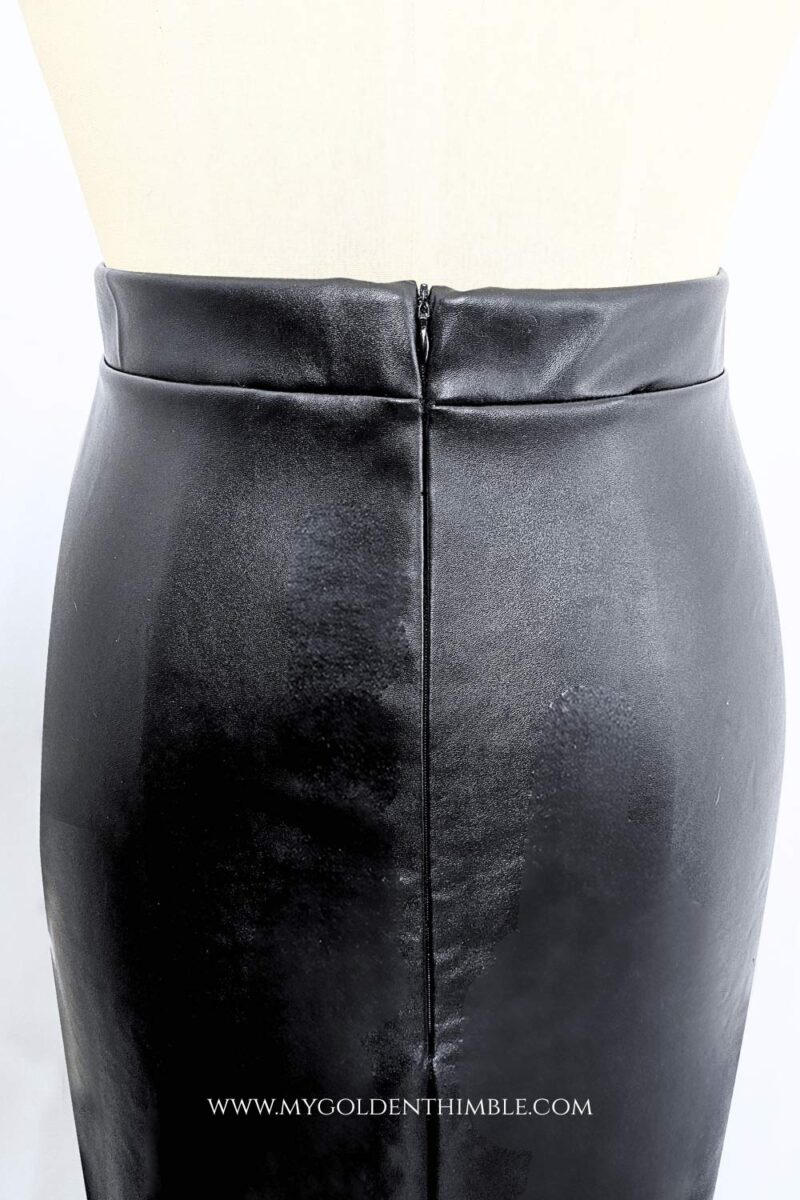
I hope this tutorial inspires you to try it on your next skirt, dress, or even a pair of leggings. And who knows? Once you get the hang of it, you might start adding invisible zippers to all your stretch waistband projects just because it makes life so much easier (and honestly, it’s kind of fun to see that clean finish!).
Thanks so much for spending this sewing time with me — I love sharing little tips like this that save you frustration and give your projects that professional touch.