In this post, I am going to teach you How to Sew A Christmas Stocking that not only has lining but is also REVERSIBLE!!
By using My Golden Thimble’s Free Lined Easy Christmas Stocking Sewing Pattern, you will be able to create the most perfect stocking for your mantel and customize it any way you like, from pretty ribbons to fun and colorful buttons.
With this Stocking Pattern, you will have many options for customization. You will be able to make 4 different sizes of Stocking for your whole family and even have options to give out to the friends of your office like the ones I am doing in this post.
So go ahead and grab your favorite Christmas fabric prints and the cutest embellishments you can find in your sewing room, and let’s sew this!

NOTE: This post contains affiliate links, which means that if you make a purchase using one of the links in this article, I may earn a commission at no extra cost to you (To know more about this, click here.)
The mini handmade Christmas Stockings I am sewing today are to give out to my dance friends at our Christmas Party this December. And I really think they are going to love them!
We are doing a gift exchange of small gifts this year, so I decided to pack my gifts in these cute, tiny DIY Lined Christmas Stockings.
What I am thinking is that I am going to get some cute necklaces and bracelets and add a chocolate bar to each stocking.
What do you think? Do you think they will like this small detail?
What is the best material for DIY Christmas Stocking Patterns?

For this Christmas Stocking Tutorial, I used Christmas-themed Fat Quarter Bundles.
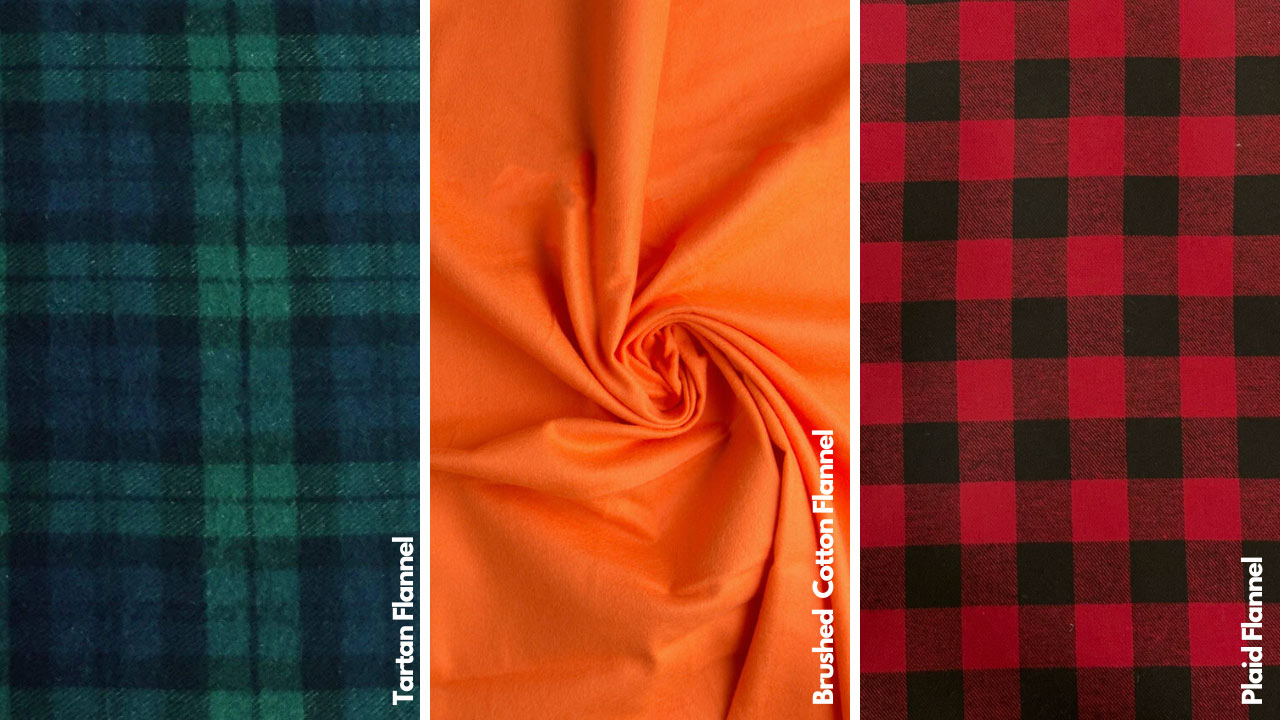
But there are many fabric options to choose from depending on the style you want to achieve. These are some of them:
- Felt: Felt is a popular choice for Christmas stockings. It’s easy to work with, comes in various colors, and has a festive and cozy feel.
- Quilting Cotton: Quilting cotton is another versatile option. It comes in a wide range of patterns and colors, allowing for creativity in design.
- Fleece: Fleece is a warm and soft fabric that can add a cozy feel to your stockings. It’s also a good choice if you want a thicker stocking.
- Velvet: Velvet stockings can add a touch of luxury and elegance to your holiday decor. They often come in rich, deep colors.
- Burlap: For a rustic or farmhouse-style look, burlap can be a great choice. It has a textured and natural appearance.
- Satin or Silk: If you’re going for a more sophisticated or formal look, satin or silk stockings can be a good option. They have a smooth and shiny finish.
Here are some great New Christmas Prints you can get on Amazon:


Ultimately, the best material depends on your personal style, the overall theme of your holiday decor, and whether you prefer a traditional or modern look.
How much fabric do you need to sew Christmas Stockings?

To sew a standard-size Christmas stocking using our mentioned pattern:
- ½ yard of fabric for the main stocking (fleece, quilting cotton, or any Christmas fabric canvas)
- ½ yard of lining fabric
- ¼ yard of contrasting cuff fabric (optional)
Additionally, you might want to consider using medium-weight fusible interfacing (optional) to provide the stocking with a better shape. The tutorial suggests using bias tape, trims, and notions for decorations, but the specific amounts are not mentioned.
For the small size Stocking of this sewing pattern, you can use any fabric scraps you already have or use a Layer Cake Bundle from Amazon.
How to Sew a Christmas Stocking with Lining and Cuff?
By following these steps, you can create the perfect Christmas decoration to add to your festive decor.
1. Print And Assemble Your Sewing Pattern
Go to the free sewing pattern page to download the Free Christmas Stocking Sewing Pattern.
To start printing your pattern, first choose your preferred paper size from the available options – Letter, A4, or A0. It’s important to print the pattern in its actual size to ensure the best possible fit to the size you want.
Once you have selected the paper size, proceed to print the pattern.

After printing the pattern, carefully cut along the dotted lines on each page. Use a rotary cutter!! This will make sure that the edges are neat and tidy, which will make it easier to assemble the pattern.
Once you have finished trimming the edges, it’s time to assemble the pattern. To do this, match the numbered squares on each page. Check that the pages are joined together correctly.
You should start with square number one and work your way through the rest of the numbered squares until the pattern is complete.
2. Customize Your Size
When making a Christmas decoration, it’s important to choose the right size. Our product offers four different sizes to choose from, ranging from Mini (5 inches) to Large (21 inches).
What sets this pattern apart is its versatility, offering four sizes from Mini (5″), Small (12″), Medium (17″) to Large (21″) tall.

For a classic Christmas look, the size we are using for this tutorial is the smallest size, which measures 5″ tall.
To get started, you’ll need to trace the chosen size on pattern-making paper.
That way, your stocking will be the correct size and shape.
3. Cut Your Festive Fabrics
Just a heads up, if you plan to quilt your project, it’s a good idea to do that first before moving on to these instructions.
Pre-wash and press your fabrics before cutting the pieces. This will help keep your fabric from bunching up or shifting around during the rest of the process.
To get started, make sure you follow the pattern-cutting directions that are specific to your main fabric. This will help your project look polished and professional.
If you want to add some holiday cheer, consider using a fun Christmas print for the lining fabric.
4. Sew The Cuff With The Leg And Lining
First, fold the cuff with the wrong sides together and press to make a crease.

To attach the front fabric and cuff, align the top edge of the stocking with the cuff, put the right sides together, and secure them with pins.
Then, sew the pieces together at a distance of 1/2″ seam allowance from the edge with your sewing machine.

Once you’re done, press the seams open to ensure a neat finish.
Next, it’s time to place the stocking lining over the cuff.

Carefully align the lining with the cuff, and sew the pieces with the right sides together, making sure to keep the right sides facing each other.
Once you’ve finished sewing, press the seams open to guarantee they’re flat and even.

Repeat and Close the Pieces
To finish the back of your stocking, you just need to repeat the same steps you followed for the front of the stocking on the mirrored pieces.
Before you proceed, make sure that you have the right orientation of the pieces. Once you’ve got that sorted, align the front and back pieces of the stocking together and pin them in place.

To make sure that the pieces don’t slip, sew along the edges of the pinned pieces from a distance of 1/2 inch from the edge. This will create a seam that holds the pieces together securely.

Don’t forget to leave a 1 to 1/2-inch opening on the lining, as this will be used later to turn the stocking right side out.
Make It Smooth
When you’re making your stockings, don’t forget to snip some curves to make those lines super smooth, especially at the heel and toe.

Once you’re done sewing, flip your stocking inside out and give it a good press to make it look even better.

To finish it off, just close up that open seam with an invisible stitch or a straight stitch – whatever you find easiest – and voila!

A beautiful, flawless stocking is all yours.
The Final Touch – Fold Cuff
Now is the time to fold the cuff towards the stocking to create this classic look.
Now, you can leave it like this, or you can add a pretty hanging loop.

Adding a special touch to your stocking is easier than you think! You can use bias tape to create a neat and tidy finish. You can either purchase it ready-made or craft your own bias tape. Just measure the perimeter of your stocking and add a few extra inches for overlap to determine the length you need.

Once you have your bias tape, it’s time to sew!
First, sew the bias tape together to create a loop. Then, fold it in half so that the raw edges are aligned.
Slip the loop inside your stocking, with the raw edges of the bias tape against the raw edges of the stocking.
Now comes the fun part!
Using a needle and thread, hand stitch the bias tape to the stocking. Be sure to stitch through both layers of the bias tape and the stocking to secure the loop. Once you’ve gone all the way around, tie off your thread and trim any excess.
Ta-da! Your stocking is now complete with a fancy bias tape finish. Give yourself a pat on the back – you did it!
There you go! Your Christmas stocking is now ready to spread joy and hold wonderful surprises.


Great pattern & instructions. If I want to use fusible interfacing on this stocking, how do I do so? You mention it as an option. Thanks!
Hi Robin! For sure. If you want to use fusible interfacing do it on the wrong side of the main fabric pieces. To give them structure. I do recomend doing this if your fabric is thin, because you want your stocking to hold it’s shape when it is hanged.
I loved this one <3
Video tutorial was really helpful and the stockings are SUPER CUTE!!
I am so glad that you liked them! Thank you for commenting !