
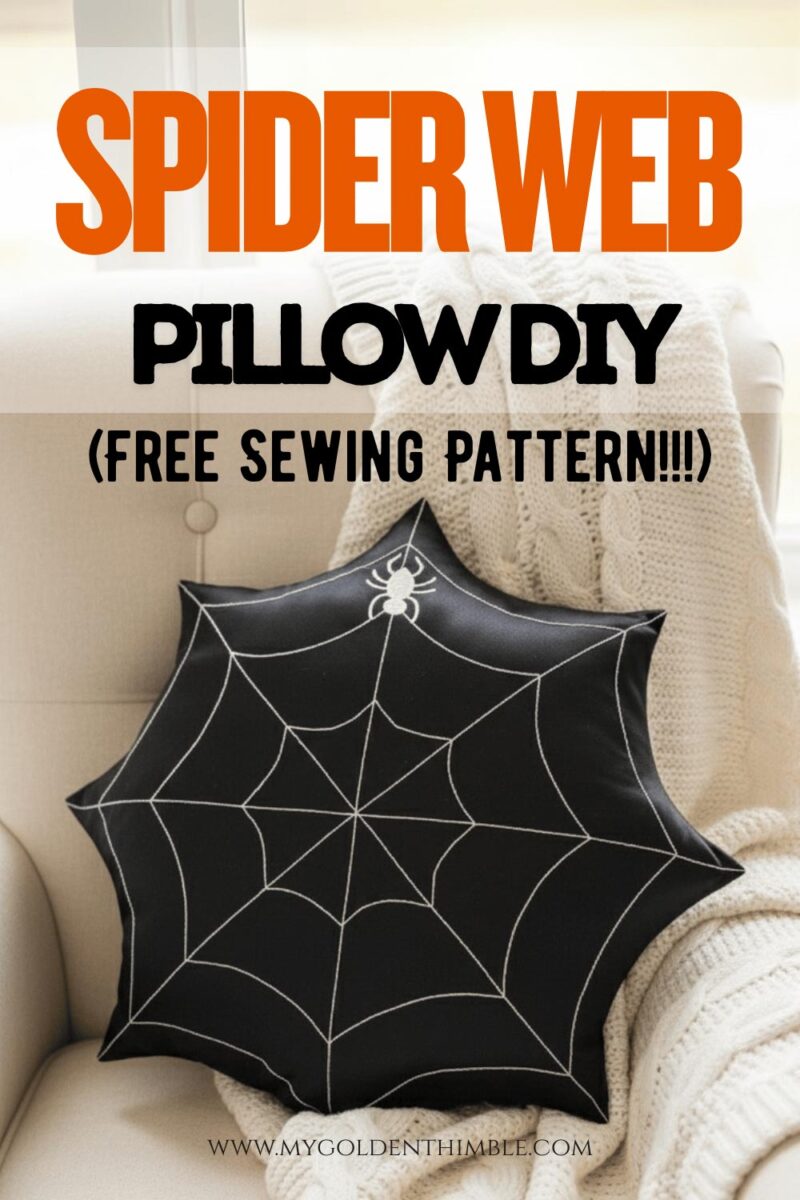
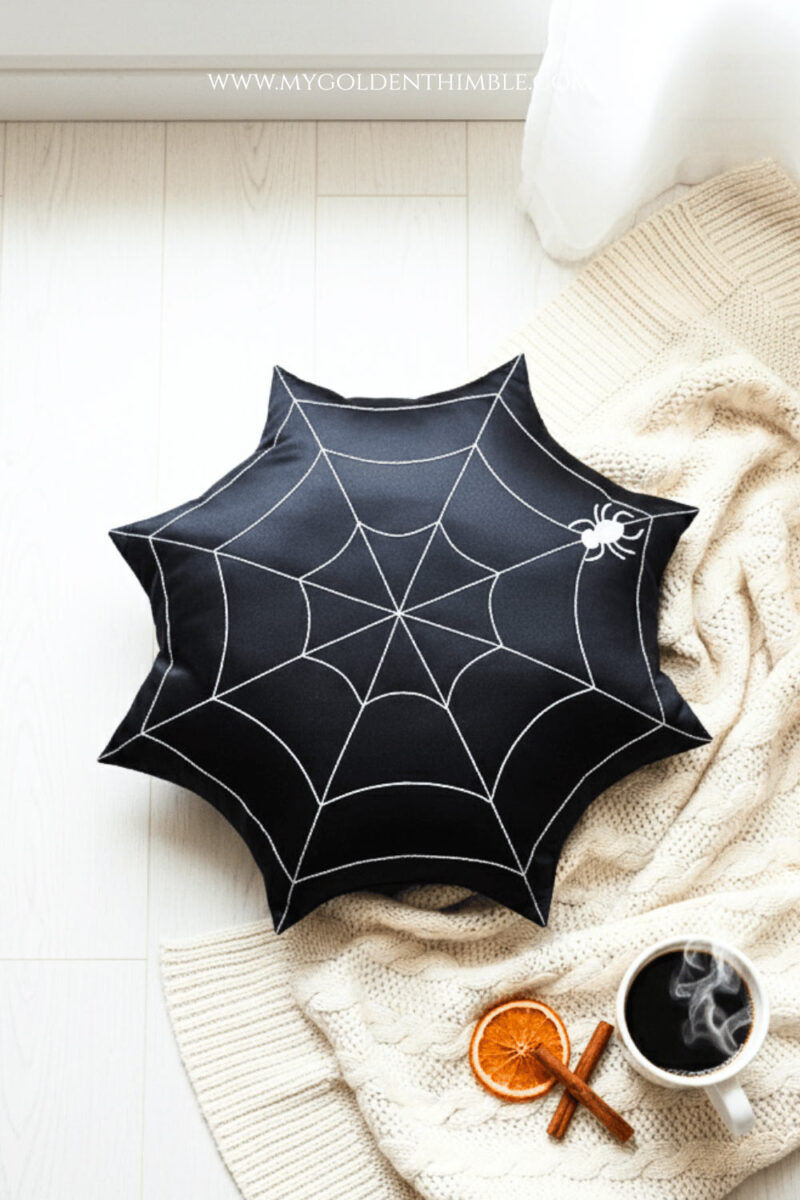
This Spider Web Pillow DIY is the perfect mix of spooky and adorable, and it’s just what your couch (or sewing corner!) needs for Halloween! It’s a lovely little accent pillow that’s super quick to sew, so you can whip one up in no time—even if you’re short on crafting hours this season.
And guess what? It comes with a free pattern file so you can get started right away!
I also added a tiny surprise: a little spider embroidery file that works with most machines! You can stitch it right onto your web or use it to make your own cute crawling accent.
Either way, this project is such a fun and easy way to bring a bit of Halloween magic into your home, handmade-style.
NOTE: This post contains affiliate links, which means that if you make a purchase using one of the links in this article, I may earn a commission at no extra cost to you (To know more about this, click here.)
About This Project
There’s just something so beautiful about spider webs, don’t you think? I’ve always loved how intricate and delicate their designs are—each one unique, like tiny pieces of art spun by nature itself. So of course, it felt completely natural that I’d want to bring that same magic into my Halloween decor!

After all, spider webs and spiders are key elements of any Halloween theme, and this project celebrates them in the prettiest way possible.
A while ago, I designed a set of spider web placemats and coasters that I bring out every October for my dining setup.
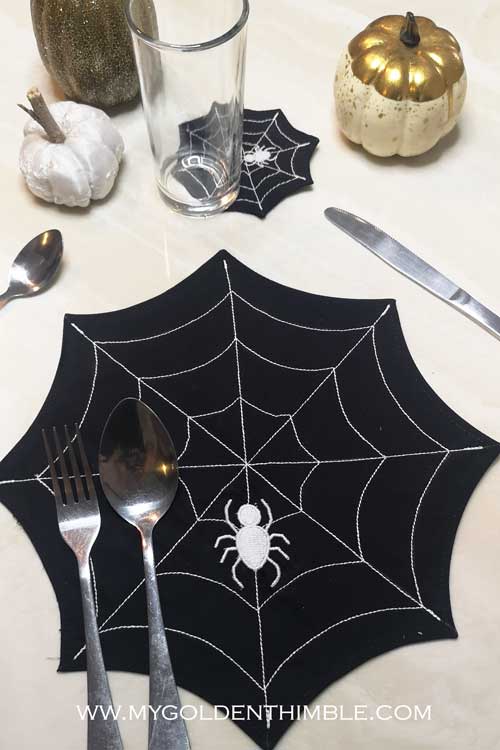
I’ve loved that design for years—it’s become one of my favorite fall traditions! So this season, I decided to give it a little twist and turn it into something new: a spider web throw pillow for my living room.
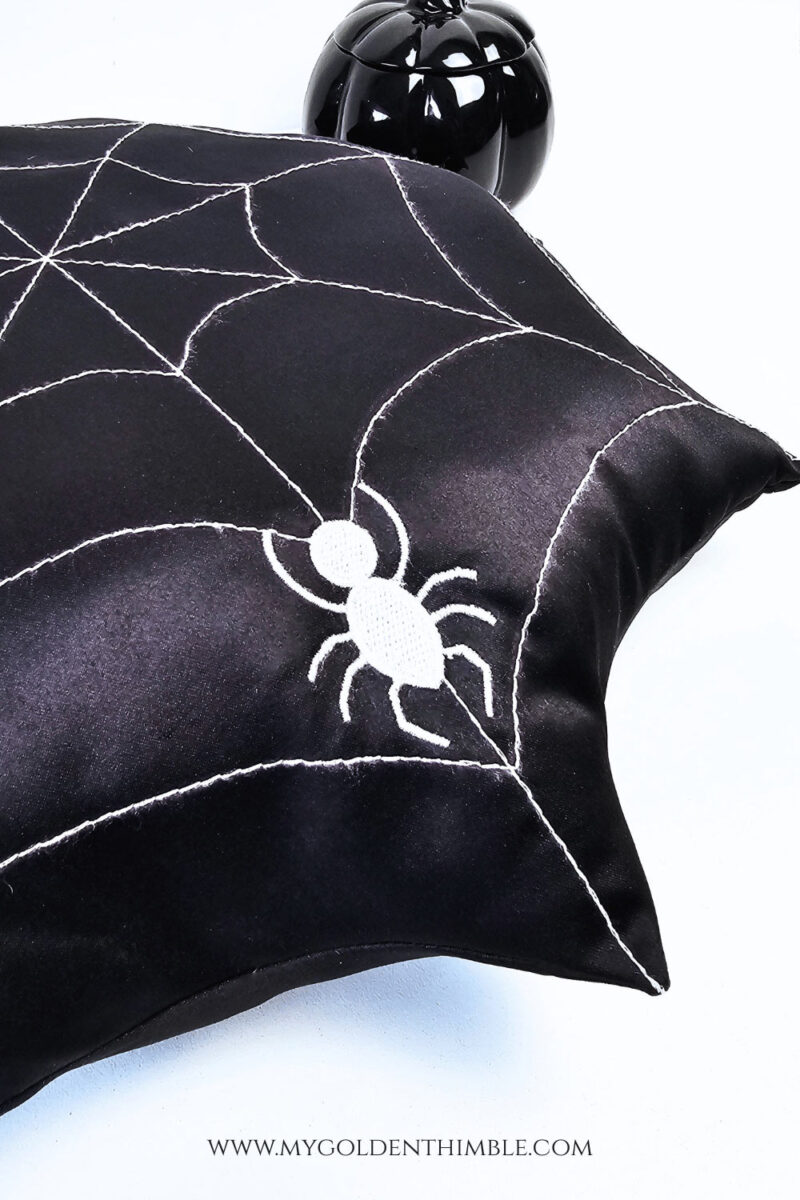
It actually matches one of the very first designs I ever shared on this blog, the Jack-O’-Lantern Pillow Cover Free Sewing Pattern and Stencil, which makes it even more special to me.

Customize Your Spider Web Pillow
This Halloween sewing project is seriously so quick to make!
The only step that takes a bit of extra time is embroidering the little spiders—but even that goes by fast. I added mine on both sides of the pillow, but you can totally keep it simple and embroider just one side.
Either way, it won’t take more than 15 to 20 minutes to complete each side.
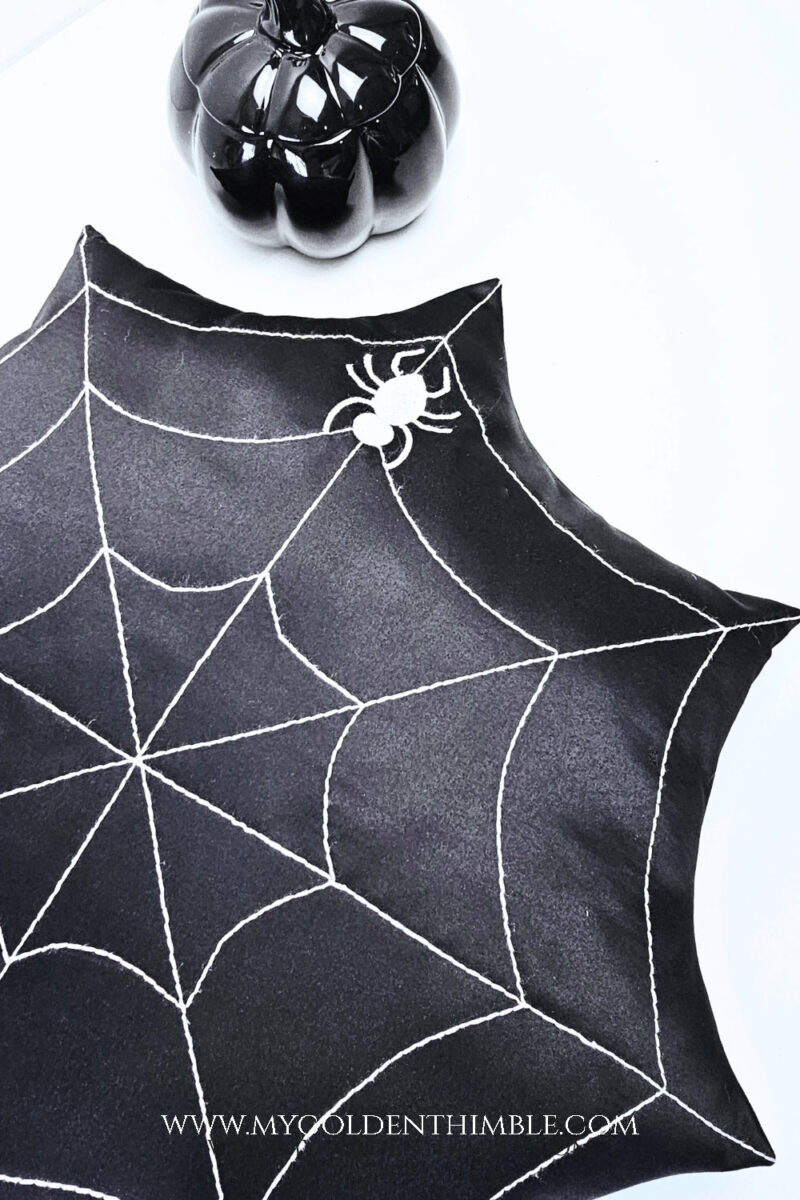
The finished pillow measures about 16 to 17 inches, making it the perfect size for a cute accent on your sofa or favorite chair. I just love how it ties my whole Halloween decor together!
TIP: If you want a bigger pillow, just add more seam allowance to the pattern!
So, grab your fabric and thread—let’s get started sewing this gorgeous Spider Web Pillow DIY and add a handmade touch of spooky charm to your home!
Spider Web Pillow DIY- Sewing Instructions
Materials and Tools
Before we jump into stitching, let’s gather everything you’ll need for this Spider Web Pillow DIY! The best part about this project is that it’s super flexible — you can use whatever you already have in your stash and still get a spooky-beautiful result.
Here’s what you’ll need:
- Fabric: Any woven fabric you love will work! I used a black satin fabric for mine because I wanted that soft, shimmery finish, but cotton, poplin, or even canvas would look amazing too. Basically, any fabric you have that’s black (or dark gray) will do the trick.
- Thread: You’ll need both white and black thread — white for the spider web stitching and black for the seams and finishing touches.
- Lightweight fusible interfacing: This helps your pillow hold its shape and gives the embroidery a smooth surface to stitch on.
- Pillow filling or insert: I used regular polyester fiberfill, but you can also use a 16” pillow insert if you prefer a neater, structured look.
- Embroidery machine: You’ll need one for the spider embroidery file that comes with this free Halloween pillow sewing pattern!
Once you’ve got all your materials ready, it’s time to start stitching your web and bringing this cute little spider home.
How to Sew the Spider Web Pillow
Now let’s get stitching! This part is where the magic happens — we’re going to draw and sew all those beautiful spider web lines and add our little embroidered spider friend.
Step 1: Stabilize your fabric
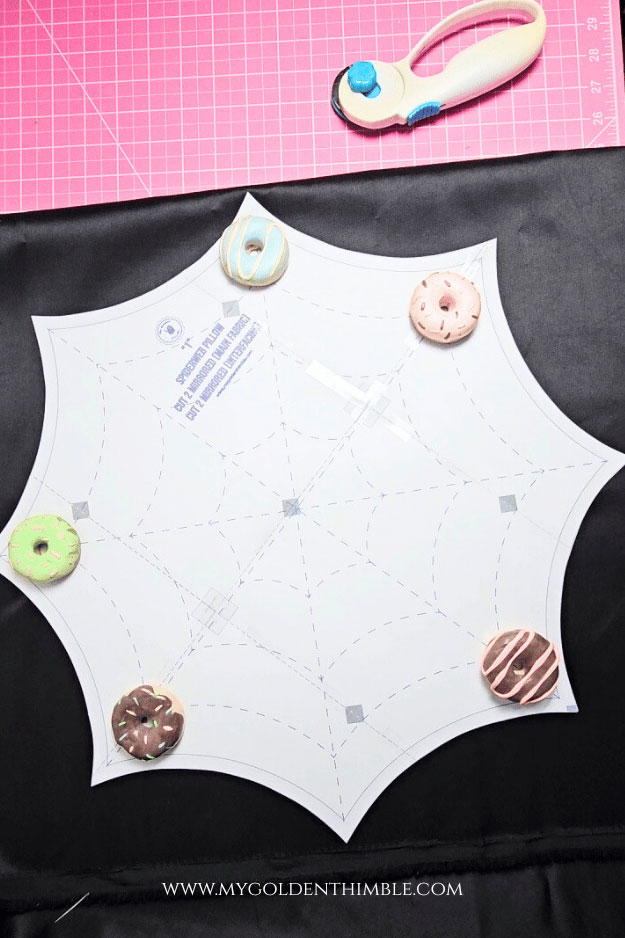
Since we’ll be using a double thread on the needle to make the spider web lines really stand out, it’s important to stabilize your fabric first.
Press a layer of lightweight fusible interfacing on the back of each pillow piece. This will give your fabric structure and keep your stitches nice and even.
Step 2: Double-thread your sewing machine
Here’s my favorite topstitching hack for when you don’t have topstitching thread: just use two spools of regular thread!

Thread both of them through your sewing machine at the same time and pass them through the needle together.
You’ll end up with a thicker, more defined line — perfect for our web design. Use a regular single-threaded bobbin on the bottom.
Step 3: Transfer the spider web design
Next, it’s time to mark your spider web pattern on the fabric.
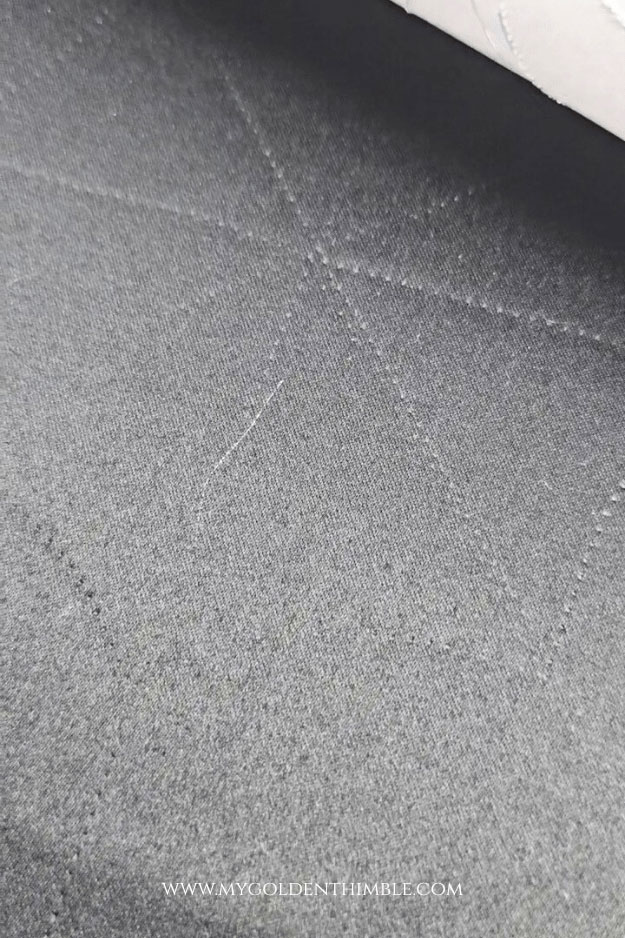
I like using a pinwheel tracing tool, which leaves tiny dotted marks you can follow when sewing.
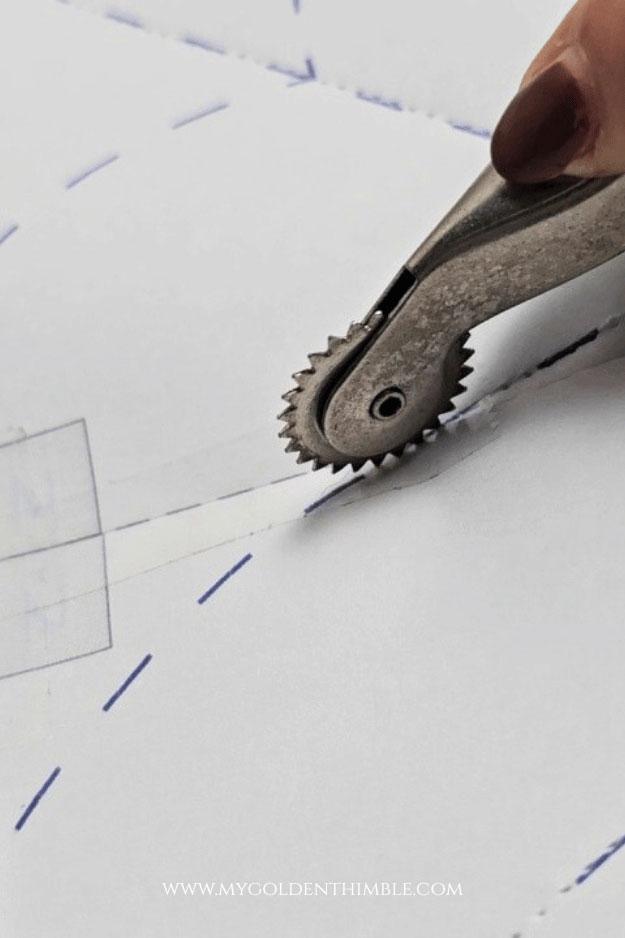
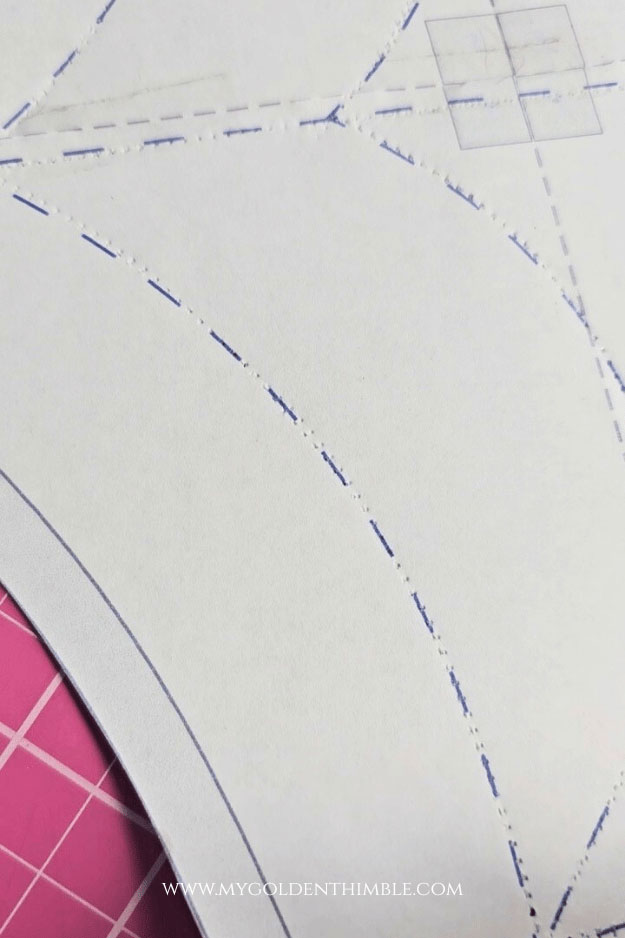
Once I’ve traced all the web lines, I go over them with a small piece of soap (my favorite marking tool ever!).
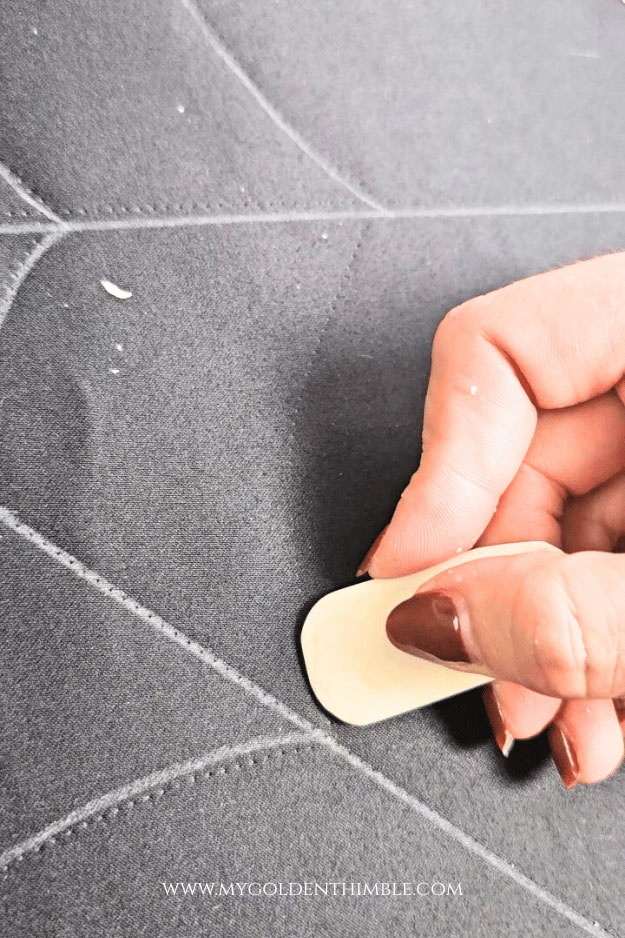
Because it shows up clearly on dark fabric and disappears completely when you steam it with an iron later.
Step 4: Sew the web design
Once your fabric is marked, start sewing along the web lines with your double-threaded needle.

Take your time following the marks, and don’t worry if your lines aren’t perfectly symmetrical — real spider webs aren’t either!
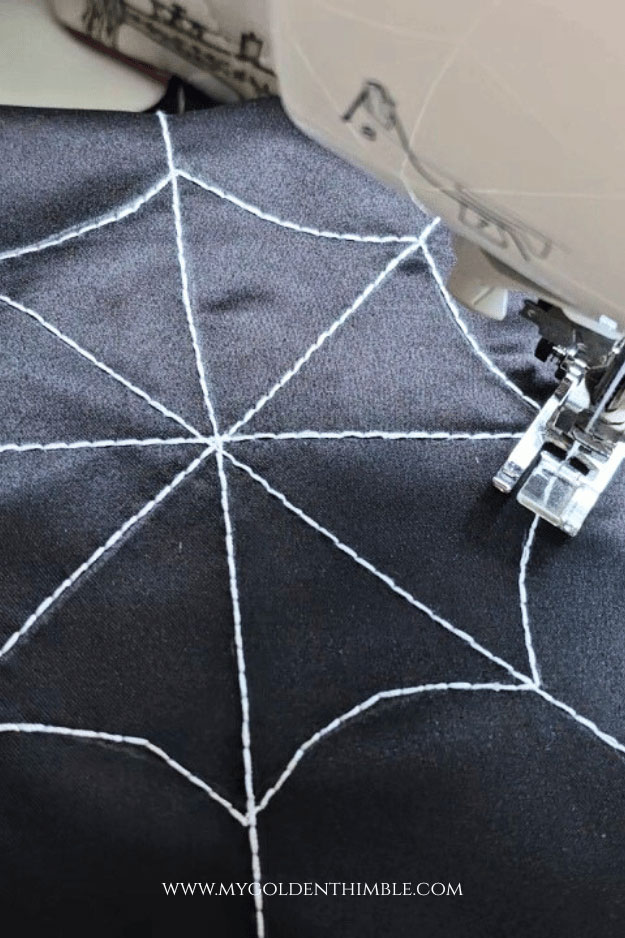
For a more polished look, I recommend sewing the same design on both sides of the pillow. It gives it that high-end, handmade feel that looks so lovely on your couch.
Step 5: Embroider the little spider
Now let’s bring in our star — the spider!
Prepare your embroidery hoop and load the free spider embroidery file (included with the pattern) onto your USB so your machine can read it.
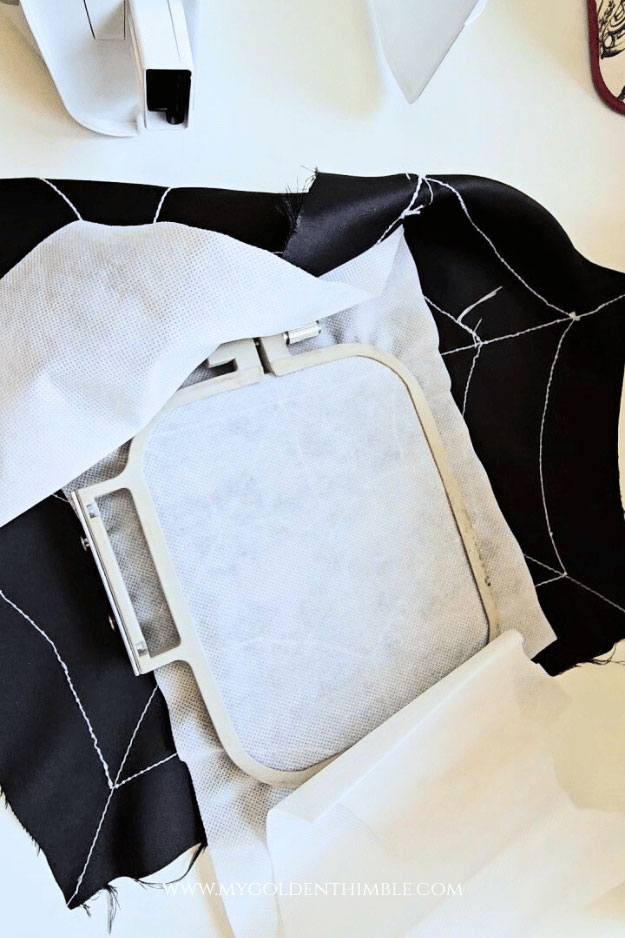
Place the hoop so the spider design lands right in the middle of one of your web lines — this makes it look like the spider is hard at work spinning its web!
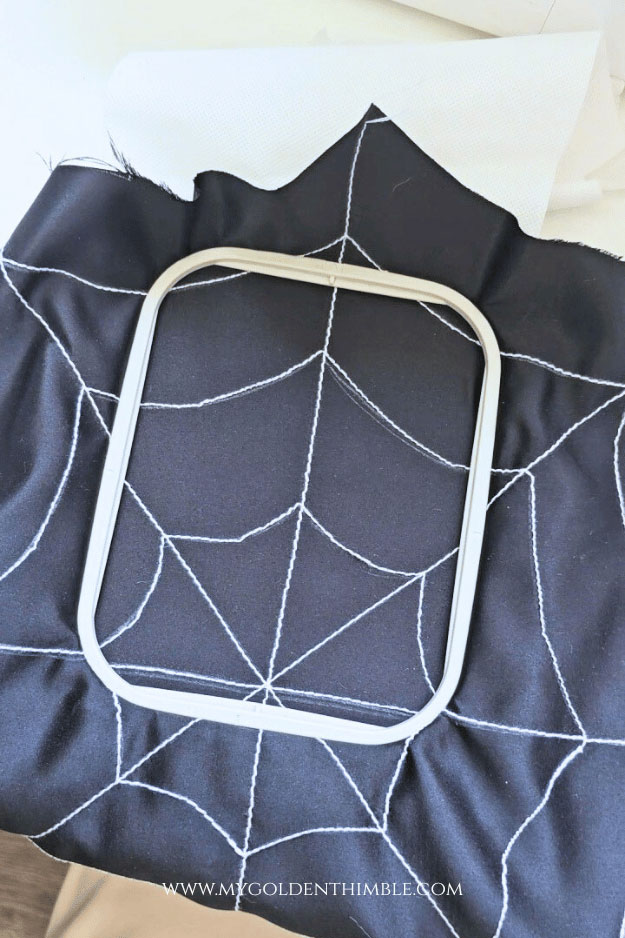
Use your machine’s arrow keys to adjust the position left or right until it’s perfectly centered.

The embroidery itself is super quick — it takes about 5 to 7 minutes to stitch out.
Step 6: Sew the pillow together
Once both pillow pieces are ready, align them with the right sides facing each other.
Sew all the way around using a ¼” seam allowance, but remember to leave one section open so you can turn your pillow right side out later.
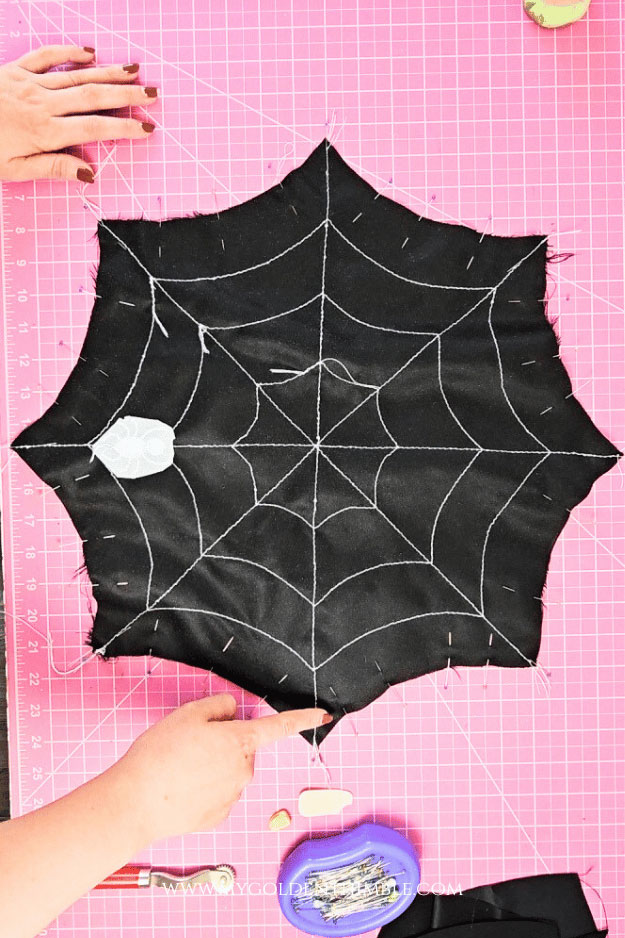
Before turning, clip all the curves and trim the corners (especially the web’s points) so everything lays flat and smooth once flipped.

Then, turn your pillow right side out through the opening and give it a good press with your iron, paying special attention to the seams.
Use a point turner to gently push out the corners for that crisp, finished look.
Step 7: Fill and close
Now it’s time to stuff your pillow!

Use soft polyester filling or a pillow insert, making sure to push the filling into all the little web corners so it stays evenly shaped.
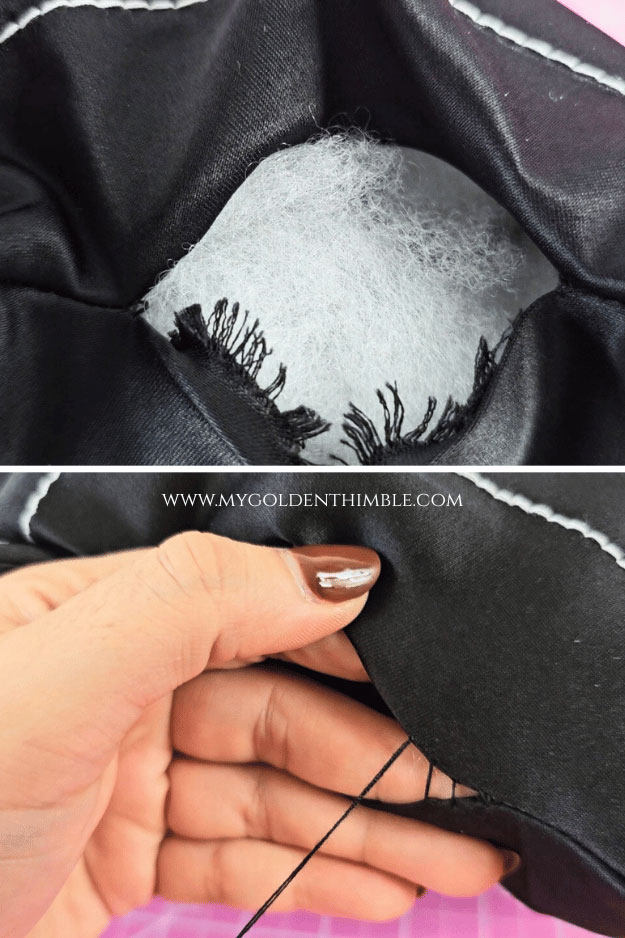
Once it’s nice and plump, close the opening with a ladder stitch (invisible stitch) for a clean, seamless finish. And there you have it — your very own Spider Web Pillow DIY! It’s spooky, elegant, and just the right touch of handmade charm for your Halloween sewing projects this year.
Wrap-Up
And that’s it, my friend — your spooky-cute Spider Web Pillow DIY is all done! Isn’t it just the prettiest mix of eerie and elegant? I love how the white web lines pop against the black fabric and how the tiny embroidered spider adds that perfect Halloween touch. It’s such a simple project, but it looks like something straight out of a boutique!
If you’d like to make your own, don’t forget to download the free Spider Web Pillow sewing pattern and embroidery file below. Everything you need — from the web template to the adorable little spider — is ready for you to print and sew. And as always, I’d absolutely love to see what your version looks like! If you sew one, tag me on Instagram at @mygoldenthimble or share it with the hashtag #MyGoldenThimble so I can swoon over your spooky creations.
Spider Web Pillow – Free Download
Hey there! Want this amazing free download? Just pop your name and email into the form below, and we’ll send it your way. Oh, and remember to check your promo or spam folders in case the email takes a detour there by mistake. If it does, just nudge it into your main inbox so you don’t miss any more freebies from us!
Don’t see the form? Disable your ad blocker and refresh the page!
Happy Sewing!!!








Lovely 🕷️
Thank you so much! 😀 I am happy you liked it
This is so brilliant and the instructions are clear and concise. I made myself a cushion and I am in love, going to make some for family and friends too! Thank you so much
I am so happy you enjoyed this pattern! I’d love to see your version of it. Please tag me on any social media.
Bellezas de cojines.. gracias
Thank you so much Edelis!
Thank you so much.
You are absolutely greatly and warmly welcome!
would love this pattern plz
Hi gorgeous! You have to fill out the form at the end of this post. If you don’t see it try using another browser like chrome. Or you can turn off your ad blockers too.
Love reading your patterns. And of course uploading them. So many handy hints, it’s great. Thank you
Hi Ronnie! Thank you so much for your comment! I love to have you here. Sending kisses!