
The following pressing tools are exactly the thing that was missing in your sewing room to get better finishes on your garments and sewing projects.
Nobody likes pressing clothes, myself included.
But pressing as you sew is indispensable to get good results when sewing. A good press will even make your sewing job easier.
And for that, you will need the right pressing tools that will make your work look professional.
In this post, I am going to tell you what they are, how do they work, and give you the best product recommendations to make your seams look fabulous!

NOTE: This post contains affiliate links, which means that if you make a purchase using one of the links in this article, I may earn a commission at no extra cost to you (To know more about this, click here.)
What are pressing tools used for?
You can use each pressing tool to improve the seams of a specific area on our projects and clothes.
They make our sewing and ironing work easier and help us to ensure that nothing is damaged during the sewing process. And when used correctly they give a better presentation to our work.
The Importance of Pressing Tools in Sewing.
If you are anything like me, you probably hate pressing clothes too.
I don’t think I’ve pressed any of my clothes in years. Unless it has very noticeable wrinkles.
Then I might think about it.
But when I am actually sewing the clothes. Well… That’s a different story.

I have all the power from my pressing tools and all the disposition to use them.
Here is the thing.
These tools will make your sewing life 10 times easier.
In fact, the act of pausing and pressing while you are sewing makes a huge difference in the finished project.
Now imagine having the help of all kinds of pressing tools and shapes to get the perfect press on your cuffs, hems, sleeves, and darts…
A tool for every zone and every need. How cool is that?
Sewing Pressing Tools and Their Uses.
1. Ironing Board
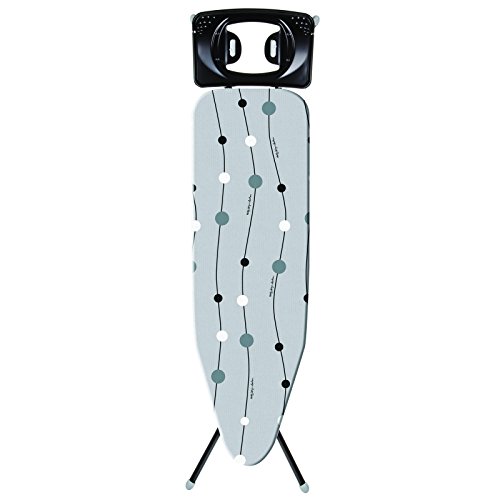
For an ironing board, the best thing would be to choose one that is durable, thick-surfaced (heat resistant), smooth, quilted, and, if possible, adjustable in height.
You will need to change your iron board cover, but it won’t be costly if you sew your own iron board cover.
You should consider how much you will use it and how much space you have for it in your sewing room plan.
I recommended buying a full-size iron for large ironing areas, considering that these take up more space.
But if you don’t have a lot of space, get a standard or a table ironing board to move around as needed.
2. Steam Iron
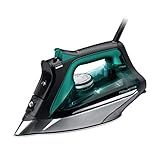

An iron with a steam function will help you to remove the creases of your fabric and make the pressed folds stay in place more easily.
They provide continuous steam and can be very useful for ironing a little bit faster.
This is the number one tool you need for pressing.
Keep in mind that not all fabrics can be pressed. So, do your research before damaging silk or ending up with melted fabric.
3. Pressing Cloth

The pressing cloth is used between the iron and the fabric to keep your garments safe from the intense heat of your iron.
It helps to protect the fabric from direct contact with the iron, preventing burn marks, stains, or shine marks.
They are usually made with see-through fabric so you can watch what is being pressed.
4. Tailor’s Ham and Seam Roll

The Tailor’s ham is an oval cushion that is used to press curved seams and corners for a better finish.
You can use it to give a better finish on darts, sleeve heads, hip curves, princess seams, and any curved parts that are hard to press on a flat surface.
It normally has two sides: a wool side for synthetic blends and fabrics that require low to medium temperatures and a cotton side for cotton, linen, and fabrics that require medium to high temperatures.
5. Sleeve Board
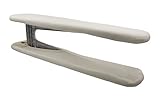
The sleeve board is very similar to the ironing board but a lot smaller; one end is wider than the other, and it is placed on a table or ironing board.
The smaller side of the board is used for pressing narrow garments such as shirt sleeves and cuffs or pants leg openings.
The larger side is for long, straight seams that need to be handled more accurately.
It does not leave creases in the garment because it allows you to insert small openings and press only one layer of the fabric.
Which you won’t be able to do otherwise with a regular ironing board.
6. Point Clappers

Point clappers are be made of different types of hardwood depending on the manufacturer, and their appearance is similar to an anvil.
Use them to get very flat pressed seams that can be left there to cool down open.
They are very helpful when you work with fabrics such as wool or denim.
This tool has curves, points, and other shapes that mimic the seams on the garments, giving easy access to turn and press collars, lapels, or other types of points and corners.
7. Mini Iron
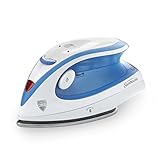
This mini iron is perfect for working with crafts, sewing clothes, small appliqués, quilt blocks, or pressing embroidery projects.
This iron will reach the small corners and tight spaces that your normal iron would not be able to.
It is also much easier to transport and does not take up much space, so you can take it on your travels for any emergency.
8. Wool Pressing Mat

This wool pressing mat is perfect if you don’t have enough space for an ironing board. Even if you do have the space, you like to move around your sewing work.
You can place it on any surface. Maybe right next to your sewing machine for quick ironing when you are working.
The wool retains heat and absorbs moisture, so there is no need to place additional fabrics.
They are also non-slip and easy to handle, so they are helpful when working with rolled fabrics tight or odd-shaped fabrics.
9. Needle Board

This needle board is used for ironing fabrics with fur or texture, such as velvet or corduroy.
Just place the pile side of the fabric on the cushion and press according to the fabric’s needed temperature.
The needle board prevents the velvet fibers from being crushed and deformed by the iron.
I know this is a very unusual sewing tool, so here is a video tutorial so you can see how it works.
10. Loops Pressing Bars

Loop pressing bars are used to press bias tape, narrow fabric strips, or any tube or fabric.
It comes in different sizes, according to your needs.
They are ideal for quilters, applique designs, loops, lingerie straps, or channels for corset stays.
You use their bodies to press seam allowances, open them up, push them aside, straighten seams, and pull cords or elastic through fabric tubes.
Useful Pressing Tools Complements
1. Starch Spray

The starch spray hardens the fabric and makes it stronger, facilitating the work of sewing or folding.
Spray the fabric with a small amount of the product and then dry it with an iron to achieve neat folds.
This can also be used when embroidering to obtain a better firmness in the fabric.
2. Hot Press Rulers
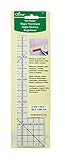
This ruler is perfect for measuring, marking, and pressing long hems-mitered corners, no matter how high the temperature is.
For example, it is much easier to make bags, pillowcases, and hem-circle skirts.
It is non-slip, so there is no need to worry about keeping the fabric in place with extra pins.
If you work with delicate or sheer fabrics, it will make it easier to hem and handle.
3. Steaming Pressing Mit

This Pressing Mit is a quilted glove that allows you to use the hand as a pressure surface.
This way, you can reach curved or small zones and the inside of your clothes.
Heat the glove with the iron or steamer, and then use the heat gathered on it to press the clothes.
It is suitable for pressing hard-to-reach places which do not fit easily on an ironing board.
4. Point Turner

A point turner is a lightweight, handy tool for turning seams, folding them over, and removing basting stitches.
It has a pointed side to reach sharp corners (which can be in the case of a dress shirt collar).
And it also has a curved side to open the seams before pressing.
You can also use it to guide or press your fabric while sewing with your sewing machine.
5. Seam Creaser

You can use a seam creaser almost the same way as a turn-pointer.
It is also used as a helper to press seam allowances and fabric folds.
Unlike sharp scissors, this tool will not cut the corners of our fabric when you use them to make your corners sharper.
How did you like these recommendations? Did any of these pressing tools catch your eye? The variety of materials that can make our lives easier and allow us to sew faster is amazing. What kind of tools make that happen for you? Please let us know in the comments box, we’d love to know!
Don’t forget to follow us on Social Media!!
Psst…Is this article helpful to you?? Please support us so we can keep making awesome tutorials for you by buying us a cup of coffee here. We will be forever grateful!

Monika Garcia loves to write about Japanese culture, which she considers to be her biggest inspiration.
She likes conscious, sustainable, and sustainable fashion, that’s why I do my best to apply it in my professional life since my goal is always to be functional and of quality.
My Golden Thimble writer.








Thank you. I have 2 items in my shopping cart!
I hope that they are very useful to you!