
Do you want to learn how to make pants waist smaller with and without a sewing machine? Keep reading. I have the perfect solution.
There are hundreds of ways to fix and reduce pants’ waists on the internet. But most of them only offer either temporary solutions or ugly-looking ones.
Today I will show you exactly how to reduce the waist zone on your jeans, making them look as if they have never been touched.
But don’t worry. I will also tell you the best-proven ways to make the pants waist smaller without sewing.
Just in case you are in a hurry.
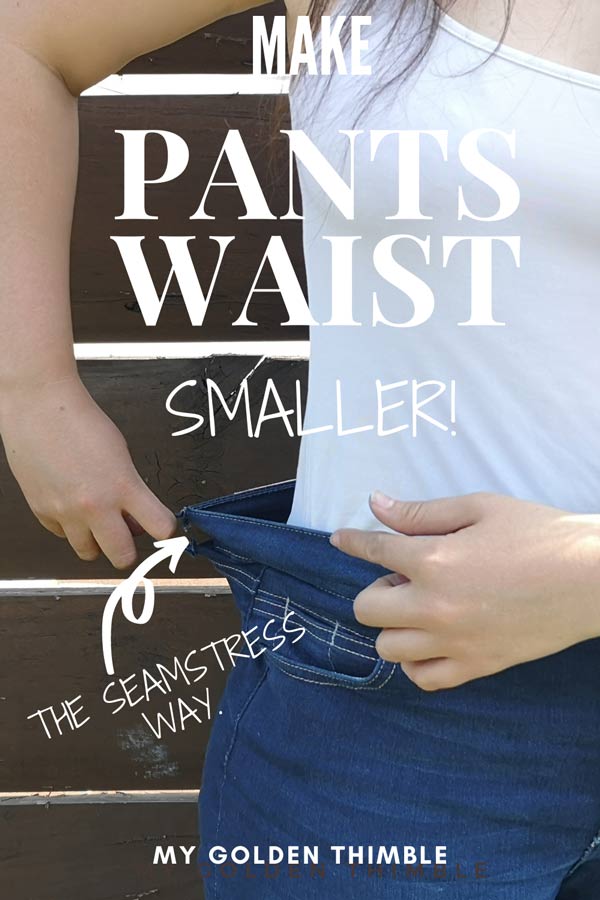
I don’t know why I didn’t write this post before. Tight hips and huge waisted pants have been my entire life’s issues.
For as long as I remember, even before I learned to sew, I was having this problem.
You see… I have a very big butt and hips compared with my upper bodice.
So not only is it challenging for me to buy pants that fit me, but I don’t think I have ever found a pair of pants that I didn’t have to take in on the waist.
This is how most pants look for me.
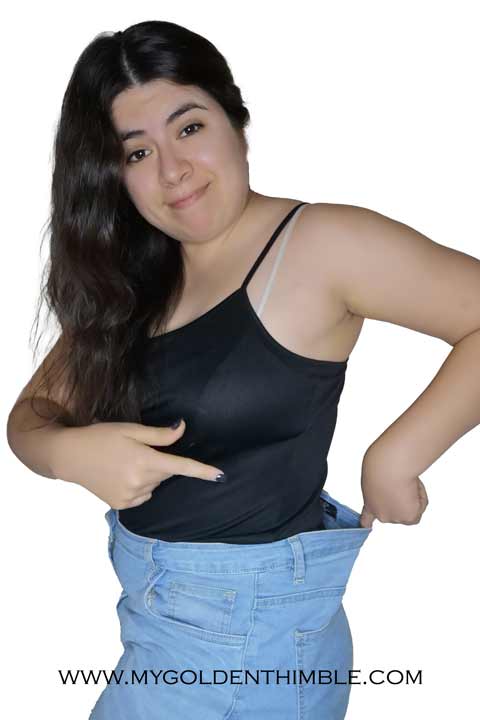
And I have tried every single method to make the pants waist smaller than you can possibly imagine.
From belts to elastic. From darts to shrink the fabric (spoiler alert, worst method ever).
But by now, I know that the best way to do this is to copy-kat the seams using a sewing machine.
The sewing technique I will teach you here takes a bit more time than any other you will find online.
But I can assure you that is the one that will make your pants look the best.
I will explain to you every detail so you can replicate this technique at home.
Even if you aren’t that experienced in sewing!!
Why won’t my pants fit at the waist?
Your pants seem to have a different size on the waist level because they are made with industrial chart sizes.
We all have different body types and shapes. I have a pear shape. Which means my hips are larger than my waist and shoulders.
The chances are that every part of your body has a different commercial measurement.
And if you have curves, you will find that most store-bought clothes won’t fit perfectly to your body.
This is completely OK and normal. It happens to all of us.
Please don’t think that this means something is wrong with your body because the fact is that it’s all part of the fast-fashion commercial strategy.
How to take in jean’s waist with a sewing machine?
All though you are going to find a lot of “hacks” online on how to do this. The absolute best way to fix a big waist on pants is by taking in seam allowance from the original seams.
You will need a sewing machine, a denim needle, a sewing thread (a color that matches your pant’s thread), and pins.
We are going to remake the flat felled seam that comes with your original jeans. No one but you will know the difference.
Tips to take in jeans waist with a sewing machine.
Here are my top tips and recommendations to make your new smaller seam look as good as possible.
- Use the same thread color as your jean’s topstitch seams.
- Large plastic-headed pins are the best for this task.
- Get a denim needle for your sewing machine.
- Use an eyebrow razor to unstitch quickly and easily.
- Have an iron and an iron board on hand. Take the time to press.
- If possible, ask someone to help. It is hard to pin your jeans’ back alone while wearing them.
- Pre-Wash your jeans before sewing them. This will shrink them and remove the factories’ dirt and excess color dye.
- Get a hammer. You can use a hammer to flatten seams if they are too bulky to sew. This is a well-known tailor’s hack.
- Check out my tracing chalk hack to mark your fabric more accurately.
How to Make Pants Waist Smaller by Replicating the Original Seam.
1. Turn your jeans inside out.
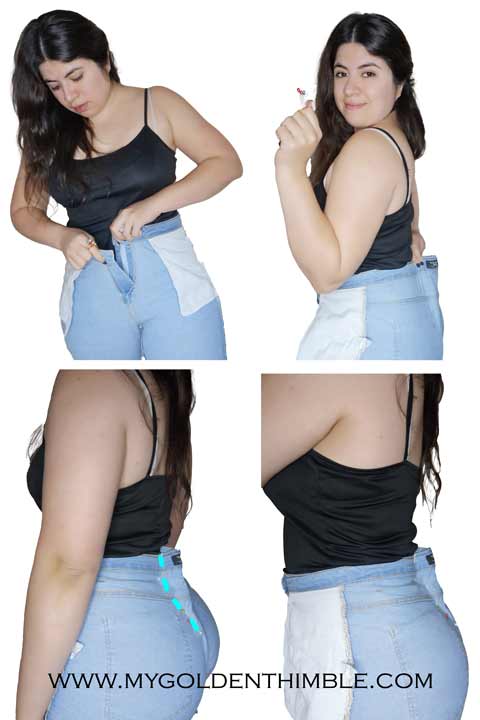
The very first step is to turn your pants inside out and try them on that way.
Close the button and zipper from the inside, if possible.
Make sure the waistband is sitting in the same place as you normally wear your pants.
2. Pin on the back.
Most pants that have a big waist issue are easily fixed by taking them in from the back.
You can do this by yourself or preferably ask for help.
As I have been doing this for a long time. It’s pretty easy for me to pin clothes without seeing what I am doing.
But if this is your first time, you could probably use some help so you won’t poke yourself with the pins.
Pinch all the excess fabric from the waistband and pin down to the highest point of your glutes.
Contrary to what most people believe you won’t get a perfectly straight dart.
Our bodies have curves.
Your dart will probably have curves too.
3. Take off your pants and mark the new seam.

Unbutton your pants and open the zipper so you can take out the pants without removing the pins.
If any of them pops out, put your pants back on and repeat the process of taking the seam in.
Is better to do this again than guess where the new seam should be.
Believe me, once that fabric is cut out there is no way back!
With the help of a marking tool or an erasable pen make a mark just above where the pin is on each side.
4. Use a ruler to measure and divide the seam allowance.
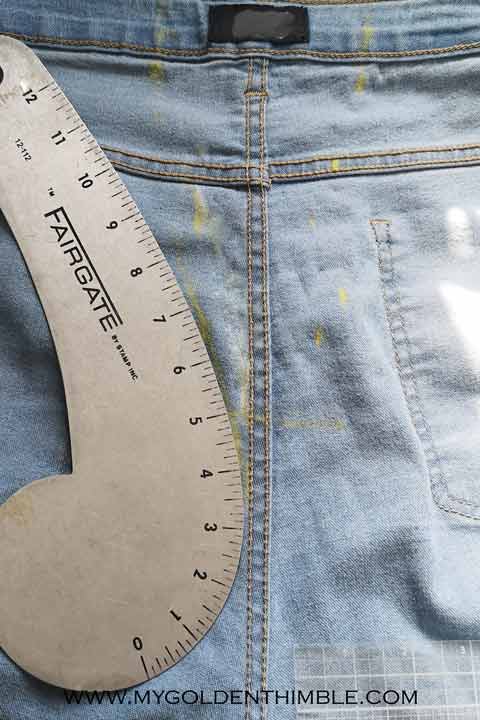
As we took in the measurement in a very hard place for us to see, the marks can be thrown over one side more than on the other.
To have the marks on the exact same spot mirrored on both sides fold your pants and mark where the exact center back is.
Then with the help of a ruler check how much measurement is between the lines on the right and left sides.
Use the center back line to distribute this measurement between both sides.
Take into account that the center of the back seam has two topstitches. The center of the pants is not between these two stitches but on top of one of them.
Depending on where is the fold side of the flat felled seam is where the real center will be.
To help you spot this easier look for the seam on which the two legs were joined.
Use this seam as a guide to distribute your measurements.
Finally use a curve ruler to connect the marks from the top down.
If you don’t have this type of ruler simply draw the curve lines by hand.
5. Unpick the topstitch back seam the waistband and the belt loop
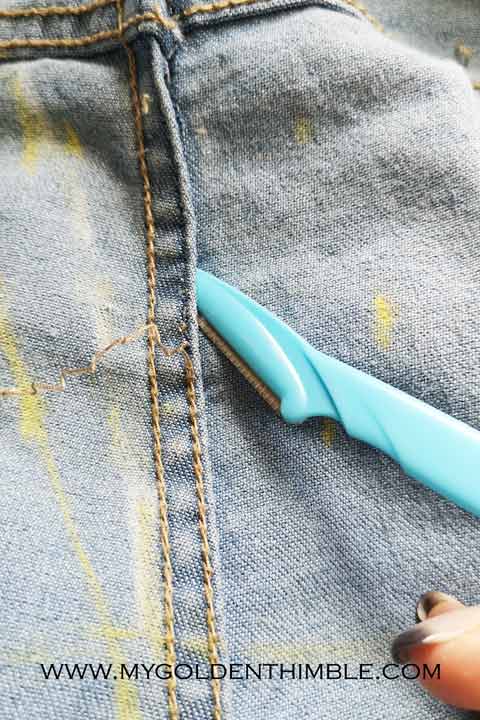
First, unstitch the belt loop, and the waistband seams using a seam ripper.
We are only going to unpick the top stitch of the back seam.
Meaning you will have to leave the joining seam there for now.
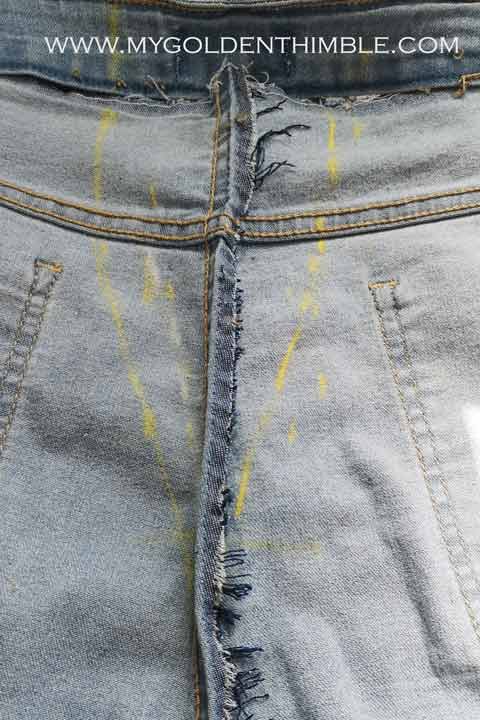
Use a seam ripper but be careful not to cut through your jeans by accident. This is a small but very sharp tool.
I have found that using an eyebrow razor helps me to unpick seams on denim way faster than using a seam ripper.
6. Fold and make the new Seam

Fold your jeans in half using the back seam as a guide.
Pin both layers of your pant’s legs together and sew the new seam over the mark you drew.
Do not sew until the end of the dart!!
See how I stopped sewing just 1 ½” before my dart actually ends.

I am doing this because industrial flat-felled seams are made with a special machine that doesn’t make an original seam first as we are doing here.
If we were to sew until the end of the dart we would be taking more seam allowance from one side than from the other.
Don’t worry too much about this for now. You will understand why on the next steps.
This is how it should look.

Before cutting out the excess, try your pants on and see if you like the new fit.
You are going to notice a small part sticking out from the part we left open. But otherwise, the seam should sit nicely over your body.
7. Measure the new seam allowance and cut out the excess.

The standard seam allowance for a flat felled seam is ⅝”.
If you aren’t sure of how much seam allowance you should draw, measure the distance from the center seam out.
Once you finished drawing the seam allowance from the top of the waistline to the end of the dart cut off the excess.
Do not cut more than that, especially when you get closer to the end of the dart.
8. Remove the second topstitch and prep the flat felled seam.

Now you can remove the original center seam.
Check out how I unstitched about 2” more of the point where the dart ends.

This is going to help me to mimic the original seam better.
9. Make the new Back Seam

We are going to make a new seam using a flat felled seam tutorial.
Turn your jeans to the right side and press the seam to one side. Follow the original seam folds.
Place your pants on top of your ironing board or any other flat surface.
Use your fingers to fix the fold of the open part of the seam as I am doing in the picture here.
The new fold should follow the fold of the original seam.
Turn the pants on the inside and fold the larger seam to cover the other side of the seam.
Press and make a basting stitch to hold the folded flat felled seam in place.

Use a topstitch thread a denim thread or a double thread on the needle to make two top stitches.
Start your seam a few inches over the old seam. Remember to make a backstitch at the beginning and at the end of your seams.

10. Sew the waistband and belt loop back in.

Now you are going to take the same measurement of the waistline on the waistband from the center.
Cut out the excess and press the seams open.
Finally, slip the waistline of the pants inside the waistband and then make the new seams.

As we did on the back center, sew a few stitches over the old seams at the beginning and the end.
To sew the belt loop back use sewing clips and sew it very slowly.

How to make Pants Waist Smaller without Sewing. 5 Ways.
Now that you know the best way to fix the waist of your jeans to make them smaller, I am going to give you more options to do it without sewing.
Most of these options are temporary, and you should use them only at the moment of wearing your pants.
If you fix the waist with any additions such as an elastic band or safety pins, remember to remove them before throwing them in the washing machine.
1. Safety Pins Method.
This is one of the quickest and the one hack that will look better.
But this is also the most dangerous one. The pins can open while you are using your pants and poke you.
So if you are using this method, get super strong and good-quality pins.
Start by putting your pants on inside out.
Pinch the excess fabrics from the back and pin on the waistband. Insert another pin on the highest part of your glutes.
Take the pants out and pin more safety pins in a straight line from the waistband to the lowest pin.
Make sure that the pins are closed and put your pants back on.
Remember to remove the safety pins before you put your pants in your washer machine.
2. No-Sew Elastic Method.
Before you make the mistake of cutting a slit in your pants to insert an elastic read this.
There is no need for it.
You can add a temporary elastic with a safety pin on both sides.
The safest way to add elastic is to cut two pieces and place them on the inside of the waistband.
You can pin through both layers of your waistband. Or, only on the inside layer so it won’t show on the outside.
3. Hair Band Method.
Easy and quick!
Take a hairband and tie it around one of the belt loops on the front.
Stretch it and insert the other side through the buttonhole. Make a knot wrapping the buttonhole.
Done!
This method is my favorite because you don’t even need to take your pants off. And it can be done with something you probably already have wrapped in your wrist.
4. Belt Loop Method.
Not the cleanest of finishings. But if you literally have anything else, this will be the method that is going to save you.
Insert the jean’s button into the belt loop next to it. Then button up as normal.
You will end up with a fold on your jeans, and a tight waistband. You can cover this up very easily with your shirt.
5. Overlapping closures Method.
The last trick is an easy and fast one. All though you will need a couple of strong pins for this one.
Is as easy as overlapping the buttonhole side of your jeans over the button one.
Pull until you feel that is tight enough.
Then simply keep it in place with the help of a couple of safety pins. Cover it up with your shirt or t-shirt.
I want to conclude this article by saying I wouldn’t use any of the no-sew methods to make my pants waist smaller unless I absolutely have to.
Use these methods if you need to fix your pants temporarily before taking them to your favorite seamstress or fixing them up yourself.
Remember safety pins get rusted if you don’t remove them from your pants before throwing them in the washing machine.
Let me know which one of these hacks worked the best for you in the comment box below.
Don’t forget to follow us on Social Media!!
Psst…Is this article helpful to you?? Please support us so we can keep making awesome tutorials for you by buying us a cup of coffee here. We will be forever grateful!





Dear Daphtne,
This is an awesome idea to adjust the Jeans or any other pans!
Thank you so much for your effortless work.
Yours Sincerely,
Ana
Hi Ana,
You are most welcome. I am so glad that this tutorial was easy to understand.
Sending lot’s of hugs!
Coming to this web page late, but your instructions are FAR more complete than any other page I’ve seen on how to cut down a pair of jeans to fit your waist. I just lost weight this past year and I’m ready to take my jeans in. Thanks for being so thorough in your instructions! It really helps!
I am so happy that you found a useful and understandable tutorial here. Please let me know if you have any more questions about making pant’s waist smaller. I’ll be happy to help!
Thank you for this tutorial, Dafhtne. My pants waists are always a bit big because of my hips :/ and I have a bit of a swayback. I don’t wear jeans (I think I’ve owned maybe 5 pairs in my 64 years 🙂 ), but most of my pants have the flat-felled seams.
I am so glad this helped you!
I totally get the frustration 🙁 Its my lifelong pants problem. I actually almost never get pants because of this same thing.
WOW I hae done dart down each side of center seam and its okay but now I am going to use your method. It looks great when finished. As for the pin method, never again! ask me why?
thanks so much for this.
Oh please tell me why LOL! XD
Kidding, I have been there. NEVER AGAIN! I went out with safety pins to a dinner party… It-was-awkward!!
This is my favorite method to make the pants waist smaller because it doesn’t leave extra bulks and my pants are very tight as they are already!
I mean… I guess I could get a bigger size, but that only means a bigger waist.
Thanks for the tutorial I think it’s the best way to do this
Thank you so much Julie!
I think so, and I hope it works for you. Let me know if you try this!
Thank you so much Julie, I think so. Even though is the hardest way to do it, its also the cleaner one.
Let me know if you try this method 😉