
If you’ve been craving a sweet and simple holiday craft, then this Tree Felt Christmas Garland DIY is going to become your new December obsession.
This project is perfect if you’re looking for a Beginner Christmas Sewing Craft, cute Felt Holiday Decor DIY Ornaments, or a fun way to use up scrap felt from old projects.
Download the machine embroidery files and make this garland quicker than you think!

NOTE: This post contains affiliate links, which means that if you make a purchase using one of the links in this article, I may earn a commission at no extra cost to you (To know more about this, click here.)
About This Project
I’ve been staring at my bundle of rainbow felt sheets for weeks now, itching to turn them into Handmade Felt Christmas Decorations, and with Christmas right around the corner, I finally gave in!
I originally wanted to finish these felt trees by hand with a blanket stitch, but between all the projects on my to-do list, I knew it wasn’t going to happen.

Luckily, my sewing–quilting–embroidery combo machine came to the rescue—honestly, this thing saves me every single time. I designed the tree shape by hand-drawing, then on my computer, to turn it into an embroidery file, and oh my goodness… it makes this project SO fast.


You can finish your entire DIY Felt Tree Garland in a single afternoon. And yes, I even have a little hack to help you embroider them even quicker without re-hooping every time.

You can even switch up the felt colors and make rainbow trees, pastel trees, vintage-inspired trees—seriously, the possibilities are endless.

You can even use them as ornaments for your Christmas Tree!!

Choose between the most popular embroidery file types: DTS, EXP, HUS, JEF, PES, SEW, VIP, XXX.
CHECK THESE IDEAS TOO:


Customization Ideas

From here, you can personalize your garland however you like:
- Add ribbons or bows
- Cut out little stars and glue them to the top of each tree
- Use rainbow felt for a whimsical look
- Add mini pom-poms
- Create a snowy version with white felt

I made two versions—one simple and one extra sparkly. I’d love to know which one you like better!
Ready? Let’s make your home magical this Christmas!
Tree Felt Christmas Garland DIY (Full Tutorial)

How to Make an Embroidered Felt Tree Garland for Christmas
Materials You Will Need

- Tree Felt Garland embroidery file by My Golden Thimble
- Felt sheets in green tones (or any colors you want!)
- Brown felt for the tree trunks
- Medium to lightweight interfacing (optional)
- Embroidery machine
- Craft stuffing / poly-fill
- Chopstick or point turner tool
- Sharp scissors or applique scissors
- Tweezers (pointed ones work best)
- White glue or cold silicone glue
- Beading needle (thin)
- Thread (use 3–4 strands for strength)
- Beads (optional but super cute!)
Step 1: Prepare Your Felt Layers
The first thing I did was prepare my embroidery hoop with two layers of felt fabric. You can sandwich a layer of medium-to-lightweight interfacing in between, but honestly, you can skip it if you want. The embroidery stitches hold beautifully even without it.
Hoop your felt securely so it stays nice and flat during stitching.
You can also use my trick to float the two layers of felt on a hoop with embroidery stabilizer, with a cut off of the embroidery area.

Then pin or hand-baste the two layers of felt to the stabilizer and start embroidering.
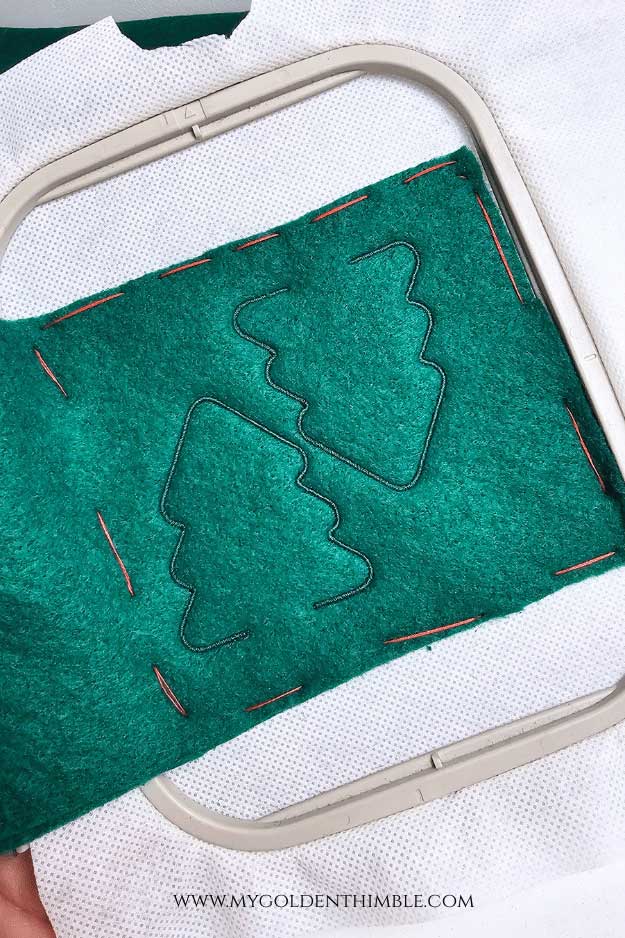
I made a long strip with both layers of felt so I could just “slide” the layers each time one batch was finished.
This made everything 10 times faster!! Plus, it saves so much material.
Step 2: Embroider Your Felt Tree Files
Now for the fun part: embroidering the little trees!
Each file includes two trees per hoop, which means every time you press start, you get a pair done. It takes about 4 minutes for each set of trees to stitch out, making this a super-fast Felt Christmas Garland DIY project.

I embroidered multiple sets using two different shades of green and alternated them in the finished garland for a pretty layered look.
You’ll notice each tree has a small opening at the bottom—this is intentional! This opening is where we’ll insert the filling and trunk later.
Step 3: Embroider the Tree Trunks
Next, hoop your brown felt to make the tree trunks. The file comes with 12 little logs, spaced perfectly so you can cut around them.
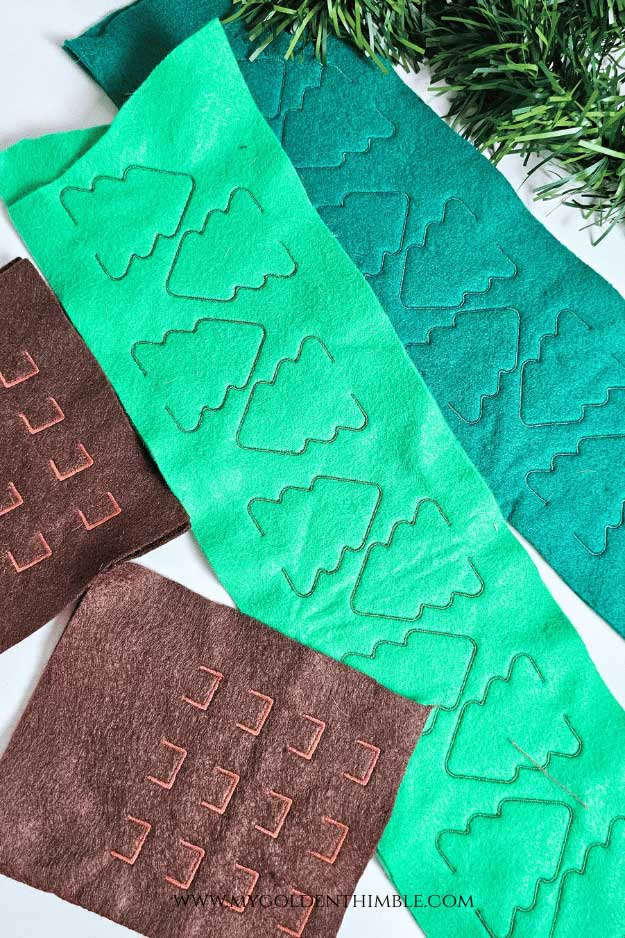
Important:
Leave ½” to ¾” of extra felt at the top of each trunk. This extra felt will slide into the base of the tree, helping everything stay in place once stuffed.
Step 4: Cut Out Your Felt Pieces
Once everything is embroidered, it’s time to trim your pieces.
Use sharp scissors to carefully cut around each tree, getting close to the stitching without clipping the threads.
For the trunks, remember to keep that extra bit of felt at the top—this is what attaches your tree to the log.
Step 5: Stuff and Assemble Your Trees
Grab your chopstick or point turner tool and gently push a small amount of stuffing into each tree. Don’t overfill—just enough to give them a cute, plushy look.
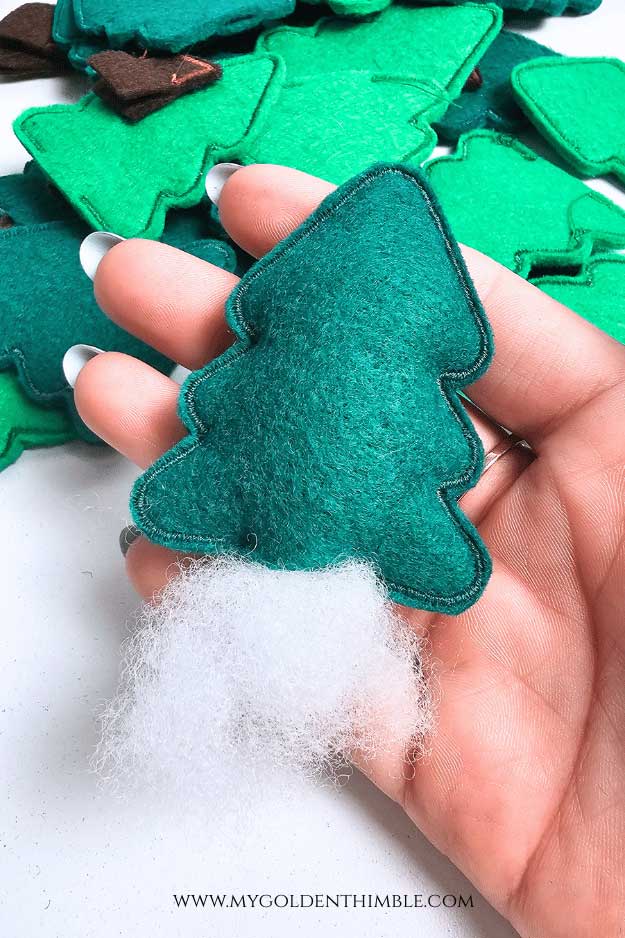
Before inserting your trunk, trim the sides slightly into a narrow triangle. This makes it easier to slide into the opening at the base of each tree.
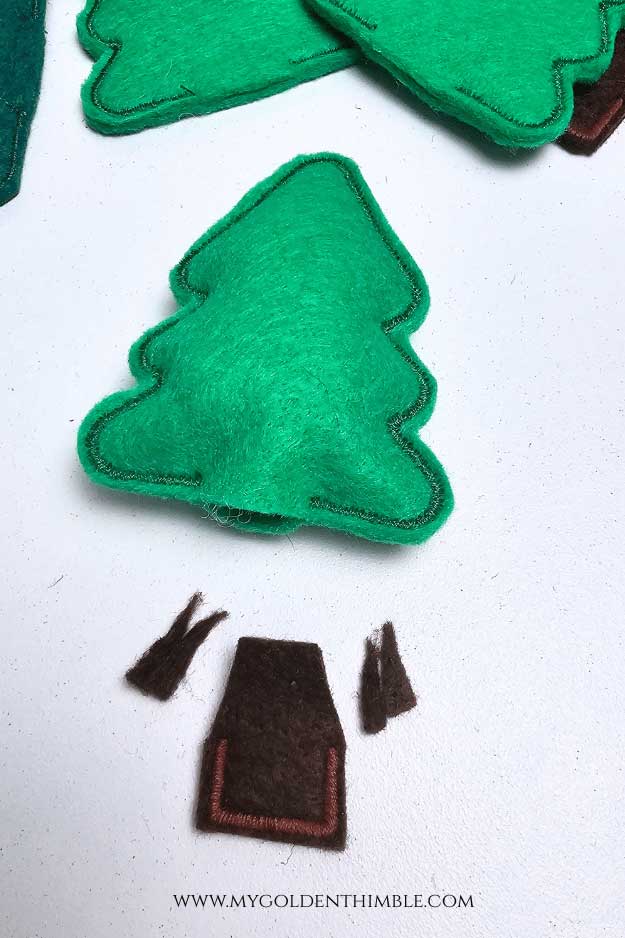
Use tweezers to tuck the trunk inside the tree opening.
Add a tiny dot of white glue or cold silicone glue to secure it. Make sure it’s just a teeny bit so it doesn’t seep through the felt.
Step 6: String Your Felt Ornament Garland
Here’s where your garland comes to life!
Ever since I made my Halloween Ghost Garland, I’ve been obsessed with using beaded thread—it adds such a magical shine.
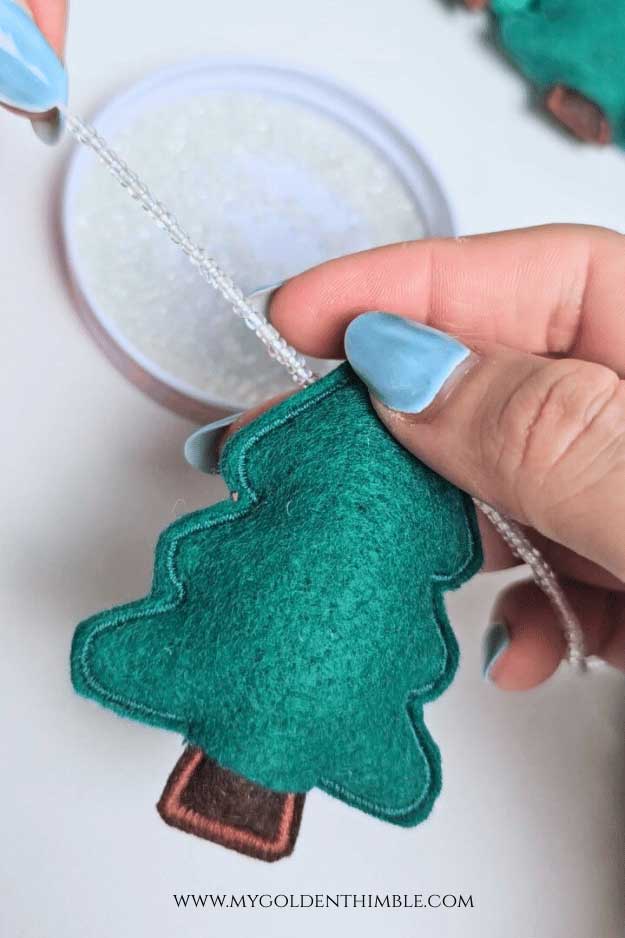
Thread 3–4 strands of regular thread through a thin beading needle.
String your beads, then pass the needle through the back of one tree, add more beads, pass through the next tree, and continue until you reach your desired garland length.
Use fewer beads between trees to keep your Tree Felt Christmas Garland DIY short, or add more beads to make it long and dramatic.

Want extra sparkle? Add tiny beads to the front of your trees to mimic ornaments.
Conclusion Tree Felt Christmas Garland
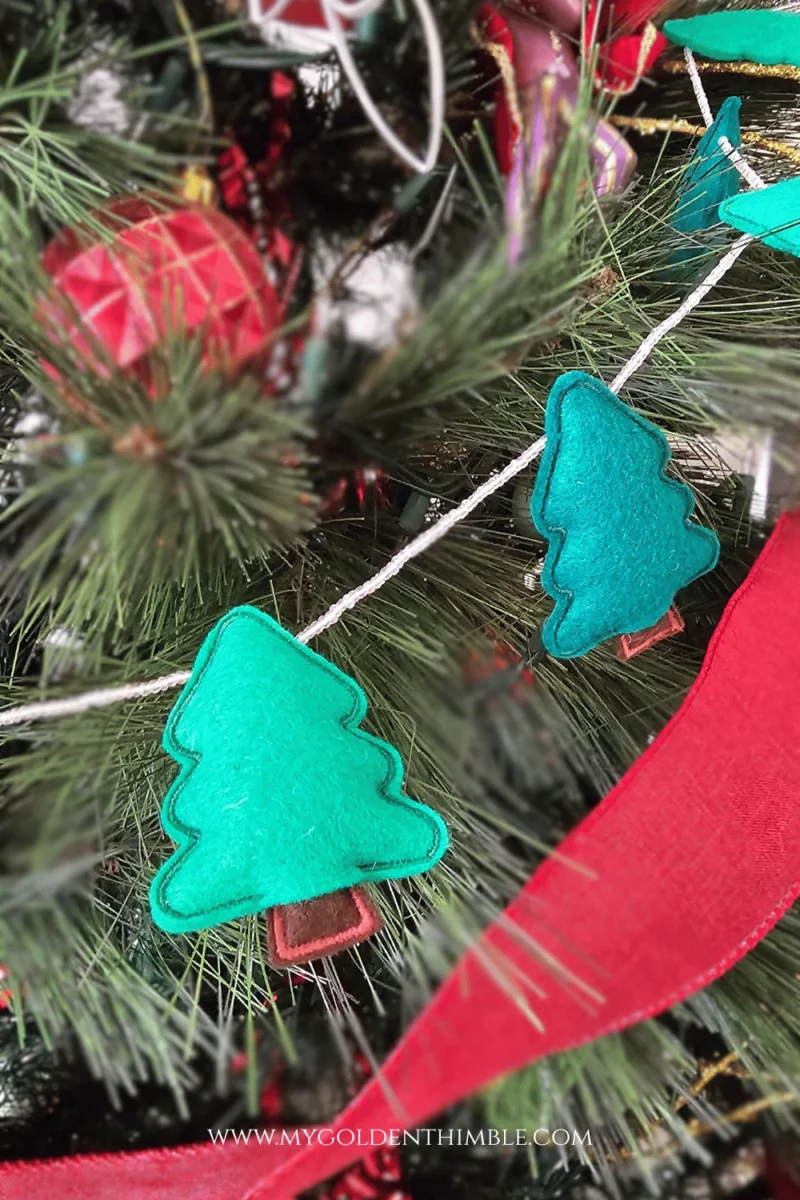
And that’s it—your charming Tree Felt Christmas Garland DIY is ready to hang! This project is fast, beginner-friendly, and perfect for anyone who loves Handmade Felt Christmas Decorations or wants a beautiful, customizable Felt Holiday Decor DIY Project.
I hope this tutorial inspires you to create a cozy and colorful Christmas for your home.
Let me know how your garland turns out and what colors you chose—I absolutely love seeing your creations. Happy sewing, my friend!








does this work in a 4×4 hoop?
Yes! It is for a 4×4 hoop machine! That’s the machine I have and it works wonders. 😀