
In today’s tutorial, I’m going to show you exactly how to embroider names on stockings just like I did on this gorgeous sequin Christmas stocking.
If you’ve ever wanted those gorgeous personalized stockings without needing an embroidery machine, this is totally the project for you.
I’ll walk you through everything I did — from working with the sequin fabric (yes, it’s easier than it looks!) to getting the cuff ready, to stitching the name on by hand so it looks clean, cute, and super festive.
.And of course, I’ll link to the free Christmas Stocking sewing pattern I used, just in case you want to sew the whole stocking from scratch like I did.
So grab your fabric, find a cozy spot, and let’s make something extra magical for the holidays together!

NOTE: This post contains affiliate links, which means that if you make a purchase using one of the links in this article, I may earn a commission at no extra cost to you (To know more about this, click here.)
About This Sequin Christmas Stocking
I’ve been wanting to make my own Christmas stocking that actually feels like me for the longest time.
Well, this year, while scrolling for inspiration, I suddenly had one of those fun little creative shrugs of inspiration. I remembered that I still had some leftover fabric from an evening gown I made a few years ago… a hot-pink sequin fabric that I’d been saving for something special.
And honestly? This was the perfect moment.

So I grabbed those sequin scraps, cut out my pieces, and decided this would finally be the year I made my own fabulous stocking — complete with my name embroidered on the cuff.
Now, here’s the funny part: I actually do have an embroidery machine… but the hoop is only 4×4 inches. Even though my name is super short (just three little letters!), the design I wanted wasn’t going to fit across the width of the cuff.

So I thought, “Okay, we’re improvising!” and decided to embroider it using my regular sewing machine with a standard presser foot.
And let me tell you — it turned out SO good. Better than I even expected!
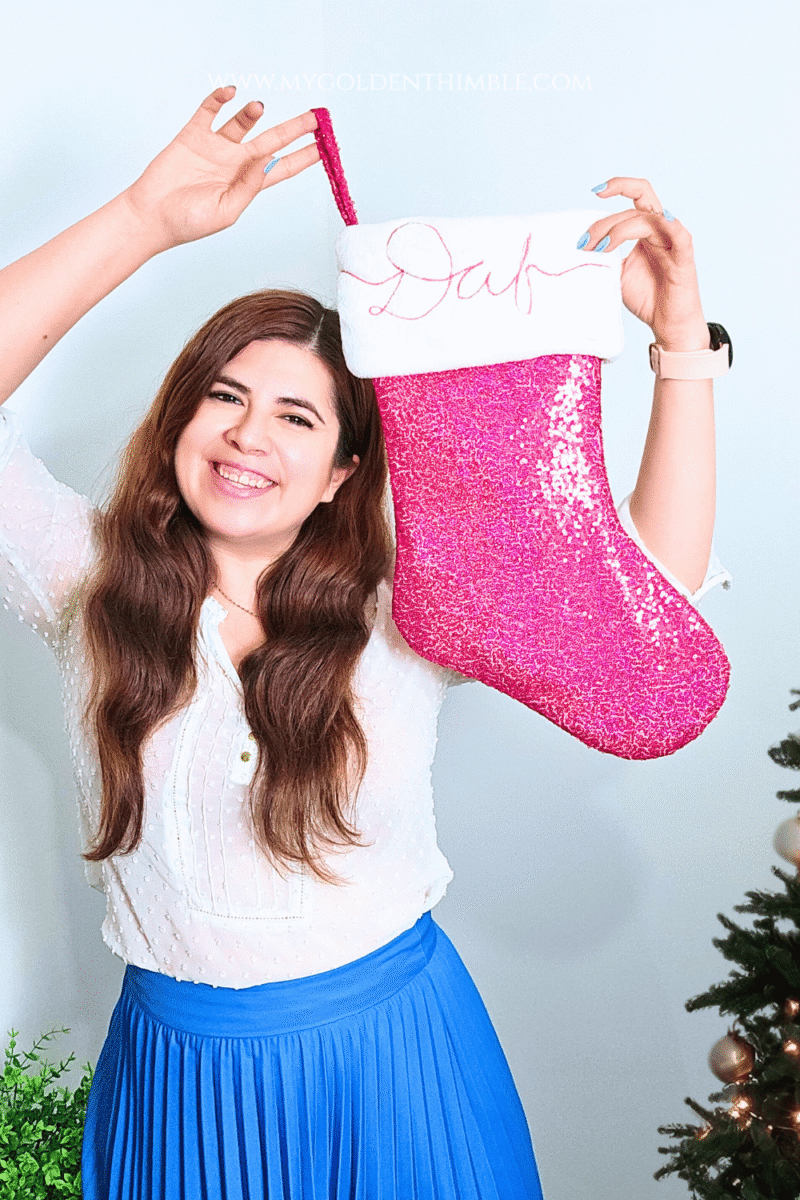
Today I’m going to show you exactly how I did it, whether you’re making your stocking from scratch or just planning to “embroider” a name on a premade stocking.
And because this sequin fabric had a personality of its own, I’m also sharing my best tips for working with sequins, so don’t miss those!
How to embroider names on stockings (Using a Regular Sewing Machine!)

What I Used for This Project
Here’s everything I gathered to make my sparkly personalized stocking. Most of these are common sewing tools, but a few are extra helpful when working with sequins:
- Stretchy sequin fabric scraps (mine were leftovers from an old project)
- Woven canvas interfacing
- Lining fabric
- Embroidery stabilizer
- Water-soluble stabilizer
- Regular polyester thread
- A regular sewing machine
- A pencil (and a pencil sharpener)
- Cutting mat and rotary cutter
- Loop turner
- Fabric scissors
Preparing Your Cuff for Embroidery
For this part, you’ll be relying on two key materials: a bottom stabilizer that goes behind the cuff, and, my favorite, the one that really made the difference, a water-soluble stabilizer that you place on top of the cuff.
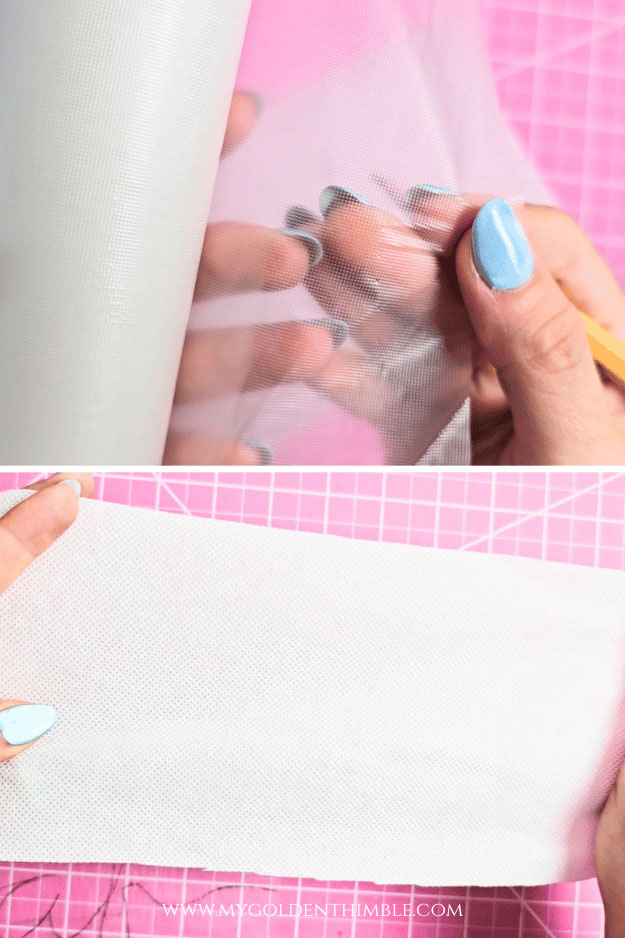
A couple of tiny tips before you start: make sure your pencil is really sharp; we are going to want a fine point for this step.
Start by tracing the top part of the original cuff sewing pattern onto paper — only the top portion. Mark a ½-inch seam allowance at the top and a ½-inch seam allowance at the bottom so you can clearly see the middle of the cuff.
This helps you center the name and avoid awkward placement later.
On that pattern paper, write your name or initials exactly where you want them.
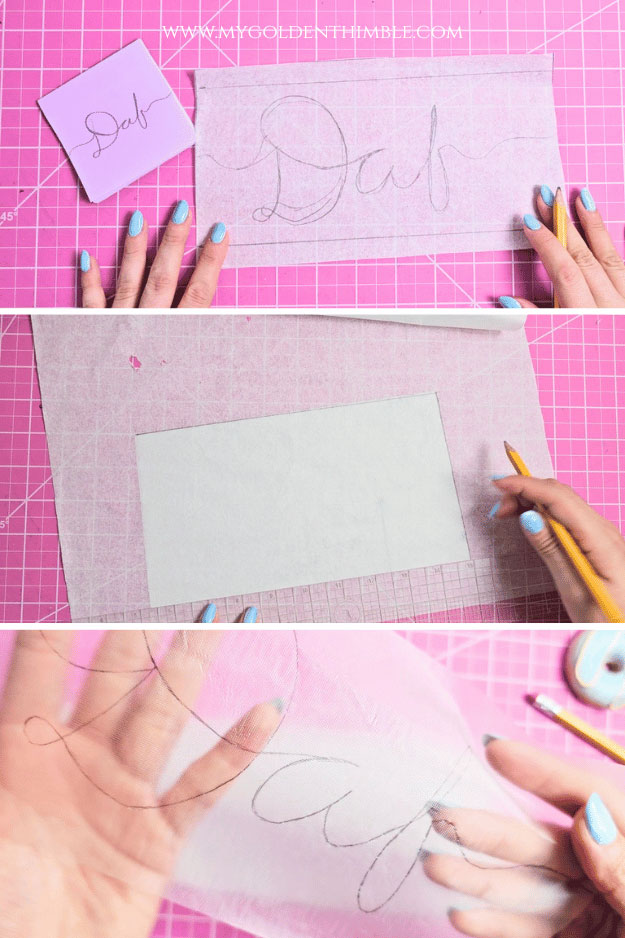
I hand-lettered my name and ensured the letters extended from one seam to the other by connecting two guidelines on each side, so the name appears to naturally grow from seam to seam.
Here are some examples of how you can do this by just connecting the lines on the sides.

Next, take a piece of water-soluble stabilizer and trace the name onto it.
This step is super important: use a very sharp pencil and make a single, very fine line — do not trace multiple strokes or go over the line. That single fine line will be your sewing guide, and you want it to be as clean and precise as possible.
When you’re ready to stitch, sandwich the cuff like this: bottom stabilizer behind the fabric cuff, the fabric cuff in the middle, and the water-soluble stabilizer on top.

Practice makes perfect
Once you have your cuff all perfectly sandwiched with stabilizers, set it aside for just a moment. Before we touch the real thing, we’re going to make a second little practice sandwich using the same fabric and stabilizer layers.
I know this might sound like an extra step, but trust me, this is NOT the moment to skip practice.
Even though we’re using a regular presser foot and a regular sewing machine, this technique behaves differently from normal sewing. You need to feel how the fabric moves, how the stitches land, and whether the stabilizer layers you used are enough.
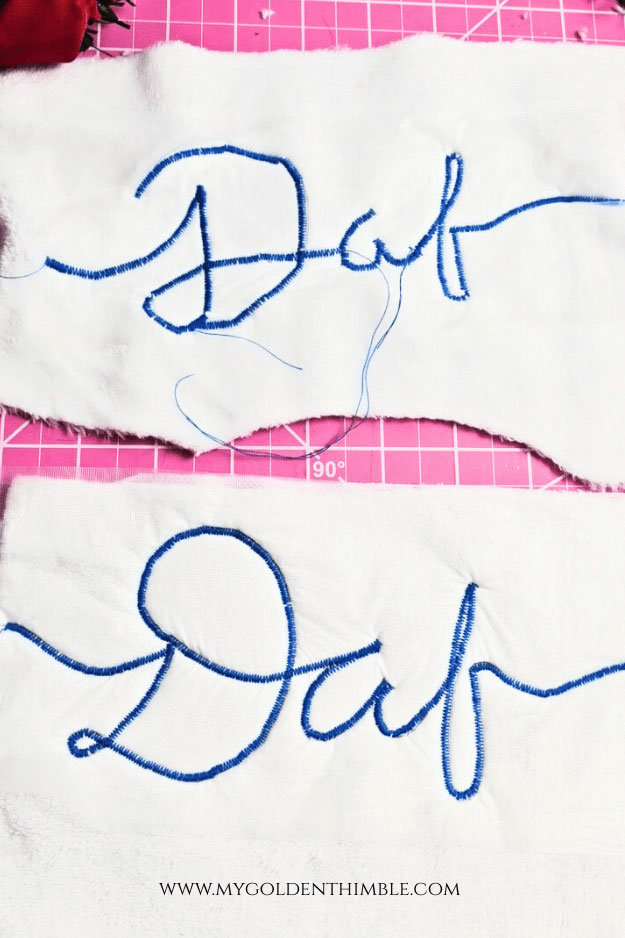
When I was testing mine, I made two very different practice tries, and the improvement from one to the next was huge.
Practicing first helps you see where things go wrong so you can adjust before touching that final cuff. So yes — practice first, always. Your future self will thank you.
Machine Settings
To mimic the look of real embroidery stitches, set your sewing machine to a zigzag stitch that is very narrow with a very short stitch length.
Here are the settings that I used. (Try widening the stitch to make it fuller!)

This creates that tight, satin-like line you usually see from an embroidery machine.
Start Stitching the Name
Now it’s time to bring your cuff back and slide it under the machine. As you sew, the most important thing (and I mean the MOST important thing) is to keep the pencil line centered exactly under the middle of your presser foot.
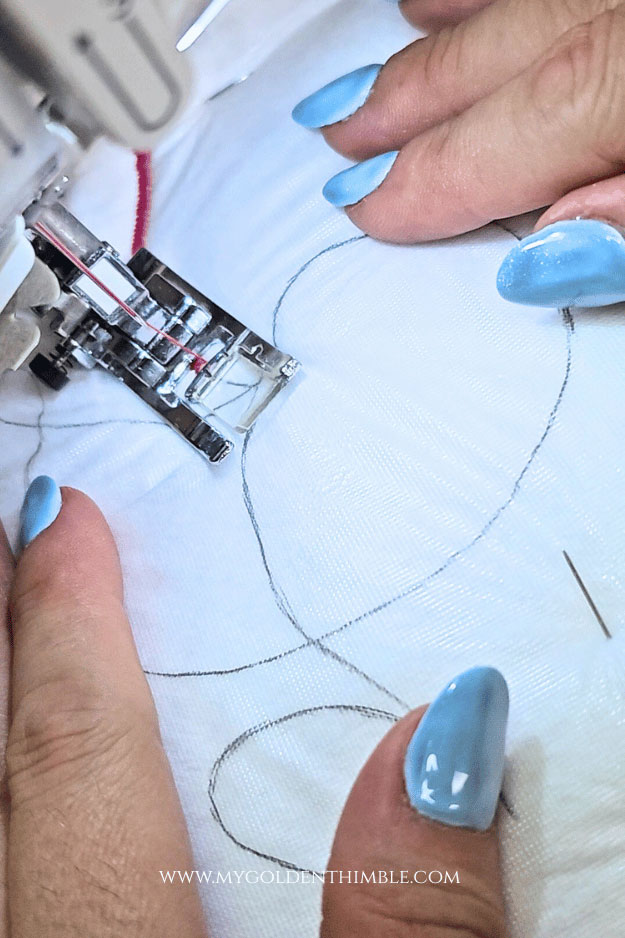
You want your needle to fall exactly on that fine line you traced earlier. Go very slowly, guiding the fabric so that the pencil line stays aligned with the center mark on your presser foot.
Think of it as drawing with thread, smooth, controlled, and steady.
Tips for Curves (This Is Where the Magic Happens)
One of my biggest tips is to pivot a LOT… and when I say a lot, I really mean a LOT.
Every time you approach a curve:
- Stop with your needle down.
- Pivot slightly.
- Take another tiny stitch.
- Pivot again.
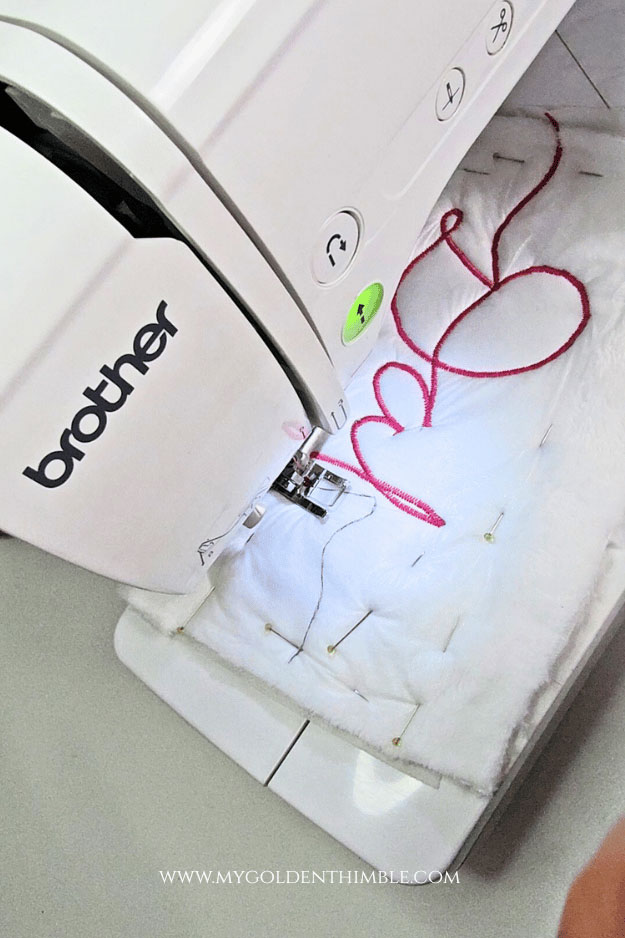
Repeat this mini pivoting dance all the way through every curve. This is how you get elegant, smooth lettering instead of wobbly or crooked lines.
Tips for Working With Sequin Fabric for Your Christmas Stocking
Now let’s talk about this gorgeous sequin fabric I used — the same one from the beautiful dress I made in my Evening Gown DIY tutorial. As fabulous as sequin fabric is (and this hot-pink one was truly fabulous), there’s one little catch: sequin fabric is usually very lightweight.
And for a Christmas stocking?
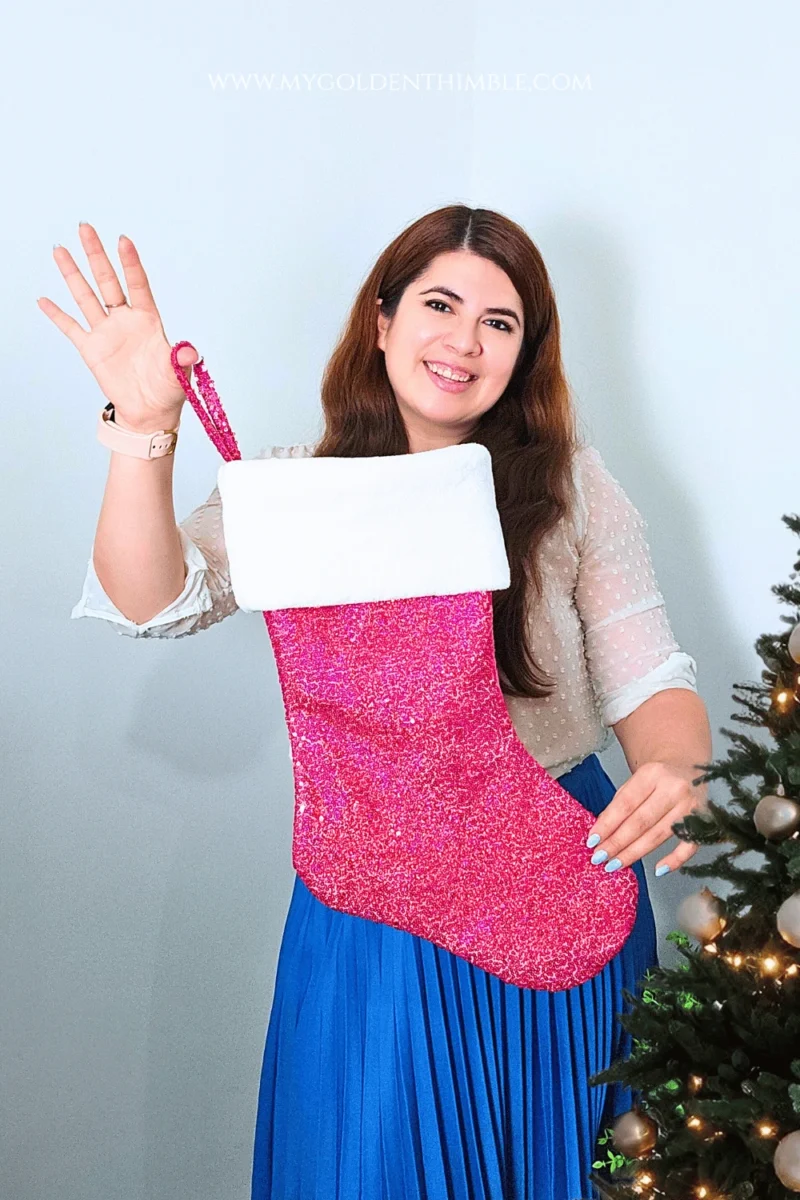
Well… lightweight fabric just won’t cut it. We want something sturdy enough to actually hold its shape on the mantle, even when it’s empty. Nobody wants a sad, floppy stocking, right?
So here’s exactly how I fixed that.
Reinforcing the Sequin Fabric
To give the stocking body and structure, I added a second layer of sturdy fabric underneath the sequins, right on the wrong side. I chose a woven canvas that almost felt like a light denim — and I’m telling you this so you have an idea of the exact thickness and sturdiness you want for your reinforcing layer.
For cutting, here’s what you’ll need:
- One layer of sequin fabric
- One layer of canvas interfacing (the sturdy canvas fabric)
- One layer of lining fabric
But for now, we’re only working with the sequin + canvas combo.
How to Combine the Layers
Place your sequin fabric on top of the canvas fabric, match all edges, and then sew a basting stitch at ⅛ inch all the way around the stocking shape.
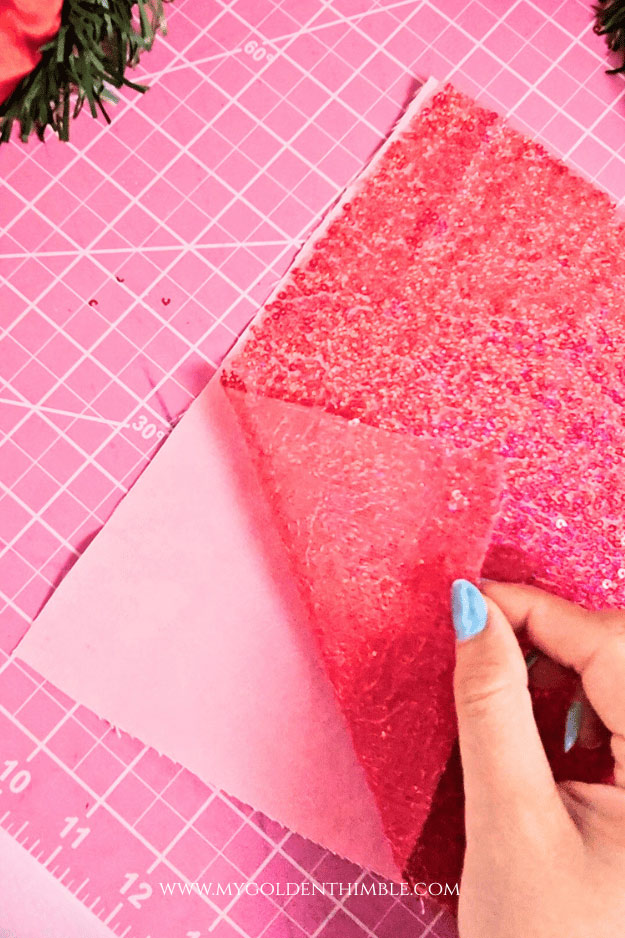
This creates a clean, workable piece where both layers behave like a single fabric. You’ll notice instantly how much better the structure feels.

In the photos, you can really see how well the stocking holds its shape — it’s sturdy, crisp, and ready for holiday magic.
Finishing The Stocking
Now that your cuff is embroidered and your main fabric is stabilized, you’re ready to assemble your Christmas stocking. This is where everything starts coming together beautifully!

Remember: the full step-by-step sewing instructions for assembling the stocking are in the original tutorial, where you can also download the free version of the pattern or grab the premium version with more sizes.
Thank you so much for following along with this tutorial. I truly hope your new stocking turns out as fabulous as you imagine and that it reflects your personality with your own beautifully stitched name shining right on the cuff.








This is gorgeous! I downloaded your stocking patterns and I am curious which size you used to make this pink sequin stocking? It looks like the perfect size!! Thank you for all your cute patterns and projects!
I used the 17″ one! The second to the biggest one. It really has the perfect size. Big enough for big stocking stuffers but small enough to hang beautifully on the mantel. The mini stockings are great for small gifts.