
Today I want to offer you this information on Sewing with Arthritis. All these tips are going to help you live a great sewing life. Even with bone pain.
Let me start this post by saying that I am no expert on this topic. I am just an empathetic friend who loves to do research and help her loved ones.
Sewing is a magnificent hobby. And I take the word hobby pretty lightly, as I consider it a true way of living.
There are two things I am sure I will be doing until I can’t do them anymore. And one of them is sewing.
I can’t imagine my life without it. And I am sure that I am not the only one who feels like that.
Here at My Golden Thimble, we have readers from all ages and all parts of the world. And today, I want to take special consideration for our seamstress’s friends with arthritis and bone pain.

NOTE: This post contains affiliate links, which means that if you make a purchase using one of the links in this article, I may earn a commission at no extra cost to you (To know more about this, click here.)
Disclosure: This post doesn’t contain medical advice, nor should it be taken as such. Do your own research about each topic and ask for help and opinions from your doctor.
Is it possible to keep Sewing with Arthritis?
Growing up, I saw my granny start getting bone pain as she sat beside me on the sewing machine to teach me how to sew. I remember watching her rub her hands before threading the machine.
At that moment, I didn’t understand what was happening. But today, when I see my mom doing the same movement, well.
Let’s say that my heart starts to fill with a sour-sweet sensation. I understand now that that gesture is from bone pain. Know that I can empathize easier with the members of the community that say they are experiencing similar things while sewing.
And I get it! Sewing, as exciting as it is, is a passive activity. We spend most of the time sitting and often looking down on our projects. We also use a lot of our hands and eyes. That alone can cause back, hands and headaches.
The thing is. What can you do with an actual condition like arthritis or osteoporosis? How do you handle your favorite activity with the less pain possible?
Today I am going to share with you a summary and a lot of resources that I found while doing my research on this topic. I will also share the tips and hacks that the members of our community told me about their experience sewing with this kind of issue.
I hope that they can be somehow useful to you and your sewing life.
Because for the life of me. Not sewing is not an option.
Other Resources on Sewing with Arthritis:
17 Tips and Tricks to Sewing with Arthritis and Bone Pain.
1. Don’t spend too much time in one position.

Problem: Spending too much time in a single body position.
Solution: Put a timer so you remember to change positions, stand up, and walk around.
The first tip might sound obvious to many. But don’t forget I sew too.
I know how we tend to spend HOURS sitting in front of the sewing machine. And don’t even get me started with seam ripping!
I have had days when I start a new sewing pattern or a project, and by the time I look up, I realize that I missed lunch and dinner.
Has this ever happened to you?
The worst part of these situations is the type of posture we take when doing them.
And we don’t even realize it.
Having your arms and hands in the same position for a long period of time might cause motion injuries and a bad posture. Especially if you are slouching too much.
A good tip to remember is to change postures and move your joints during the day to set the alarm.
Dignity Health says that you should stand up for five minutes out of every hour you spend sitting down.
I think is a good start. But the timing is up to you.
You might need more or less.
Try to measure how long you sew before the pain starts coming and set the alarm before that time.
2. Pay attention to your posture.

Problem: Slouching over the sewing table.
Solution: Learn the best sitting posture to avoid back pain.
Having a correct sitting position is essential for your spine health. It can also avoid many future injuries and prevent the pain from current ones.
I get how easy it is to slouch when sewing. We often need to spot small details in seams and cuts.
For starters, try to avoid hunching towards the table to see anything closer. Instead, be conscious of getting the project near to you.
The second thing is to know which sitting position will help you reduce the tension on your back.
According to Medical News Today, the best sitting position meets the following criteria.
- Keep your feet flat on the floor.
- Maintaining a small gap between the back of the knees and your chair.
- Changing your sitting height so your knees are at the same level as your hips.
- Relax your shoulders.
- The forearms and knees should be parallel to the floor.
- Hold your elbows at the sides, forearms resting on the desk, maintaining an “L” shape.
- Keep the back against the chair.
- Look straight in front of you (try to lower your head as less as possible). Look down using your eyes.
3. Rearrange your Sewing Room Layout.
Problem: Your stations are arranged, so you don’t move much.
Solution: Rearrange the things you need, so you have to walk more.
Ok, so now we know that we have to take constant breaks to change positions and stand up. Right?
Well, a great way to force us to do that is to modify our perfectly convenient Sewing Room Floor Plan. I know I do recommend a lot to ease up our stations for easy access on my Sewing Room Organization Challenge. But in this case, the good thing to do is the exact opposite.
Instead of putting your stations (that is, your ironing station, your cutting station, tools, etc..) near you, so you don’t have to stand up while you are sewing, you are going to put them as far as possible.
The end goal here is to make you stand up and walk around the room when you need pressing or cutting. Even if you need to grab your seam ripper. Put it far away!
In fact, you can get a different ergonomic chair and make a “seam ripping station.” That way, if you need to undo seams, which we know takes a little while, you will have to stand up and sit in a different position.
There is one chair that I recommend in my “Chairs to reduce Back Pain” post that will be perfect for that. It’s called a kneeling chair, and you sit on it facing the front.
4. Consider investing in an Ergonomic Chair.

Problem: Uncomfortable sitting positions.
Solution: Getting an Ergonomic Chair to avoid back pain.
Sitting for long periods of time puts a lot of pressure on your spine. And you know as well as I do that when we are sewing, we spend huge amounts of time sitting down. Things can worsen if you have a bad chair that doesn’t allow height modifications. They might have a hard surface or an inconvenient backrest.
I have made a post listing the best-rated ergonomic chairs for back pain issues. Look for an ergonomic chair that is specifically designed for people who spend a lot of time sitting down.
According to with PyshioMed, a good ergonomic chair will have multiple adjustment settings available. For example, you will be able to adjust the height of the seat and the height of the backrest. The seat and back cushions are ergonomically designed to fit your body in a comfortable position.
You can also adjust the seat pan tilting it up or down depending on your needs. In the ideal situation, you will also be able to adjust the tilt of the back, but if the chair you get doesn’t have this feature, you can always get a lumbar support cushion.
5. Get a back support cushion.


Problem: Bad sitting position causes pain in the lower back.
Solution: Get back support for your chair.
Ergonomic chairs can be a very big investment. I know.
If you don’t have the money to do that right now, a cheaper alternative is getting back support for your current chair.
The good thing about a good lumbar support cushion is that you can move it up and down the back of your chair to fit the best position for your body.
Using back support will take the pressure out of your lower back, realizing the pain and preventing future injuries.
6. Use a Knee Pedal instead of a Foot Pedal.
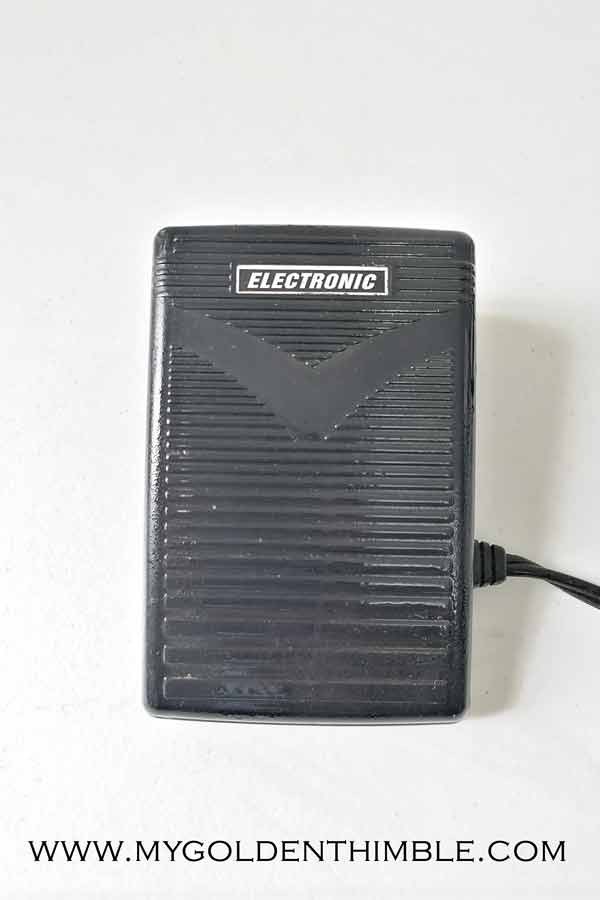
Problem: Pressure and movement of the ankle on the foot pedal.
Solution: Modify your table to hand the pedal at knee height.
Many seamstresses with osteoporosis problems say that one of the most annoying pains is the one on the feet.
To press the foot pedal and make your sewing machine sew, you have to raise and lower your foot constantly. This keeps the foot elevated and at constant movement on the ankle. Which, as we saw in point number 2, is a bad thing.
Some people suggested alternating the foot you use to press the pedal. That way, the pressure won’t rely on only one foot.
The solution I like better is raising the pedal at a knee height. With an easy adaptation of your sewing table, you can make it, so the pedal is next to you. If you want to make your machine go, then you will only need to push your leg to one side.
That will take the ankle movement completely away.
7. Use the start/stop button
Problem: Pressure and movement of the ankle on the foot pedal.
Solution: Switch to the start/stop button on your machine.
Most modern affordable machines now have a stop and start button.
It works by unplugging the foot pedal from your machine. As its name states, you push it to start and to stop sewing.
If it is the first time, you use this, lower the speed on your machine.
You might need to practice mastering this sewing like this. But it will be so worth it as you won’t need to apply pressure on your feet or on your knee.
A lot of seamstresses use this feature only to sew on their machines and report that it has made a huge change in their leg’s bone health.
8. Take breaks, walk and stretch.

Problem: Being sedentary all day.
Solution: Include a short stretching routine in your day.
One of our readers recommended this great chapter of a podcast in which the writer of the book Sew Healthy and Happy talks about stretching in the sewing area.
Rose says that stretching helps your body fluids to flow. So everything goes where it is supposed to.
That’s why it’s a great idea to include a stretching routine between your breaks. Here is a great stretching routine designed for quilters to stretch everything it needs to be stretched.
She says she is a firmer believer in stretching as soon as you need to do it. And that’s great when you are used to doing it.
I second this. But I also know how easy it is to get lost in our sewing work. That’s why my recommendation is that while you get used to stopping and stretching constantly through your day, you put an alarm.
I have a pretty cheap smartwatch that has a sedentary reminder. If I spend more than 1 hour standing up, it vibrates and shows a little figure stretching.
It is truly a great solution if you are forgetful like me.
9. Rearrange your Tools, Notions, and Materials so you don’t bend.

Problem: You must bend a lot to grab fabrics, tools, or materials.
Solutions: Put the materials you use the most in a higher position.
I understand why this point might be a hard one to follow.
It’s pretty easy to accumulate a lot of fabrics, materials, and notions. So it is understandable that most of us have shelves from the floor to the ceiling.
Nevertheless, if you have many of your most used materials on the lower ground, that will only mean you will need to bend more.
Try to scan your sewing room and identify the tools and materials you use the most. Put them at a height where you won’t need to bend at all to grab them.
You will see how much difference this easy arrangement makes in your life.
10. Get the right sewing tools for arthritis.


Problem: Using generic Sewing Tools.
Solution: Use special sewing tools to prevent bone pain.
Believe it or not, bone pain in sewing is a pretty common issue. That is so that many brands are working toward alleviating the pain in hands, hips, and legs that sewing might cause.
For example, when I was making my post about the best-rated rotary cutters, I found something cool.
There is this brand called Martelli that makes ergonomic rotary cutters for both left and right-handed.
And there are many other tools you can choose to use when you are sewing to help.
- Some of them are:
- Lightweight irons for pressing,
- Antifatigue mats for ironing,
- Copper compression gloves for your hands,
- Furniture raisers for your tables, and more.
You can find more tools that will help you sew with arthritis here.
11. Use a support belt.
Problem: Too much weight relies on the lower back.
Solution: Use a lumbar belt to give you vertical support and prevent rolling your back.
It is so easy to find me hunching my back when I am sewing. Does it happen to you too?
I often bend down to look closer to my seams or stitches because, above all, I have super bad vision.
Hunching your back puts all the weight of your upper body right into your lower back. Causing very bad pain there.
A good solution for this is to wear a lumbar support belt. These sorts of belts stabilize your back in the right position relieving pain and preventing bad postures while you are sitting or standing.
They are pretty comfortable to wear all day, and if you can’t rearrange your materials to be higher, this belt will help you bend securely.
12. Get a Standing Desk to alternate between sewing sitting and standing.


Problem: Too much time sitting down.
Solution: Get a modifiable height table for your sewing machine.
We will spend the most time in front of our sewing machines. So a great investment is to turn our sewing machine table into a standing table.
One that you can push up and down to alternate between sewing sitting down and sewing standing up.
You should raise your table until the needle plate of your sewing machine is at a height where your arms can rest bent over “the table.” A common error is to raise the table until the flat surface of it is at a comfortable height to rest our arms.
But in that scenario, we are not considering the height of the sewing machine plate. Which is the place where we will actually be resting our hands.
This standing desk is one of the reviewers’ favorites because it raises and lowers with the push of a button. That way, you won’t need to apply any effort to modify the height as much as you want.
13. Turn your Ironing, Cutting, and Sewing stations into standing stations.

Problem: Standing benching over the tables.
Solutions: Turn all your stations into standing stations with the correct height.
If you have the possibility to turn all your stations into standing stations, it will make a huge impact on your bone health. Also, it will force you to stand up regularly.
If you don’t want to invest in 3 different standing desks for each station, you can always use furniture raisers to do the trick.
The only thing is that it will probably have to be only standing stations because they are hard to put on and off. So I would recommend making only your cutting and ironing station that way.
There’s a general rule for a standing station in the sewing room. You must check that it is low enough, so your shoulders are down, not low, so your bench over to see what you are doing.
What we want to avoid here is to make our shoulders raise too much (because of a too-high table). But you also want to avoid bending over the table (if it’s too low).
If we follow the rules of point 2 of this list, then we must ensure our neck and shoulders have no tension at all.
14. Do sitting exercises.
Problem: There’s no time to do a proper workout.
Solution: Do exercises while you are sitting.
First of all, let me tell you. If there is someone who understands the lack of time to exercise, that’s me.
I know, I know all the fit people out there are going to say, “If you want, you can.”
Well, that might be part of the problem, my friend. After a whole day of working, cleaning, taking care of my dogs, doing chores, and driving around, the last thing I want to do is work out.
I only want to get home, pour myself a glass of wine and sit in front of my sewing machine. And I can almost see you through the screen, moving your head in agreement.
So, I got you, girl. If you can’t exercise properly, then the alternative is to squeeze in some effortless exercises. You don’t even have to stand up.
The moment you start feeling like you need it. Follow these sitting exercising routines to give your body a much-needed rest.
15. Add Hip exercises designed for bone pain to your routine.
Problem: Hip pain because of big amounts of sitting time.
Solution: Release the pain by doing hip exercises.
Strengthening your hips will make your life so much easier and pain-free.
You can easily add these routines to your daily routine. If you don’t exercise during the day, you can make them before going to bed each night.
That way, you will take the tension of the entire day from your body. You’ll see how you sleep better too.
The only thing I want you to remember is that if you have never done exercise before, you need to start slow.
Don’t force yourself too much trying to complete the time or steps of any routine. Listen to your body and stop when you need to stop.
Every day you can make a little bit more until you reach the ideal time.
16. Tilt your Sewing Machine towards you.
Problem: You need to bend over your machine to see better the needle.
Solution: Tilt the sewing machine towards you slightly.
Do you know how sometimes we need to pierce a very PRECISE point on our seams and fabrics with the machine needle??
What do you do when that happens? You hunch your back and shoulders to get a better view of that needle.
Well, a great tip that Rose shared on the Love to Sew podcast was to tilt your sewing machine towards the front just a bit. You can use a couple of pieces of cardboard. It doesn’t have to be that much.
Just with ⅜” will make the difference. Place them behind your machine on the bottom, and you will get a better view of where the needle is without bending that much.
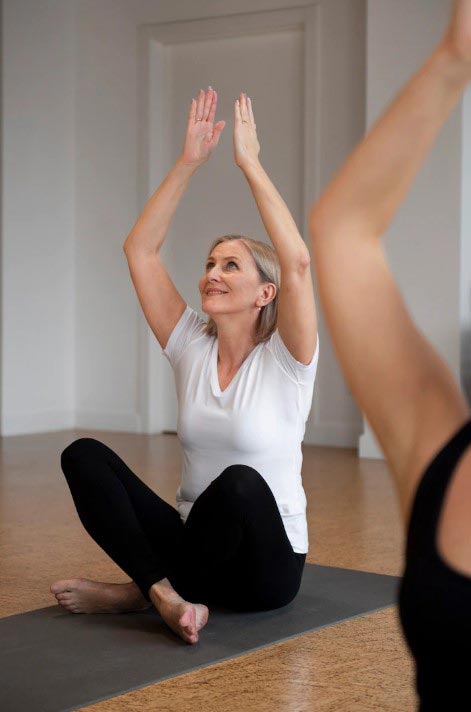
17. Do low-impact Yoga.
Problem: Lack of movement causes joint pain.
Solution: Try doing low-impact yoga.
A lot of people say Yoga has changed their life. They say it increases muscle elasticity and mobility, and it even adds years to your life.
Clearly, I am not one of those people. I just don’t have the patience (or sanity) to do yoga. But I am pretty aware of all the health benefits yoga has in one’s life. If I absolutely have to do it at one point, I will.
That’s why it is my last resource on this list.
But if we have the patience to sew a queen’s bed quilt, we surely can handle yoga, right? Start with low-impact yoga exercises, and if your mobility increases, take it from there.
How about you? What are your best tips on Sewing with Arthritis? Let me know in the comments below.
Don’t forget to follow us on Social Media!!
- Resources:
- https://www.dignityhealth.org/articles/is-your-office-job-bad-for-bone-and-joint-health
- https://www.osha.gov/etools/computer-workstations
- https://osteoporosis.org.za/bone-work-living-with-osteoporosis-in-the-workplace/
- https://strwebstgmedia.blob.core.windows.net/media/ce3prxrw/employment-and-osteoporosis-fact-sheet-december-2016.pdf
- https://www.forbes.com/health/body/best-office-chairs-for-back-pain/
- https://www.creativebloq.com/buying-guides/best-office-chair-for-back-pain
- https://www.womenshealthmag.com/life/g39757450/best-office-chair-for-back-pain/
- https://www.healthline.com/health/compression-gloves#copper-infused
- https://www.forbes.com/health/healthy-aging/best-arthritis-gloves/
- https://lovetosewpodcast.com/episodes/episode-206-sewing-ergonomics-with-rose-parr/?fbclid=IwAR2HbBrR6OgRQviIBPb8_V7ywWV6FD3nX8ZF4LFwGsnaXWiITKvxt9ro-xA






Thank you, these are wonderful tips for this old girl. I will get up more often. I have to walk to the kitchen from the sewing machine to press my seams and come back again. I think the points above are all excellent.
I am so glad you approve! I hope this can help more gals!
This is a very post ty.
I also invested in a sewing machine light, pretty inexpensive and helps you see a little better.
Happy sewing ❤️
I think I need one of those lights, too, my eyes are getting tired more quickly than they used to… Which one did you get?
Thanks for the arthritis tips as this sixty-seven year old stitcher can certainly relate. I use two rubber door stoppers behind each of my machines to tilt them toward the front. It helps to see what I’m stitching without hunching over so much. They are usually sold in packs of two and available at dollar type or Walmart stores, for very little money.
That’s a great tip! And it will level up better than the cardboard.