Drawstring bags are super helpful and pretty; that is why today I am going to teach you How to Make a Lined Drawstring Bag!
Did you know that the accessories we use in our daily lives have been around for ages and have served countless purposes? Not only do they add a dash of style to our outfits, but they also help us in many ways.
So, let’s learn how to make this unique and super cute bag and see why lined drawstring bags are an absolute game-changer to store your most unique items!

NOTE: This post contains affiliate links, which means that if you make a purchase using one of the links in this article, I may earn a commission at no extra cost to you (To know more about this, click here.)
Drawstring bags are one of my go-to projects when I want to sew something easy and quick.
I use these bags for all sorts of things, from organization to gifts.
What I love about this project is that it is super beginner-friendly! It is the perfect project for someone who is just starting to sew.
Even if, like my sister, you just started learning how to sew. I showed her how to make drawstring gift bags this past Christmas, and she nailed them!

It’s impossible not to like them.
In fact, I love them so much that I have made many versions of them. In our blog post, for example, I showed you two ways to make simple drawstring bags (no lining).
But now I will show you how to sew a bag with a lining, which is a great way to upgrade your drawstring bag game.
What can you use a drawstring bag for?

Drawstring bags are all about convenience! They’re perfect for everyday use, whether you’re heading to the gym, running errands, or simply strolling through the park.
With their easy-to-use drawstrings, these bags offer quick access to all your belongings without any fuss or hassle. My favorite use for drawstring bags is as gift bags, to store my jewelry, or any small items like bobby pins, thimbles, coins… I also use them for traveling to keep my toothbrush and other toiletries.
What are the best fabrics to make a drawstring bag?
The choice of fabric for a drawstring bag depends on the intended use and personal preferences.
When choosing a fabric, consider the intended use of the drawstring bag, the items it will carry, and your personal preferences for texture, appearance, and durability.
Here are some popular fabric options for making drawstring bags:
In this tutorial, I am using cotton canvas as my main fabric for the exterior, and as I wanted a nice contrast, I chose to use a lovely satin fabric for the lining.
Cotton will give you a great structure, but if you want a drawstring bag for a special occasion, use velvet. This last fabric will give your lined drawstring bag pattern a touch of elegance and luxury.
How to make a lined drawstring bag. F.A.Q’s.

1: Can I use different fabrics for the interior and exterior?
Absolutely! Mixing and matching fabrics can be a great way to create a unique and eye-catching look. Just make sure that the fabrics you choose play nicely together regarding weight and texture. Try pairing fabrics that have similar weights and textures, or use one fabric as your base and then add accents with the others. With a little bit of creativity and some experimenting, you can create a fun and stylish outfit that really stands out.
2: Can I add interfacing to the bag for added structure?
Interfacing is a great way to give more body to a flowy, lightweight fabric like knits, mesh, or satin fabrics. It’s totally optional, but adding this extra layer of material will give your bag some additional support and structure, which can come in handy if you tend to carry heavier items or use your bag a lot. So, if you’re looking for a sturdier bag, definitely add some interfacing!
3: Are there variations in size for this bag?
Certainly! We actually have two other versions of unlined drawstring bag tutorials in our blog here, where you can learn how to make the two different versions. One of them is the most simple flat drawstring bag with double pull string. The second one is a single-string bag with a boxed bottom! You can totally use that tutorial to make a box bottom for this lined version, too. So make sure to check that out!
How to Make a Lined Drawstring Bag?

Follow these easy steps to learn how to make a super cute drawstring bag. The first thing you have to do is gather your materials.
Here is what you will need:
Materials:
1. Cut your fabric pieces.
To get started, you’ll need two rectangles of fabric – one for the lining and one for the exterior (main fabric).
For this tutorial, we’re making a small bag with final measurements of 8” x 6”.
So, for that end measurement, let’s cut two rectangles that measure 6 ½” x 16 ½”. This is going to be our pattern for both the main fabric and the lining.

Easy peasy, right?
But hey, if you want to make a different-sized bag, don’t worry!
Just refer to the chart below for the appropriate measurements.
| Bag Size | Pattern Pieces |
|---|---|
| Small | 4 1/2″ x 12 1/2″ |
| Medium | 6 1/2″ x 16 1/2″ |
| Large | 8 1/2″ x 20 1/2″ |
With these two rectangles, you’ll be all set to follow along with the tutorial and create your very own bag. So, let’s go to the next step.
2. Sew the ends.
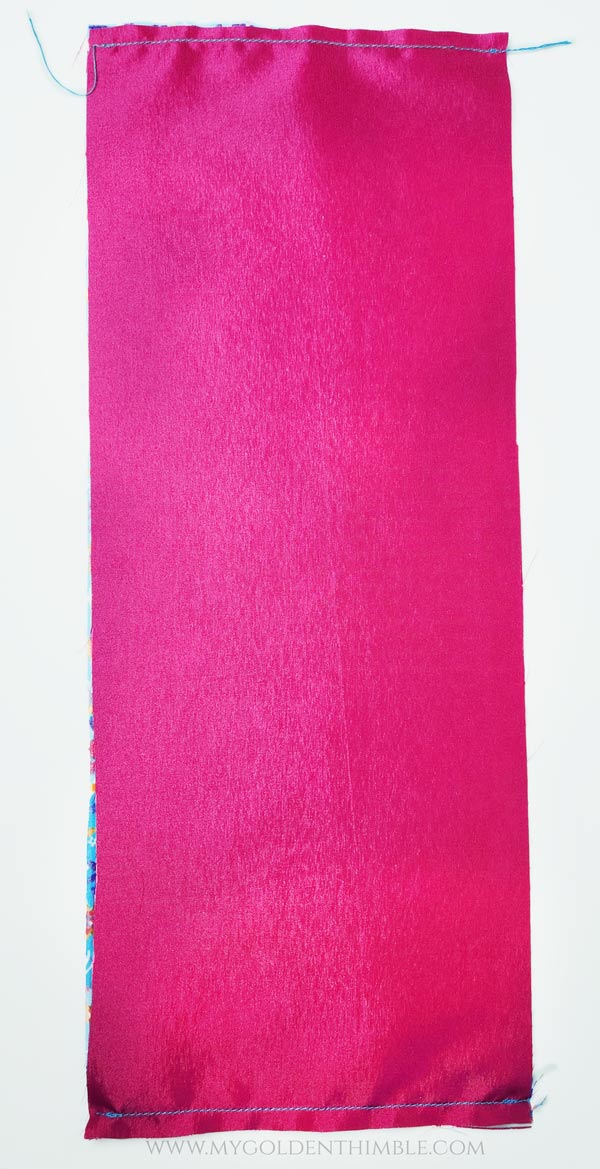
After cutting out your rectangles, it’s time to join them together. Place the rectangles with their right sides facing each other. Align the edges carefully and pin them together. Make sure that the shorter ends are in line with each other.
Now, it’s time to join both fabrics together.
Stitch along the pinned edges using a sewing machine at a ¼” seam allowance. Remember to backstitch at the beginning and end of the seam to secure it in place.

After sewing, remove the pins and open up the seam allowance. Press the seam open using a hot iron at a low temperature to ensure it lays flat.
Be careful not to burn the fabric while ironing.
3. Sew the sides.
Can you believe how easy is this bag turning out to be?
Ok, now you will open the loop you created by sewing the ends of the drawstring bag pieces.
Align each one of the fabrics with their own correspondent right sides together. To do this super easily, just align the seams you just did with the right sides together.
Then, you will end up with the lining on one side and the main fabric on the other side.
Pin along the sides, making sure the seams on the center are aligned with each other.
Now, we are going to mark where the opening of our string is going to be.

Measure 2” from the seam of the main fabric down and make the first mark. Then, from that mark, measure ½” and make a second mark. Do this on both sides.
*Note* If you are sewing the smallest size drawstring bag, make the marks at 1 ½” instead.
The space between these marks is the space you are going to leave OPEN. And this will only be on the main fabric side.

Now that you know that, sew the sides with a seam allowance of ¼”.
Cut the corners of the seam allowances and press the seams open with the help of a pressing ham.
4. Turn inside out.
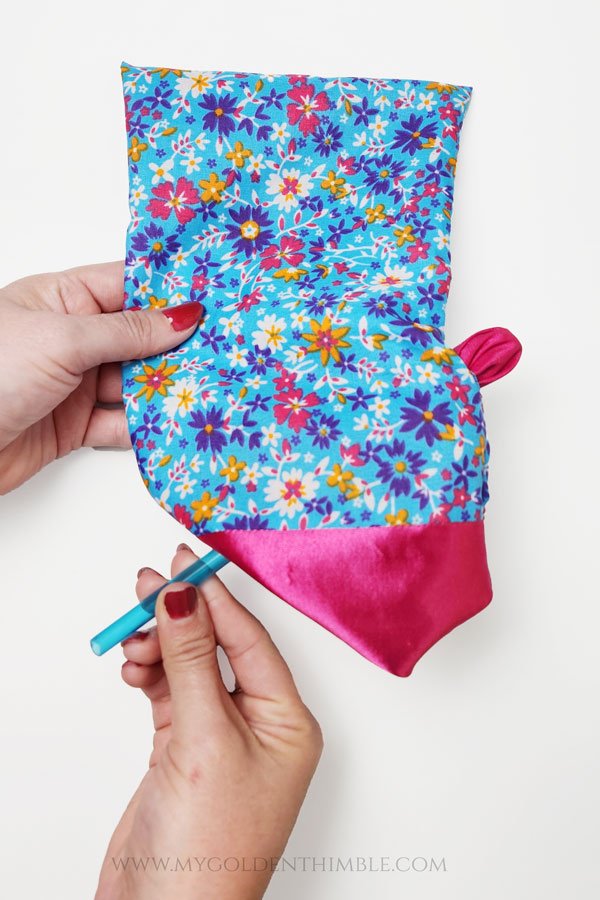
I know how crazy this is going to sound. But now we need to turn our piece right side out through the space we left open on the sides.
But, Dafhtne! It is such a small space! There is no way I can turn the bag inside out through that!!
Yes, you can! One, because you are amazing and so brilliant. And two, because we are going to use a tool to help us out.
In my case, I am using a plastic straw (I use this straw for so many hacks in sewing) to push the lining through the opening.

When you have enough of the lining out there, just use your fingers very carefully to pull the rest of the bag out.
5. Sew the casing.
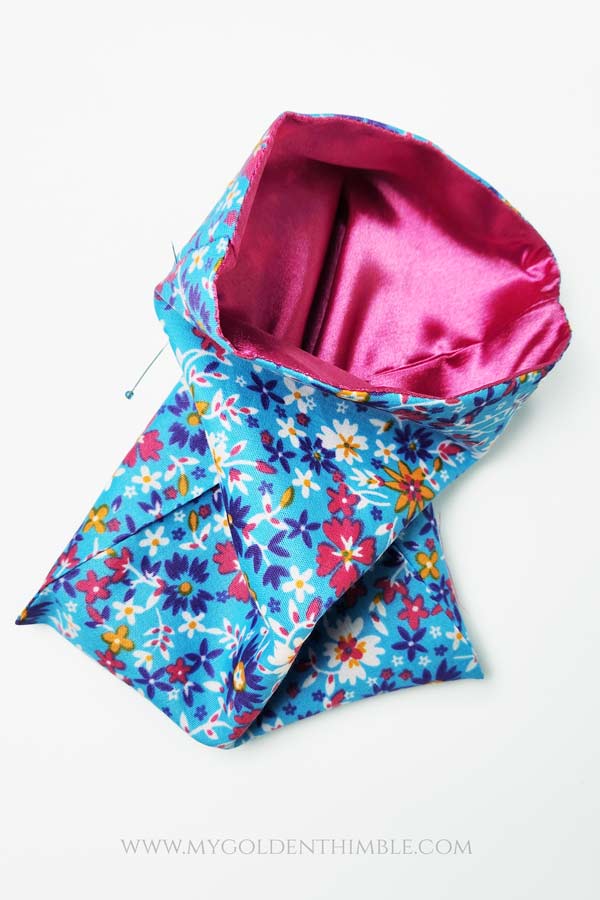
We are almost done!!
In this step, we are going to sew the casing from where our strings are going to go through.
To do this, you will have to mark a horizontal line joining the top of the opening with the opposite side of the top opening. Then, do the same thing with the bottom opening.

You will end up with two parallel lines like these.
Use your sewing machine to sew a straight seam on top of both lines around the bag’s opening.
You will end up with something like this.

6. Make the strings.
If you are using a ribbon or rat tail cord, you can skip this step.
Otherwise, let’s make our own string for our lined drawstring bag. I am going to be making spaghetti straps, which are skinny fabric straps.

Cut two strips of fabric measuring 22” x 1 ¼”. Fold them in half lengthwise and sew them at ¼” seam allowance.
Use your loop turner to turn them right side out and press.
7. Insert the strings through the casings.
The final step, my love!!
For any drawstring bag, you have two options for the strings. One is to have a double-pull drawstring bag like I am doing here.
The other option is to have a single string.
For the double-string bag, here is what you do.

Starting on the right side, insert one end of the string into the bag’s front casing until it goes out on the left side opening.
Use your loop turner or your elastic threader to make this step easier. If you don’t have any of these tools, you can also use a safety pin attached to the end of the strings.
Now, take the opposite end of the string and insert it through the back casing of the bag, starting from the right to the left.

Each end of the string has to get out through the opposite opening of the casing/channel in the shape of a “U”.
Now, do the exact same thing starting from the opposite side, meaning starting from the left and going out on the right.

And that’s it!!
You have successfully learned How to Sew a Lined Drawstring bag! Remember that if you want to know how to make a lined drawstring bag with a flat bottom, you will have to refer to our tutorial on how to make drawstring bags here. Then, follow those instructions to make the flat bottom for your lined bag.
Conclusion.
Lined drawstring bags make for an incredible sewing project, especially for beginners like you. You have done a fantastic job in creating these versatile and practical bags.
Not only do they provide ample storage space, but they also showcase your creativity and personal style.
So keep up the great work and continue exploring the wonderful world of sewing – countless exciting projects are just waiting to be discovered!


I got to step 5 making a small bag, I cannot sew the casing stitches on my machine! I guess I will have to hand stitch.
You can sew the casing first and then the sides, but to insert the ribbon you will have to pierce the fabric of the casing.
Thank you for this pattern on how to make draw string bags. I belong to a guild that helps The Isaiah House with hand made projects or purchased items for unfortunate children entering the foster care system. We also make bags to put these items into, the bags are then filled with clothing, diapers, quilt, or blankets etc. Thank you again. from Bobby Jo.
What a beautiful work you are making. I hope you can continue to do such amazing things! Thank you truly.