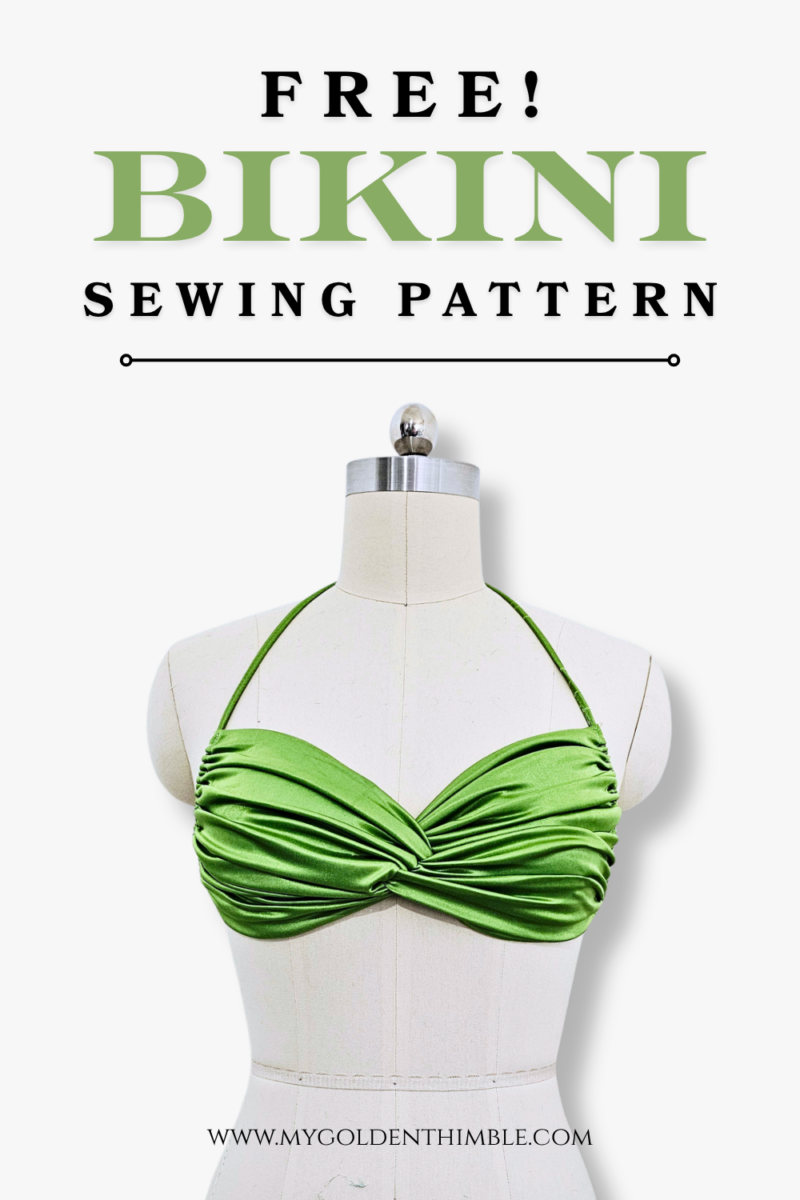
Today I’m so excited to share this FREE Gathered Bikini Top Sewing Pattern, a quick and beginner-friendly project that’s perfect for sunny days, beach vacations, or relaxing by the pool.
Best of all, the Buttercup Bikini Top pattern is completely free!
Just draft the pattern with the instructions below (trust me, you don’t need a download), grab your favorite swim fabric, and follow the step-by-step tutorial below.
I’ll walk you through the entire process, from cutting your fabric to sewing the twisted front and finishing your bikini top like a pro.
Let’s get started!
NOTE: This post contains affiliate links, which means that if you make a purchase using one of the links in this article, I may earn a commission at no extra cost to you (To know more about this, click here.)
About This Pattern
The first time I thought about making this bikini top, I honestly wasn’t sure it would work. And even after I finished sewing the first sample… I still wasn’t completely convinced I liked it!
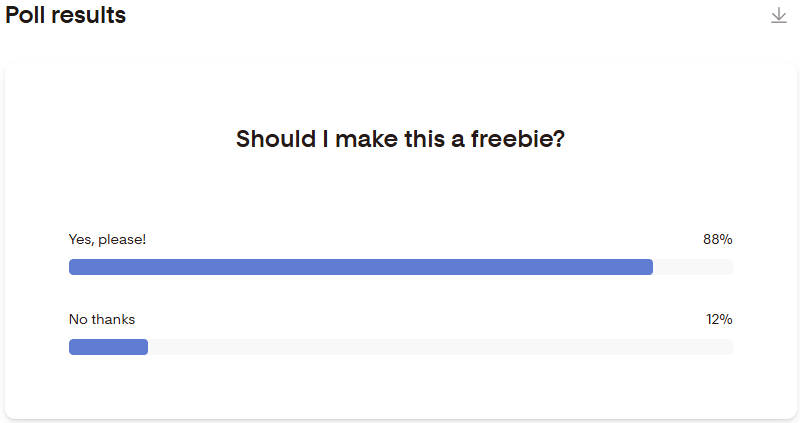
So, instead of keeping the decision to myself, I asked all of you on my newsletter if this was a design worth turning into a pattern.
To my surprise, more than 80% of you voted “Absolutely!” That was all the encouragement I needed to finish the tutorial and share it here on the blog.
The idea behind the Buttercup Bikini Top actually came from a completely different project. I was thinking about the twisting technique used to make twisted headbands, and I wondered, if it works so well for a headband, why couldn’t it work for a bandeau bikini top?
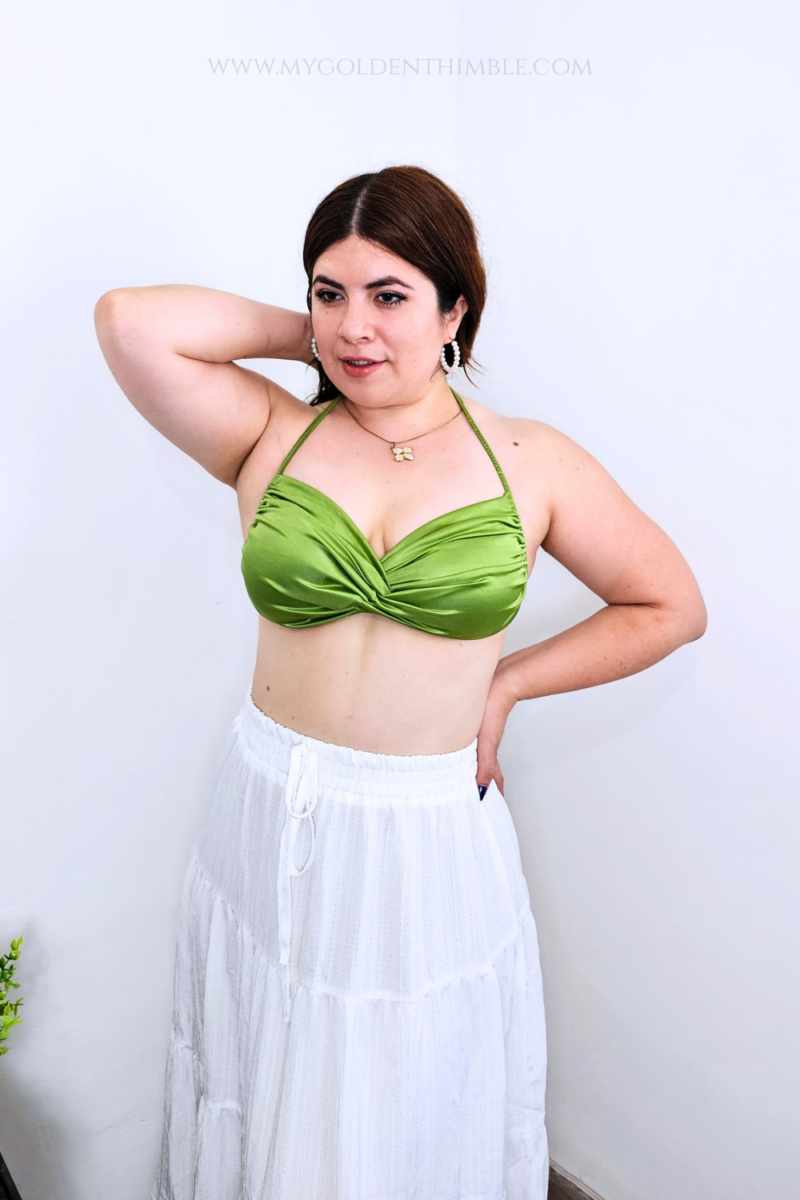
So I grabbed a piece of stretchy swim fabric and started experimenting. I didn’t have a pattern or a plan—I simply recreated the design I had in my head until it looked just the way I imagined.
Design details:
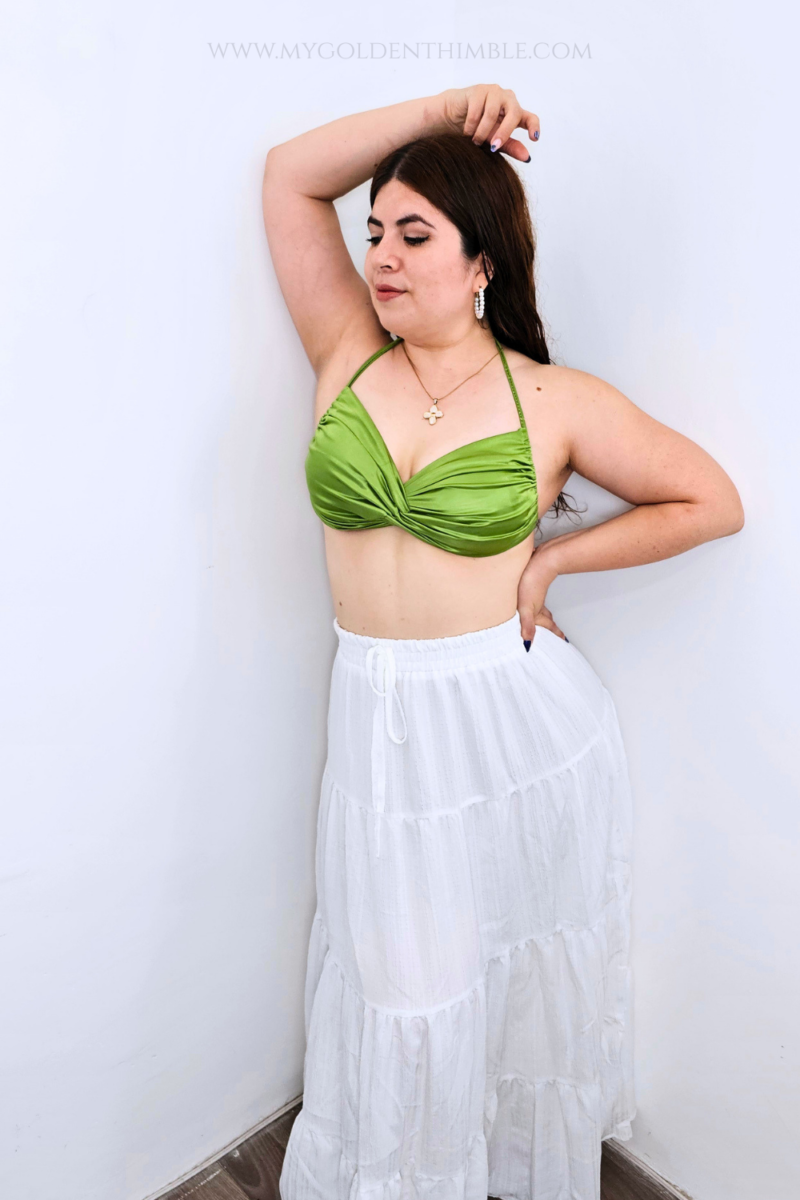
The Buttercup Bikini Top features a beautiful twisted front detail, soft gathered ruching, and delicate spaghetti straps that tie around the neck for an adjustable fit.
It looks good on any color!!
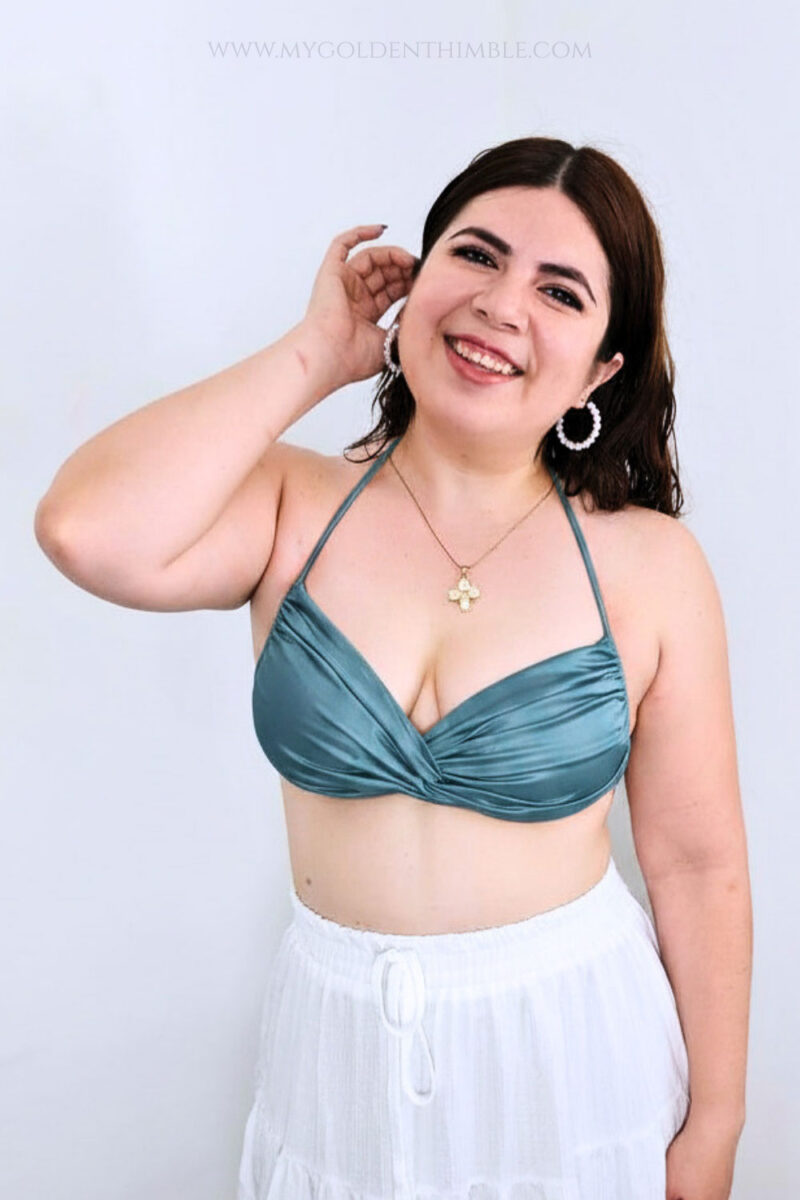
It has a classic, flattering shape that’s comfortable to wear and surprisingly easy to sew.
In fact, the entire top is made from just one pattern piece, making it a fantastic project if you’re new to sewing swimwear.
Materials Recommendations:

The Buttercup Bikini Top is designed to be sewn with swimwear fabric that has 4-way stretch. This is one of the most important parts of the project, so make sure you choose the right fabric!
Look for a swim knit with at least 80% 4-way stretch, preferably 100%, so it stretches well both horizontally and vertically. The fabric should stretch easily in any direction you pull it. This gives your bikini top the flexibility it needs to fit comfortably and hold its shape when worn.


I don’t recommend substituting another type of fabric for this pattern. Woven fabrics or knits with limited stretch won’t provide the same fit, comfort, or support, and the finished top may end up too tight, too loose, or uncomfortable to wear.
In addition to your swim fabric, you’ll also need:

- Polyester thread, which is stronger and more resistant to chlorine, salt water, and sun exposure than cotton thread.
- A ballpoint or stretch needle for your sewing machine.
- Scissors or a rotary cutter
- Pins or sewing clips
- A safety pin or bodkin to help turn the spaghetti straps right side out.
OTHER SWIMWEAR PATTERNS:


Drafting the Pattern
One of my favorite things about the Buttercup Bikini Top is just how simple the pattern is. In fact, you’ll only need two measurements to draft it yourself!
The first measurement is your chest girth. Measure all the way around your chest, just above your bust, keeping the measuring tape snug but not tight.
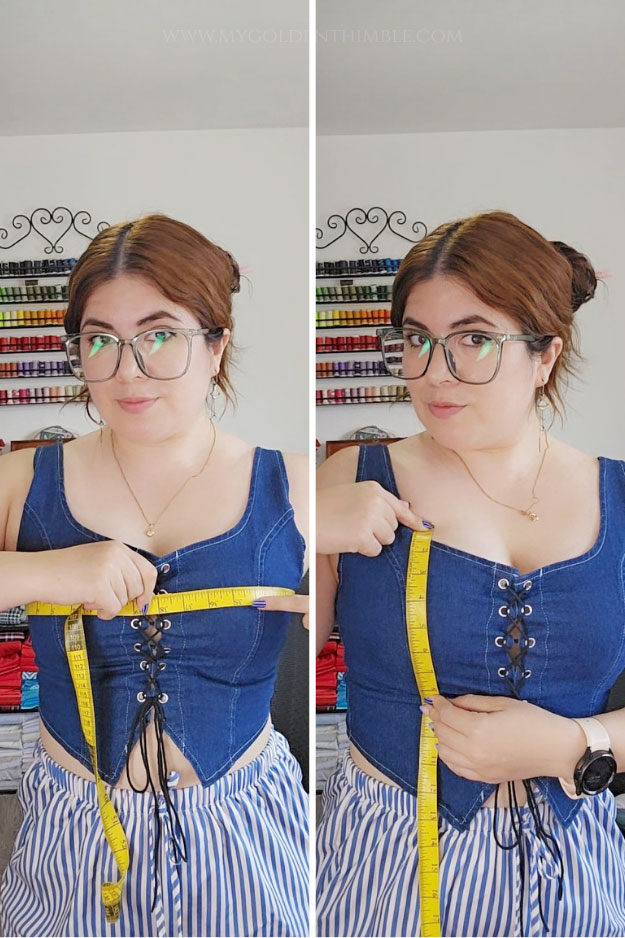
The second measurement is what I’m calling your bust height. Don’t worry—we’re keeping this project as simple as possible!
Just measure from the top of your breast to the bottom, making sure you’re covering the fullest part of the bust. That’s it!
Draft the Pattern
Ready for the easiest pattern you’ve ever made?
It’s just one rectangle!
Here’s the simple math:
- Rectangle Width: Half of your chest girth.
- Rectangle Length: (Your bust height × 1.5) × 2.
That’s all the drafting you need!
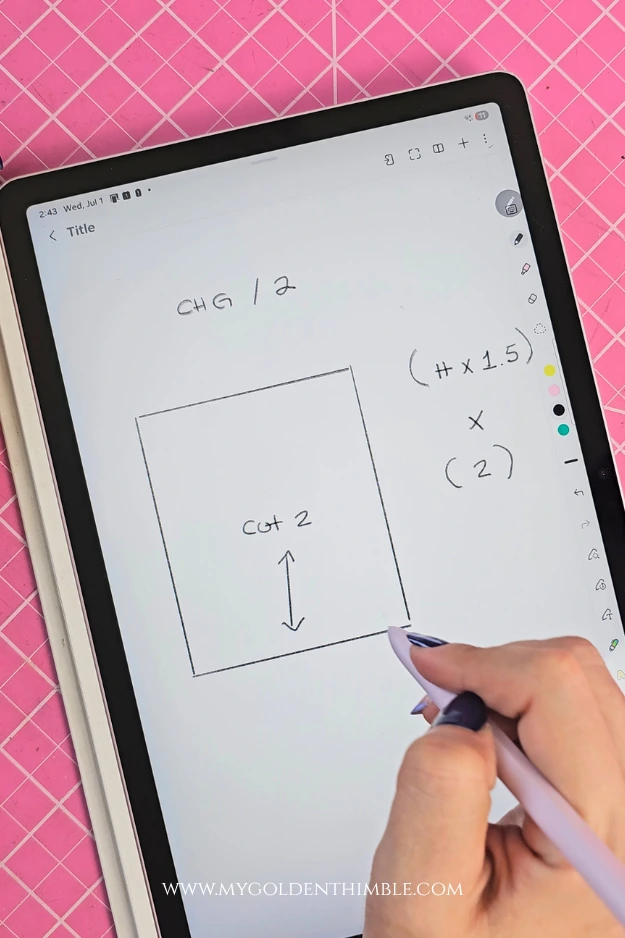
Cut 2 rectangles from your swimwear fabric using these measurements. Make sure the width of the rectangle is placed along the stretchiest direction of the fabric (the crosswise stretch).
This is essential so your bikini top has the right amount of stretch and fits comfortably.
If you’re not familiar with grainlines or stretch direction, be sure to check out my tutorial on how to read sewing pattern symbols, where I explain everything you need to know.
Cut the Strap
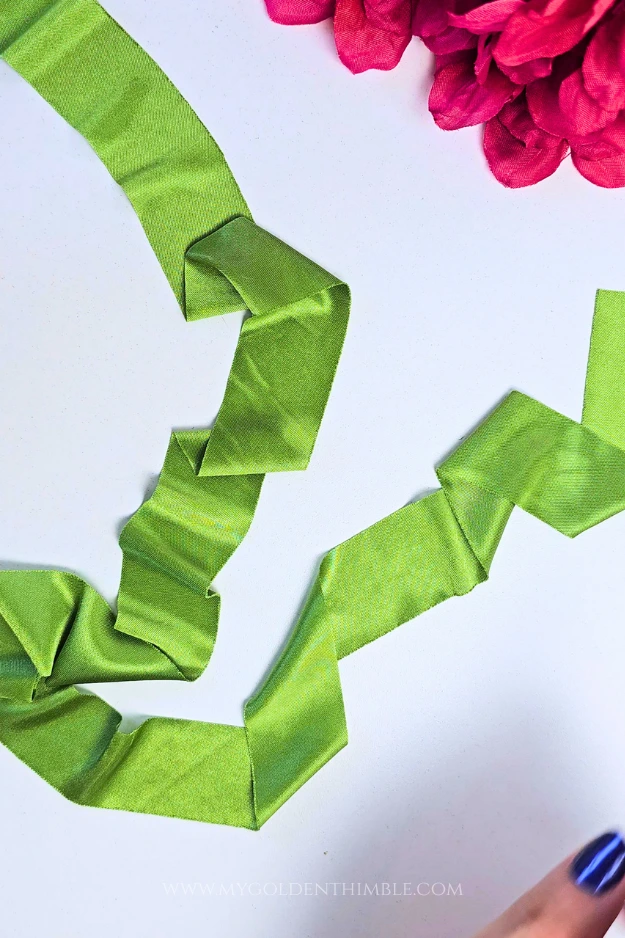
You’ll also need one long strip of fabric for the necktie.
Cut one strip measuring approximately 70 inches (178 cm) long by 1¼ inches (3 cm) wide from your swimwear fabric. This strip will be sewn into a spaghetti strap that ties around the neck, making the top fully adjustable.
And that’s it! Just three pieces of fabric—two rectangles and one long strip—and you’re ready to start sewing your Buttercup Bikini Top.
It really doesn’t get much simpler than that!
How to Sew the Buttercup Bikini Top
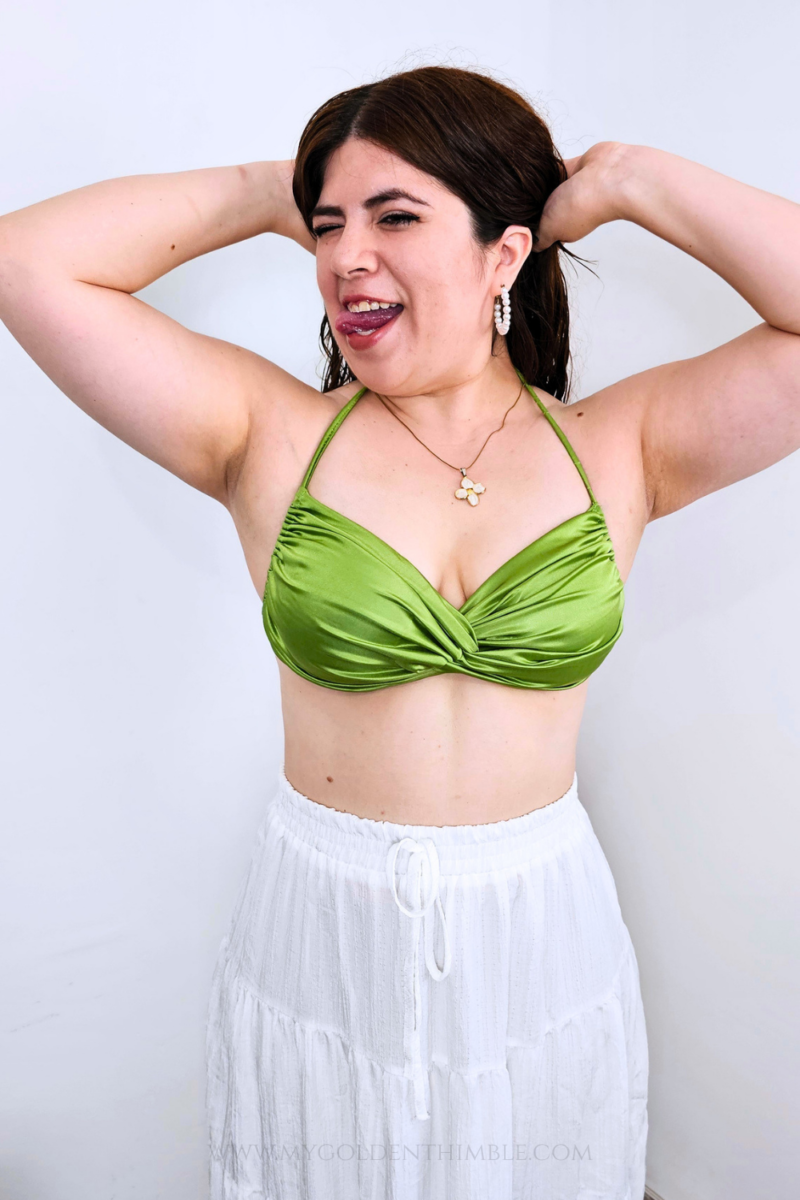
Now for the fun part—let’s put everything together! Don’t worry if the twist looks a little confusing at first. I’ll walk you through every step, and once you see it happen, you’ll realize it’s much easier than it looks.
Step 1: Sew the Spaghetti Strap
Let’s get the easiest part out of the way first.
Take the long strip you cut for the strap and fold it in half lengthwise, with the right sides of the fabric facing together.
Using your serger or sewing machine, sew along the long raw edge. Leave both short ends open.
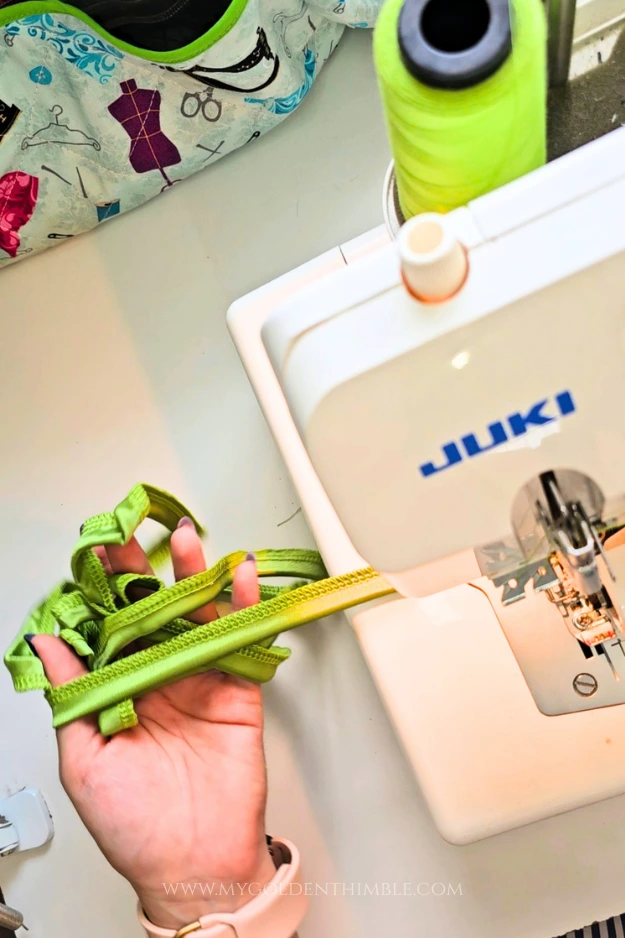
Next, use a loop turner (or your favorite turning tool) to turn the strap right side out. If you’ve never used a loop turner before, this is the perfect project to try one—they make turning skinny straps incredibly easy!
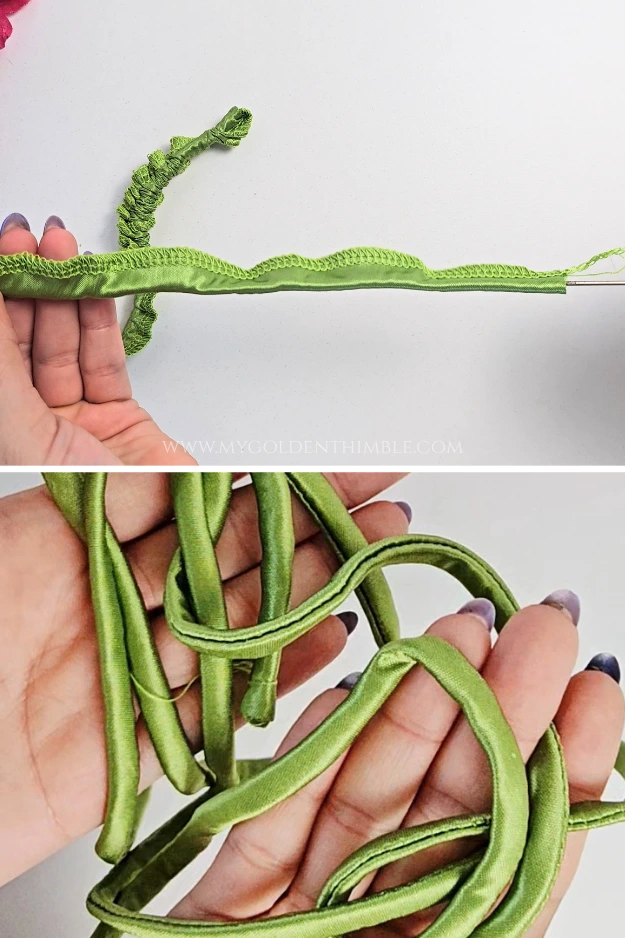
Once the strap has been turned, finish each end with a tiny, tight knot or close them with a few invisible hand stitches to keep the tube from unraveling while you assemble the bikini top.
Set the strap aside for now.
Step 2: Prepare the Bikini Cups
Take your two rectangles and fold each one in half, matching the shorter edges together with the right sides facing each other.
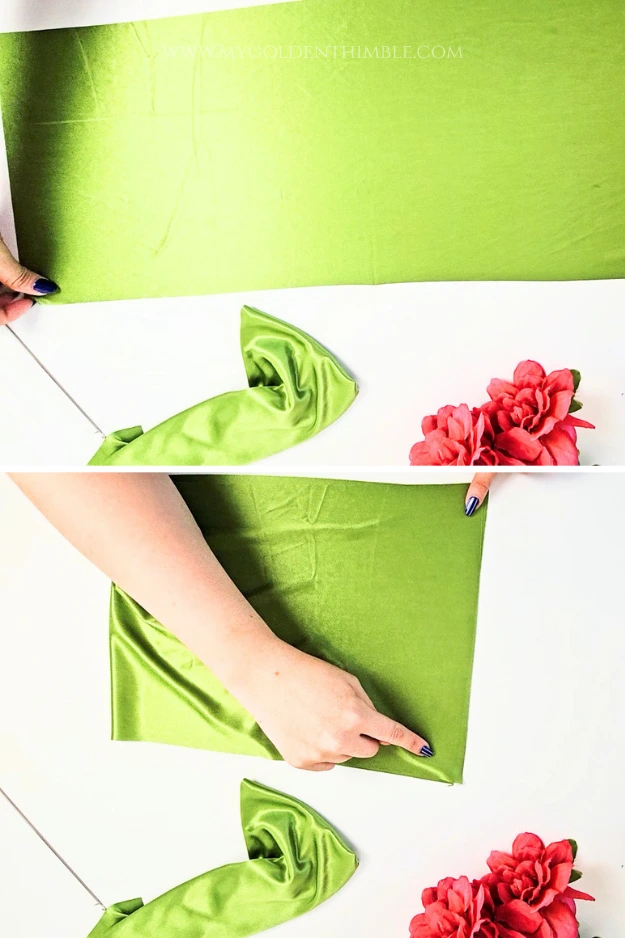
Sew along the short edge using your serger or a stretch stitch on your sewing machine.
Turn each piece right side out so the seam is enclosed inside the tube.
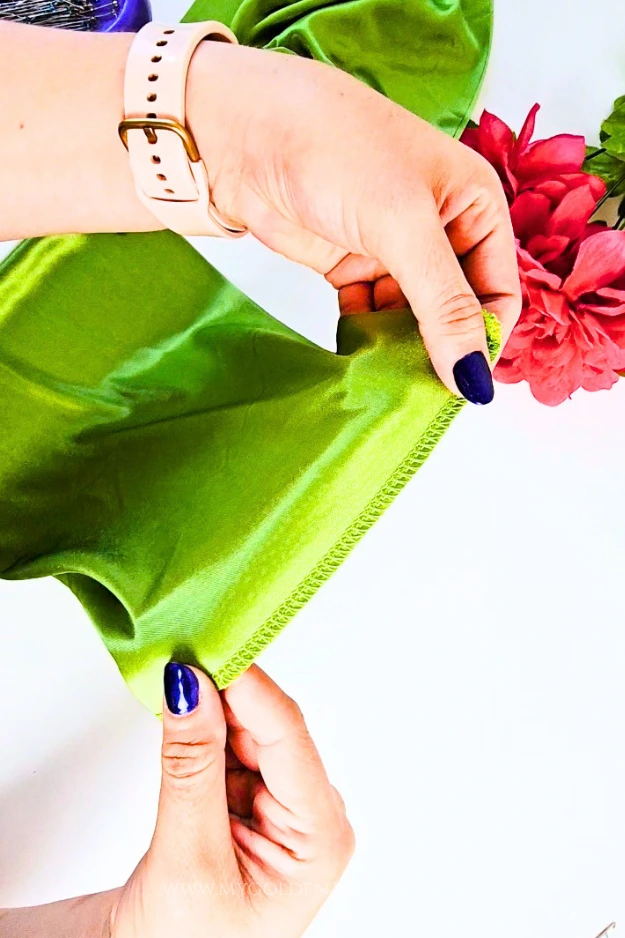
Now rotate the tube until the seam sits exactly in the center. This centered seam will become the inside of the bikini top.
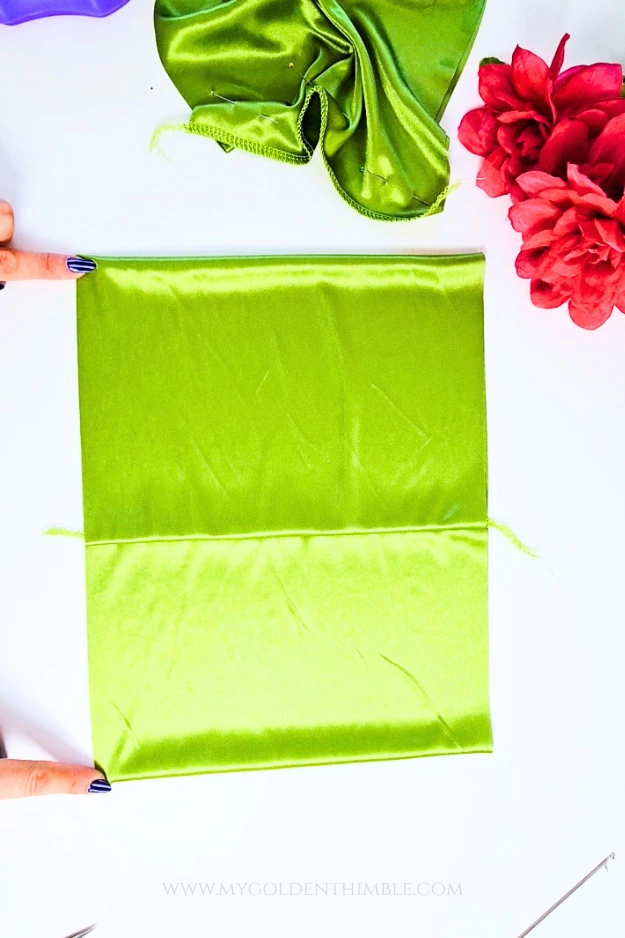
Flatten each tube so the two open raw edges line up evenly.
Step 3: Finish One Edge of Each Piece
Choose one open edge from each tube.
Using your serger or a long basting stitch on your sewing machine, sew through both layers of that edge to hold them together.
Tip: If your fabric has a directional print, make sure you choose opposite ends for each piece. One finished edge should be on the left side of one cup and on the right side of the other cup. This way, your print will face the correct direction once the bikini is assembled.
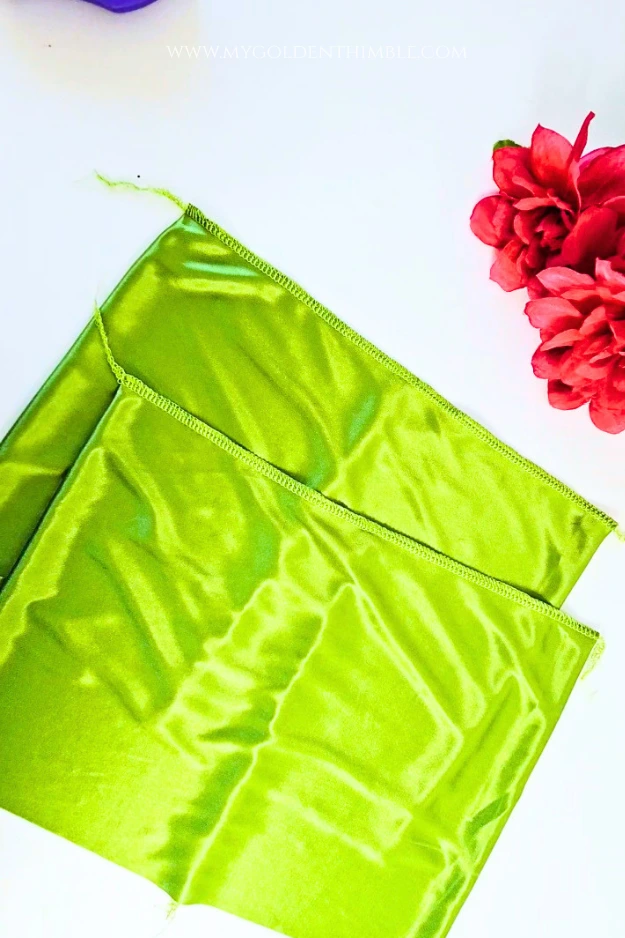
Now we’ll create the channel for the neck strap.
Fold the finished edge toward the inside of the tube ¼ inch (6 mm).
Then fold it over once more for a total fold of ½ inch (12 mm).
Pin or clip the fold in place all the way across.
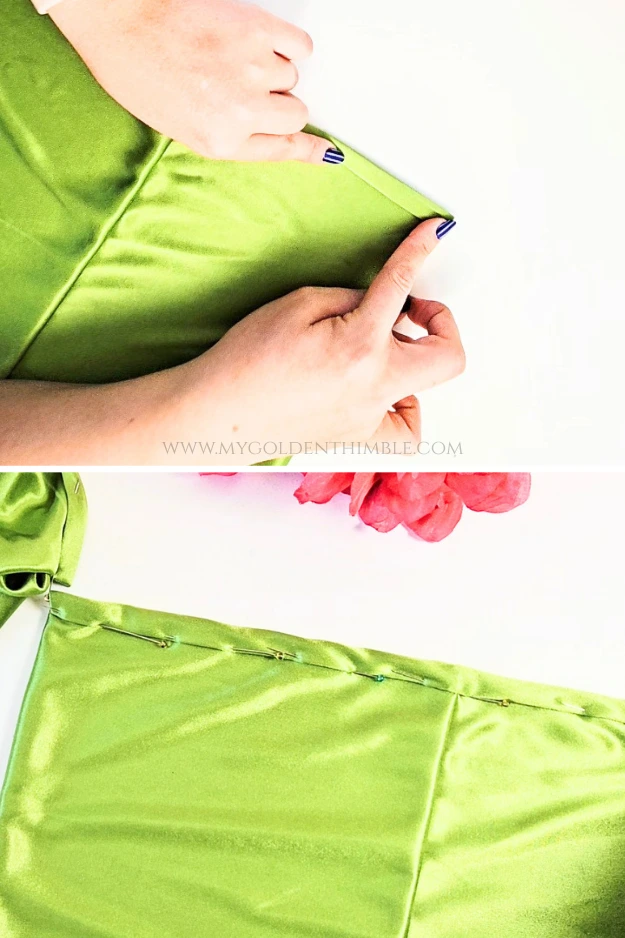
Using a straight stitch, sew approximately ⅛ inch (3 mm) from the folded edge to create a clean channel for the strap to pass through later.
Repeat this process for the second bikini cup.
Step 4: (Optional) Add Swim Cups
If you’d like a little extra shaping or coverage, now is the perfect time to add swim cups.
Insert one cup inside each bikini piece, making sure they are oriented correctly. Most swim cups are labeled Right and Left, so double-check that each one is placed on the correct side before securing them.
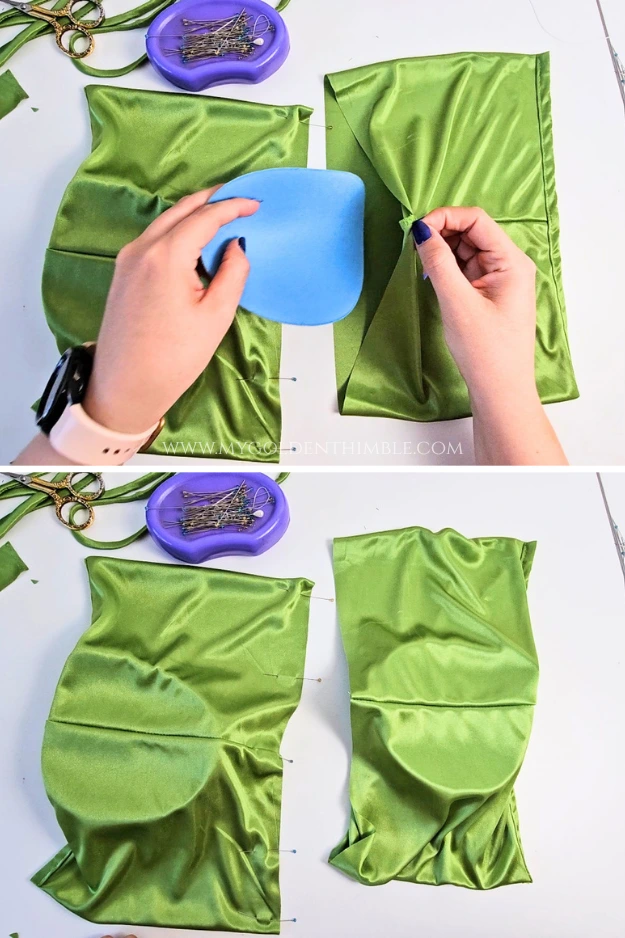
You can tack them in place with a few hand stitches if you’d like, although this step is completely optional.
Step 5: Create the Twist
Now for the signature detail that makes the Buttercup Bikini Top so special!
Each bikini cup still has one open edge that hasn’t been sewn.
First, find the center of each open edge and mark it with a pin or your favorite fabric marker.
Next, place both bikini pieces right sides facing each other, aligning the remaining open edges exactly as shown in the photos.
To make the next steps easier to understand, I’ve labeled the corners with the letters A through F in the illustration.
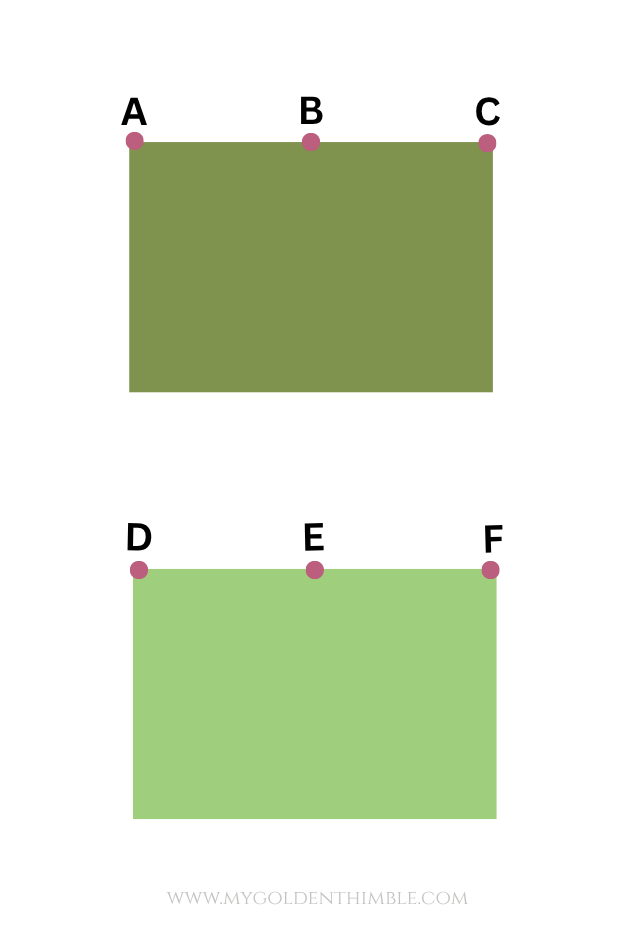
Now follow these folds:
- Match Point C to Point E and pin them together.
- Match Point B to Point D and pin them together.
- Fold Point F over until it meets Point B.
- Fold Point A over until it meets Point C.
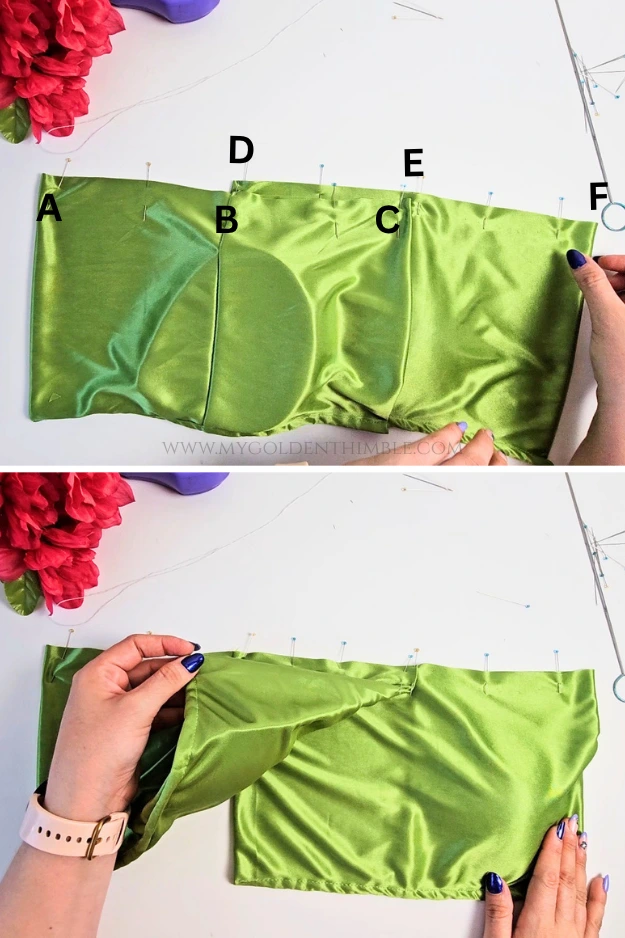
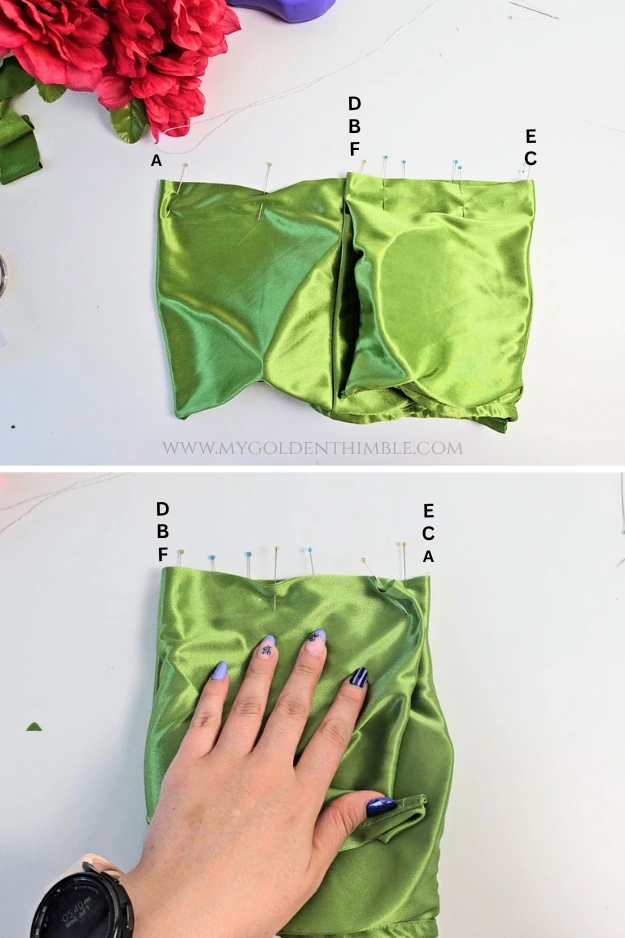
Take your time here. Once all of the points are stacked together correctly, you’ll begin to see the twist forming.
Add plenty of pins or sewing clips to keep all the layers from shifting.
Finally, sew across the entire edge using your serger or a stretch stitch on your sewing machine, making sure you catch every layer as you sew.
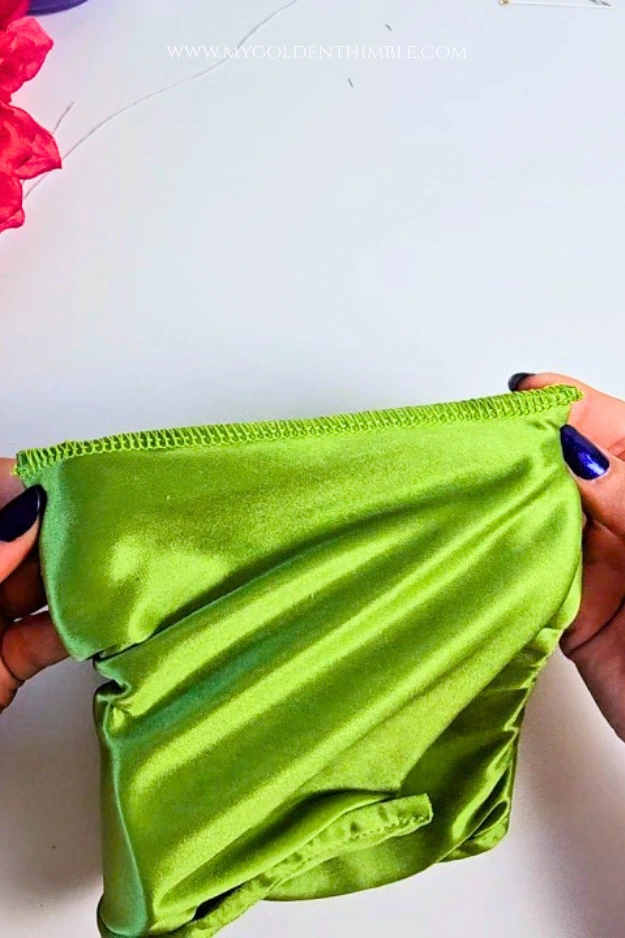
This is definitely the trickiest step of the project—but once it’s stitched, you’re basically done!
Finish your serger tails by tying a small knot or weaving them back into the seam.
Then turn the bikini right side out and unwrap the twist.
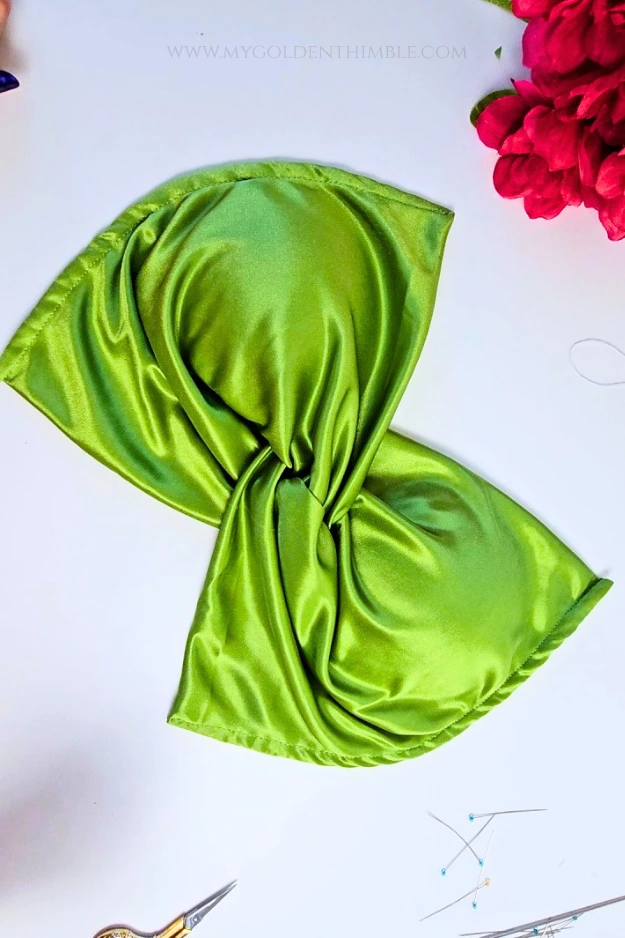
Magic! Your twisted front will appear all on its own.
Step 6: Insert the Strap
The final step is to thread your spaghetti strap through the channels you created earlier.
Attach one end of the strap to your loop turner or a safety pin and feed it through one channel, across the front twist, and out through the second channel.
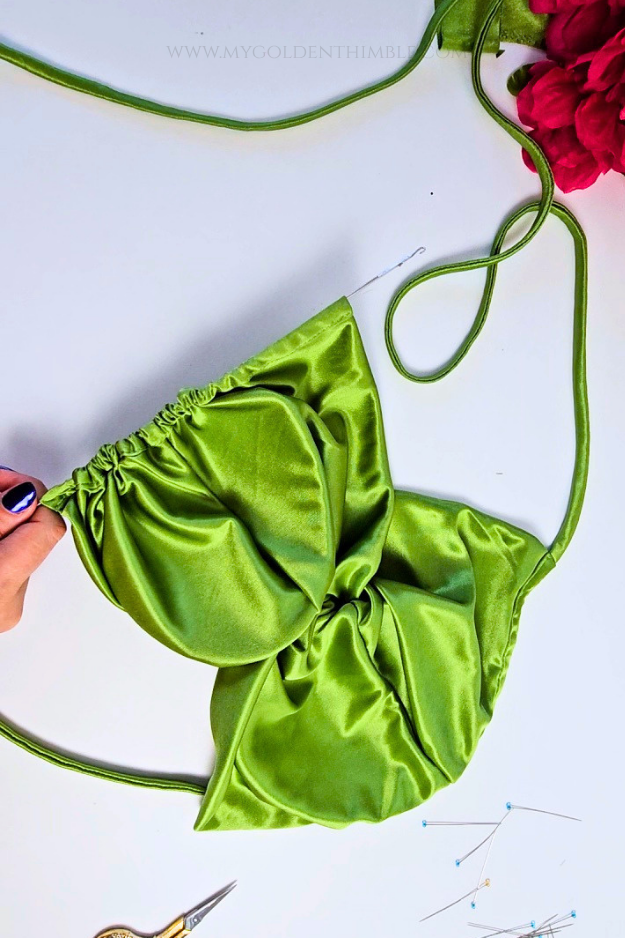
Center the strap so you have an equal length on both sides.
The middle section of the strap will sit comfortably behind your neck, while the two long ends wrap around your back and tie into a bow, allowing you to adjust the fit exactly how you like it.
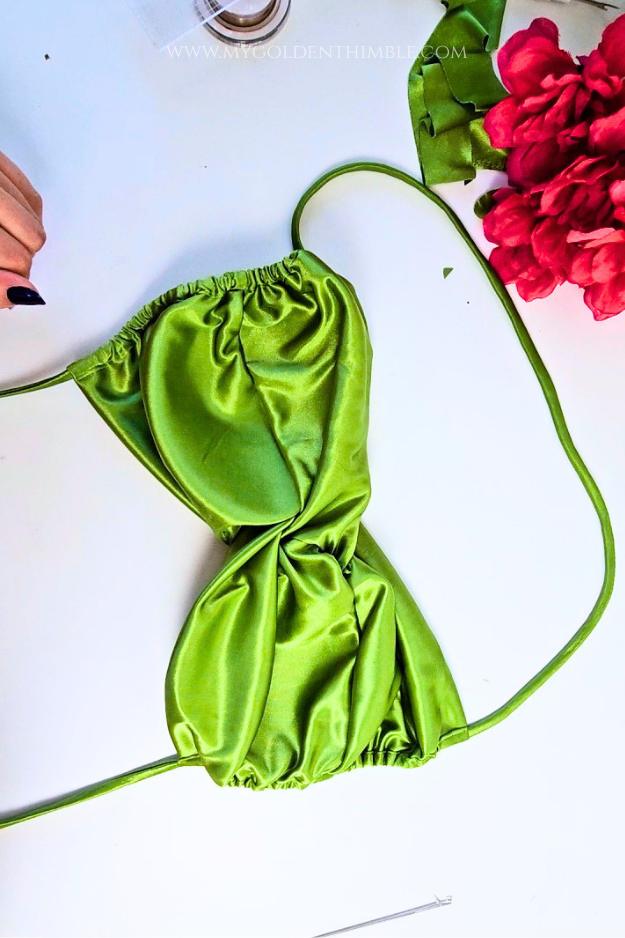
And that’s it!
Your Buttercup Bikini Top is finished and ready for your next beach day, pool party, or tropical vacation. I think you’ll be surprised by how quickly this project comes together—and don’t be surprised if you find yourself sewing another one in a different color right away!
Give It a Professional Finish
For the prettiest results, place your finished bikini top on a dress form or mannequin if you have one. Take a few minutes to gently steam the twisted front, folds, and gathers, shaping them exactly how you’d like them to sit.
The steam will help the fabric relax and keep those beautiful folds in place. If you’d like a more permanent finish, you can also add a few small hand stitches on the inside of the top to secure the folds and gathers just the way you like them.
No one will notice the stitches from the outside, and your bikini will keep its perfect shape every time you wear it.
Final Thoughts
And just like that, your Buttercup Bikini Top is finished!
I hope this tutorial showed you that sewing your own swimwear doesn’t have to be complicated. With just a few pieces of fabric, one simple pattern piece, and a clever little twist, you can create a bikini top that’s comfortable, flattering, and completely handmade by you.
One of my favorite things about this pattern is how easy it is to customize. Sew it in a bright tropical print for your next vacation, choose classic black for a timeless look, or make a few in different colors so you always have one to match your favorite bikini bottoms. Since it comes together so quickly, it’s the perfect project for using up those smaller pieces of swim fabric left over from other projects.
If you make your own Buttercup Bikini Top, I’d absolutely love to see it! Share a photo on Instagram and tag @mygoldenthimble so I can admire your beautiful creation, or join us in the My Golden Thimble Sewing Club on Facebook to show it off and inspire other sewists.
As always, if you have any questions while making this project, leave them in the comments below. I’m always happy to help!
Happy sewing, and I’ll see you in the next tutorial!