
In today’s tutorial, I’m going to show you how to sew the cutest summer DIY Corset Top ever—and guess what? It has removable puff sleeves for that extra cute twist. Think: a classic corset silhouette with girly, fairy vibes that you can take from sunny brunch dates to warm summer nights out.
This adorable design is based on my Rose Corset Pattern, which comes in both a free and paid version (this last one has length/style options). So you can pick the one that works best for you!
Honestly, this project is super beginner-friendly and fun to sew in an afternoon. It’s simple, quick, and so satisfying.
Once you make one, you’ll want to create a complete matching set— I’ve already got a skirt planned next, so stay tuned for that, too!

NOTE: This post contains affiliate links, which means that if you make a purchase using one of the links in this article, I may earn a commission at no extra cost to you (To know more about this, click here.)
About This Pattern: The Idea Behind the Design
So picture this: I’m out on one of my buying fabric sprees, and I stumble upon this gorgeous blue floral rayon. I immediately knew I wanted to make a summer set with it—top and skirt, light and flowy, but still giving “put together.”

I didn’t feel like drafting something from scratch (you know the vibe); I wanted an easy top-sewing pattern.
So, I reached for my Rose Corset Pattern. I used the paid version, which has sizes from 4XS to 8XL, and three length options—including a cropped version! If you’re using the free version (link in instructions), no worries—you’ll only need to crop the pattern to your desired length. Easy peasy.

For the sleeves, I wanted something cute but quick. I was between ruffles and puff sleeves, but puff sleeves won because they’re easy to make with just two rectangles and a bit of elastic. Oh, and the best part? They’re removable! Perfect if you want a little change-up in your look.
I used a flowy rayon for that soft drape and added fusible interfacing for gentle structure. I also added acrylic boning for support (don’t worry, it’s super flexible), and I’ll walk you through every step below. And yes—I’ll make a matching skirt soon to complete the look.
Get ready for cuteness overload.
Make it a set!!

Be sure to check out the other part of this design to complete the full outfit: The A-line Skirt Pattern and tutorial. Which also comes in a free pattern with sizes XS to XL!
DIY Corset Top Notes and Sewing Directions
Materials You’ll Need
- ½ yard of rayon fabric
- ½ yard of lightweight fusible interfacing
- Four pieces of ¼” wide elastic, each 13” long
- Acrylic boning (I used the kind that’s easy to sew and super soft)
- Loop turner
- Elastic threader or safety pin
- Sewing machine (I used my Brother combo quilting and embroidery machine)
Buy the materials and tools on Amazon:


Modifying the Pattern

Like I said, I used the paid Rose Corset Pattern and simply chose the cropped version. If you’re using the free version, just crop it to your liking. Measure from your waist up to where you want the DIY Corset Top to end, and adjust the pattern accordingly.
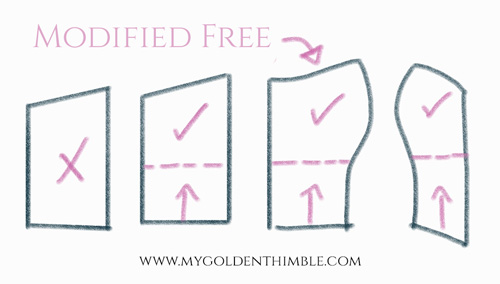
For this design, we’re only using the center front, side front, and side back pieces. Skip the center back piece entirely—that space will now be used for our cute corset lacing.
Don’t forget! The pattern doesn’t include seam allowance, so be sure to add your own. I recommend either ½” or ⅝” seam allowance, whichever you’re more comfy sewing with.
Assembling the Corset Bodice
Once everything is cut out, start by fusing interfacing to both your main fabric and lining pieces. I used the same fabric for both, so I marked the lining to keep things organized (totally optional but helpful!).
Then, just follow the corset pattern assembly instructions. I added the acrylic boning to the lining only, which gave it that perfect structured-but-still-soft feel.
Now, let’s talk loops!
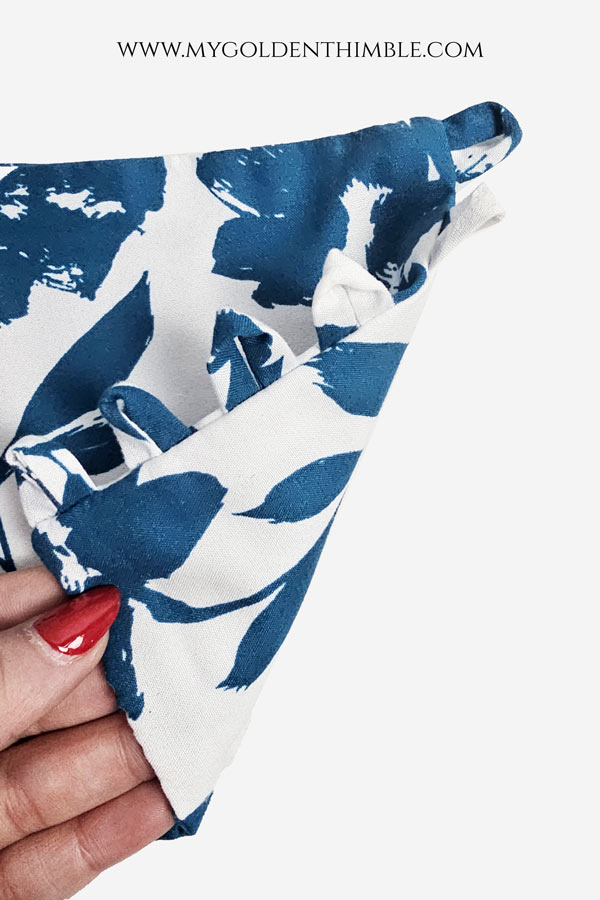
Instead of installing grommets, I went with fabric loops (they’re so much easier, honestly). I cut a strip of fabric the full width of the fabric by 1 ¼” wide, folded it in half lengthwise, sewed it at ¼,” and used my loop turner to flip it right side out.
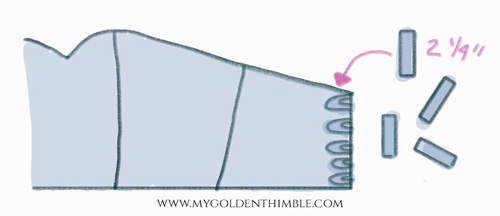
Then I cut it into 2 ¼” pieces for the loops and basted them along the new center back edge—spaced about ½” apart. Adjust the spacing to your liking!
To finish the bodice, place the main and lining pieces right sides together, sew around the edges (leaving about a 3-4” opening at the hem), and turn the whole thing right side out. Since the boning is soft, this part’s a breeze!

Close the opening with a ladder stitch by hand for that clean finish.

I made another fabric strip (same method as the loops) for the corset lacings straps, but this one was 90” long. I tucked in the ends and closed them up with a ladder stitch, too.
Making the Removable Puff Sleeves
These sleeves are seriously so easy and so cute!

I cut two rectangles, each 8 ¼” tall by the full width of the fabric.
You can either serge the short ends and sew them up, or if you’re feeling fancy, use French seams like I did for that ultra-clean inside.
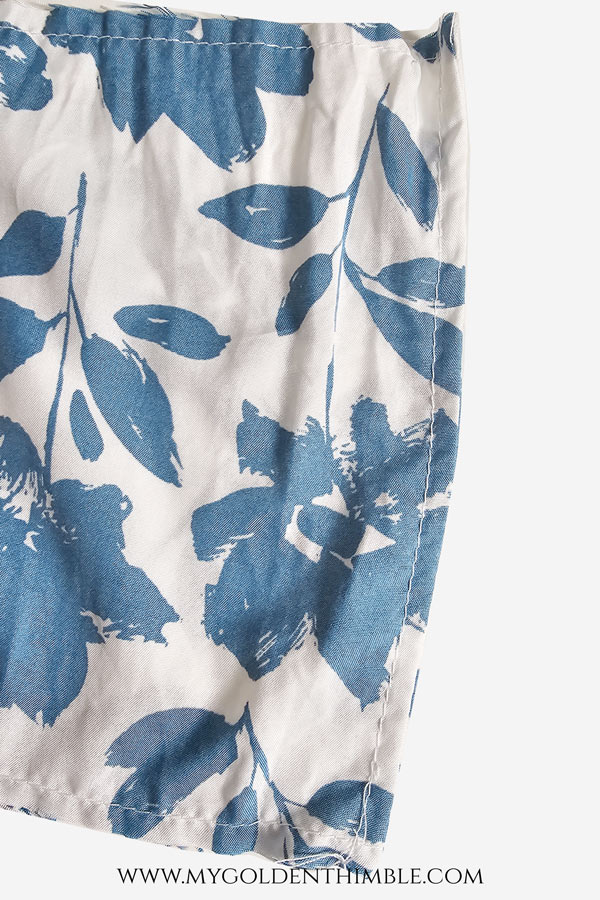
Next, we’re making elastic channels along both long edges. Here’s how:
- Sew a ¼” basting stitch as a guide.
- Fold and press that edge to the wrong side using your basting stitch as a fold line.
- Then fold it again by ⅜”, and stitch close to the edge—leave a little opening to insert the elastic.
For the elastic length, measure the girth of your upper arm, subtract 1”, and cut two pieces for each sleeve (top and bottom channels).
Use your elastic threader or safety pin to insert the elastic into each channel, then sew the openings shut with a quick straight stitch.
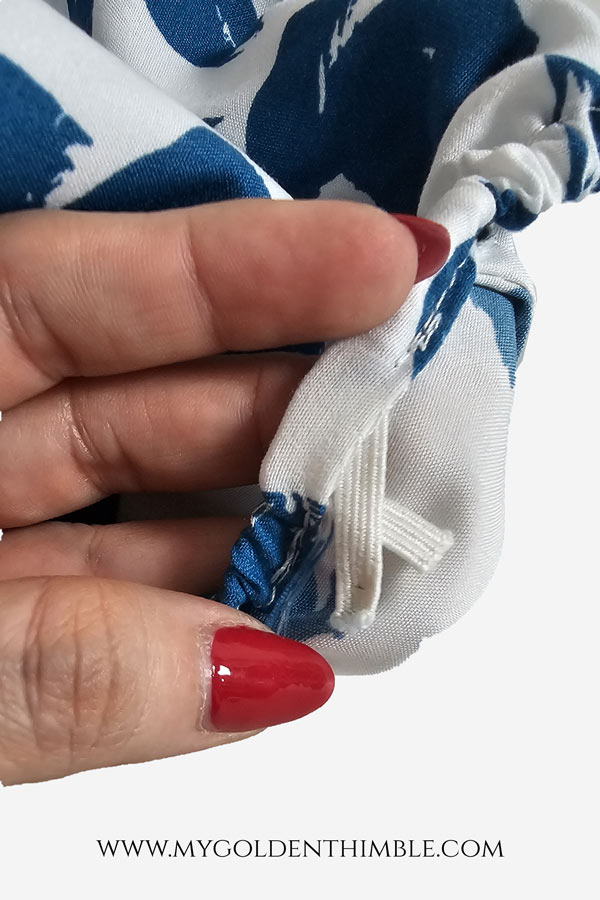
Tadaaa! You’ve got the cutest puff sleeves, and because they’re not attached, you can wear them or ditch them whenever you feel like switching them up.

All Done, Cutie!

Wasn’t that super fun and easy? I’m honestly obsessed with how this top turned out and can’t wait to finish the matching skirt tutorial to go with it—so keep your eyes peeled for that!
If you make this DIY Corset Top, I’d LOVE to see it!
Come share your version in our My Golden Thimble Sewing Club on Facebook or tag me in your stories and posts on Instagram or TikTok. Let’s all be cute corset twins together this summer!
Happy sewing, sweet bean!







