
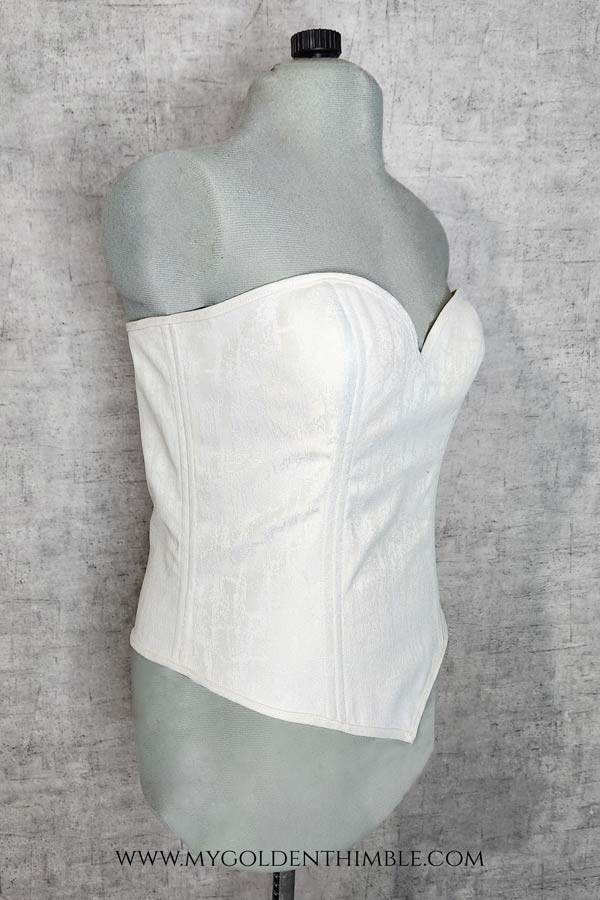
With this free corset pattern, you will be able to understand and make your first corset using your favorite fabrics.
I will guide you step-by-step through making a basic corset with princess seams and boning (optional). You can modify and fit this pattern to your size and customize it as you like.
I know how hard it is to search and find a good corset sewing pattern online.
That is why I wanted to give you an option that wasn’t all too complicated, like a historically accurate corset, but rather a simple style that represents the essence of corsets for women.
You will need just a few easy-to-find materials, your sewing machine, your iron, and some patience. Ultimately, you will have the most gorgeous corset to take all your outfits to the next level.
NOTE: This post contains affiliate links, which means that if you make a purchase using one of the links in this article, I may earn a commission at no extra cost to you (To know more about this, click here.)
Corsets have been around since the 16th century to help women shape their bodies and provide support for the heavy dresses and skirts of that era. They were designed to create a small waist and were made with stiff materials such as whalebone, metal, and wood to provide structure.
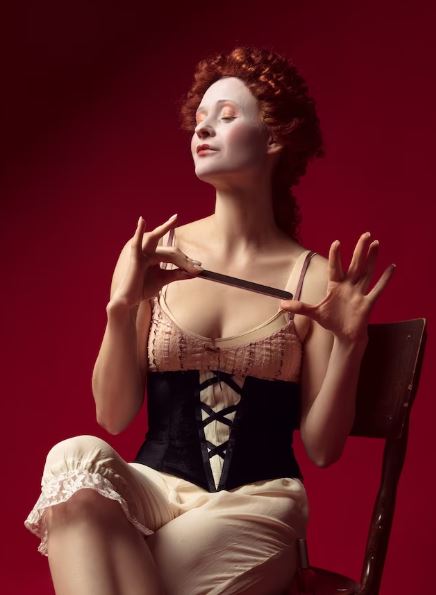
Of course, today, we use corsets as a fashion statement. The style has been widely modified to think about comfort and safety.
Once upon a time, corsets were considered necessary in women’s wardrobes. But today, this garment has evolved to represent femininity, elegance, and sensuality.

It enhances your shape, improves your posture, increases your curves, and gives you an incredible boost in confidence.
Why Make Your Own Corset?

For starters, a good-quality corset can be very expensive, not only because of the many hours and effort put into every design, but also because historically accurate corsets require much more complex pattern-making than commercial ones.
That is why I am meeting you in the middle.
Today, I’m sharing a classic corset design that requires only basic sewing skills. It consists of just a few pattern pieces.
With this design, you can express your creativity, save money, and customize it to your size.

The cost of making your own corset is around $30 to $40 if you add up the costs of the fabric, boning, and interfacing. Consider your budget when you get your supplies.
You can also use this sewing pattern as a base to make many different designs.
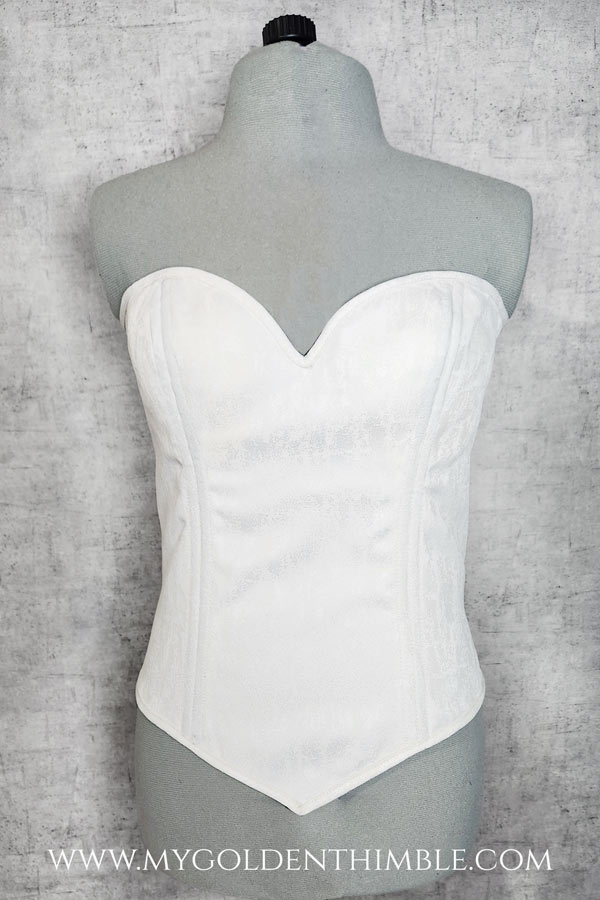
Here, I used the Rose Corset Pattern to make a nice Spring Corset Top with removable puff sleeves.

The instructions for this corset top are here. After you learn how to make the base of this corset, you can check them out.
Corset Making Tips and Tricks-Before You Start.
Contrary to what you might believe, making a corset is actually very easy. You just need to remember these tips to make the whole process much easier.
Tip 1: Use lightweight fusible interfacing.

Just using your fabric and your lining isn’t enough. A corset must have a good structure to maintain a great shape and hold it.
Using a good medium-weight fabric will be great, but reinforcing it with fusible interfacing will be much better. You can press the interfacing on both layers or only on the main fabric layer.
Tip 2: Make Notches and Use a Lot of Pins

Notches are extremely important in corset making. So, whether you have a pattern notcher or snap your fabrics with scissors, don’t skip this step.
You will use notches to align the pieces with pins.
Then you will pin the remaining seam allowance line. When working with curves, use as many pins as you think you need so the fabric won’t move.
Tip 3: Boning sizing matters.
More specifically, the length size you cut your boning before inserting it in your corset.
The boning has to fit in the channel and not stick up or down because of the pressure. If this happens, you will be very uncomfortable as the boning will poke you as you walk or sit.
To avoid this, always cut your boning 1/2″ shorter than the princess or seam line measurement.
Tip 4: Mark your pieces.
Corset pattern pieces are very easy to confuse.
So make sure you take notes with your favorite marking tool on which piece is which, which side is which, which is the center, and which is the top and bottom of the piece.
Save this Free Pattern on Pinterest
Sewing Your Free Corset Pattern-Instructions.
Materials
- 1-yard Woven Fabric
- 1-yard Lining Fabric
- Metal or Plastic Boning
- Grommet Pliers
- Lightweight Fusible Interfacing
- Free Rose Sewing Pattern
1. Download and Print the Free Corset Pattern.
Download the Rose Corset Pattern by scrolling down this tutorial and following the instructions at the end of this post. Print and assemble the pattern pieces.
This pattern DOES NOT include seam allowance. Add your desired seam allowance before cutting the pattern.
As with many of my sewing projects, this includes a free sewing pattern. The pattern is in PDF format, with pages in letter and A4 sizes. This sample is made of my size only (chest: 39″, waist 31″, hips: 44″, cup B), which is a medium-large size. Remember that you can customize this pattern down or up by adding or removing the seam allowance.
You can also purchase the complete version of this pattern, which includes 22 sizes (from 4XS to 8XL), detailed downloadable digital instructions, and multiple printing options (letter A4, A0, and Projector).
But just in case this pattern isn’t good for you, I have other options that are very similar to this pattern made by other designers.
You can also download these designs and just follow these instructions to make your corset. These resources are at the end of this post.
Making a muslin/ toile is strongly recommended so you can make the necessary modifications to adapt the pattern to your size.
You can get this and other similar free corset sewing patterns by following the instructions at the end of this post in the section “Other resources.”
2. Prepare a Toile (Optional).
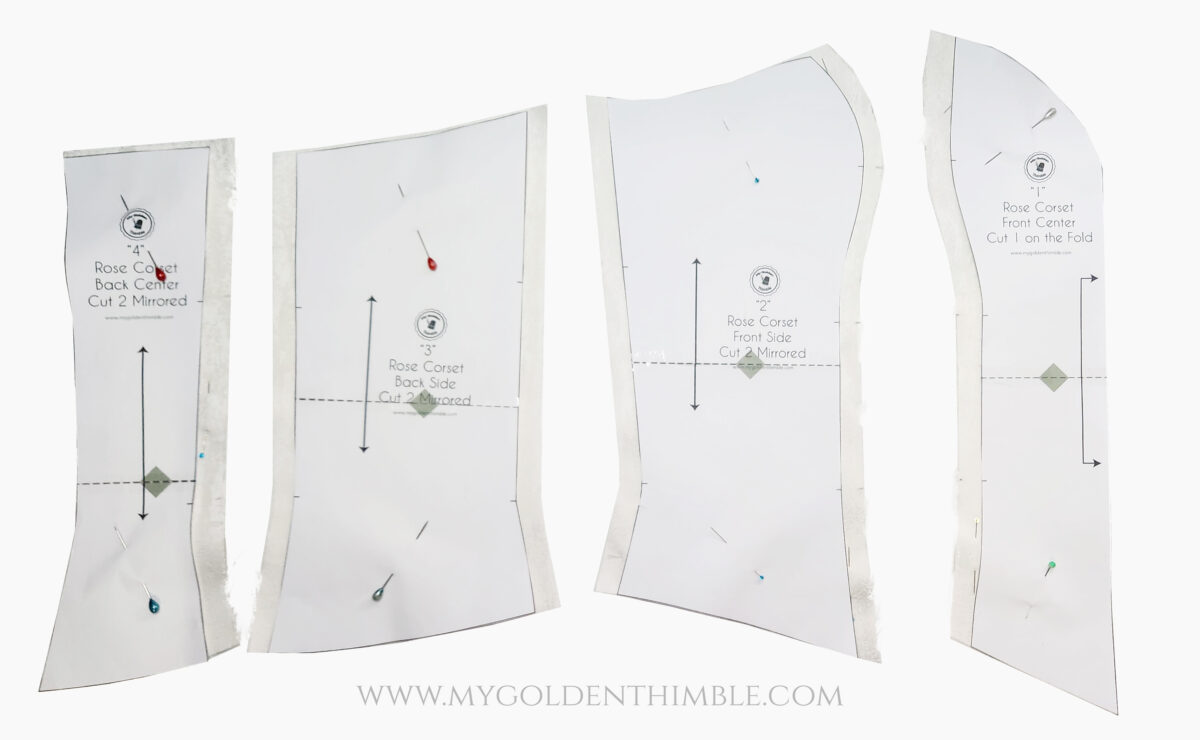
Once you have printed and assembled your pattern, you will need to decide on the seam allowance you want to use.
I recommend using at least a 1/2″ seam allowance for modifications when making your muslin/toile.
If you are too far down the measurements I gave you above, you won’t need to add more than 1/2″, but if you have bigger sizes, add up to 1″ of the seam allowance.

To make a toile, follow all these instructions (except for the interfacing) in only one layer and modify your pattern.
Then, proceed with the rest of the tutorial.
3. Assemble the bodices.
From this point forward, you will follow these instructions on both the main layers of the fabric and the lining layers.
With the front pieces, align the side panels with the center panel, starting by the notches with the right sides of the fabrics facing together.
Pin along the seam line and sew at 1/2″.

Next, align the back side panels with the center panels. Start by pinning the notches, and then pin the rest of the seam line. Sew at 1/2″.

Now join the front and back bodices by aligning the front and back side panels, with the right sides of the fabric facing together.
As before, start pinning at the notches, then pin the rest of the seam line. Sew at 1/2″.

Before pressing, make snips on the seam allowances through all the curves.
This will help open the seam allowance better and give a better shape to the corset.
Press the seam allowances open.

4. Make the boning channels.

Place the main fabric layer over the lining layer, aligning the seam lines.
You can use pins to ensure the main fabric’s seam lines and the lining are perfectly aligned.
I like putting my pins vertically through all the seam lines to ensure they won’t move.

To make the channels for the boning, you are going to first make a “stitch in the ditch” seam.
This means you have to make a seam just above the seam line to hold/secure both layers of the fabric together.
Then, make a top stitch seam 3/8″ from this seam to each side.
This will form two channels in each seam of the corset that we will use for our boning.
5. Sew bias tape and insert the boning.

For this step, you can use any store-bought bias tape.
Nevertheless, I recommend you use your own handmade bias tape made with the same or similar fabric of your design.
Use your preferred method to sew the bias tape to add it to the top of your corset.
If you have trouble with the pike on the sweetheart neckline, you can see this reel on my Instagram to help shape it.
Once your bias tape is sewn on the top, insert your pre-cut boning through the channels we made.
Remember that the length of the boning has to be 1/2″ shorter than the measurement of the garment. Each channel will be of a different length.

Then, sew bias tape on the bottom of the corset and finish by sewing it on the center back.


6. Apply the eyelets.

Ok, I have to be honest with you. I made this the hard way.
The very hard, hard way.
I made the eyelets using bra rings. I cut a small hole with my scissors and sewed it by hand around the eyelet to hold it to the fabric.
Don’t do this. For the love of everything you hold dear, don’t.
You will regret it.
The easiest way to add your eyelets is to use a grommet plier, which costs about $9-15 and has many eyelets.
No products found.
It is straightforward to use, and you will save so much time and effort.
I have a full step-by-step tutorial on how to install eyelets here.
Put on as many eyelets as you want. I like to put at least 6 or 7 on each side for better grip.
7. Add your straps.

You can use the same bias tape you made on the steps above to make your straps.
Consider making a very long strip to see how much you need for this project.
Fold the bias tape in half lengthwise with the right side of the fabric on the inside and sew at ¼” from the folded line.
Cut the excess fabric away and use a loop turner to turn your straps inside out.

Thread your corset and try it on to see how long you need to cut it out. I considered having enough length to pull the corset over my head without the straps unthreading from any eyelet.
As I have no one at home to help me put this on and off.
I need to be able to pull it in and out already threaded, so the only thing I have to do is pull it close.
Once you calculate your desired length, cut out the excess and use an invisible seam to close the open ends of the staps.

And that’s it!!
Now you have the most wonderful corset to wear at any party or in a casual, daring outfit.
Remember to let me know by commenting below if you want me to make this pattern available in all sizes. If there are enough comments, I will draft the pattern for all sizes.
Rose Free Corset Pattern. PDF Download
To get this free sewing pattern, sign in to the form below. The files will be sent to your email in a few minutes. The pattern is in PDF format, with pages in letter and A4 sizes. This sample is made out of my size (chest: 39″, waist 31″, hips: 44″, cup B), which is a medium-large size. You will get the pattern in PDF format in Letter and A4 printing options.
If you don’t see the email in your inbox, wait five minutes and refresh the page.
If you still can’t find it, check the spam or promotion folders and drag the email to your main inbox to open and download the patterns.
Note*You can also purchase the complete version of this sewing pattern (see next section)*.
Or purchase the complete sewing pattern!
But, just FYI, you can also get the complete version of the Rose Corset Sewing Pattern, which includes three style variations, 22 sizes (from 4XS to 8XL), detailed downloadable digital instructions, and multiple printing options (letter A4, A0, and Projector).

The next section has some resources for you if you are looking for a similar pattern in all sizes.
Corset Making Resources
- How to make your corset muslin/toile.
- Corset Pattern Generator.
- Free Corset Pattern in all sizes from Mood (slightly different design).
- Anatomy of a Corset with names.
Do you enjoy our freebies?? Support us so we can keep making freebies for you by buying us a cup of coffee here. We will be forever grateful!








looking forward to 3d printing this corset
Do you mean like on a 3D printer? I would love to see that!
thank you !
You are most welcome! I am glad this free corset pattern was useful to you.
Hi there, I’m from philippines and a beginner in sewing it would be a big help for me to your pattern. thank you in advance <3
Hi Jesman, absolutely please enjoy this free pattern!
thanks
You are most welcome!
Hi, is the free pattern no longer available? I would love to try altering and making the DIY Puff Sleeve corset. Thank you!
Yes dear! You have to fill out the form at the end of the post. The instructions are there, you put your email and it will be sent to your inbox!
Hi I apologize, but I am not seeing a link to fillout at the end of the post, Just the link to buy the corset and coffee link. Im sorry!
Is right above the title for purchase, under the title that says “Rose Free Corset Pattern. PDF Download”. Its a soft blue and white form, with the picture of the corset on the left.
Hi, I was not able to see the email box on Firefox, but could on Chrome. I was very confused. Thank you.
You are welcome 😀 sending love!
I love your Corset and would like to use this design for my upcoming cosplay.
Hi Michelle! Absolutely! I will love to see your cosplay with our Rose Corset. Make sure to tag me on your pictures please! It’s my greatest joy to see your designs.
I would love to have this pattern in in Extra Large and does it have darts????
I am currently working on making all sizes for this sewing pattern! Please sign up to my newsletter to know where I launch it. All though you can come back to this post. I will announce it here too!
Your blog is a lifesaver! I’ve been wanting to try making a corset, but couldn’t find any simple yet stylish “clothing patterns”! It’s great that you provided the pattern and also shared tips, like using lightweight fusible interfacing and making notches.Thank you!
Hi Louis! Thank you so much for that comment! I am so glad that you liked my tutorial and I hope you liked the corset sewing pattern too!
Hi! I’d love a small/medium. Ty!
Thank you Cam,
I am already working on getting ALL Sizes for this pattern.
Me gustaria recibir el patron de corse.
gracias
Hola Maria, para recibir el patrón debes inscribirte en el formato que aparece al final de este post. Así de esa manera lo recibirás en tu correo. Recuerda revisar spam y promo folders!
I’d love to have a bigger size as well, and I cant seem to get the tutorial to print out
Have you tried refreshing the page? Anyway I will try to include printable instructions in the all sizes pattern.
I’d love to see this in larger sizes as well! I saw in another comment that it’s in the works and am very excited.
That’s right!!
please send this pattern for multiple larger sizes. my first time making anything like this. please send news once a week. thanks so much.
Thank you so much Rossi.
The pattern is currently on the works for all the sizes! Wait for it.
Would love the pattern in a 3x/4x .
Thank you May
Hello I have not receive it 🙁 thank you
I just sent it again!
Love, D
yo tampoco lo eh recibido 🙁
Hola Aylen,
Te envíe de nuevo el correo con el patrón del corset gratis. Me podrías confirmar si lo recibiste?
Abrazos, D
Could you please make this for a size s?
Absolutely Rose! I am making all sizes for this pattern this month. Follow us on facebook and instagram to stay tunned 😉
How much boning did you use for this pattern, and how long were the pieces you used?
Center back: 10″- 4 pieces – 2 pieces per side.
Sides: 10 1/2″- 4 pieces – 2 pieces per side.
Center front: 13″ – 4 pieces – 2 pieces per side.
I don’t see my pattern in my inbox
Hello Devyn,
I see on my side that your pattern has been delivered via email. Could you help me check on your spam or promo folders?
yay!
Hi I’ve been waiting for the pattern to reach my mail but nothing is happening, I could really use the pattern as I have an event I will be attending soon so I want to make a corset from the pattern, your help will be much appreciated
Hi Rose! I have checked on my data and it says the email was delivered to you on January 26th. Could you please check on your spam or promo folders???
Usually you have to drag the email from there to your main email folder to white list us and get our emails and freebies right away. 🙂
I’d love to use this but the download for the pattern doesn’t seem to be working?
Could you tell me what issue are you having??
Hello! Does the pattern send immediately to my email inbox? I can’t find mine. Wondering if I should start looking through my junk mailbox.
Yes it does! Sometimes they go to the promo or spam folders. You need to drag it out from there to the main inbox 😀
hola cómo descargo el patrón?
Hola Brenda, primero tienes que ingresar tus datos en la ventana dónde indicamos para que te pueda llegar el patrón de costura a tu correo. Una vez hecho eso te enviamos el correo con el patrón descagarble en formato PDF y de ahí solo lo bajas y sigues las instrucciones para ensamblarlo.
I am not exactly small chested, I’m a 46C or 44D depending on what bra I’m wearing. This would be my first corset ever and I would have no idea how to resize this. I would love this in a larger size!
Thank you so much Keladria, I will consider your size!
would love to see this in more size love your pattern
Thank you so much for letting me know!
i want the pattern :O
Just sent it!
can you make a size large because I’m a 36c and my waist is 29. and I want to make a corset for my 20th birthday. I could wait till next year when I take the class for it but I wanna start now. thank you
Hi Melanda! It seems like I am going to make this pattern available for more sizes as I am seeing a rise in visits. I hope to get more comments to see if more people want it.
Hi, i have checked my mail and spam folder and I am not able to see the pattern.
Can you please help me?
I just sent it again. Can you help me check?
I can’t seem to find the link to download the pattern. I have checked my spam and all the other places you mentioned and it’s not there. Tried refreshing, etc. Help please.
Hi Sharon, could you please check out again?? I just re-send it.
Thank you!
It is my absolute pleasure to provide you with pretty sewing patterns.
bonjour, je n’ai pas reçu de patron, j’ai vérifié les spams. merci
Je viens de renvoyer le fichier, pourriez-vous vérifier à nouveau ?
Yes please to more size options! Especially as an overbust, a few more options would help.
Thank you!
Thank you so much for commenting! I will make that note if/when I make more sizes!
Thanks!
Would Love this pattern drafted for larger sizes! XL, 2X and 3X. Busty girls deserve cute stuff too.
Of course, Barbara. If I make this pattern in all sizes, I will make sure to add the XL sizes as with all of out other patterns
I’d love to have this one in extended sizes! My measurements are a considerable distance off from yours. Having those extra sizes would make grading a lot easier.
Hey Rachel! Absolutely!! If more people ask for this pattern, I will totally add the extra sizes. Be sure of that 😉
Thank you so much for leaving your comment here.
Thank you.
You are most welcome
Thanks
You are welcome!