
This Half Slip Pattern is going to make you travel back in history to a more classy and sexier time. Learn how to sew your own Slip to use it under your dresses or your skirts.
Is so easy and only takes 10 minutes to sew!!

Read this too: The Rigth Way to Sew a Button
NOTE: This post contains affiliate links, which means that if you make a purchase using one of the links in this article, I may earn a commission at no extra cost to you (To know more about this, click here.)
Half Slip Pattern and Tutorial
Making this beautiful Vintage Half Slip is only going to take 10 minutes of your time.
So, if I were you, I would just cut 3 or 4 to make all at once.
The best part of this tutorial is that you don’t really need to use your Serger at all. Which in my opinion, gives it a more professional and high end look.
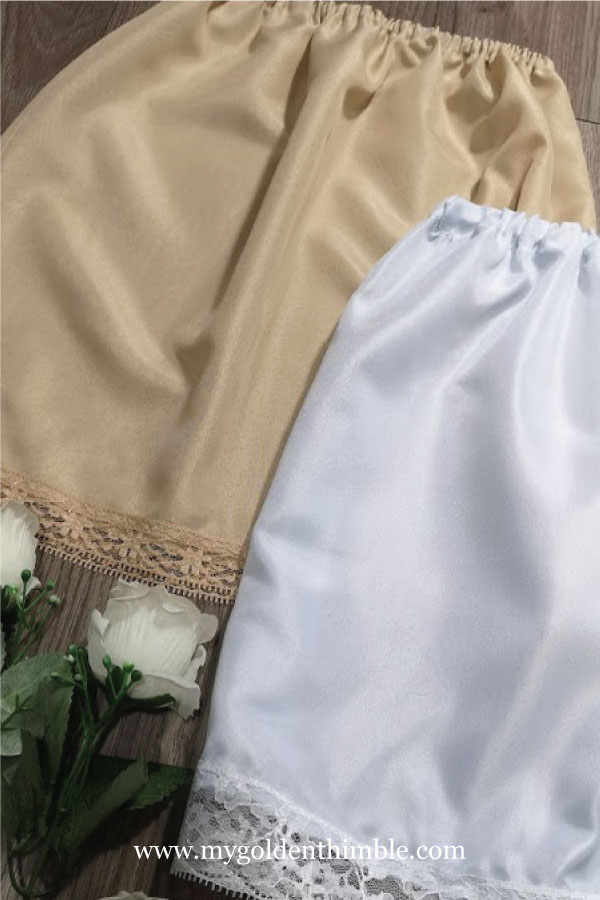
These Half Slips are perfect for un-lined dresses or skirts. If it is an unlined medium-heavy weight skirt is going to protect your legs from the garment seams.
On the contrary, if you have a see-through fabric skirt like one made with chiffon fabric. The Slip is going to give you an extra layer so you don’t go out giving a show. LOL
So let’s get on with the tutorial!
1. Make a Half Slip Pattern right on the fabric
For this tutorial we are going to draw the pattern directly on the fabric as you don’t really need anything paper for it.
Start by drawing and cutting a rectangle that measures 1/4 of your hip seat measurement + 5/8″ + 1/2″ for ease (*optional) by the length you want your half slip to have + 2 1/4″.

2. Sew a French Seam at Sides
Now sew a French seam by sewing on each side 1/8″ on the right sides of the fabric and then turning the skirt inside out and sew 1/4″ to close the seams.

3. Sew the Waistline
To sew the Waistline of the Slip, first, make a basting stitch of 1/4″ overall the waistband and press it to the inside of the skirt.
Learn it: Basting Stitch, What? Why? and When to use it.


Then fold again 1″ to the inside of the skirt and press. Sew an edge stitch leaving about 1 1/2″ open.


4. Insert the elastic.
With the help of a safety pin, insert an elastic that measures your waist girth circumference – 2″.
Close the elastic by overlaping it 1/2″ and runing a straigth stitch a couple of times.


After this close the opening of the waistband, making sure you don’t grab the elastic.

Looking for a Sewing Pattern? Dahlia Dress the prettiest pattern for knits.
5. Sew a Lace Hem
To make the lace hem, fold 1/4″ on the right side of the fabric and press.

Finally, place your lace over this folded edge and sew it with a zig-zag stitch making sure you pass the stitch right over the 1/4″ fold. This way you won’t have to worry about loose threads.

And that’s it!!

I hope you enjoyed this quick tutorial! If you made this Slip please share it with us at My Golden Thimble Sewing Club or tag us on Instagram and our Facebook Page!






Thanks!
You are most welcome!
I know this is going to sound like I’m dumb…and sometimes I probably am. But….you say to cut a rectangle 1/4 of my hip measurement…but how many? I know it would be 4. How many young beginners would?
Just trying to be helpful to new sewists. Love your patterns, your site, and your style. Thank you for letting me be a part of it!
This is a nice tutorial but I don’t see where you mentioned what type of fabric was used. Thanks!
I am sorry! You are right. I used a cotton poplin, but you can also use a nice silk fabric.