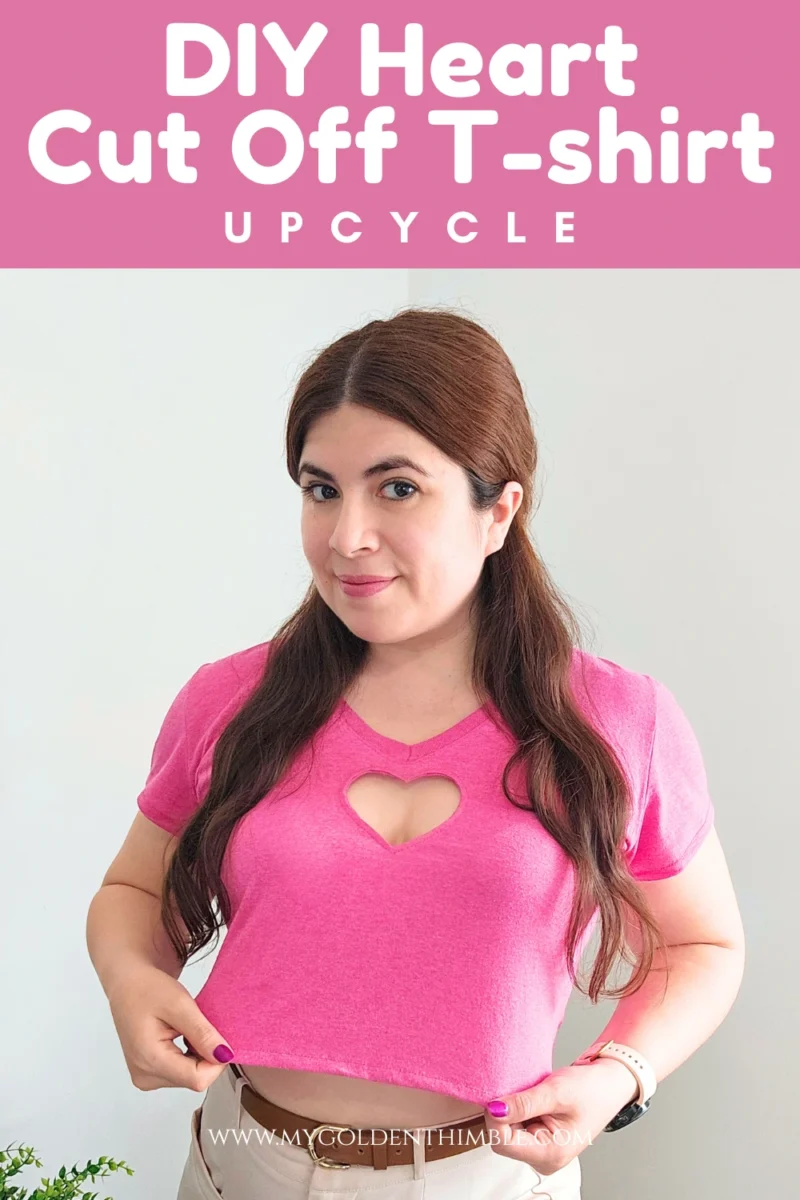
Let’s learn how to sew a heart-shaped cutout to customize your garments!! Today I’m going to show you exactly how to do it using an old T-shirt that I’m upcycling for Valentine’s Day.
In this tutorial, I’ll walk you step by step through how to sew heart cutouts onto your garments in a way that looks polished, intentional, and totally wearable. I’m starting with a basic T-shirt because I love giving everyday pieces a second life, but you can use this exact technique on almost anything.
Think sweatshirts, dresses, tote bags, jackets, or even handmade pieces from your own sewing patterns.
The best part is that this method works beautifully with knit fabrics, woven fabrics, canvas, and even leather, so you’re not limited to just tees.
NOTE: This post contains affiliate links, which means that if you make a purchase using one of the links in this article, I may earn a commission at no extra cost to you (To know more about this, click here.)
What Is a Heart Cutout?
Before we start sewing, let’s quickly talk about what a cutout actually is in fashion.
A cutout is a design detail where a portion of fabric is intentionally removed from a garment to create an opening as part of the style. Instead of adding fabric like an applique, you’re subtracting fabric to reveal either skin or another layer underneath.

There are two main ways to create this look:
- Hollow heart cut out – The fabric is removed, leaving an open heart shape that shows skin or whatever is worn underneath.
- Lined heart cut out – The heart opening is backed with another piece of fabric, so instead of showing skin, it reveals a contrasting or coordinating fabric behind it.
In this tutorial, I’ll show you how to sew a heart cutout onto a T-shirt, and you can decide whether you want yours hollow or lined.
Before You Start (Things You Really Need to Know)
Before we begin sewing your heart cut out, here are a few important tips to make sure your final result looks clean and polished.

1. Knit Fabrics Will Stretch
If you’re working with a knit fabric like a T-shirt, remember that it stretches when worn. That means your heart cut out will stretch too.
To avoid ending up with a larger opening than expected, make your heart ¼ inch to ⅜ inch smaller than your desired size. Once the garment is on, it will naturally expand a bit.
2. Don’t Skip Fusible Interfacing
For clean, smooth curves, you need fusible interfacing on the back of your fabric. It stabilizes the area and prevents the heart shape from stretching or looking wavy, especially around the curves and point.
A lightweight fusible interfacing works perfectly for this.

3. Leave Extra Fabric Around the Shape
When cutting the fabric that will go behind your T-shirt, leave enough extra space around the heart. You’ll need that allowance when we turn the fabric to the wrong side later. I’ll explain this step in detail soon, but for now, just don’t cut too close.
4. Practice If Needed
If this technique is new to you, try it first on a scrap piece. It helps you understand how your fabric stretches and gives you confidence before cutting into your actual garment.
How to sew a heart cutout. Valentine’s Day T-shirt Upcycle

Materials You’ll Need
- Old T-shirt (cotton or knit works best)
- Scrap fabric (perfect for fabric scraps!)
- Heart template (free printable option if you want)
- Fabric scissors
- Pins or clips
- Sewing machine
- Matching or contrasting thread
- Fusible interfacing
- Fabric marker or chalk


How to Sew a Heart Cut Out (Step-by-Step)
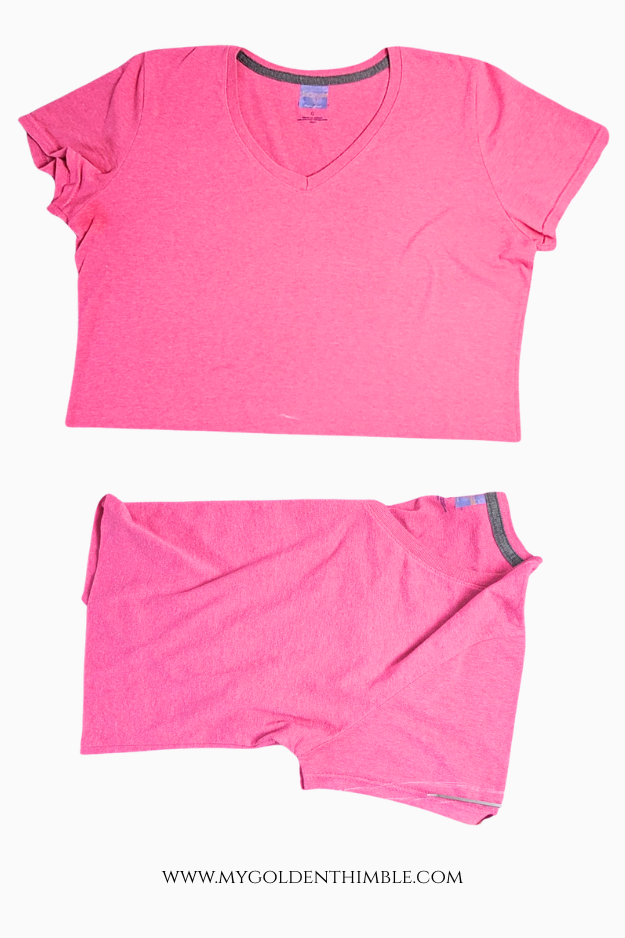
Before adding my heart cutout, I started by making some modifications to my t-shirt so it would end up a nice crop top. I took a bunch of the length of the T, and then modified the sleeves to make them cap sleeves instead.
Step 1: Create Your Heart Template
Start by drawing your heart template in the size you want. The easiest way to do this is to fold a sheet of paper in half, draw half of a heart along the folded edge, and then cut it out. When you open it, you’ll have a perfectly symmetrical heart.
Remember to make your heart slightly smaller than your desired final size. As we sew and turn the fabric to the wrong side, the shape will stretch a little, especially on knit fabrics.
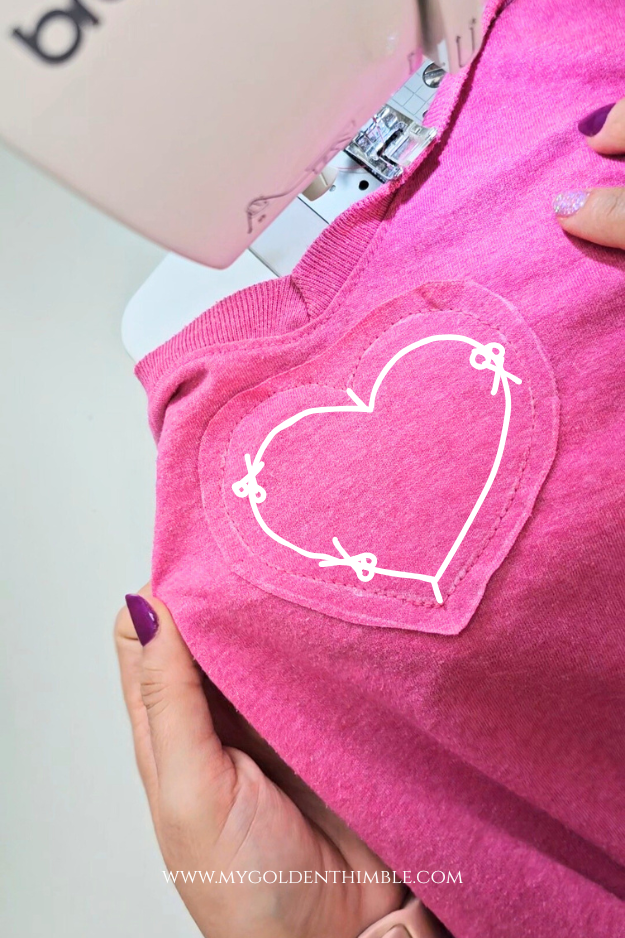
Step 2: Mark the Heart on Your T-Shirt
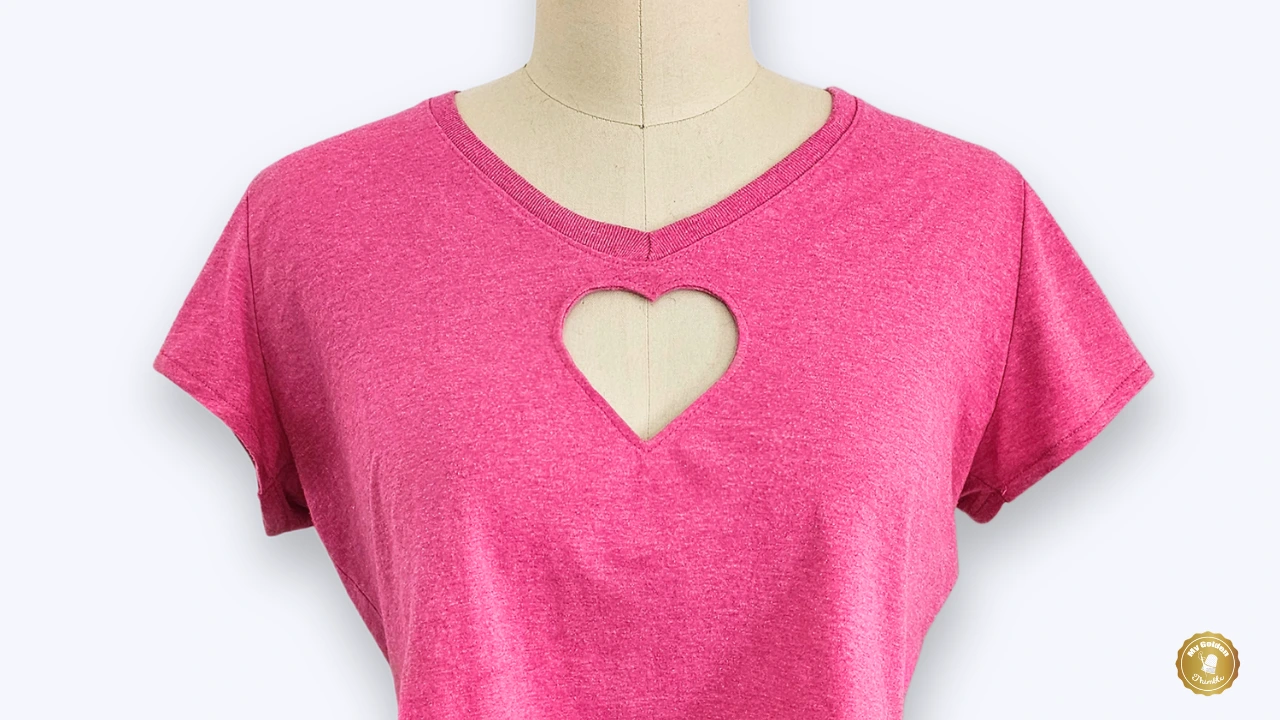
Place your template where you want the cutout to be. In my case, I chose the front of my T-shirt for a bold Valentine’s look.
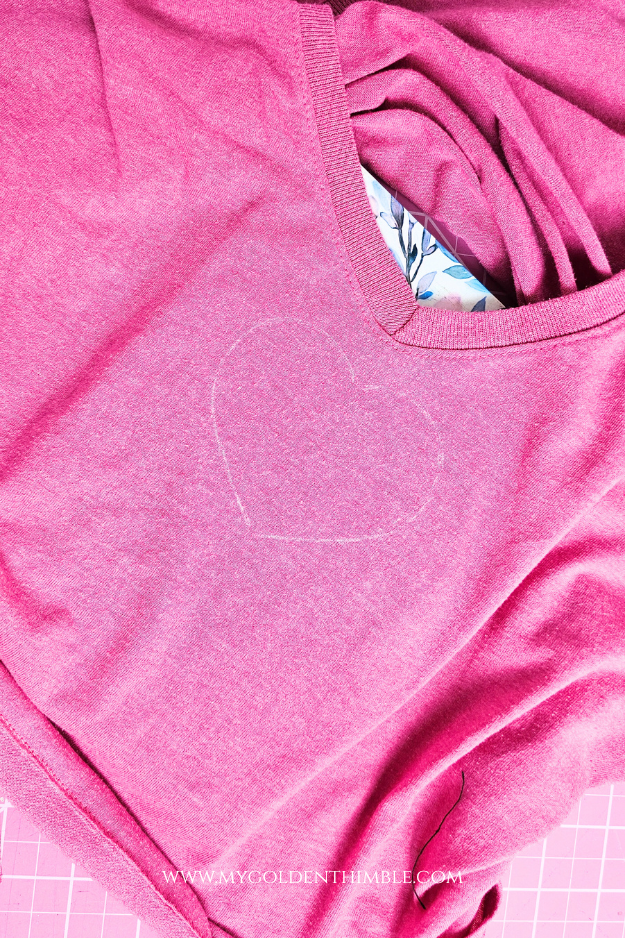
Mark around the heart using a washable marker, tailor’s chalk, or even a small piece of soap (which is what I used). Make sure it’s centered and positioned exactly how you want it before moving on.
Step 3: Mark the Heart on Scrap Fabric
Now take your scrap fabric and trace the same heart shape onto it.
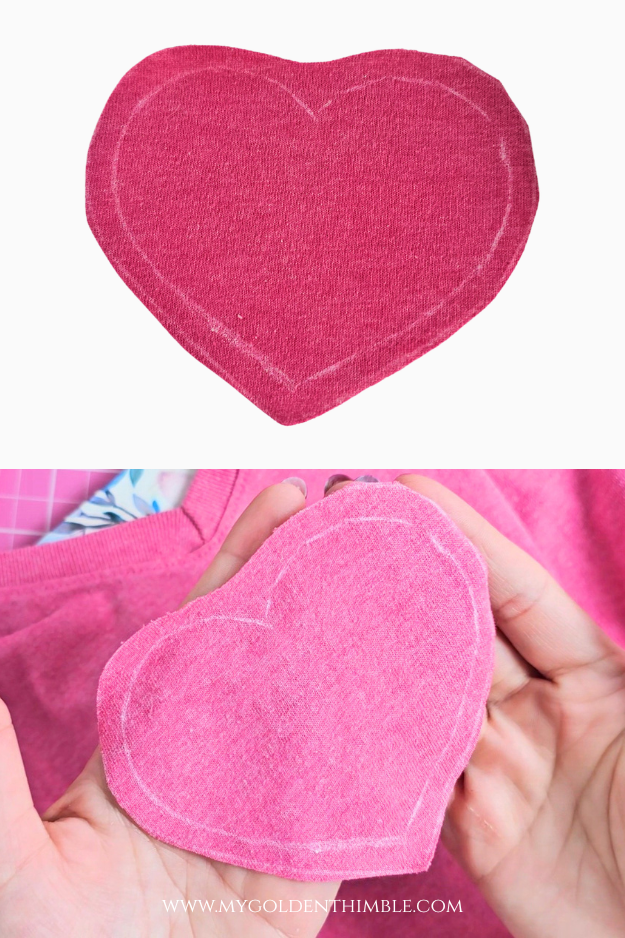
This time, leave about ½ inch around the heart shape, as if you were adding seam allowance (we’ll call it seam allowance in quotes because technically we’ll trim it later). You can leave even more if you want and trim it down afterward.
I made the mistake of leaving too little seam allowance, and on the back of my T-shirt, you can slightly see bits of interfacing and fabric peeking out. That’s not the look we’re going for. So give yourself at least ½ inch — future you will be thankful.
Step 4: Stabilize the T-Shirt
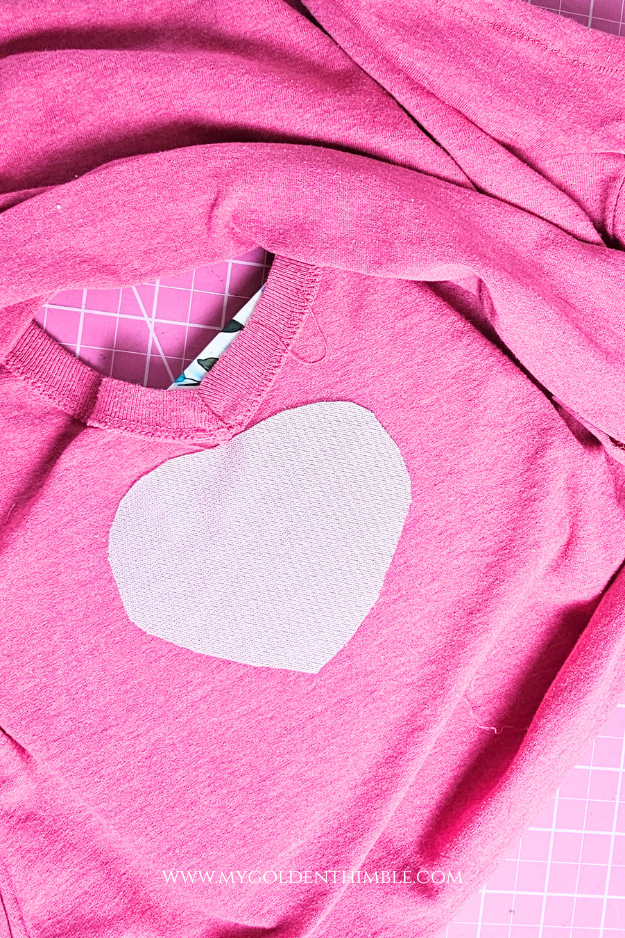
Before pinning anything, fuse a piece of fusible interfacing to the wrong side of your T-shirt, exactly behind where the heart will be sewn.
This step is essential for clean stitching and smooth curves.
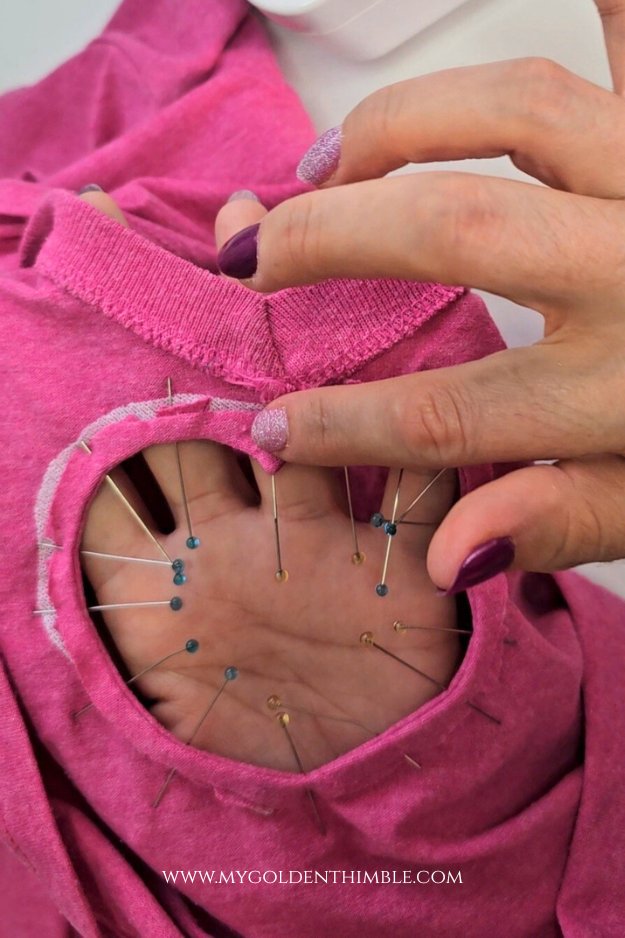
Step 5: Pin the Scrap Fabric in Place
Place your scrap fabric on top of the T-shirt, aligning the heart outlines carefully. I like to fold both hearts slightly to find the center and use pins to match those center points so everything lines up perfectly.
Pin securely so nothing shifts while sewing.
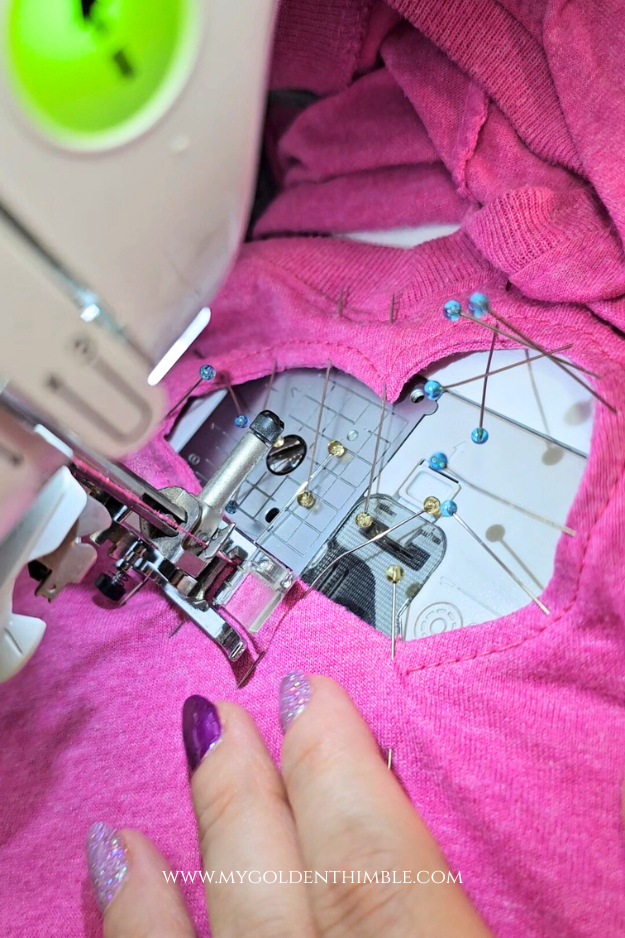
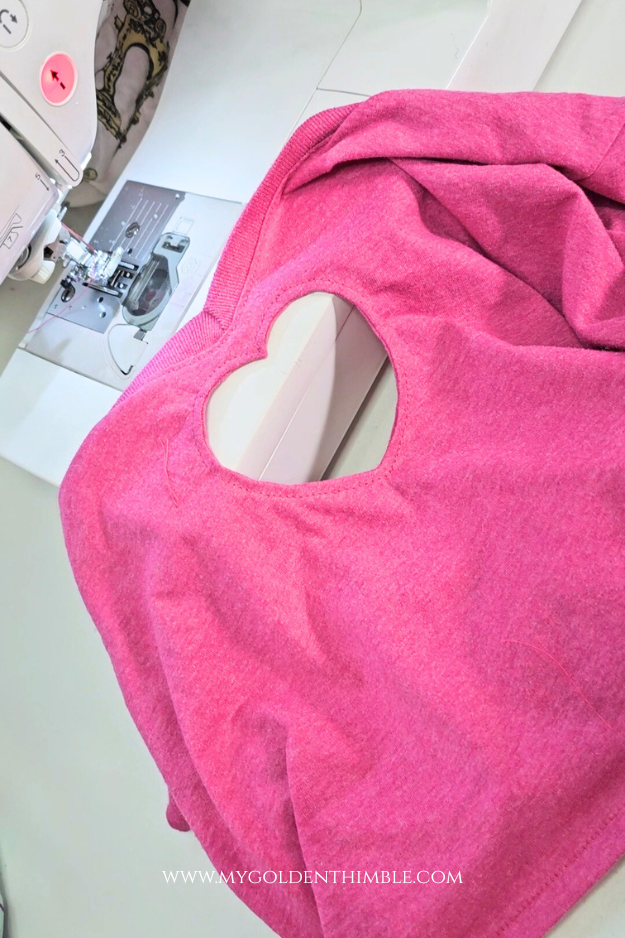
Step 6: Sew Around the Heart
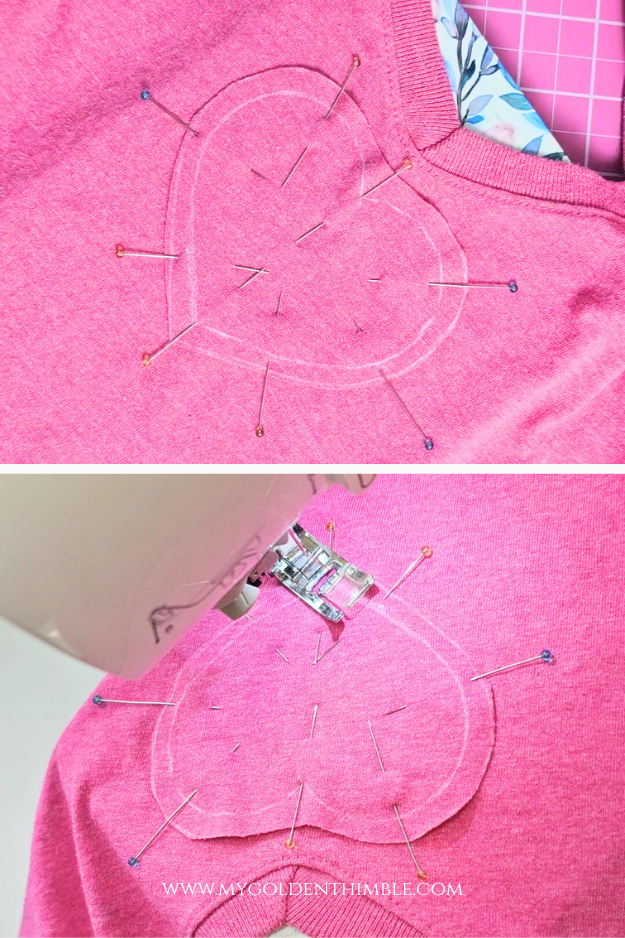
Using a straight stitch on your sewing machine, carefully sew directly on the heart outline.
Take your time around the curves and the top “spikes” of the heart. Slow stitching here makes a big difference.
Step 7: Cut and Clip
Once sewn, carefully cut out the inner part of the heart from the T-shirt, leaving about ¼ inch seam allowance inside the stitched line.
At the top center curves (the heart’s “spikes”), make small snips toward the stitching — but do not cut into the seam. This helps the shape lay flat.
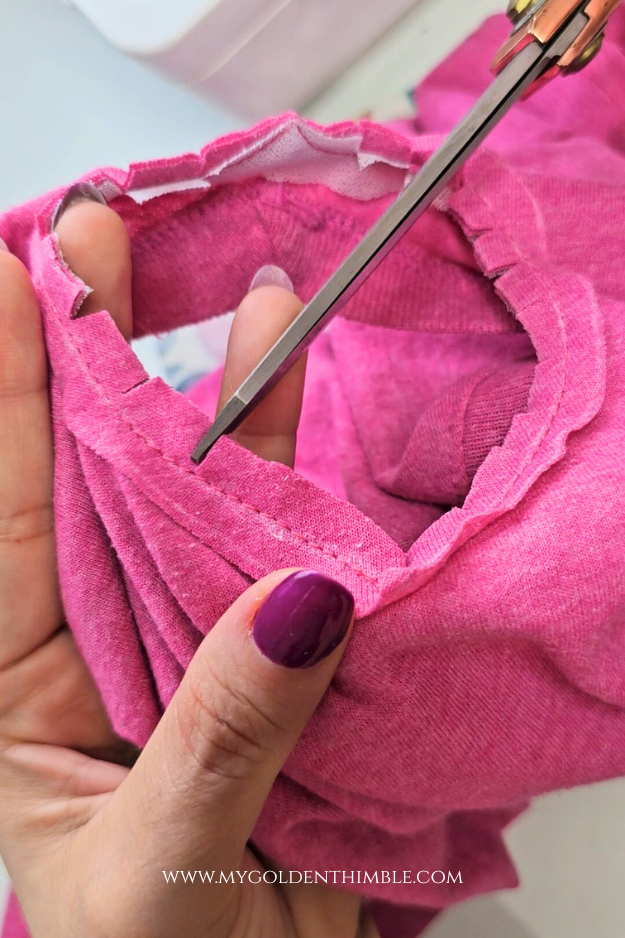
Then clip around the curves to reduce bulk.
Step 8: Turn to the Wrong Side
Take the scrap fabric and gently pull it through the heart opening to the wrong side of the T-shirt.
Use your fingers to smooth out the edges and shape the heart nicely. Once it looks even, press it well at your ironing board. This step really reveals the clean heart shape.
Step 9: Topstitch to Secure
To set the heart permanently in place, sew a topstitch around the heart from the right side of the garment.
Stitch about ⅛ inch from the folded edge using a straight stitch. This keeps everything flat and gives the cut out a finished, professional look.
If you left extra seam allowance on the inside, you can now trim it down neatly.
And that’s it — you now have a beautiful heart cut out that completely transforms your plain T-shirt into a unique, handmade statement piece.
Conclusion: how to sew a heart cutout
And just like that, you’ve learned how to sew a heart cut out and turn a simple T-shirt into something completely unique and full of personality.
I love how such a small detail can make a plain garment feel intentional, handmade, and perfect for Valentine’s Day — or honestly, any time you want to add a little extra charm to your wardrobe.