
In this post, I will cover everything you need to know on How To Make Binding For A Quilt by making your own binding strips from your favorite fabric.
We will learn how to make the calculations you need to figure out how many strips you need to make depending on the size of your quilt and even how to figure out how much fabric you will need to cut those binding quilt strips.
I am going to try to make this as easy as possible to understand, so the biggest worry will be choosing the fabric color and print you want for your quilt binding strips.
So, grab yourself a cup of coffee, sharpen your scissors, buckle up your sewing machine, and prepare for a wild ride because today, we will talk about the unsung hero of quilt finishing: binding!

NOTE: This post contains affiliate links, which means that if you make a purchase using one of the links in this article, I may earn a commission at no extra cost to you (To know more about this, click here.)
- What is quilt binding?
- Best Fabrics Choices for Binding Quilts
- Understanding Quilt Fabric Grain for Cutting Binding Strips.
- What is the width of binding for a quilt?
- How to Make Binding For A Quilt
- Determining the amount of strips and fabric needed
- Preparing and Joining Binding Strips
- Attaching Binding to Quilt Edges. Step-by-Step Guide:
- Conclusion
NOTE FROM EDITOR: To truly understand this guide, I recommend you read every section carefully and look at the pictures included! We have covered everything you need to know to complete your quilt successfully. Enjoy your binding journey!
Why is Binding So Important?
Now, I know what you’re thinking – “Binding? A Hero? Seriously?
But trust me, gorgeous binding is like the cherry on top of a sundae or the perfect punchline in a joke.
It may seem small and insignificant, but it can make all the difference between an ordinary quilt and one that will knock your socks off.

And the thing is that making binding strips may be intimidating for some of us. There are so many calculations, formulas, and joining strips Don’t get me started on the grain of the binding fabric!
Of course, it can get overwhelming!
Binding a quilt should be a fun culmination of all those long hours you spent on your masterpiece. It SHOULD NOT be giving you a headache!
That is why, in this binding tutorial, I am going to do my very best to unthread the mystery of how to make binding for a quilt for beginners.
Yes! For beginners, because even if you are a pro, having an easy, comprehensive quilt binding tutorial will make your quilting life easier.
What is quilt binding?

Quilt binding is the finishing edge applied to the outer edges of a quilt to encase the raw edges of the quilt top, batting, and backing fabric. It serves both a functional and aesthetic purpose, providing a durable and neat edge to the quilt while also adding a decorative element.
When it comes to quilting, the binding method, fabric, and style you choose can make a big difference in the final look. Some quilters love to add a pop of color with a contrasting binding, while others prefer a more subdued look that blends with the quilt top.
Whatever your preference is, the binding process requires careful attention to detail to achieve a polished and professional finish.
After all, it is the final step of that gorgeous quilt edge you just made.
Best Fabrics Choices for Binding Quilts
Even though cotton is the most popular choice to make bias binding, you can use almost any type of fabric to do it. Each one has its own pros and cons. But it all comes down to your personal taste and the style of your quilt.
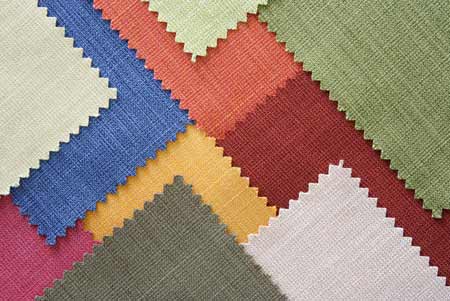
- Solid Cotton:
- Description: Cotton fabric is a classic binding option for quilts. Many colors and designs to choose from.
- Advantages: Easy to work with and provides a clean and timeless finish.
- Considerations: Choose a complementary color and pre-wash to avoid shrinkage or color bleed.
- Batik Fabric:
- Description: Batik fabrics offer a unique look for quilt bindings with their hand-dyed or wax-resistant designs.
- Advantages: Choose from different patterns and colors to enhance your quilt’s edge.
- Considerations: Color variations may occur due to the hand-dyeing process, but this is part of the fabric’s individuality.
- Flannel:
- Description: Flannel is warm and cozy for winter quilts.
- Advantages: Adds a tactile element to the quilt, suitable for quilts intended for snuggling or warmth (like lap quilts!).
- Considerations: Check for compatibility with the overall quilt design and materials and consider the quilt’s purpose.
- Satin Fabric:
- Description: Satin is a smooth and luxurious fabric that adds an elegant and glossy finish to quilt binding.
- Advantages: Adds a touch of sophistication, available in different colors, and creates a visually appealing contrast.
- Considerations: Consider the quilt’s style and if satin is suitable. It may need special care for washing and storage.
- Specialty Fabrics:
- Description: Specialty fabrics, such as metallics, linen, or silk, can be chosen for a unique and high-end look in quilt binding.
- Advantages: It creates a luxurious finish, adds texture or sheen, and makes the quilt stand out.
- Considerations: Choose fabric that matches the quilt’s design and purpose. Follow special care instructions for the fabric.
Understanding Quilt Fabric Grain for Cutting Binding Strips.
Remember the post where we talked about the Fabric Grainline directions? Good, because we are going to use this info!
There are two ways how to cut binding for a quilt.
Binding strips can be cut on the grain (or lengthwise/vertically), cross-grain (widthwise/horizontally), or bias grain (on a 45° degree angle) – Each fabric cutting direction has its own level of stretch and flexibility, making them ideal for specific purposes in your quilt binding strips.

- Straight Grain Binding: Strips are cut along the grain of the fabric, parallel to the selvage. This type of binding has the least stretch. If you have quilts with straight edges, this is an excellent choice for binding them.
- Cross Grain Binding: Strips are cut cross grain, meaning across the fabric from selvage to selvage. This type of binding has a small amount of stretch. This is a fantastic option for quilts that are a bit on the thicker side. It’s a great way to make sure your quilt stays cozy and comfortable!
- Bias Binding: Strips are cut at a 45-degree angle to the fabric grain. This type of binding has the most stretch and is best used for quilts with curved corners or circular quilt blocks like the one on quilted fabric coasters.
So, to summarize this information, if you want your quilt to be stable, go for straight-grain binding. But if you want more flexibility around the edges of your quilt, try cross-grain or bias binding. Just choose the method that works best for your project, and have fun quilting!
When it comes to quilt binding, straight grain will give you the most stability, whereas cross-grain and bias binding will have more flexibility and stretch.
My Golden Thimble
What is the width of binding for a quilt?
As the binding is sewn around the edges of the quilt and folded over to the back, you need to consider the finish width you want + the seam allowance you are going to use.

Width Binding Strips Formula:
The width binding strips formula goes as follows:
(Finished binding width x 2) + (Seam Allowance x 2) = Binding Width
Example Calculation:
For example, let’s say I want a final, binding width of ½” for the edges of this quilt tutorial. Considering that the most common seam allowance to sew binding on quilts is 1/4″, my formula will go like this:
((1/2 x 2) + 1/4) x 2 = 2 1/2″
This means I need 2.5 inch quilt binding strips.
Commonly used widths for quilt bindings include 2 inches (1/4″ final), 2 ¼ inches (3/8″ final), 2 ½ inches (1/2″ final), and so on.
| Final Width | Binding Width |
|---|---|
| 1/4″ | 2″ |
| 3/8″ | 2 1/4″ |
| 1/2″ | 2 1/2″ |
The width you choose for your quilt binding will depend on the thickness of the batting and the overall size of your quilt.
Binding Strips Width Formula: ((Finished binding width x 2) + (Seam Allowance)) x 2 = Binding Width
My Golden Thimble
How to make binding for a Quilt. -What is the formula for Binding a Quilt?
Ok, gorgeous, bear with me. Let’s do this slowly and easily.
We already determined the width we wanted for our binding strips. Now, we will calculate how long our binding needs to be to cover the entire perimeter of our finished quilt.
The formula for determining the amount of fabric needed to bind a quilt depends on the method of binding (straight grain or bias) and the quilt’s dimensions.
Due to the nature of the bias binding, we recommend adding more than 25″ of extra length to the formula.
Here is the basic formula for both straight grain and bias binding:
Quilt Binding Formula:
((Quilt Width + Quilt Length) x 2 ) + 20″ = Total Length of Binding

In this formula, factor 2 accounts for both the widths (top and bottom) and both of the lengths (sides) of the quilt. And the 10″ is the extra length needed for joining the ends and muttered corners. *You can add more than 10″ if you consider it necessary*
Length of Binding Formula: ((Quilt Width + Quilt Length) x 2 ) + 20″ = Total Length of Binding
My Golden Thimble
Example Calculation:

Let’s say you have a quilt that is 60 inches wide and 80 inches long, and you want to use 2.5-inch wide binding strips.
((60 + 80) x 2) + 20 = 300
Ok, so in this example, first we add 60 + 80, which gives us 140, then we multiply 140 x 2, which gives us 280, and finally, we add 10 to that amount, which will be 280 + 10 = 290.
In this example, you would need approximately 300 inches of straight grain binding or approximately 305 inches ( because we added more than 25″ extra) of bias binding to bind the quilt.
Keep in mind that these formulas provide an estimate, and it’s always a good idea to add a little extra to account for any unexpected variations or mistakes during the binding process.
Determining the amount of fabric needed to cut the strips.
Ok, my beautiful human being, this is the very last calculation!! I promise! You are doing amazing, and this one is the easiest of the 3.
The final step is actually figuring out how much fabric we need to buy to cut all the strips we need.
To do that, first, we need to know how many strips of fabric we need.
Amount of Strips Needed Formula:
Binding Length/Fabric Width = # of Binding Strips Needed
Example Calculation:
Using the binding length result we had in the last step (300″) and the most common fabric width (45″), the formula will look like this:
300/45= 6.6
In this case, I will need 6.6 strips of fabric, but we are going to round that number up, so I will need 7 strips of fabric.
Amount of Fabric Needed Formula:
To know how much fabric (how much length) I need for those 7 strips, I am going to multiply the number of strips by the width of the binding. And it will look like this:
# of strips x width of binding = fabric yards needed
Example calculation:
If I need 7 strips of fabric of 2 1/2″ each, this will mean I need to do the following calculation:
7 x 2.5 = 17.5 inches of fabric length
Of course, my recommendation is always to get more fabric than the exact result of these calculations just in case you have an accident (God knows, I have my own share of those) and you need to cut new fabric.
Does this make sense? Don’t forget that if you have any questions at all about this process, you can leave them in the comments below so I can help you out.
Preparing and Joining Binding Strips
We just learned how to prepare binding for a quilt on the steps above, so if you haven’t read that, take a look before continuing.
Now that you have all your binding strips cut and ready let’s learn how to make binding strips!
The goal here is to make a continuous strip and to do that, you have two options for joining your strips: you can stitch the ends diagonally or with straight seams.
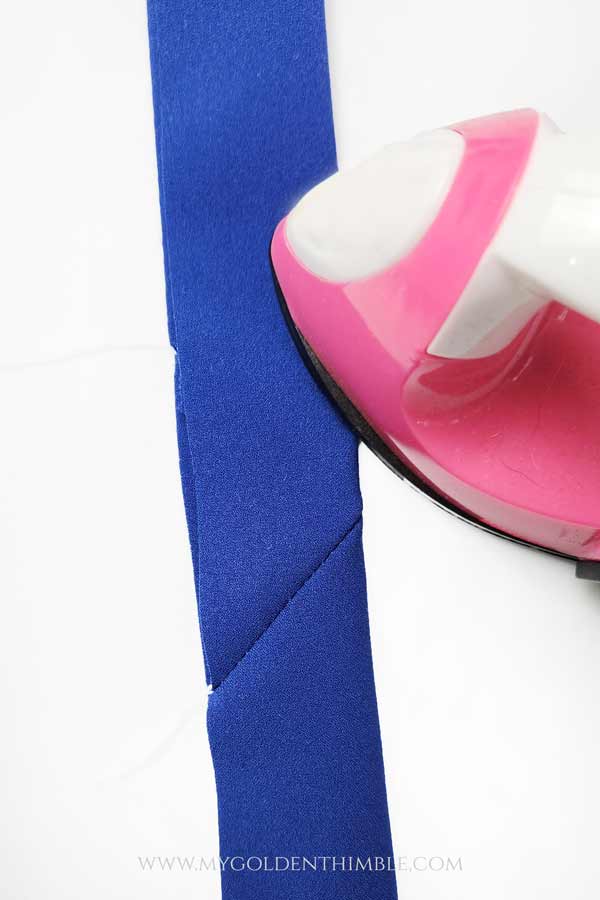
To join your strips diagonally, place one end of the first strip with the beginning of the next one with the right sides together, forming an “L” shape.

Then, make a seam diagonally stitching from the top left corner to the right bottom corner of the overlapping section, just like this:
Then, trim the excess fabric to leave a seam allowance of 1/4″ to 1/2″. Press the open seams.

Repeat with the rest of the strips until you have the complete quilt binding.
On the other hand, if you want to join your strips with a straight seam, simply align the ends by placing one strip over the other with the right sides of the fabrics together, sew at 1/2″, and press the open seams.

Finally, press your binding by folding it in half lengthwise with the wrong sides of the fabrics together.
Attaching Binding to Quilt Edges. Step-by-Step Guide:
1. Prepare the Quilt
When you’re preparing to join the binding to your quilt, you need to make sure of some things.
It’s important to ensure that your quilt top, batting, and backing are properly layered, basted, squared off, and trimmed to the desired size.
This means that you should carefully place the batting between the quilt top and the backing, making sure that it is centered and smooth. Once the layers are properly aligned, you can baste them together using your preferred basting method.

After basting, it’s important to square off the edges of your quilt. This means trimming away any excess batting or backing so that all edges are straight and even.
You can use a quilting ruler and rotary cutter to do this, making sure to measure and cut accurately. Finally, double-check that your quilt is trimmed to the desired size and adjust as needed.
2. Join Binding Strips (if necessary)
If you find that your quilt is bigger than your binding strips, no worries! You can easily expand your binding by joining the strips diagonally.

This creates a smooth and continuous length of binding that you can use to finish off the edges of your quilt.

If you already did all the steps to create your own binding based on the instructions above, you can skip this step, as you already have the exact length of binding that you need.
3. Press the Binding Strips
To create a neat and even binding on your quilt, it’s important to fold the binding strips in half lengthwise and press them to create a crease.
This will help you align the binding properly and attach it evenly. When you fold the binding strips in half, make sure that the edges of the strip are aligned correctly and then press the strip with an iron to create a crease.
This crease will serve as a guide for you to attach the binding uniformly to the project.
4. Start Sewing on the Quilt Front
To begin sewing the binding to the front of the quilt, you want to leave a tail of about 6 to 8 inches unsewn.
Starting about a third of the way down one side of the quilt, align the raw edges of the binding with the raw edges of the quilt.

This will guarantee a neat and tidy finish once the binding is complete. Pin the binding in place to keep it secure before you start sewing.
Once you have secured the binding in place, you can begin sewing it to the quilt. Make sure to sew slowly and carefully, keeping the stitches as straight as possible.
When you get to the corners, fold the binding neatly and securely around them to create a clean and crisp finish.
5. Miter the Corners
When you approach a corner, stop sewing 1/4 inch from the corner.

Fold the binding strip up, creating a diagonal fold that aligns with the corner of the quilt.
Then, fold the strip back down, aligning the raw edge with the next side of the quilt.

Continue sewing along the next side, repeating this process at each corner.
6. Continue Sewing
Sew around all sides of the quilt, repeating the mitering process at each corner.

When you approach the starting point, stop sewing, leaving a gap between the starting and ending points.
7. Join Binding Ends
Confession!!
This part of the tutorial was the hardest for me to learn. So, in order to make it simpler for you, I used two color strips. This way, you can understand more easily than me.
To finish off the binding, you’ll need to trim the ending tail, but make sure to leave a little extra fabric, around 2 to 3 inches, to work with.
Unfold both ends.
Extend the left side and place it with the wrong side down the right side of the quilt.

Now, do the same thing with the right side of the binding and then fold the end at 45 degrees. Mark both of the diagonal lines at where they meet on the right side of the fabrics.
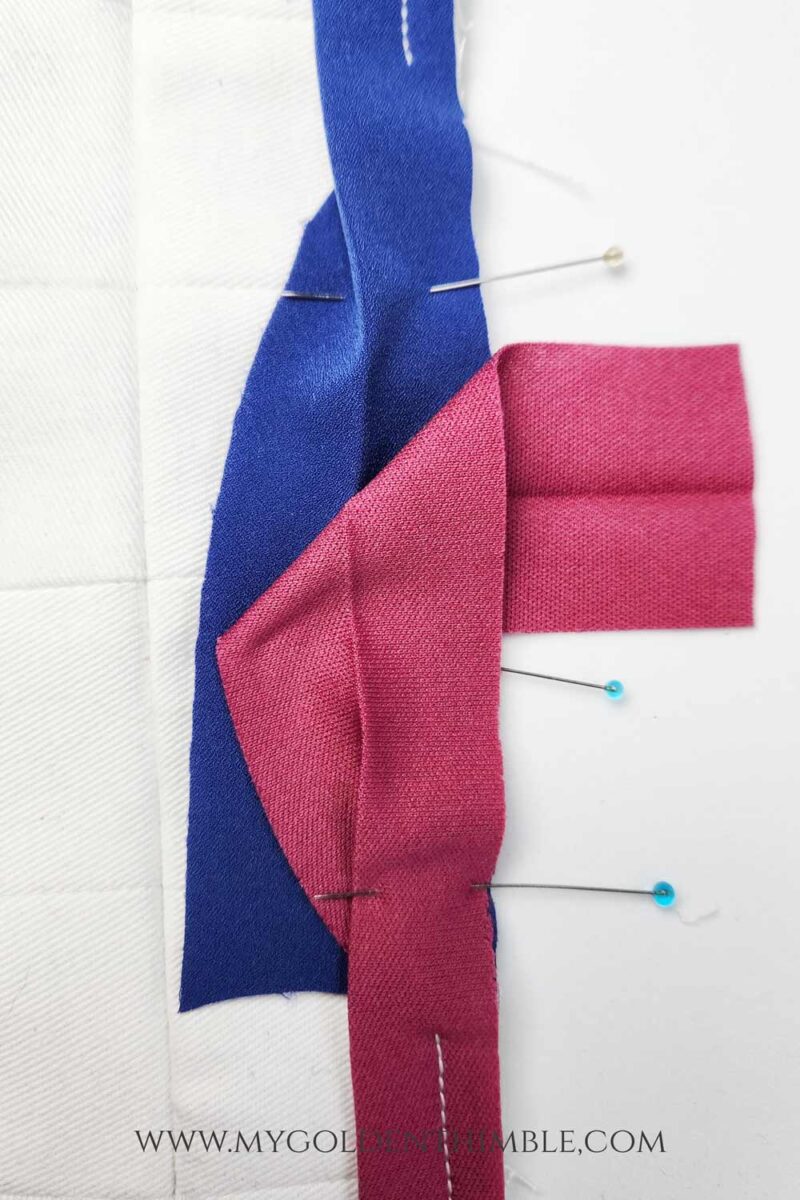

Now, proceed to open the binding on the right side and position the crease of the fold precisely on top of the lines you drew.

After that, pin it together along the crease. Once you have pinned it, take it over carefully to the sewing machine.

Stitch along the folded crease, ensuring that you start and end sewing right in the valley where the crease lines meet the corners, as mentioned earlier in the tutorial.

8. Finish by Fold Binding to the Back

To complete the process of sewing the binding to the quilt front, you should start by folding the binding’s folded edge from the front to the back.
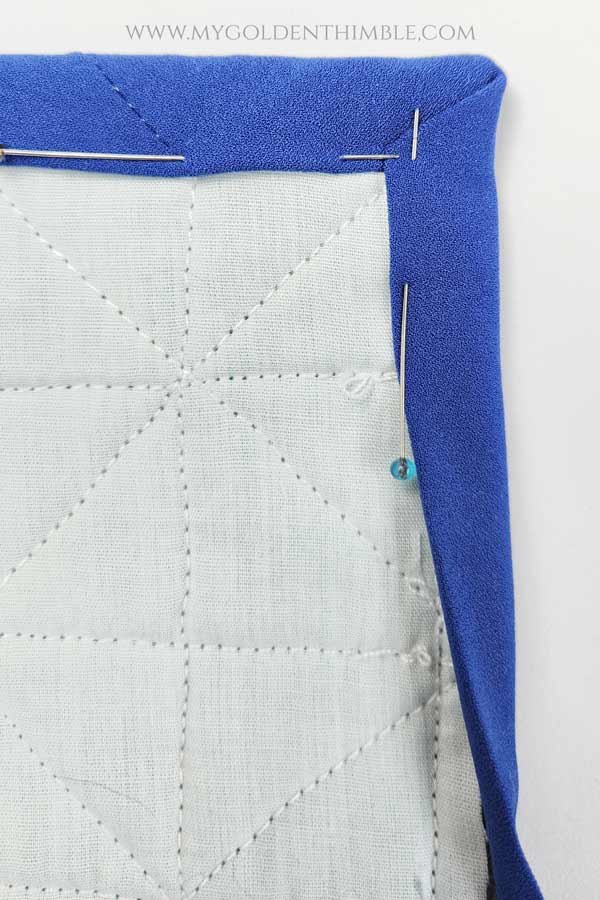
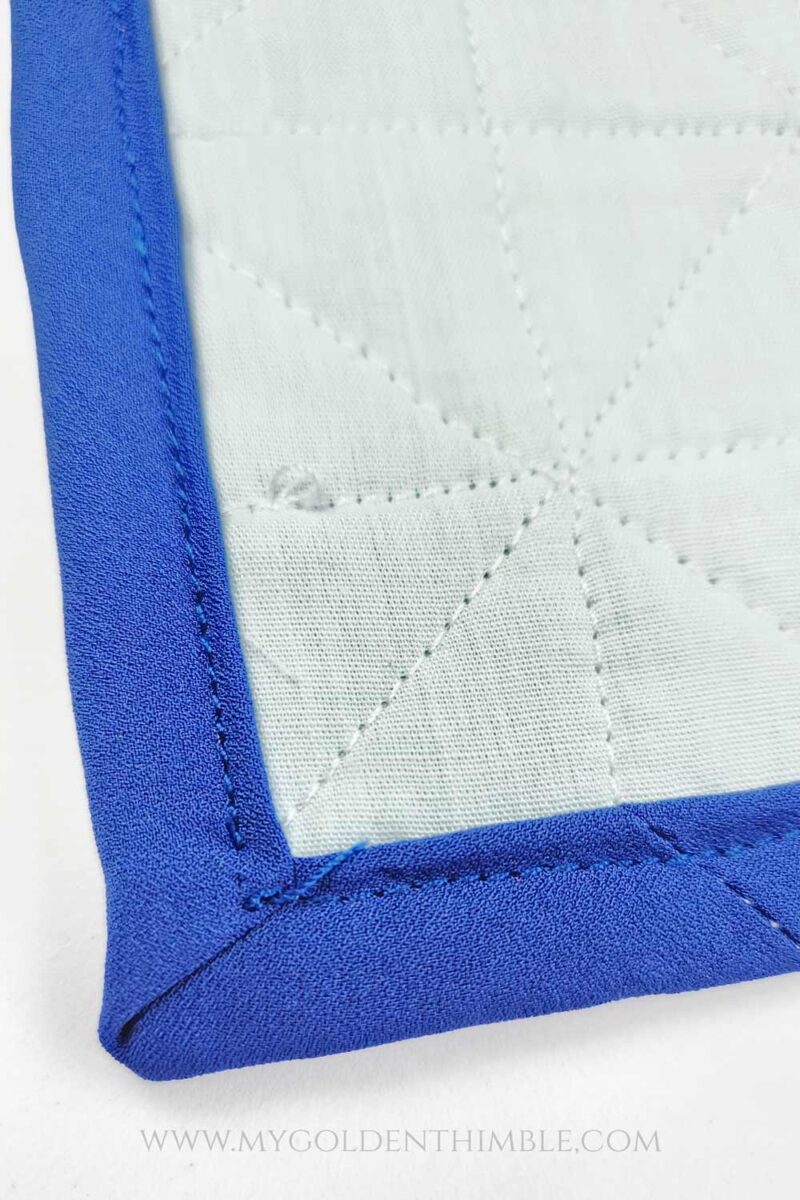
Then, use pins to secure it to all the edges of the quilt. At this point, you can choose to stitch on the ditch from the front to catch the binding from the back.
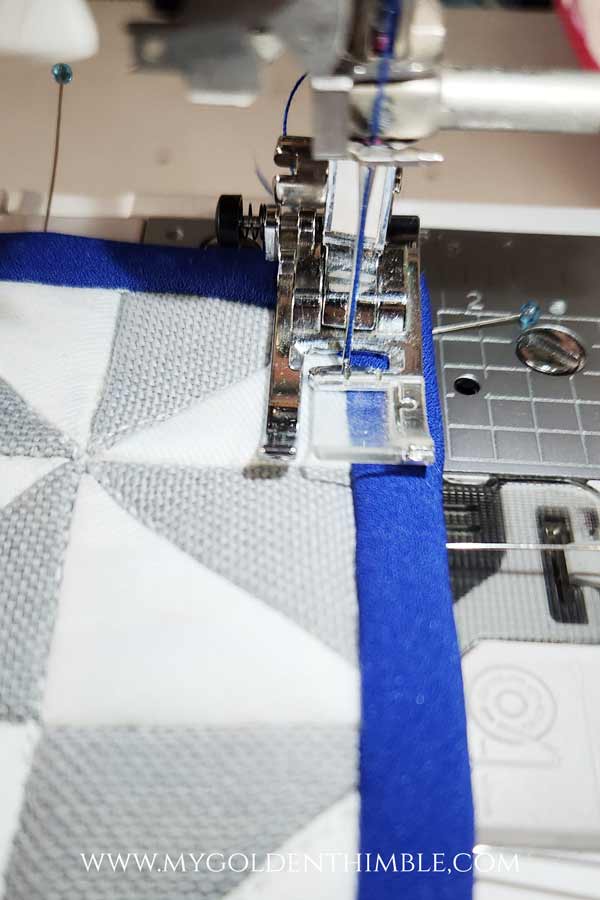
This technique will create a visible stitch line on the back of the quilt.
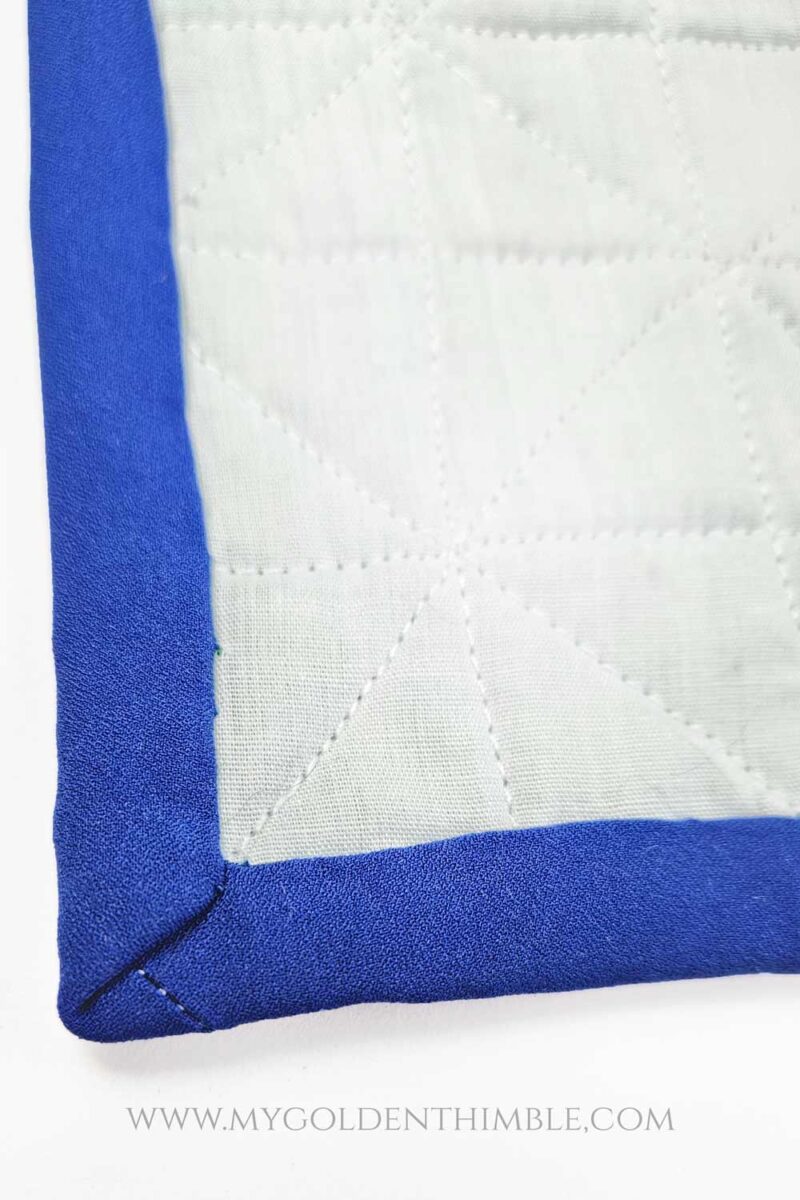
Alternatively, you can go for a cleaner and more professional-looking finish by using an invisible stitch to secure the binding to the back.
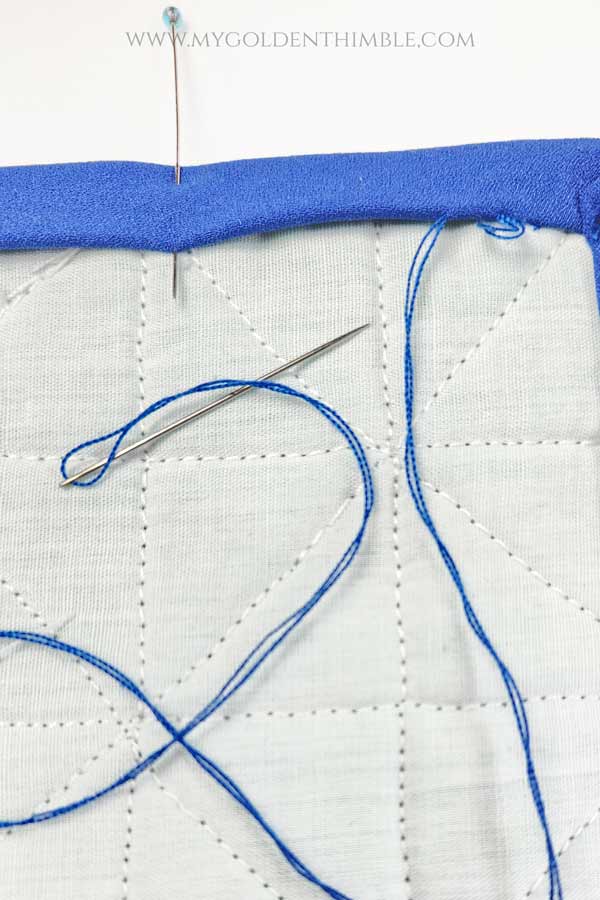
This option will give you a clean and seamless binding that blends perfectly with the quilt’s back.
9. Finish and Press
To finish it up, you’ll want to stitch all the way around the edges. This will help keep everything in place and make sure your quilt lasts for years to come.
Take your time and sew carefully to keep the edges nice and neat. Once you’re finished, it’s time to give the binding a final press.
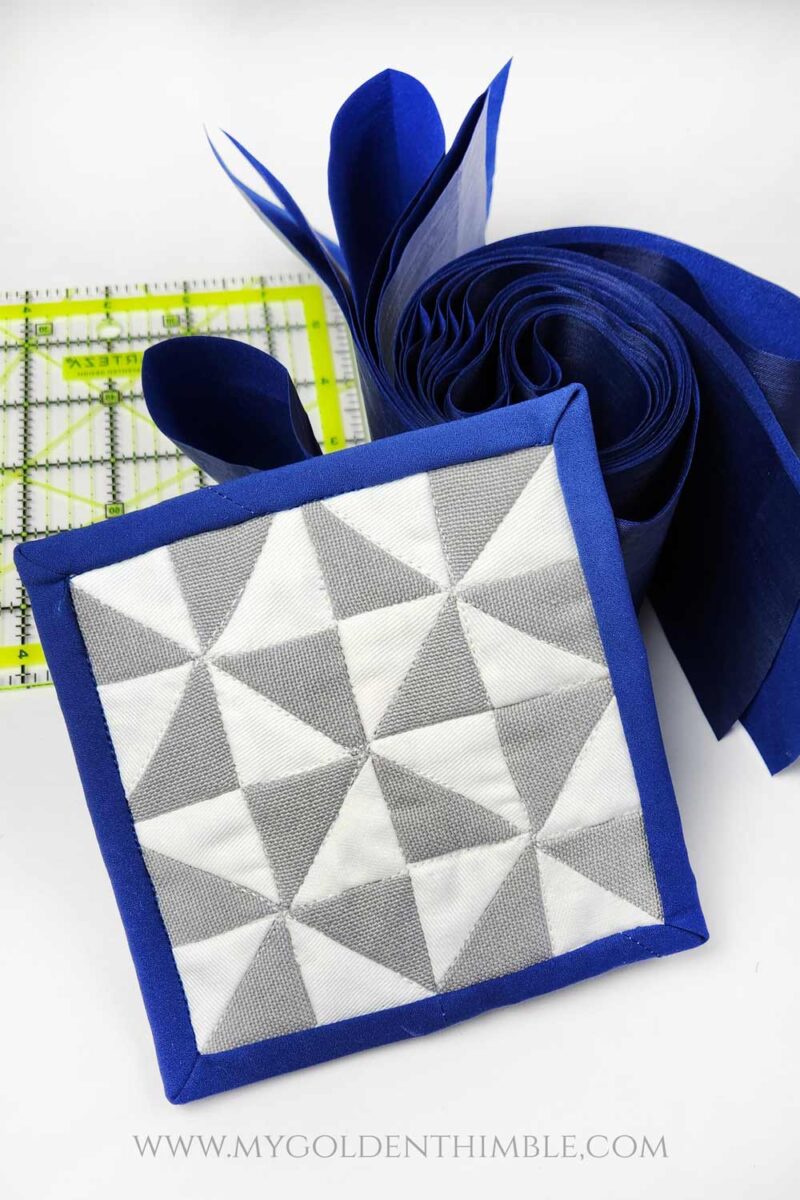
Just think of it like steaming your dress clothes before a big event – it helps smooth out any wrinkles and makes everything look polished and professional.
Be sure to go easy on the iron, though, we don’t want to burn anything! Once you’ve completed these final steps, your quilt will be all set to snuggle up with or show off to friends and family.
Conclusion
In a world where every task seems overwhelming, finding something that can be done easily is refreshing. I hope this binding tutorial was one of them!
Our article is filled with clear and concise guidelines that will make your binding journey an absolute breeze. And hey, sewing is not just a hobby, it’s a way of life!
So why not share this article with your buddies on social media and share the joy of easy bindings? Trust us, it’s a great feeling. Happy binding, my adorable friends!






Is there a simple way to download these instructions for older people to follow and succeed?
Hi Sherry. Not at the moment. But if you are interested in a printable guide, let me know and I pass that on!
jltfordson@aol.com. Hello, I’m Darleen. I have never left any comment before, but I need to address your math on how you got the total width for your binding. You got an extra inch for your width and I ended up with 1and 1/2”. I did my math 3 x’s and asked my husband to do the same as you printed in your measurements. We ended up with 1and1/2”( you have 2 1/2”). Material is very expensive and I don’t like much leftover. Also, I want to have enough and then find out I needed to purchase more because the measurement was off. Please clarify this before I continue reading your directions. You do wonderful projects and save me money. Have a beautiful New Year.
My dearest Darleen,
I am terribly sorry about this!! I clearly made a typo mistake and I am so very greatful for you to notice and telling me. I have corrected it now, but just in case here is how it should go:
You need to multiply the finish width you want times 2, then add to that measurement 1/4″ of seam allowance. To that result you will multiply it times 2. And that will be the width of the strips you need to cut.
So, the measurements of the chart are and were in fact correct, no changes there.
My mistake was adding the “()” in the wrong space. But as I said it is corrected now.
Thank you again for the kind way you made me notice this. We are not above correcting our mistakes and kindness is just so appreciated in this industry! Happy new year!