Once you learn How to Sew a Scalloped Edge on all your garments and sewing projects you will be able to add this special touch of design very easily.
This kind of hem can make any garment look high-end, and you can place it on any hem and edges.
The only thing you need is our printable template.
Keep reading because in this tutorial I will guide you step-by-step on how to add this detail to a finished garment or to a paper pattern if you want.
I’ve always thought that a scalloped edge has a great power to make a flat garment look cute, delicate, and unique.
This is a timeless style. It represents femininity and softness.
I constantly use this technique to add scalloped edges to my patterns. I have used it on shorts, dresses, even on coats!
When I was thought to make this finishing I was simply grateful.
More than just a template.
Not only did I get to practice sewing perfect curves, but I also learned a very simple way to enhance my clothes.
Truth is, when I am afraid I am sewing something too simple, or too boring, I take out my scalloped edge template and it saves my day.
…And my projects.
So, I got thinking that it might be time to share this knowledge with you guys.
I am sure that you are going to love it as much as I do.
Don’t worry because this technique is actually pretty easy to learn, and with our free template it will be just a breeze.
Follow our step-by-step picture tutorial, or if you feel more like it, watch the video tutorial too.

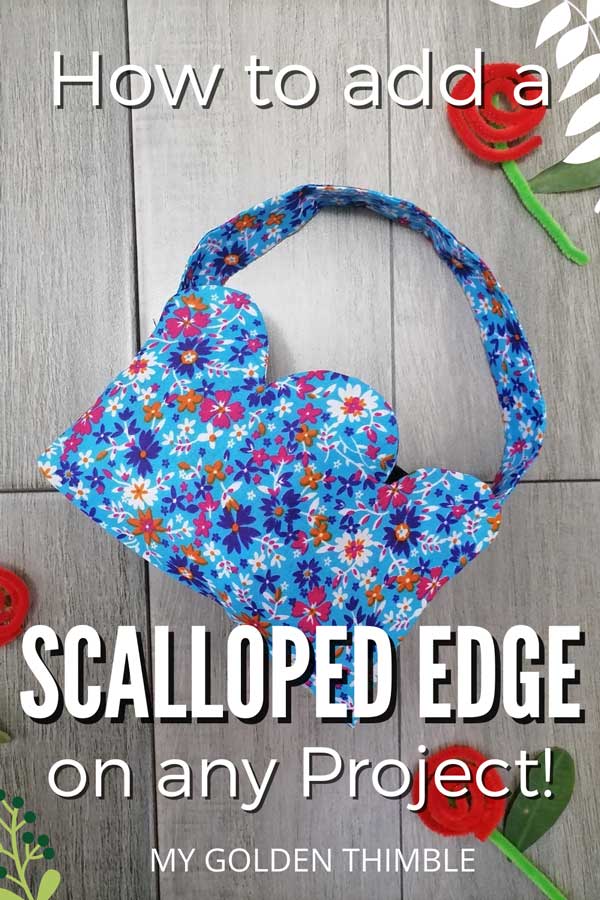
I was meaning to make a mini tote bag for a while now. So I thought to myself that this project was an excellent opportunity to teach you how to use a scalloped edge template.
I am using our free Cherry Bag Pattern, but I made it shorter in length.
You can, of course, make it on any size you want and use it to go out! I bet that if you use these two patterns together you will end up with a beautiful bag for any occasion.

I have made two versions of this bag today.
One with a contrasting lining color and another one with matching colors too.
Are you excited?? Let’s learn this technique and unwind our imagination.
What is a scalloped edge?
A scalloped edge is a type of finishing with consecutive curves, semicircles, or shells that are used on the edges or hems of certain garments, sewing projects, and non-sewing-related drawings.
You can apply this finishing on hems of tops or dresses patterns, blankets, curtains, tablecloths, bags, and more.
You can replicate a scalloped edge pattern by downloading a free template like the one we are offering here, or you can also draw it yourself with your wanted measurements.
With this template, you can draw the semicircles on the length of the fabric or pattern edge.
But if you are drawing it yourself, just make sure to measure that every curve is the same. Otherwise, it will cause a funny or odd-looking design.
You can also find scalloped edges on knitting patterns and as a sewing stitch on your machine.
What is the measurement of a standard scalloped edge for hems?
Just like you, I had this question the first time. But the thing is that there isn’t a standardized size to make a scalloped edge.
You can make it as tall or curvy as you want. Make the circles wide or close together.
It all depends on your taste.

Think of it this way.
The circles can be as small as a coin or as big as a dining plate.
Obviously, it will depend a lot on the area you have to work with. If you have yards and yards of fabric you probably will want to use a bigger curve.
But if you only have 10” then a smaller curve will look better.
How to use our free Scalloped Edge Template?
To use our scalloped edge template, first, you have to download the free pdf file below.
Then sign in to your Grow account to access this free download and many others from our blog. (You just have to sign in once!)
Print at home in real size and cut the pattern.
Use the template to extend the hem of your patterns by placing it over the edge of the hem or any other straight-line really.
Draw the shells and then proceed to cut your fabric. Remember to cut an extra strip of fabric that measures the length of the line you want to add the scalloped edge to by the width of the template you chose.
Follow our instructions to sew the curves, trim the seam allowances, turn inside out and press your project.
¿How to sew a scalloped edge?
Follow these instructions with me to achieve a perfect scalloped edge.
1. Download the template
Download the template above and choose the scalloped size. Another option is to make the pattern yourself with the measurements you need.
2. Measure the hem.
Measure the outline of the hem to which you will add a scalloped edge.

3. Cut a strip of fabric.
On fabric cut a strip that measures the length of your hem + ½” and with a width depending on the size of the template you chose + ¼”.

4. Sew the hem.
Once you have your strip, make the hem, by folding ½” and then ½” again. Sew at ⅛” of the edge to secure the hem in place.

5. Press and sew.
To have a nicer finish, it is necessary to press your seams before and after sewing.
6. Trace the scalloped edges
Mark the curves of the template to the fabric. The curves should be on the opposite side of the hem on the wrong side of the fabric.

7. Close the strip
Once the strip has a hem and the edges are traced, proceed to close the shorter ends of the strip at ¼”.

8. Join the scalloped edge to the hem
Place the strip of lining over the hem of your outer garment. Line up with the right sides of the fabrics facing together.
The curves of the strip should be aligned with the raw edge of the hem.
One tip if you are doing this to a finished garment is to remove the original hem by either cutting it off or by unstitching the seam first.

9. Sew the scalloped edges
Sew the scalloped edges just over the line you traced on the strip of the lining.

10. Cut off the excess.
Carefully cut off the excess seam allowance from the entire edge. Follow the curve lines by leaving ¼” of a seam allowance.

11. Clip and Notch
Make notches around the curves by making a zig-zag cut. You can use pinking scissors for this step or just cut small triangles with your regular sewing scissors.
Just be careful to not cut your stitches.

12. Turn and press
Turn the scalloped edge to the right side and press the curves.
You can use a pin or the point of your seam ripper to make sure the curves are well positioned before pressing them.


And that’s it! You have a beautiful scalloped edge.
Another great way to add scalloped edges on the hems of your projects is to use the lining strip on the outside!
It all depends on your ideas and imagination. But I believe that could make a beautiful and different option for this free template.
I am so happy that you made it this far and you chose to use our tutorials and free patterns to make beautiful things in your sewing room.
Do you enjoy our freebies?? Support us so we can keep making freebies for you by buying us a cup of coffee here. We will be forever grateful!
Don’t forget to follow us on Social Media!!
How to Sew an Scalloped Edge
Learn how to add scalloped edges on your garments or sewing projects.
Materials
- Pattern Paper
- Free Scalloped Edge PDF Printable Template
- Fabric
- Sewing Machine
Instructions
- Download and print our free scalloped edge template sewing pattern
- Measure the length of the hem or edge you want to add a scalloped edge.
- Cut a strip of fabric with that length and the height of the template you chose, including 1" of the seam allowance.
- Sew a hem on the strip edge by folding 1/2" two times.
- Trace the scalloped edges on the wrong side of the strip fabric.
- Close the ends of the strip if required.
- Join the strip of fabric to the hem of your project with the right sides of the fabrics facing together.
- Sew over the lines you drew.
- Cut out the excess fabric leaving a seam of 1/4"
- Make clips and notches along the curves.
- Turn inside out.
- Press.


Thank you so much.
You are most welcome my dear!
Detailed! accurate! easy! What more could one ask for? Thank You
I am so glad it was useful for you!