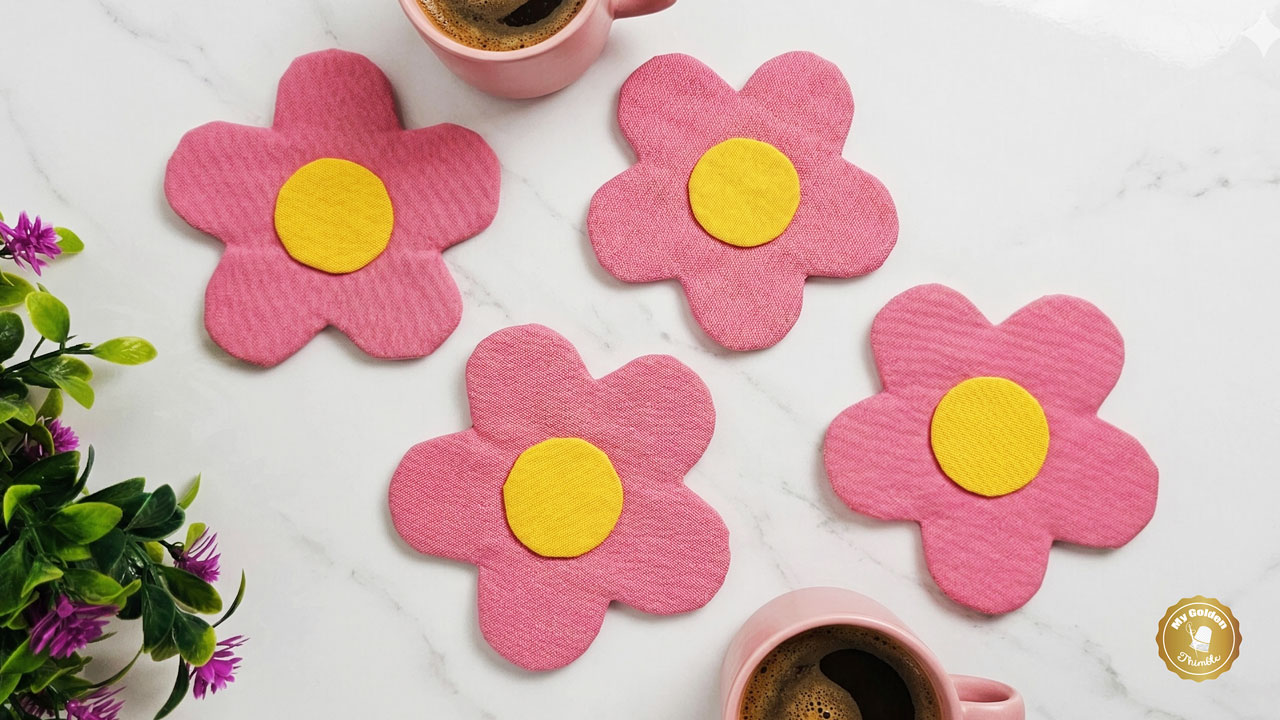
This Fabric flower coasters pattern is one of my favorite ways to kick off the spring sewing season, and this one is extra fun because it helps you practice sewing curves while making something bright, cheerful, and a gorgeous novelty item your guests will love.
This is truly a beginner-friendly sewing project that comes together quickly and feels so rewarding to finish.
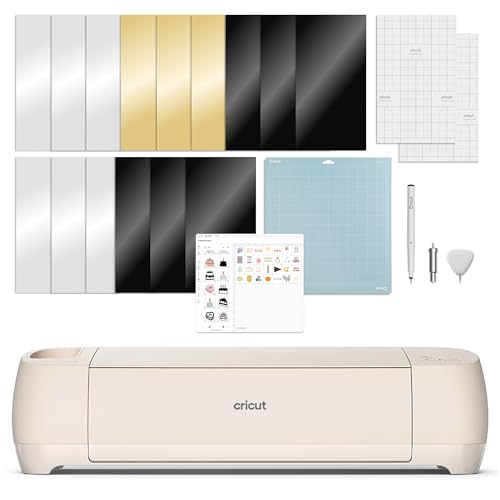
For this tutorial, I’ll show you how to make the coasters using a Cricut machine to cut the fabric pieces, which makes the process extra quick and precise.
But don’t worry at all if you don’t have one! I’m also including a printable sewing pattern so you can simply download it, print it, and cut your pieces the traditional way.

NOTE: This post contains affiliate links, which means that if you make a purchase using one of the links in this article, I may earn a commission at no extra cost to you (To know more about this, click here.)
About This Project
This is truly a beginner-friendly sewing project that comes together quickly and feels so rewarding to finish.

The coasters are cute, colorful, and small enough to make from fabric scraps, which means you can mix and match prints to create the happiest little set for your coffee table.
They add such a sweet pop of spring to your space, and since they sew up fast, you can easily make a whole bouquet of them in one afternoon.

You can get both the PDF pattern files and the SVGs by signing into the form at the end of this post. But if you want to support our blog, you can buy the files in our shop for only $2.99, without subscribing.
Choose the option you like best. I am very happy to share these projects with you.

We are going to use our Cricut Machine for this project. Which is something really exciting.
If you’d like me to make an even more detailed tutorial on how to use this machine for sewing projects, let me know in the comments.
Fabric Flower Coasters Pattern – Step-by-Step Tutorial
This fabric flower coasters pattern can be made in two different ways: using the printable paper pattern or cutting the pieces with a Cricut machine. I’ll walk you through both options so you can choose the method that works best for you.
Materials


To make this fabric flower coasters pattern, you only need a few simple sewing supplies. This is a small project, which means it’s perfect for using up fabric scraps while practicing your sewing skills.
Here’s what you’ll need:
- About ¼ yard of cotton fabric in spring colors like pink and yellow (or a mix of your favorite floral prints)
- Batting or
- Fusible interfacing (optional, but it helps the coasters keep their shape)
- Matching thread
- Fabric scissors
- Pins or sewing clips
- Sewing machine
- Iron
If you’re cutting your pieces using a Cricut machine, you’ll also need:
- Your Cricut machine
- Rotary blade for fabric
- Fabric cutting mat (a pink or fabric grip mat works best)
- Rotary cutter (optional if you prefer trimming by hand)
- Cricut weeding tools or spatula tool to lift the fabric pieces from the mat
The great thing about this project is that it doesn’t require much fabric at all, which makes it a perfect scrap-buster sewing project. You can mix and match prints to create a bright set of flower coasters that feels fresh and cheerful for spring.
Step 1: Prepare Your Pattern Pieces
If you are using the paper sewing pattern, start by downloading and printing the pattern. Then cut your fabric pieces following the instructions provided in the pattern.
If you’re new to sewing patterns and feel unsure about reading them, don’t worry—I have a helpful resource on the blog that walks you through how to read sewing patterns step-by-step.
If you are using a Cricut machine, download the SVG files provided with this tutorial. When you open the download, you’ll see two different files:
- Main fabric flower pieces
- Batting pieces

Open Cricut Design Space and create a new project. Upload the SVG files and place them on the canvas. Once uploaded, you’ll see two flower shapes:

- A colored flower shape (this will be cut from your main fabric)
- A white flower shape (this will be cut from batting)
Duplicate the shapes depending on how many coasters you want to make. For example, if you want to make a set of four coasters, you will copy the shapes 4 times.

Because my cutting mat measures 12 × 12 inches, I had to cut the main flower shapes (pink shapes) in two batches.
This means you will end with 8 pink pieces, 4 yellow pieces, 4 batting flowers, and 4 batting circles.
Step 2: Cut the Fabric Pieces
Place your fabric on the sticky side of your Cricut fabric mat, smoothing it out carefully so there are no bubbles or wrinkles.

Before sending the file to cut, make sure:

- The rotary blade is installed in your Cricut machine
- The correct fabric color is loaded for each layer
- The shapes are positioned correctly on the mat in Design Space
Click “Make It”, and Cricut will automatically arrange the shapes on your mat.

For my project, I used these settings:
- Canvas fabric setting for the main flower pieces
- Acrylic felt setting for the batting pieces
It’s always a good idea to test a small shape in one corner to make sure your blade is cutting all the way through. If necessary, increase the cutting pressure slightly.

Once finished, you should have perfectly cut flower shapes ready to sew.

Step 3: Assemble the Flower Layers
Take two fabric flower pieces and place them right sides together.
Then place one batting flower on top of the stacked fabric pieces.
To help keep the batting from shifting, you can add a small dab of glue stick to the back of the batting before placing it.
Use pins or clips around the edges to secure everything in place.
Step 4: Sew Around the Flower Shape
Take the piece to your sewing machine and sew around the flower shape, stitching along the outer edge of the batting.

Because this project has curves, sew slowly and guide the fabric gently around each petal. Don’t forget to backstitch at the beginning and end of your seam.
Step 5: Clip the Curves
Once the seam is complete, take your scissors and cut small triangle notches between each petal.

This step is very important when sewing curves because it allows the fabric to spread smoothly when turned right side out.
Next, trim the seam allowance on the petals to about ⅛ inch, getting close to the stitches without cutting them.

Step 6: Turn the Flower Right Side Out
Separate the top layer of fabric that does not have the batting attached.
On this layer, cut a small cross-shaped opening in the center. Make sure this opening is smaller than the yellow center circle piece, because it will later be covered.

Use this opening to turn the flower right side out.

Gently push out each petal with your fingers to help shape the curves. Then take the piece to the iron and press the flower flat, shaping the petals neatly.
Step 7: Prepare the Flower Center
Take the yellow circle fabric piece and place the small circle of batting on the wrong side.
Thread a hand sewing needle with a single strand of thread and sew a basting stitch around the edge of the circle.

When you gently pull the thread, the seam allowance will gather on the back side, forming a smooth, rounded circle. The batting inside helps create a perfect shape without wrinkles or folds.
Take your time here, this step gives the flower its beautiful finished center.
Optional Tip About the Batting
You can leave the batting inside the center circle or remove it after shaping.

- If you leave it in, the center will have a small amount of thickness. This usually works perfectly for mugs because most coffee cups have a slightly raised base.
- If you remove it, the coaster will be slightly flatter, which may work better for certain glasses.
Even if you decide to remove it, the batting is still useful for pressing the circle into a perfect shape.
Step 8: Attach the Flower Center
Without cutting your thread, place the finished circle over the opening in the center of the flower.

Using an invisible hand stitch, sew the circle to the flower so the stitches don’t show on the front.
Make a small knot on the back when you’re done and trim the excess thread. And that’s it! Your fabric flower coaster is finished and ready to brighten up your coffee table for spring.
Conclusion
And that’s it! You can see just how easy this fabric flower coasters pattern is to make. It’s the kind of sewing project that comes together quickly, looks adorable, and gives you a chance to practice sewing curves in a fun and relaxed way.

These flower coasters are such a lovely spring sewing project, and they’re perfect for making in an afternoon with friends or family.
If you decide to try this project, I would absolutely love to see your version!
Make sure to leave a comment in the box below and tell me what you think of this tutorial.
Did you enjoy making these flower coasters? And what colors are you planning to use for your set?
Download the Fabric Flower Coasters Pattern

Ready to make your own fabric flower coasters? You can get the pattern files in two different ways, depending on what works best for you.
If you’d like to download the pattern for free, simply subscribe to the form below. Subscribing helps support the blog and allows me to keep creating more free sewing patterns and tutorials for you.
If you prefer instant access without subscribing, you can also purchase the pattern directly from our shop for only $2.99. Once purchased, the files will be available for immediate download so you can start sewing right away.

Flower Coasters Sewing Pattern
Sew the cutest spring table decor with this Flower Coasters Sewing Pattern.
The download includes:
- The printable sewing pattern (PDF) for cutting by hand
- The SVG files for cutting your pieces with a Cricut machine
Whether you’re using the printable pattern or your cutting machine, you’ll have everything you need to create a beautiful set of fabric flower coasters for your spring table.