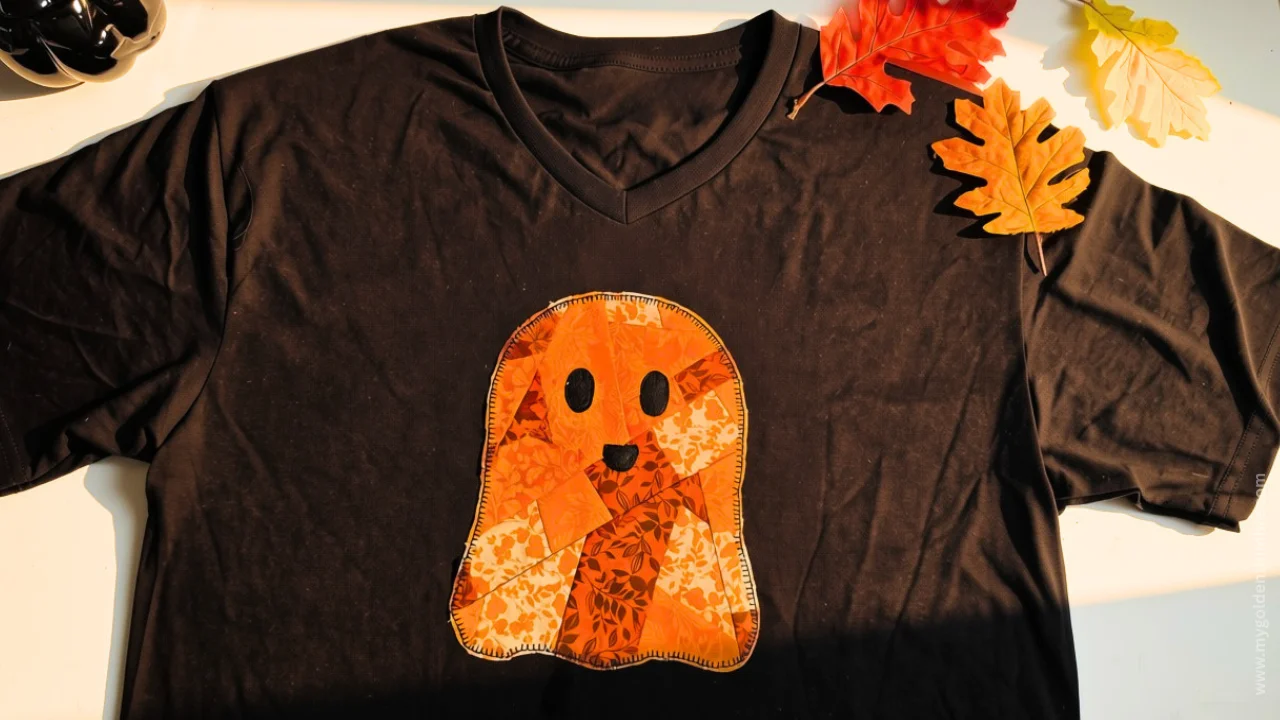
If you love making cute Halloween clothes as much as I do, this Ghost Patchwork T-Shirt is such a fun little sewing project to add to your October list!
And the best part? You don’t need to sew an entire T-shirt from scratch.
We’re going to take a plain T-shirt and give it a handmade Halloween makeover using fabric scraps, my crumb quilting technique, and a free ghost appliqué pattern.

NOTE: This post contains affiliate links, which means that if you make a purchase using one of the links in this article, I may earn a commission at no extra cost to you (To know more about this, click here.)
I have a confession to make: I am a fabric scrap hoarder.
I know, I know!
Those little pieces of fabric are just too pretty to throw away, and I’m always convinced I’ll find the perfect project for them eventually.
Well, after finishing my Quilted Pumpkin Pot Holder, I had some lovely little scraps left over that were practically begging to be transformed into something else.
And since Halloween is one of my favorite times to make cute seasonal projects, I thought, why not turn those leftovers into a little patchwork ghost?
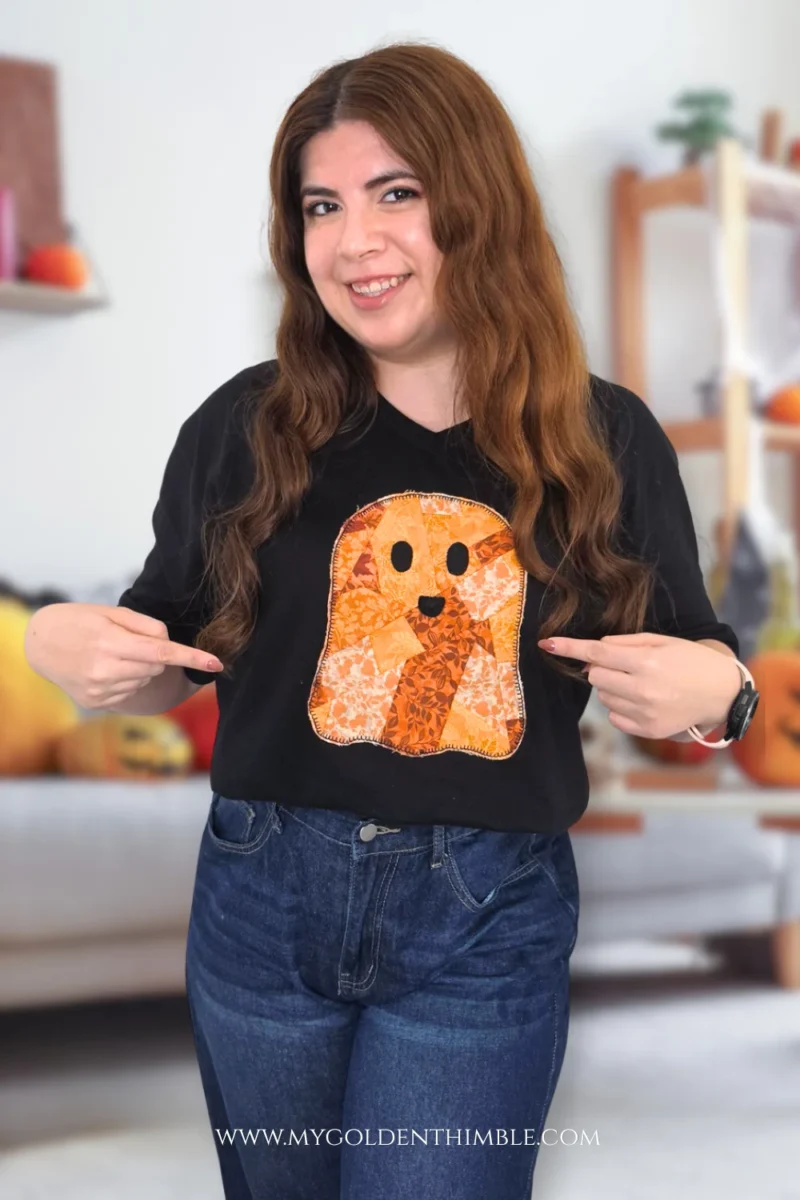
That’s how this sweet ghost T-shirt idea came to life!
So, grab those fabric scraps you’ve been saving for a rainy day, and let’s turn them into something spooky-cute!
About This Ghost Patchwork T-Shirt
This DIY ghost T-shirt is a fun way to personalize a plain shirt and give those leftover fabric pieces a new life.
Instead of using one solid fabric for the entire ghost, we’ll create our own patchwork fabric using the crumb quilting technique.
For this project, we’ll use crumb quilting to join our small fabric scraps into a unique patchwork piece, cut out our ghost shape, and stitch it onto the center front of a T-shirt.
We’ll even give our little ghost a face to make it extra cute.
If you haven’t tried crumb quilting before, the idea is simple: you sew small pieces of fabric together to create a larger piece of unique patchwork fabric.
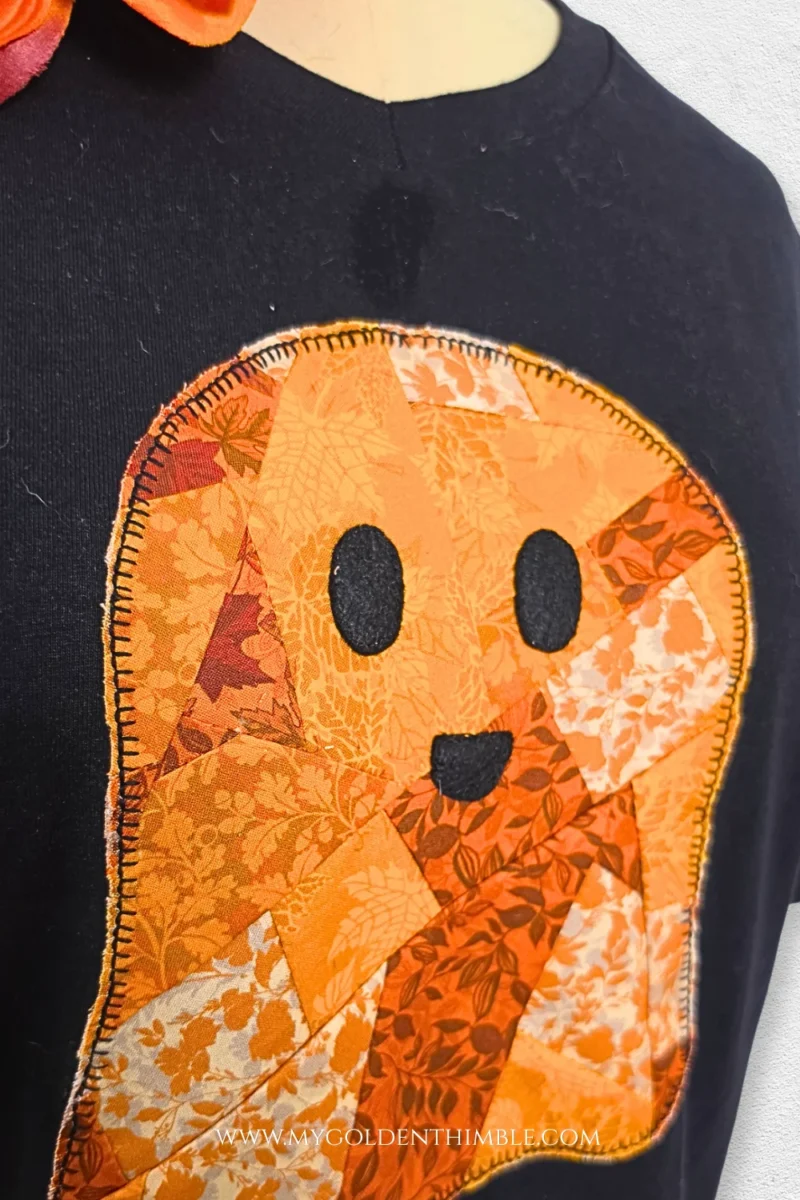
There is no need to make everything perfectly uniform, which is part of what makes this technique so enjoyable!
I’ll also share my free printable ghost pattern so you can make your own.
The finished ghost appliqué measures 7 × 9 inches, making it a lovely little statement without taking over the entire shirt.

This is a confident-beginner sewing project. You should be comfortable using a sewing machine and sewing small pieces of fabric together, but you don’t need advanced quilting skills to give it a try.
And remember, you don’t have to use the exact fabrics I used. That’s the beauty of working with scraps!
Your ghost can be colorful, traditional Halloween-themed, or made from a completely unexpected combination of prints.
Materials You Need to Make a Ghost Patchwork T-Shirt
Before we start, let’s gather everything we need. This project uses a few basic sewing supplies, plus a couple of helpful stabilizing materials to make the appliqué easier to sew onto a stretchy T-shirt.

Fabric and Pattern
- A plain T-shirt.
- Small cotton fabric scraps for the crumb quilting.
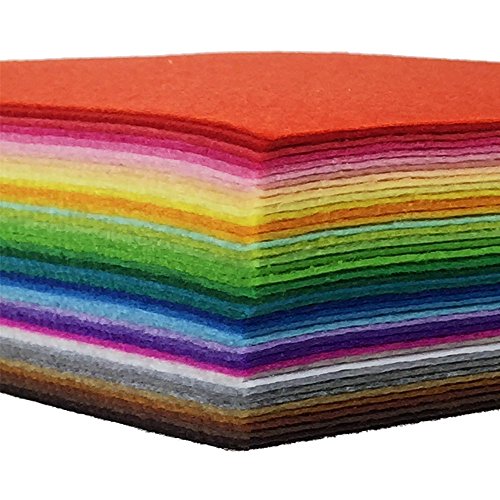
- Felt fabric for the ghost’s eyes and mouth.
- The free ghost appliqué pattern, delivered as a PDF by email.



Sewing Supplies
- Sewing machine.
- Thread in colors that coordinate with your patchwork.
- Black contrasting thread for the decorative blanket stitch.
- Fabric scissors or a rotary cutter and cutting mat.
- Pins or fabric clips.
- Iron and ironing board.
- Lightweight fusible interfacing to support the patchwork fabric (optional).
- Washable stabilizer for the back of the T-shirt while stitching the appliqué (optional).

For the best results, I recommend these interfacing suitable for your patchwork fabric and a stabilizer compatible with your T-shirt material.
These materials have different purposes: the interfacing supports the patchwork ghost, while the stabilizer helps prevent the knit fabric from stretching and puckering as you sew.
One little tip before we begin: test your interfacing and stabilizer on spare fabric first. It’s always better to check how everything behaves together before working on your finished garment!
How to Make a Ghost Patchwork T-Shirt

Step 1: Prepare Your Patchwork Fabric Using the Crumb Quilting Technique
Start by gathering the fabric scraps you want to use for your ghost.
This is the perfect opportunity to pull out those little leftover pieces you’ve been saving from previous sewing projects.
Using the crumb quilting technique, sew the small fabric pieces together until you have a patchwork piece large enough to accommodate the entire ghost pattern.

If you’ve never tried crumb quilting, please check out my free crumb quilting beginner’s guide here.
Keep adding scraps until you have enough fabric to fit your template, including a little extra room around the edges for easier cutting.
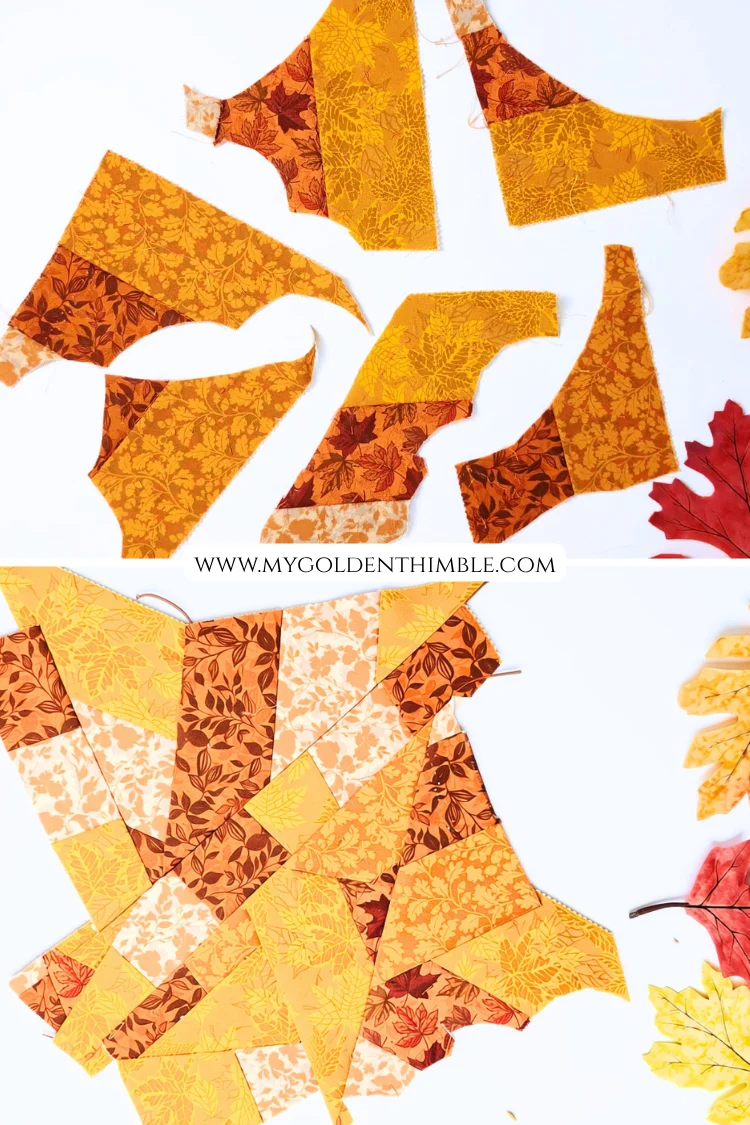
As you build your patchwork canvas, press the seams after each new piece or section you add. This helps keep the fabric flat and makes it easier to see where you can attach the next scrap.
Keep adding small pieces until your patchwork is large enough to fit the ghost template.
Once your canvas is complete, give it one final press before cutting out the ghost shape.
Step 2: Apply Lightweight Fusible Interfacing
Before cutting out the ghost, I recommend applying lightweight fusible interfacing to the back of your patchwork fabric.
The interfacing helps support all those little joined fabric pieces, making the patchwork easier to cut and sew onto the T-shirt. It also helps keep the appliqué from feeling too flimsy while you’re handling it.

Follow the manufacturer’s instructions for applying your interfacing, including the recommended temperature, pressing time, and whether you should use a pressing cloth.
Allow the piece to cool before moving on.
You want the interfacing to adhere properly without stretching or distorting your patchwork.
Step 3: Cut Out the Ghost Shape
Print your free ghost pattern and cut out the paper template.
Place the template over your patchwork fabric, making sure the entire ghost fits within the available area.

If you want particular prints to appear in certain parts of the ghost, take a moment to arrange the template before cutting.
Secure the pattern in place with pins or fabric clips, then carefully cut around the outline.

Take a moment to check the shape before moving on.
Trim any loose threads carefully, but avoid cutting into the ghost’s outline.
Step 4: Make the Ghost’s Face
Now for one of my favorite little details: the face!
For the eyes and mouth, I used hand-cut pieces of felt fabric. I’ve found that felt works wonderfully for small appliqué details because it doesn’t unravel along the cut edges.

That means you can cut out tiny shapes without worrying about turning under their edges.
Cut out two eyes and a little mouth from your felt. You can use the pattern as a guide for their shape and placement.
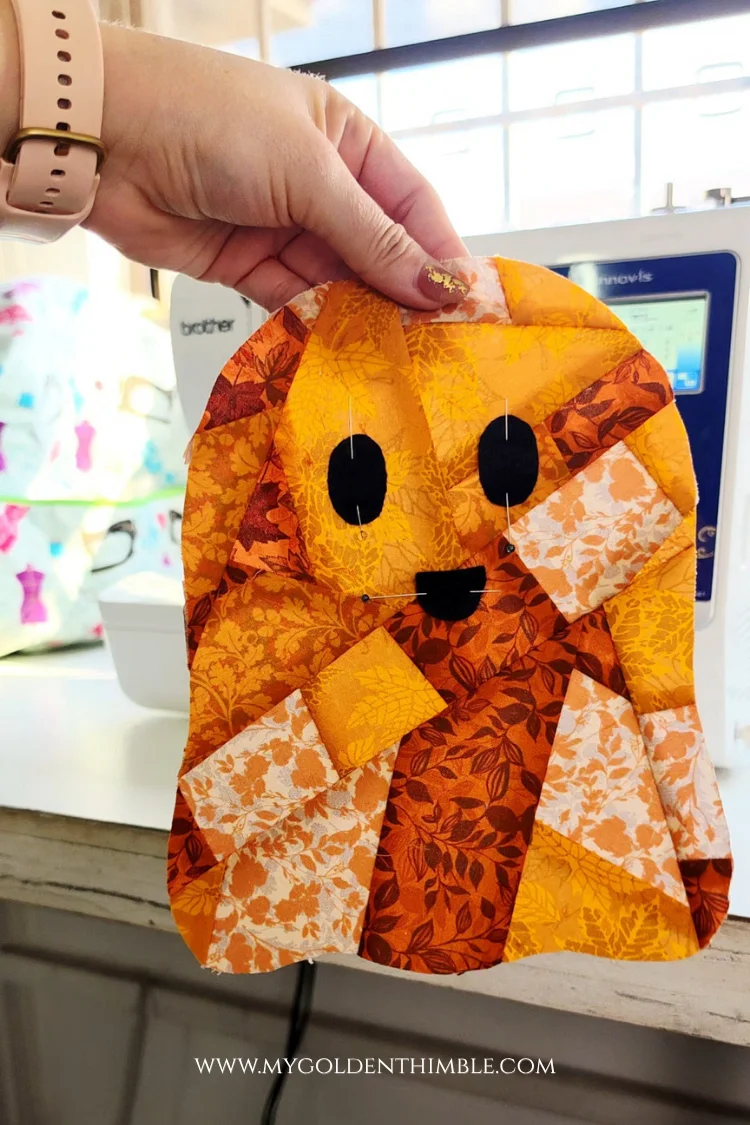
Position the felt pieces on the ghost and make sure you’re happy with the expression before sewing them down. I recommend arranging all three pieces first so you can see how they look together.
Using your sewing machine, stitch around each felt piece with a straight stitch, keeping your stitching approximately 1/8 inch from the raw edge.
Sew slowly around the smaller curves so you can keep the stitching neat and close to the edges. Since these pieces are small, take your time and adjust the fabric carefully as needed.
I think these simple little felt details give the ghost so much personality without making the project complicated.
You can keep the expression sweet and friendly or experiment with different faces if you’re making more than one!
Step 5: Position the Ghost on Your T-Shirt
With the ghost ready, it’s time to give your T-shirt its Halloween makeover!
Place the ghost in the center front of your T-shirt, checking that it sits straight and looks balanced.
You can lay the shirt flat on a table or try it on to help decide exactly where you want the appliqué.
Once you’ve chosen the perfect spot, secure the ghost in place using pins or fabric clips. Be careful not to stretch the knit fabric while positioning it.

Before stitching, I also recommend placing a suitable washable or tear-away stabilizer on the back of the T-shirt, directly behind the area where you’ll be sewing.
This extra support helps keep the knit fabric from stretching or puckering as you stitch around the appliqué.

It is particularly helpful when you’re working with a patchwork piece that has several seams.
Make sure the stabilizer is compatible with your T-shirt fabric and can be removed according to the manufacturer’s instructions.
Step 6: Stitch Around the Ghost
Now it’s time to attach our patchwork ghost!
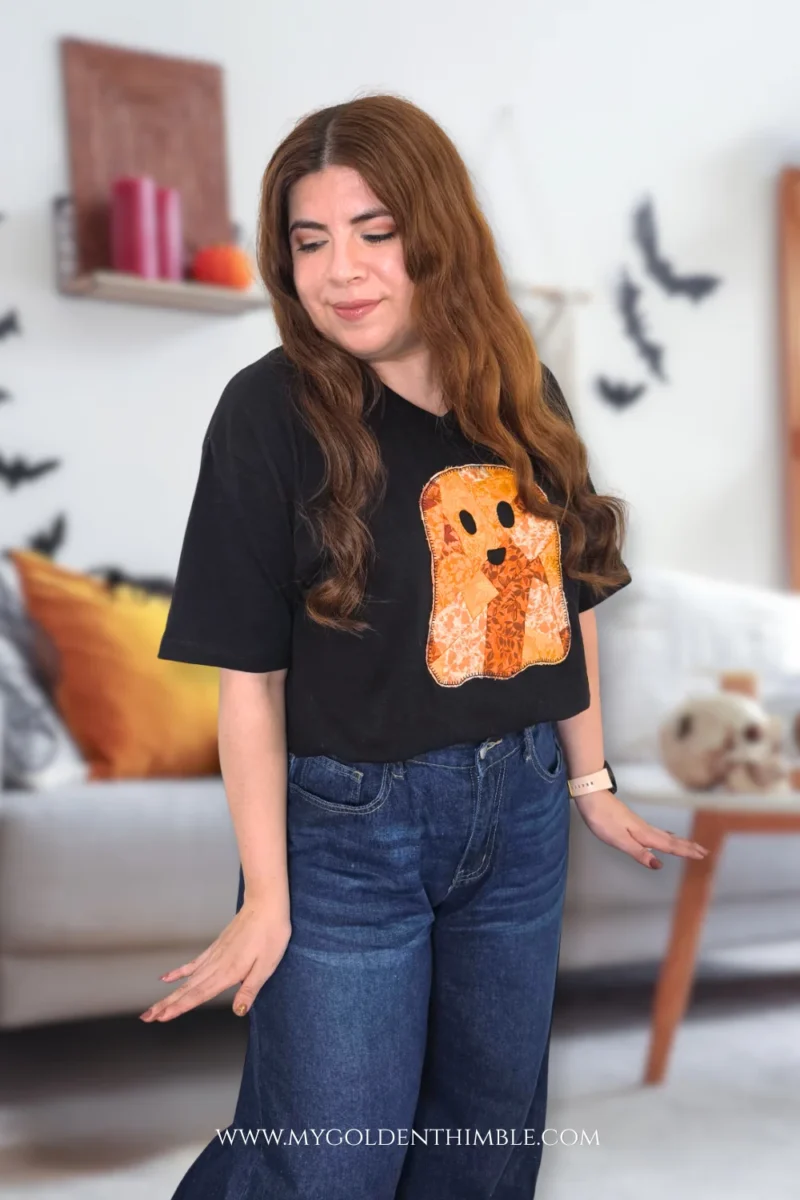
For this project, I used a blanket decorative stitch on my sewing machine, paired with contrasting black thread.
I love how the dark stitching outlines the ghost and makes the patchwork stand out.

Follow the ghost’s outline, keeping the decorative stitch along the raw edge to secure it to the T-shirt.
As you can see, I decided to keep the blanket stitch inside the shape of the ghost, and not at the very edge, as you would normally see on appliqués of this style.
I did this to give it a slightly more handmade, rough look (not as clean), leaving tiny raw edges to fray a little after a few washes.
Work slowly around the curves, especially near the top and bottom of the ghost.
Gently guide the fabric as you sew, but avoid pulling or stretching the T-shirt. Let your machine feed the fabric through naturally.

If your sewing machine has several decorative stitches, you can experiment with them on a scrap first.
The black thread adds a lovely outlined effect, almost like drawing around the ghost with a pen. It’s a small detail, but it really helps bring the design together!
When you reach the end of the stitching, secure your thread by passing a couple of stitches above the first stitches you made, overlapping them.
Check the entire outline to make sure the raw edge is caught securely.
Step 7: Finish Your Ghost Patchwork T-Shirt
We’re almost done!
Check the front of your T-shirt for any missed areas, loose threads, or sections where the patchwork edge needs additional stitching. Trim excess threads carefully.
Remove the washable stabilizer from the back according to its instructions, taking care not to pull or distort the stitching.
Give the shirt a gentle press if needed, following the care requirements for your T-shirt, felt, and interfacing. Avoid applying heat directly to materials that may be damaged by it.
And that’s it!
Your plain T-shirt has become a cute, handmade Halloween piece, and you’ve given those little fabric scraps a new purpose.
Before washing, follow the care instructions for all the materials used in your project.
If you’re planning to wear your shirt throughout the Halloween season, proper care will help keep your appliqué looking its best.
Get Your Free Ghost Patchwork Pattern
I hope this little ghost inspires you to look at your fabric scraps in a new way!
I love projects that let us make something cute and useful from materials we already have. And if you’re anything like me, you probably have a little collection of scraps just waiting for their next adventure.
Use the signup form below to receive your free Ghost Patchwork Appliqué Pattern PDF by email, then grab your favorite fabrics and make a Halloween shirt of your own.
Can’t see the form? No worries, my friend! Try turning off your ad blocker extensions and refreshing the page. If it still doesn’t show up, you can also try opening the post in a different browser.
Happy sewing, and I can’t wait for you to make your own spooky-cute ghost!
I’d love to see what fabrics you choose for your ghost! Please send me your version via email or post it on our sewing club on Facebook!