Today, we’re diving into something extra fun and festive—the pumpkin quilt block!
I’ll walk you through how to sew this adorable pumpkin block, and trust me, it’s perfect for so many fall projects. You can use it to make a cute table runner, spruce up some throw pillows, or even make it into a cozy autumn throw quilt (like I am doing) that you’ll want to cuddle with all season long.
This block is super fun and easy, and I know you’ll love how it adds the perfect touch of fall to your creations!
Ready?

NOTE: This post contains affiliate links, which means that if you make a purchase using one of the links in this article, I may earn a commission at no extra cost to you (To know more about this, click here.)
If you’re like me and absolutely love all things fall (I mean, who doesn’t love sweater weather and pumpkin spice everything?), then this quilt block is about to become your new favorite for the season.
This pumpkin block is part of a cozy throw quilt blanket I’m making for my living room, and I’m so excited to see it come together! It’s my second big-ish quilt project, and I’ll be honest—my first one took forever.

The quilt design features two main blocks: this pumpkin block and the maple leaf block, which we learned how to make just a couple of weeks ago. Now that we’ve got the maple leaf down, we’re ready to move on to the pumpkin and finally start bringing this project to life.
My goal is to have it finished in time for all the fall festivities so I can show it off to my family and friends.So grab your fabric scraps (you know how much I love using those!), and let’s get started on bringing some pumpkin magic to your sewing!
How to Sew a Pumpkin Quilt Block Pattern. Step-by-step Tutorial.
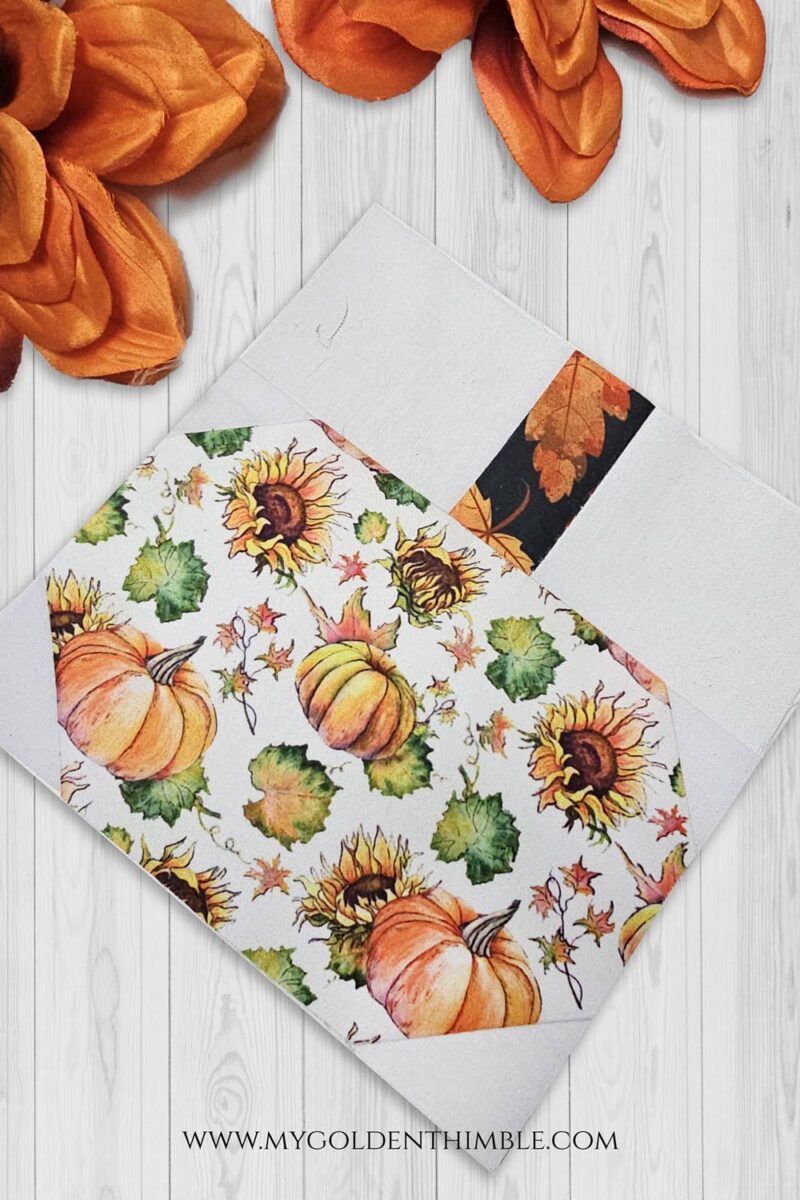
Materials You’ll Need
Before we dive into the fun part of sewing, let’s gather all the materials we’ll need to make this pumpkin quilt block. We will need eight maple blocks measuring 6” x 6” for our throw quilt blanket, and here is how we will make them.
- Fall-themed Fat Quarters (these are the ones I am using)
- Background fabric (neutral shades like cream or white will make those leaf colors pop!)
- Rotary cutter and cutting mat
- Quilting ruler (I am using this set)
- Sewing machine or needle and thread if you’re feeling the hand-stitching love
- Thread in a coordinating color (I love a good neutral white thread for piecing)
- Iron and pressing mat for crisp seams
- Quilting pins or clips to keep everything in place
- And, of course, a measuring tape (because quilting = math, right?)
Cut Your Fabrics
Now that we’ve gathered all our materials, it’s time to cut the fabric pieces for our pumpkin quilt block! Don’t worry, this part is quick and straightforward, and by the end, you’ll have all the pieces ready to sew together. Here’s what you need to cut:
- 8 orange rectangles – each measuring 6″ by 4 1/4″. These will form the body of your pumpkin.
- 16 white squares – cut 2″ by 2″. These will be for the corners, helping to shape the pumpkin and create that nice, clean border.
- 16 white rectangles – cut 2 1/2″ by 2 3/4″. These will frame the sides of your pumpkin stem, making it pop against the background.
- 8 black or dark brown rectangles – cut 1 1/2″ by 2 1/2″. These pieces will form the stem of your pumpkin.
Make sure to use your rotary cutter and ruler for precise cuts—it’ll make piecing everything together much easier!
Creating the Pumpkin Body
Now that we’ve got all our fabric pieces cut, let’s start working on the main part of our pumpkin block—the body! For this step, we’ll be using the 8 orange rectangles and the 16 white 2″ by 2″ squares to give our pumpkin its shape.
Cut the white squares in half diagonally. This will give you little triangles that we’ll be placing on the corners of the orange rectangles.

Next, take one of your orange 6″ by 4 1/4″ rectangles and measure 1 inch from each corner. Use a fabric marking pen or a pencil to make tiny marks at those spots. Now, using your rotary cutter and ruler, cut diagonally from each mark on the orange rectangle, trimming the corners off. Repeat this for all your orange rectangles.
Place one of your half-triangle white pieces onto each corner of the orange rectangle, aligning the long edge of the triangle with the cut edge of the orange fabric. Once everything is in place, sew the triangles onto the orange rectangle using a 1/4″ seam allowance.

After sewing, press the seams toward the orange fabric. This will help give your pumpkin block a smooth, clean look and prevent any bulky seams.
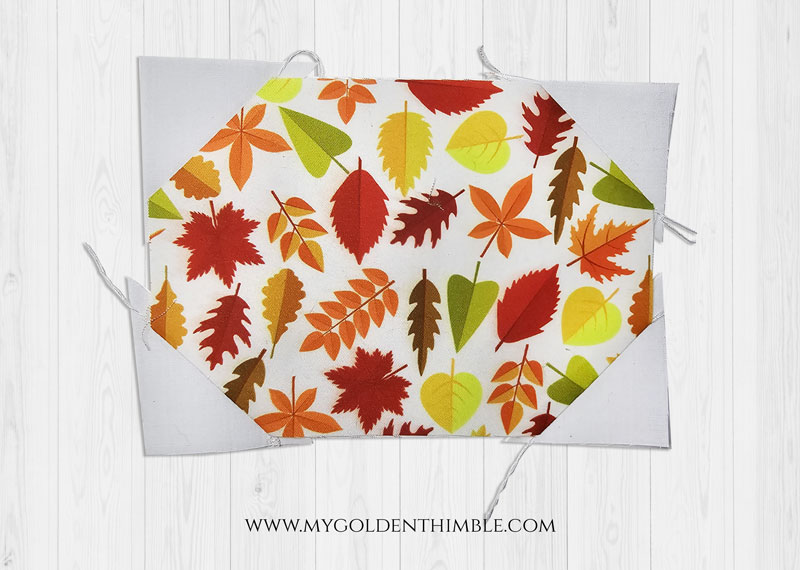
Repeat these steps for all eight of your pumpkin body pieces. Once you’ve finished, trim the edges.

Assembling the Pumpkin Stem
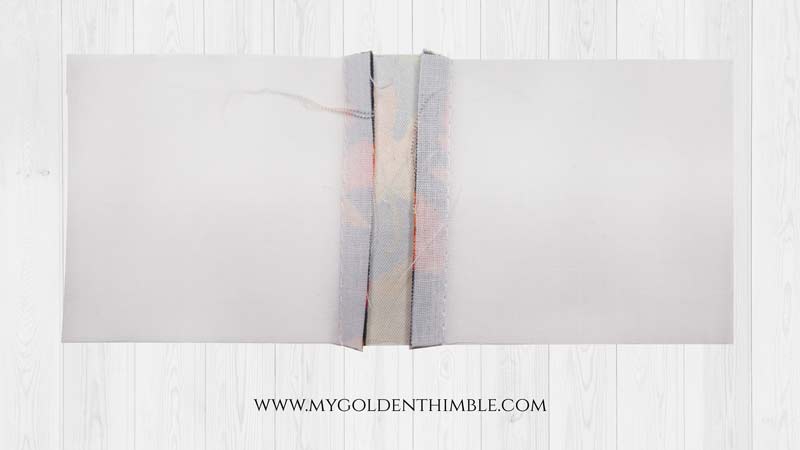
Now that our pumpkin bodies are coming together, let’s move on to making the stems! For this part, we’ll use the white 2 1/2″ by 2 3/4″ rectangles and the black or dark brown 1 1/2″ by 2 1/2″ rectangles to create the top of the pumpkin.
Grab two of your white 2 1/2″ by 2 3/4″ rectangles and place them on either side of the black or brown rectangle, aligning the 2 1/2″ edges with right sides together. This will create a nice contrast for the stem against the background.

Sew the white rectangles to the black/brown rectangle with a 1/4″ seam allowance on each side. Make sure your edges stay even, as this will give your stem a neat, balanced look once it’s all pieced together.

Once sewn, press the seam allowances toward the center (toward the stem). This will help keep the block flat and make the stem stand out nicely against the background.
Finishing the Pumpkin Block
Now that we have both the pumpkin body and the stem ready, it’s time to piece them together and finish our block!
Align the stem piece with the body of the pumpkin by placing the stem section right sides together with the top of the pumpkin body. Make sure the seams line up so your pumpkin looks seamless once sewn together.

Sew them together with a 1/4″ seam allowance. This step connects the pumpkin body and stems into one complete block!
Press the seam toward the pumpkin’s body. Finally, take your 6″ quilt ruler and trim the edges to square up the block perfectly. Make sure all sides are even so you can achieve a clean and professional finish.
Final Thoughts
Congratulations on finishing your pumpkin quilt block!
I’m so proud of you for sticking with it and adding this fun and super easy quilt block pattern.
I’d love to hear how this project went for you, so don’t hesitate to leave any questions or opinions in the comments below. And, of course, if you’ve made your own version, I’d absolutely love to see it! Share your creations on social media and be sure to tag me @mygoldenthimble so we can all admire your hard work and creativity.
Until next time, happy sewing!!